Receiving Inventory
Inbound Inventory Workflows
All PO's move from NetSuite to DataNinja automatically. To receive against a PO in DataNinja, simply select the "Receiving" tab on the left hand menu and double click on the "Purchase Order" you wish to receive against, or click "View" in the Actions column.
You can also search for the receiving inventory under the "WIP" tab, which displays all current inventory that is being received. Lastly, you can receive inventory based on part type under the "Lines" tab.

Once the PO is open, click on the green "Receive" icon on the right side of the screen.

Depending on how your account is set up, you may be prompted to select the receiving unit of measure or add additional information. After that you should see a screen like this:
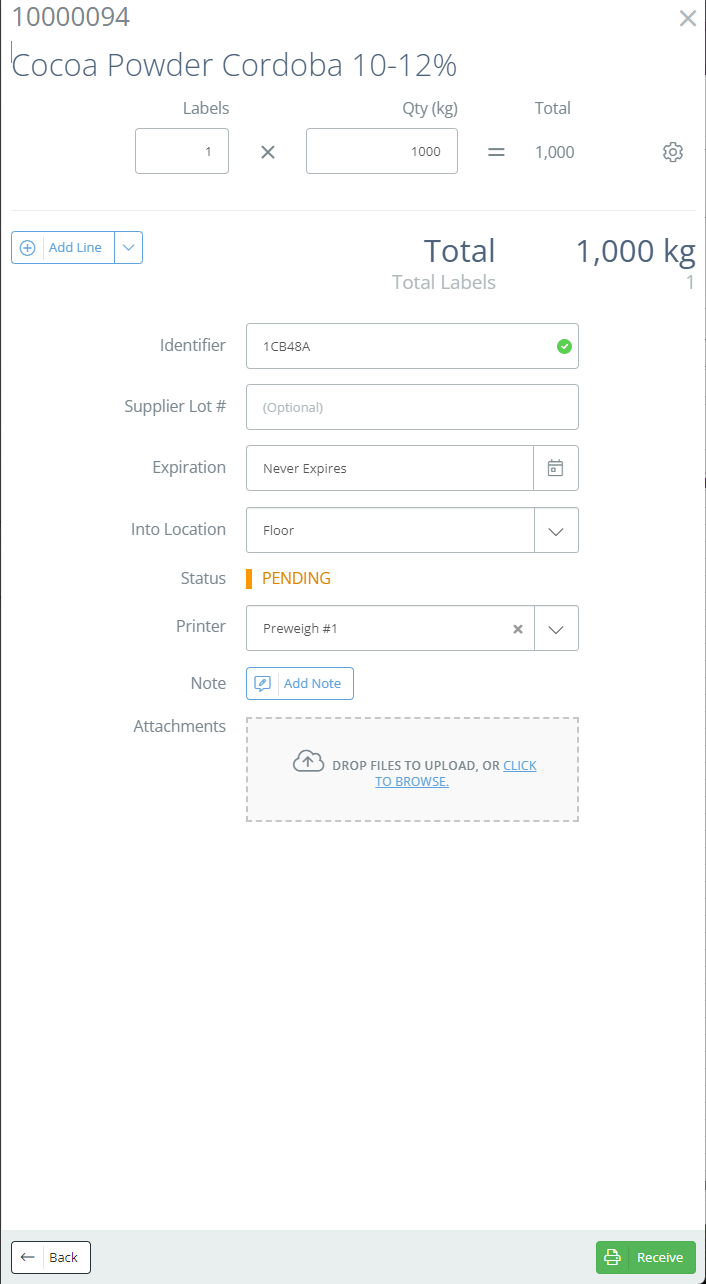
Select the number of labels and the inventory quantity you want associated with that label (in the example above, 1000 kg). You can customize the lot number, set the expiration date, and the into location on this screen. Select the correct printer and click "Receive" in the bottom right corner.
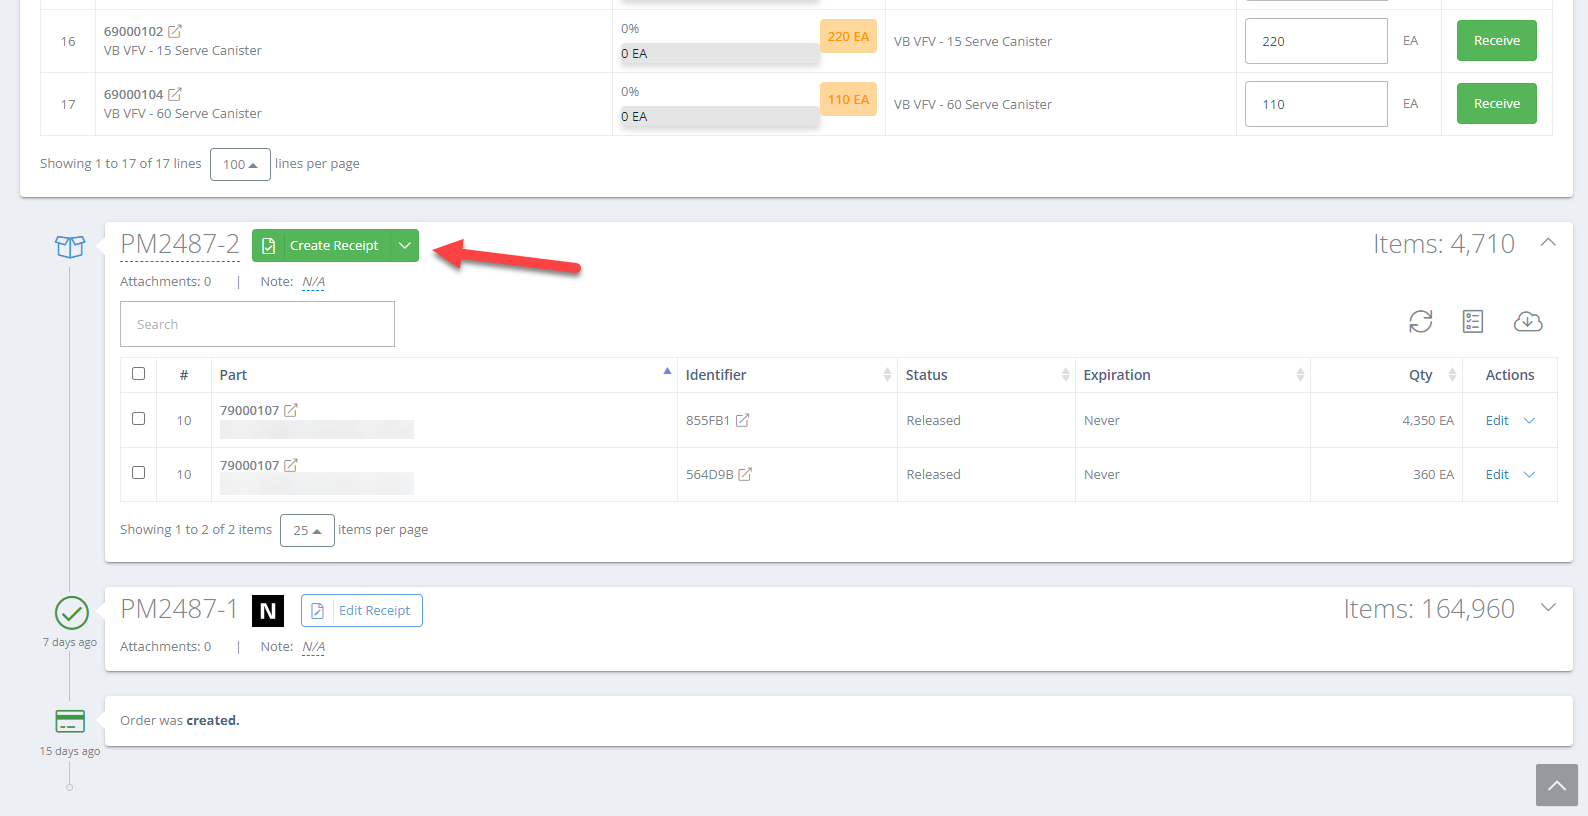
After you have received inventory make sure to click "Create Receipt" as this prompts DataNinja to push the updated inventory to NetSuite.
The product is now received. If there is an inspection associated with that part, you will be prompted to perform that inspection.

Click "Complete Order" to close the PO in NetSuite.

Updated 2 days ago