License Plates
Transact Grouped Inventory Lots with a Single Scan
A license plate is like a virtual "container" that holds as much inventory as you scan into it, however big or small that may be. The three most common uses for license plates are: inventory transfers, shipments, and manufacturing consumption.
For example, let's say you get an order for 5 boxes of cookie dough, 7 boxes of frosting, and 20 boxes of chocolate chips, and each of those items needs to be transferred from warehouse 2 to outbound staging. Rather than initiating 3 separate inventory transfers, all the needed inventory could be placed on a license plate and transferred all at once. Then, once the 32 boxes are prepped for shipping, the license plate can be scanned into the shipment and all 32 boxes will be added in one go.
Similarly, if you were to place a various raw materials in a LPN and then scan it during production, the consumed inventory would be deducted from the LPN the same way it would be deducted from a location upon consumption. In other words, you can group different parts into the same "container" and transact them all at once instead of part by part.
Creating a License Plate (LPN) and Adding Inventory
From the Manufacturing Record
This can be done either during manufacturing, or after the record has been fully signed. Go to Production Plan in the left-hand sidebar, then search and find the batch you want to add to the LPN (typically in the WIP or Completed tabs). Click "View" under the Actions column, then scroll down to the "Produced Quantity" section.
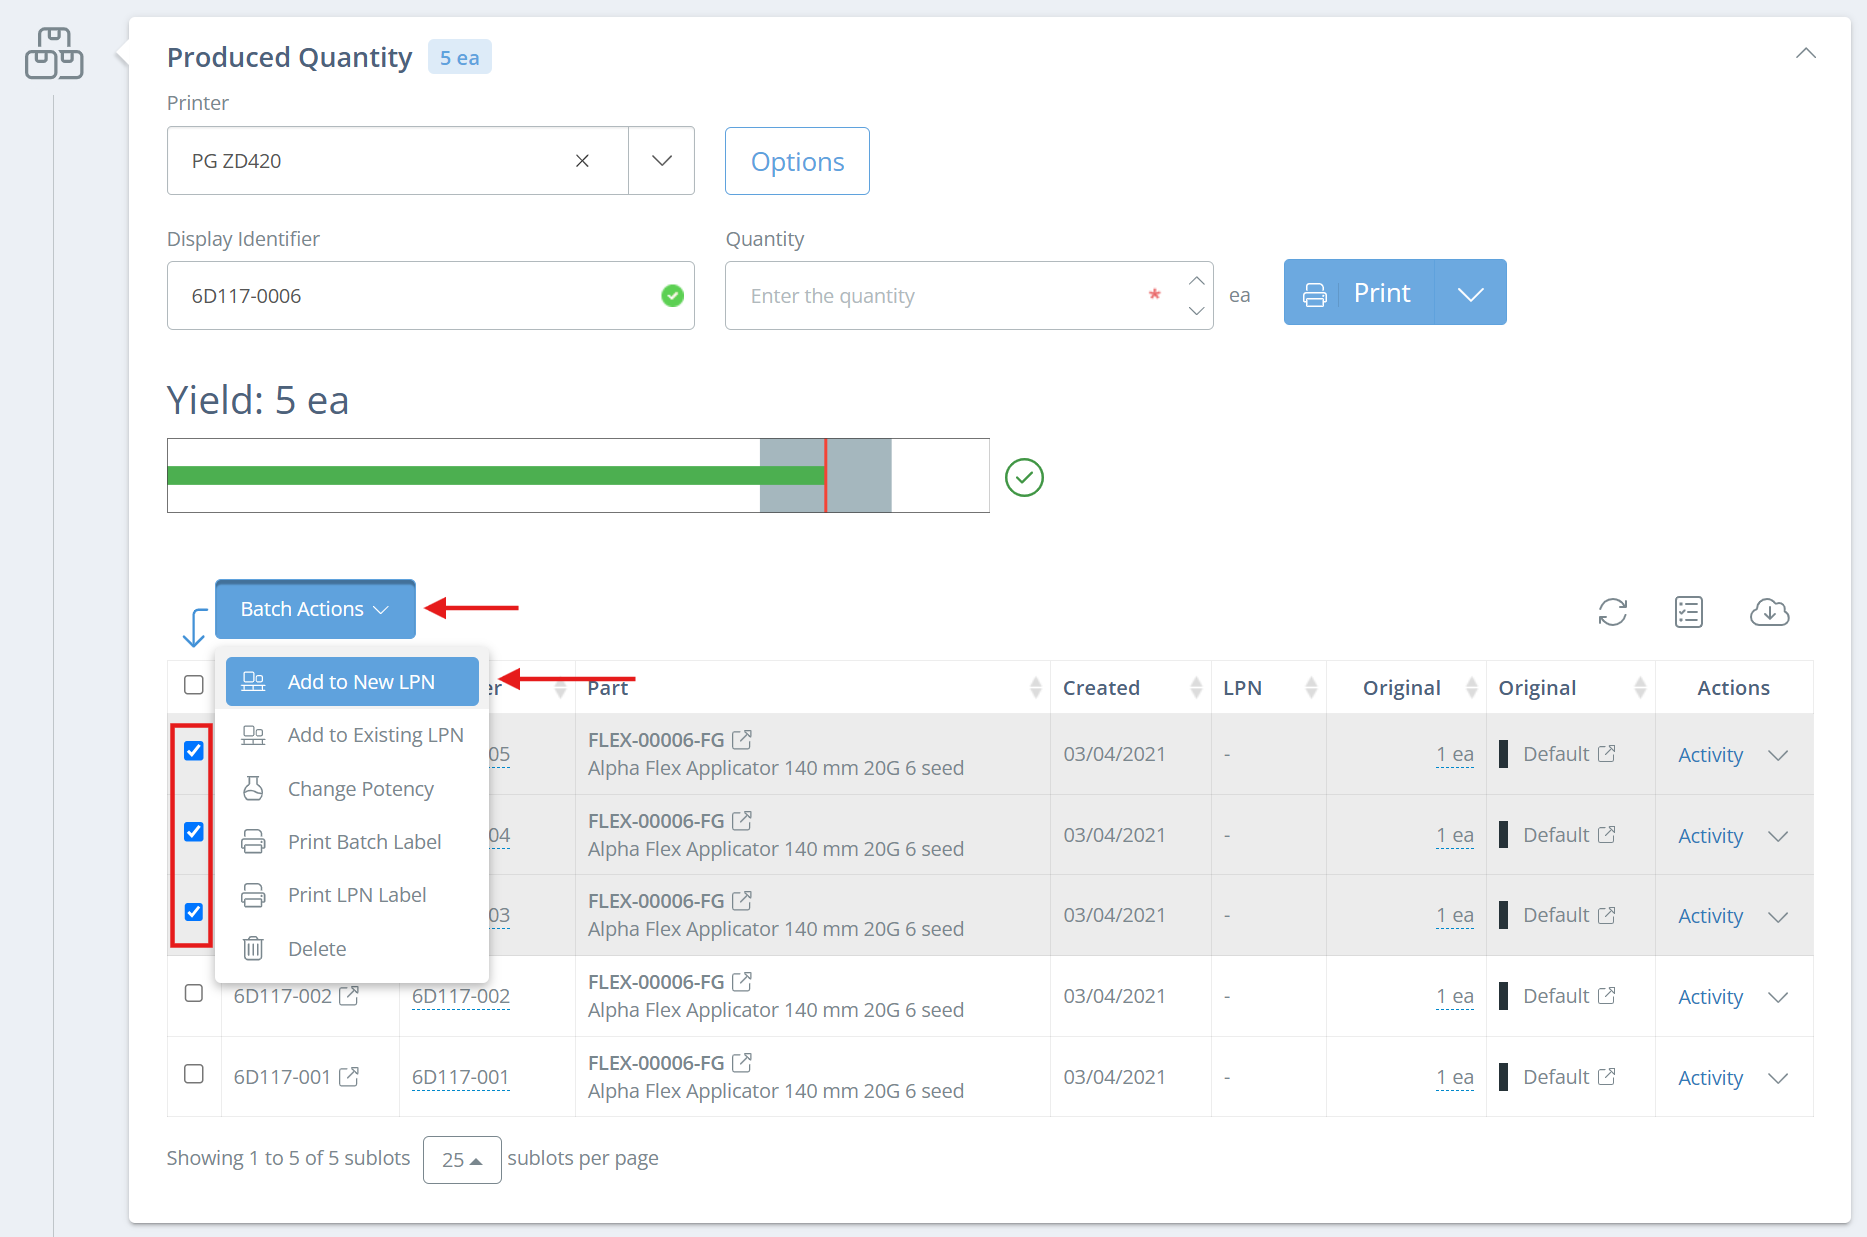
If you already have existing sublots on the record, check the box next to the sublots that you want to add to the LPN, then click Batch Actions and "Add to New LPN" or "Add to Existing LPN".
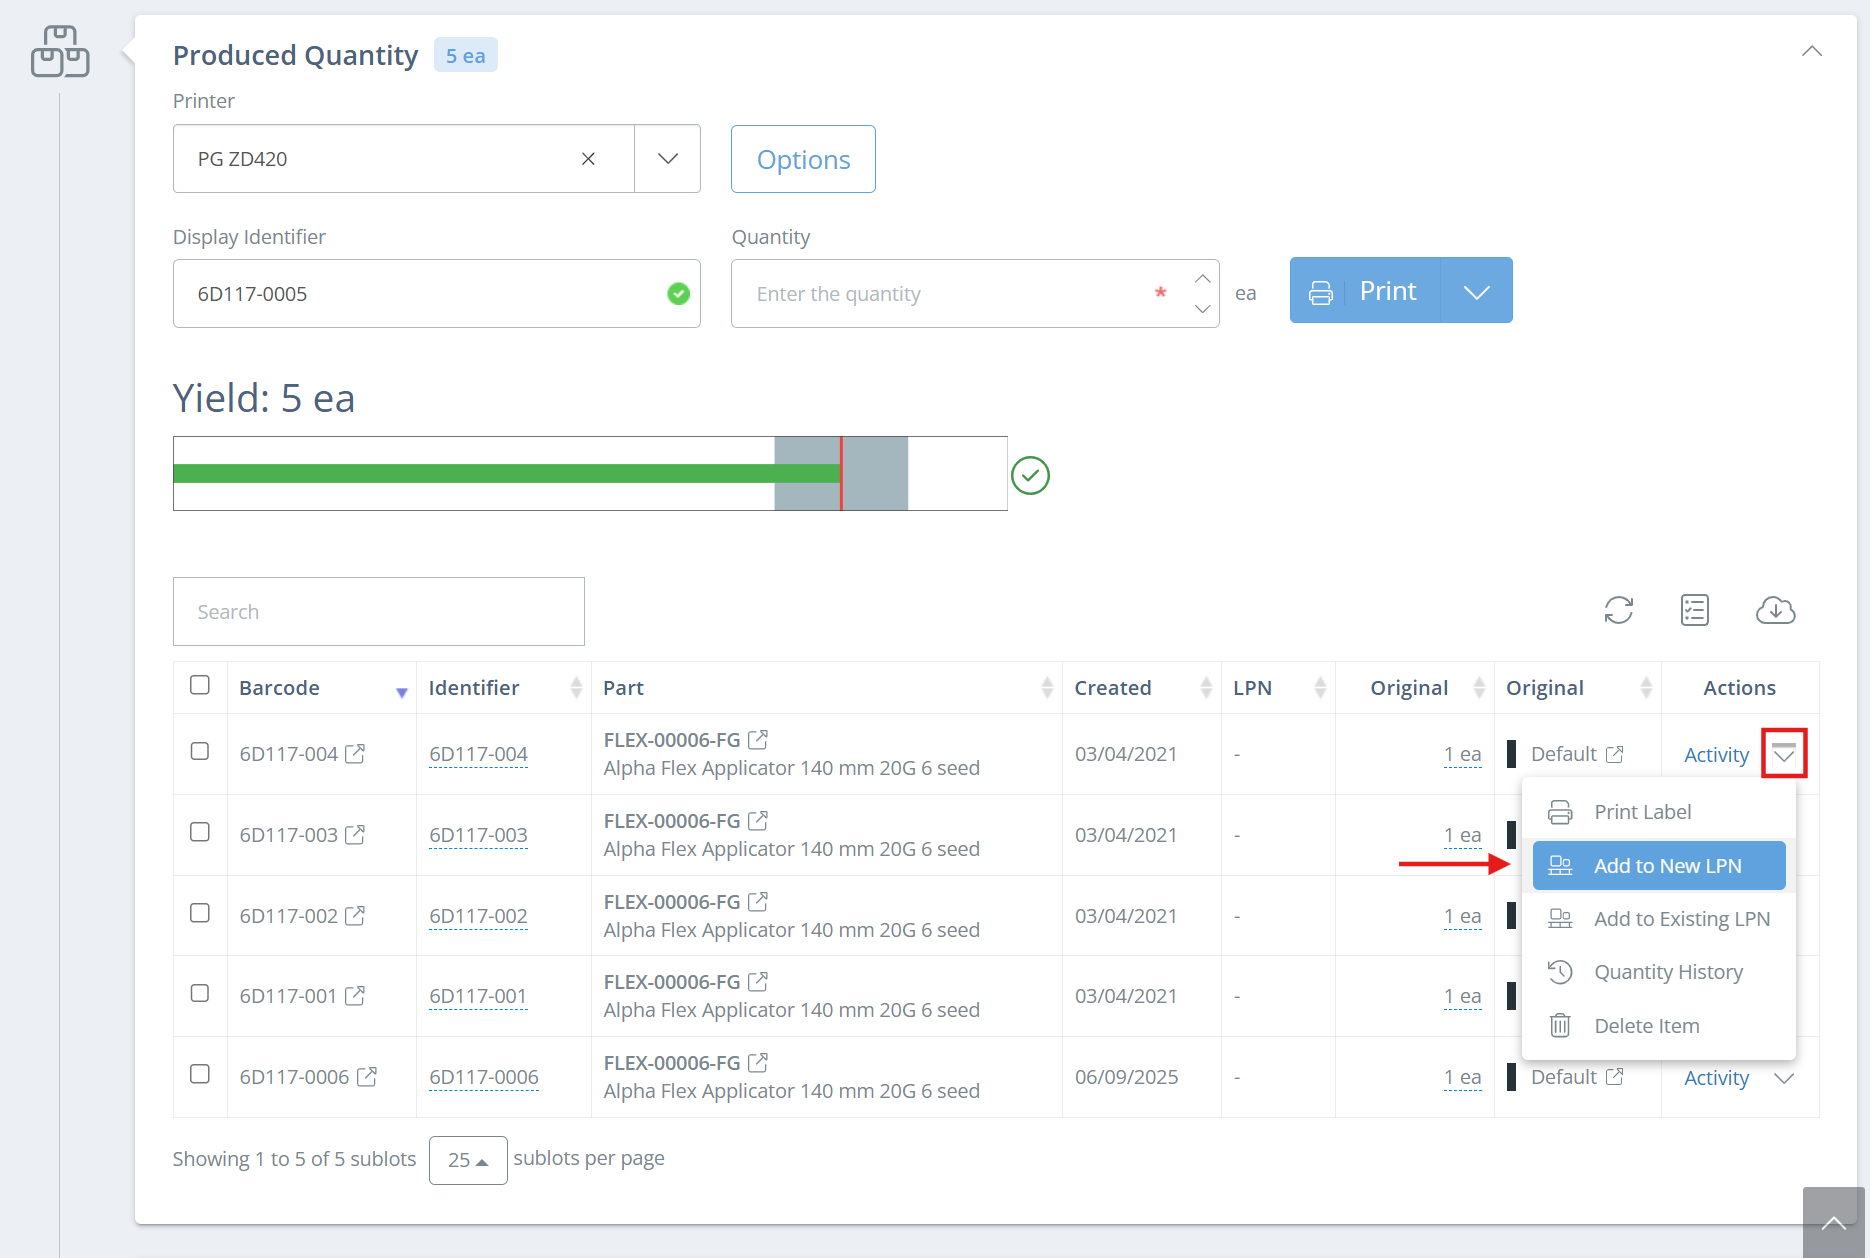
If you want to add only one sublot, you can also click the dropdown arrow next to "Activity" in the Actions column and you will see the same options as above.
If there aren't any existing sublots on the record, fill in the "Quantity" field, select a printer, then use either Batch Actions or the dropdown next to "Activity" to add the sublot to the LPN.
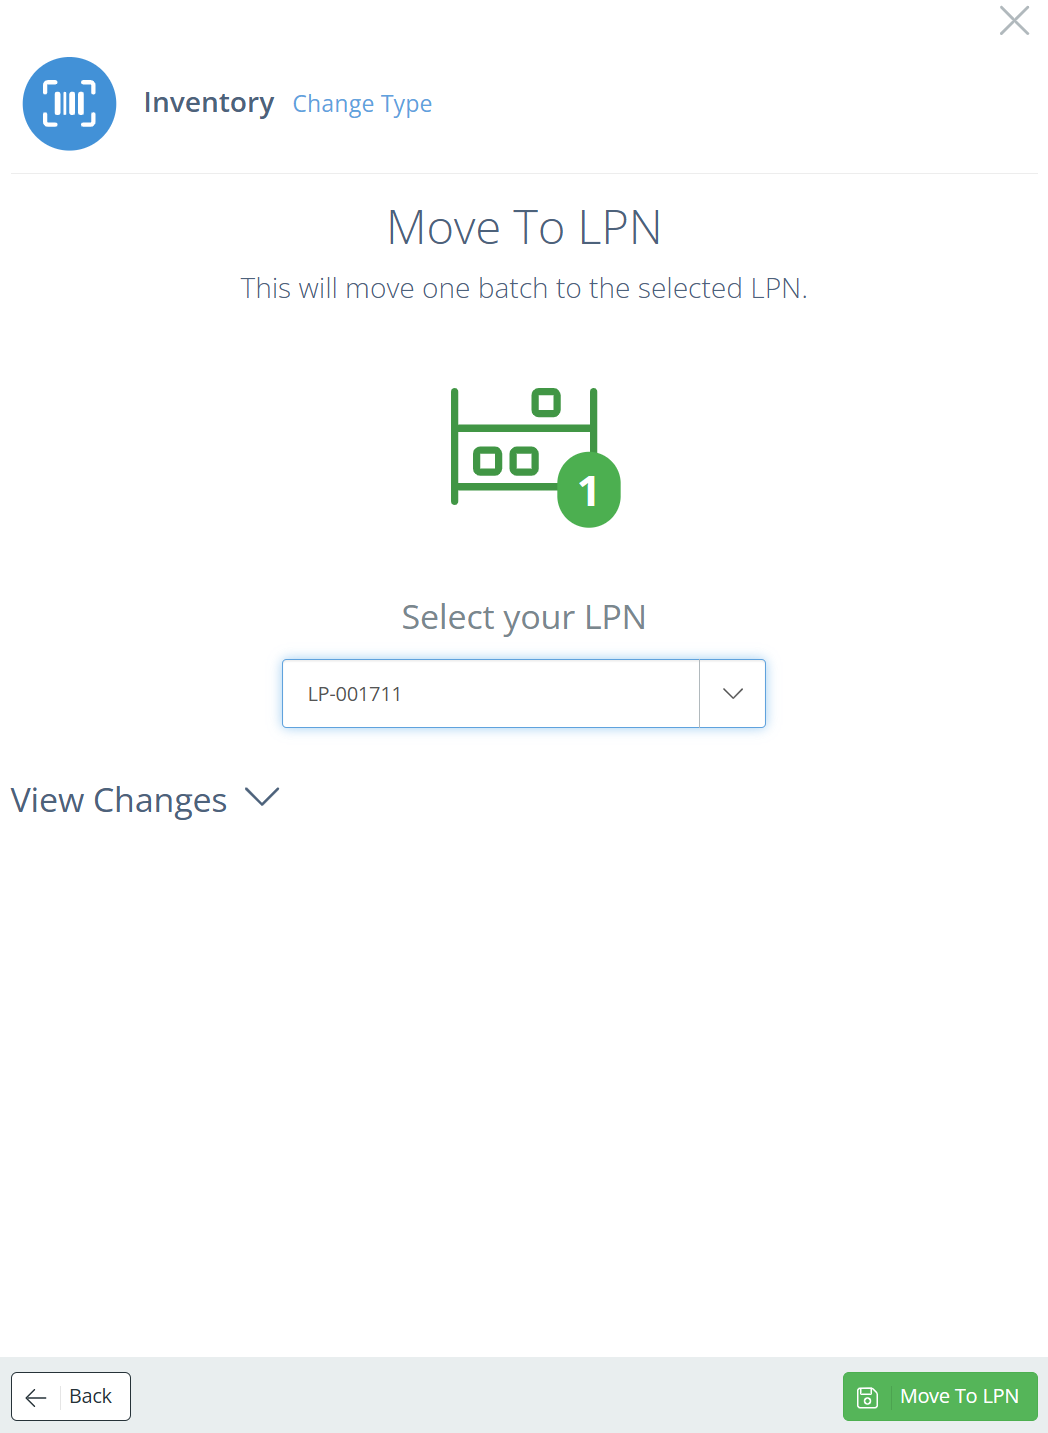
If you are adding to an existing LPN, a new sidebar will show on the right side of the screen. Search for and select which LPN the items should be added to, then click "Move To LPN".
From the Adjustments Page
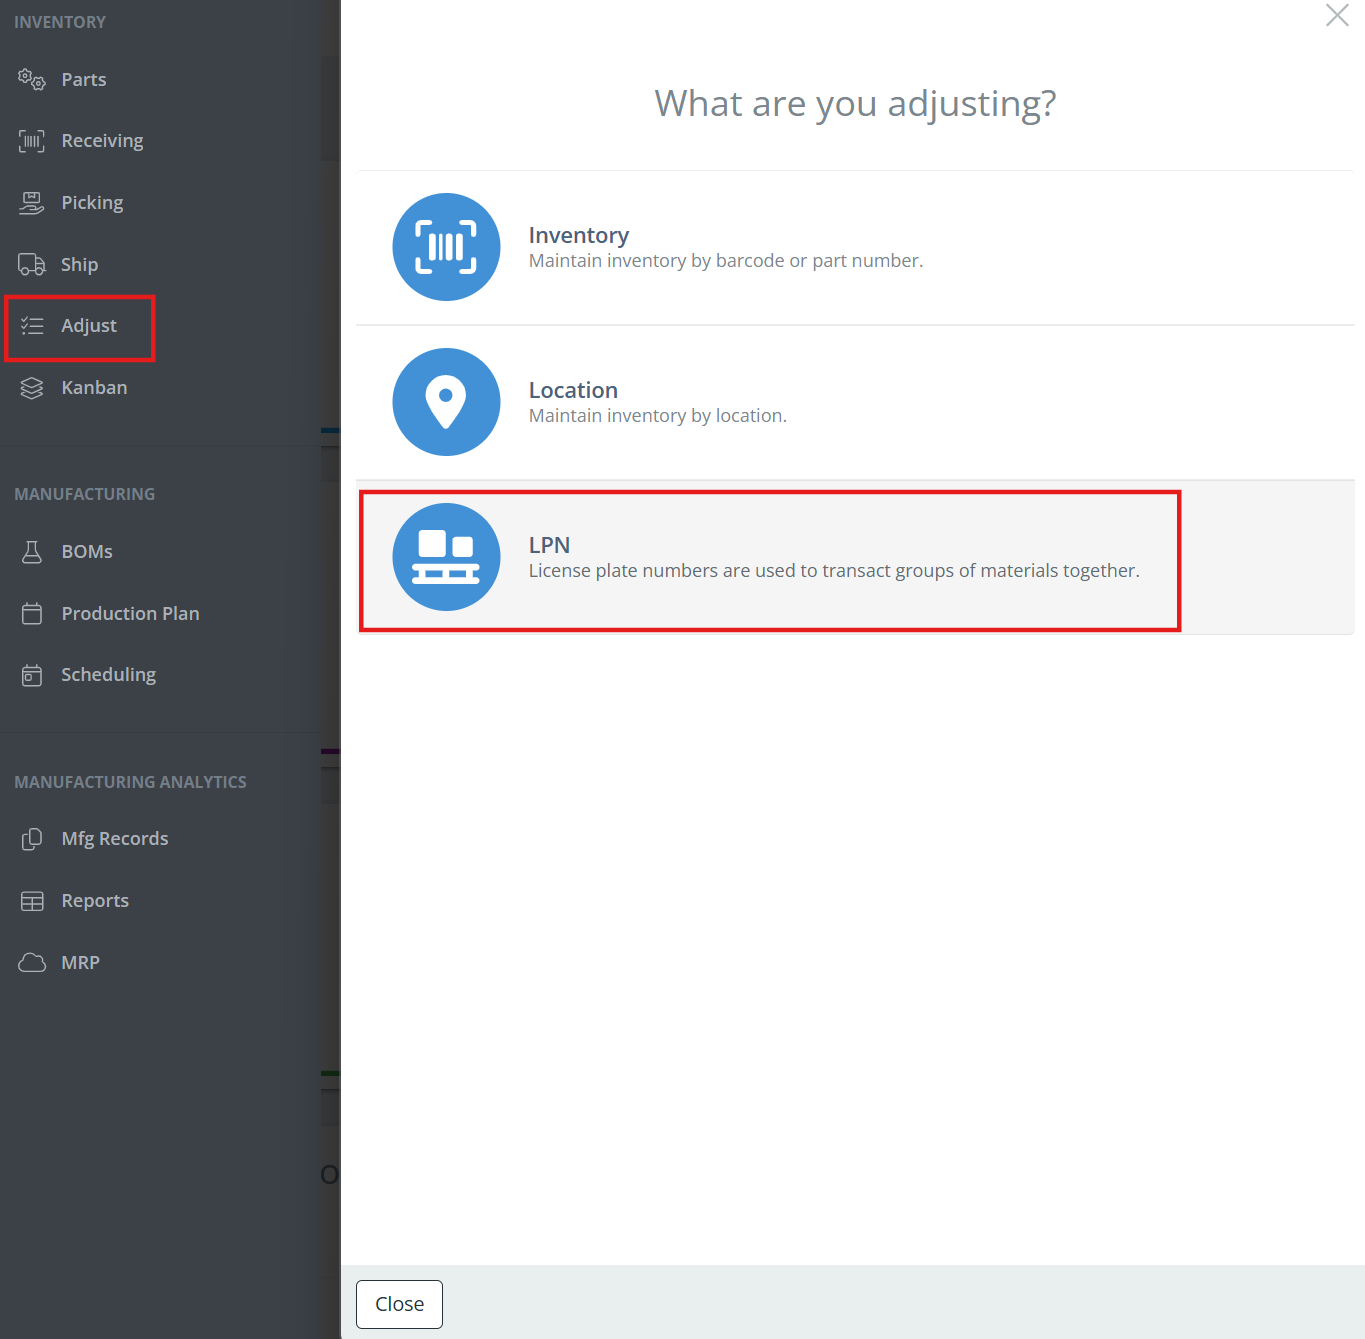
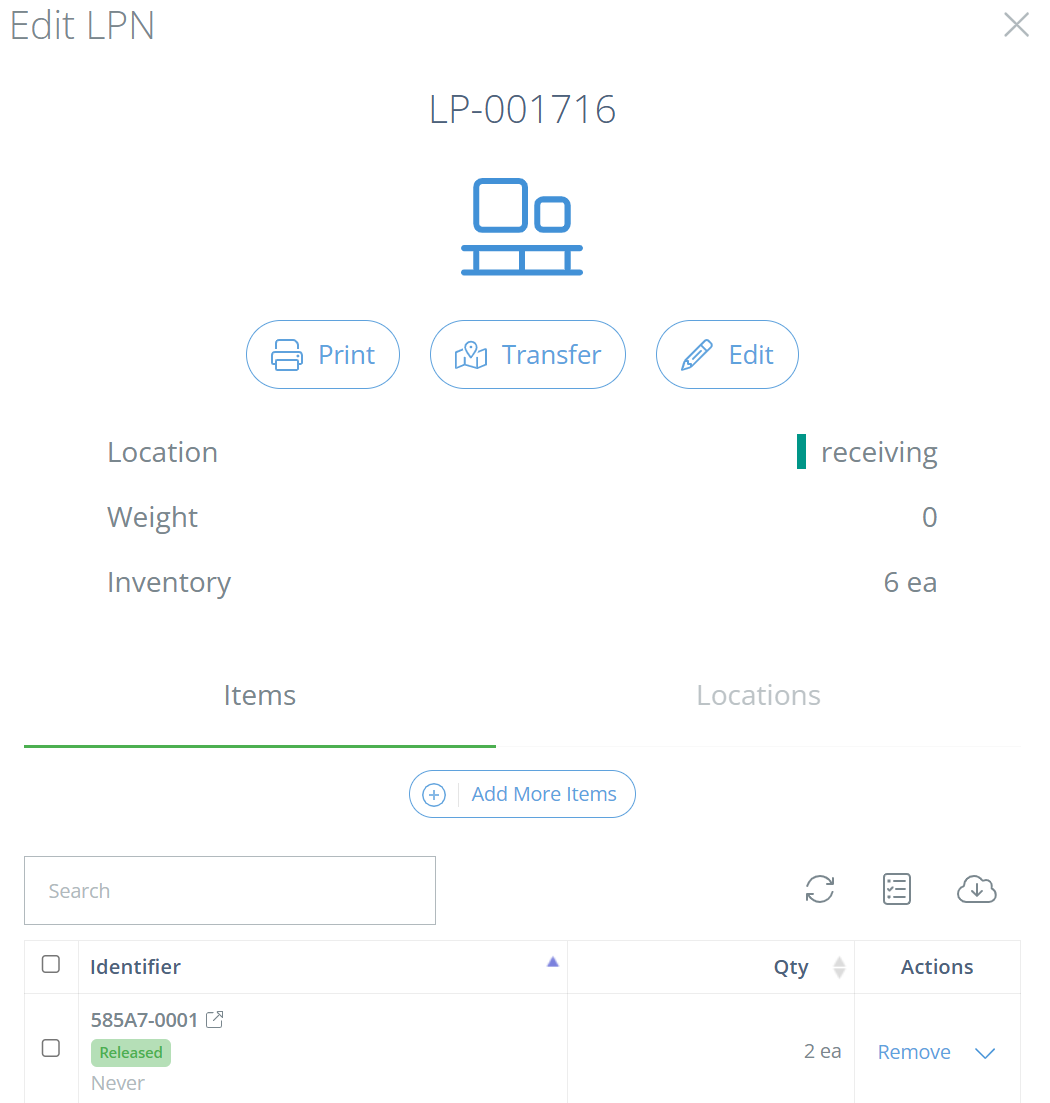
To add inventory on to a license plate, click on the "Adjust" tab in the left hand sidebar, then choose "LPN".
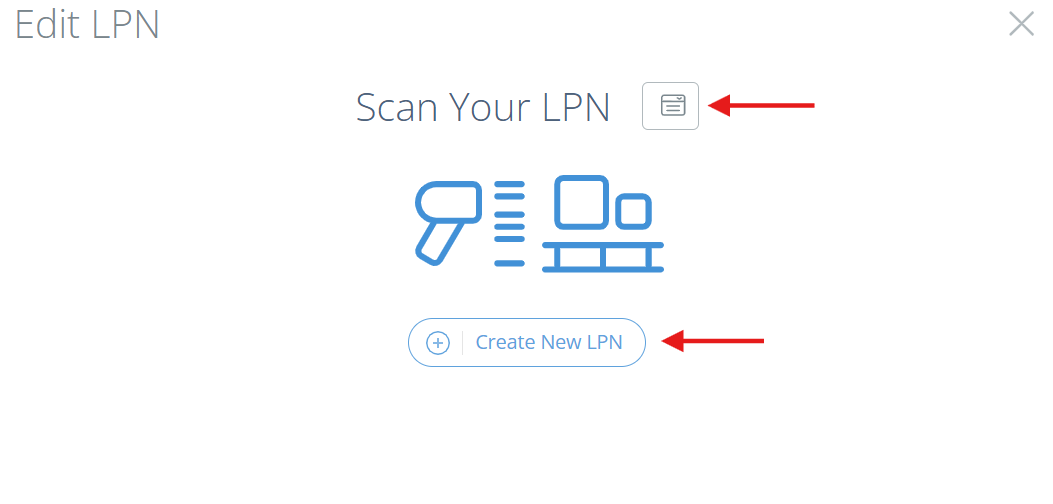
From here, you can either scan/search for an existing LPN or create a new one. If you click "Create New LPN", DataNinja will automatically generate a number for the license plate: LP-xxxxxx. You can change the name of the license plate later, but DataNinja will automatically increment the number for each LPN created (LP-000001, LP-000002, etc.).
Once you've created a new LPN or accessed an existing one, click "Move Items" and begin scanning the inventory, or manually typing it in.
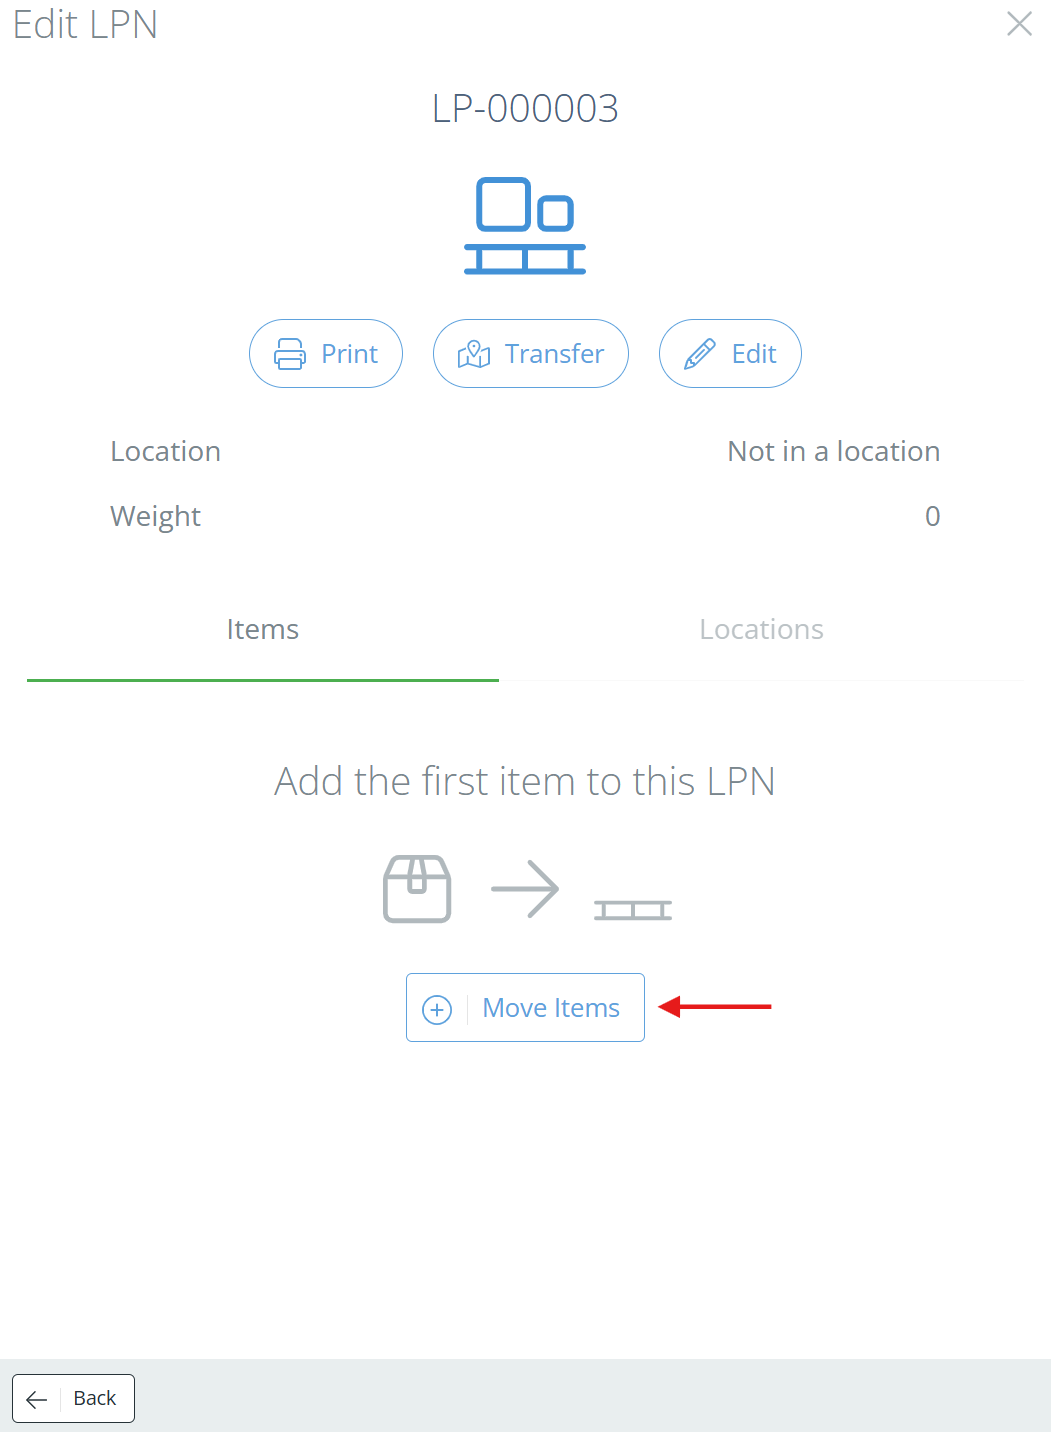

Once the needed inventory is placed in the LPN, close the sidebar.
From the Parts Page
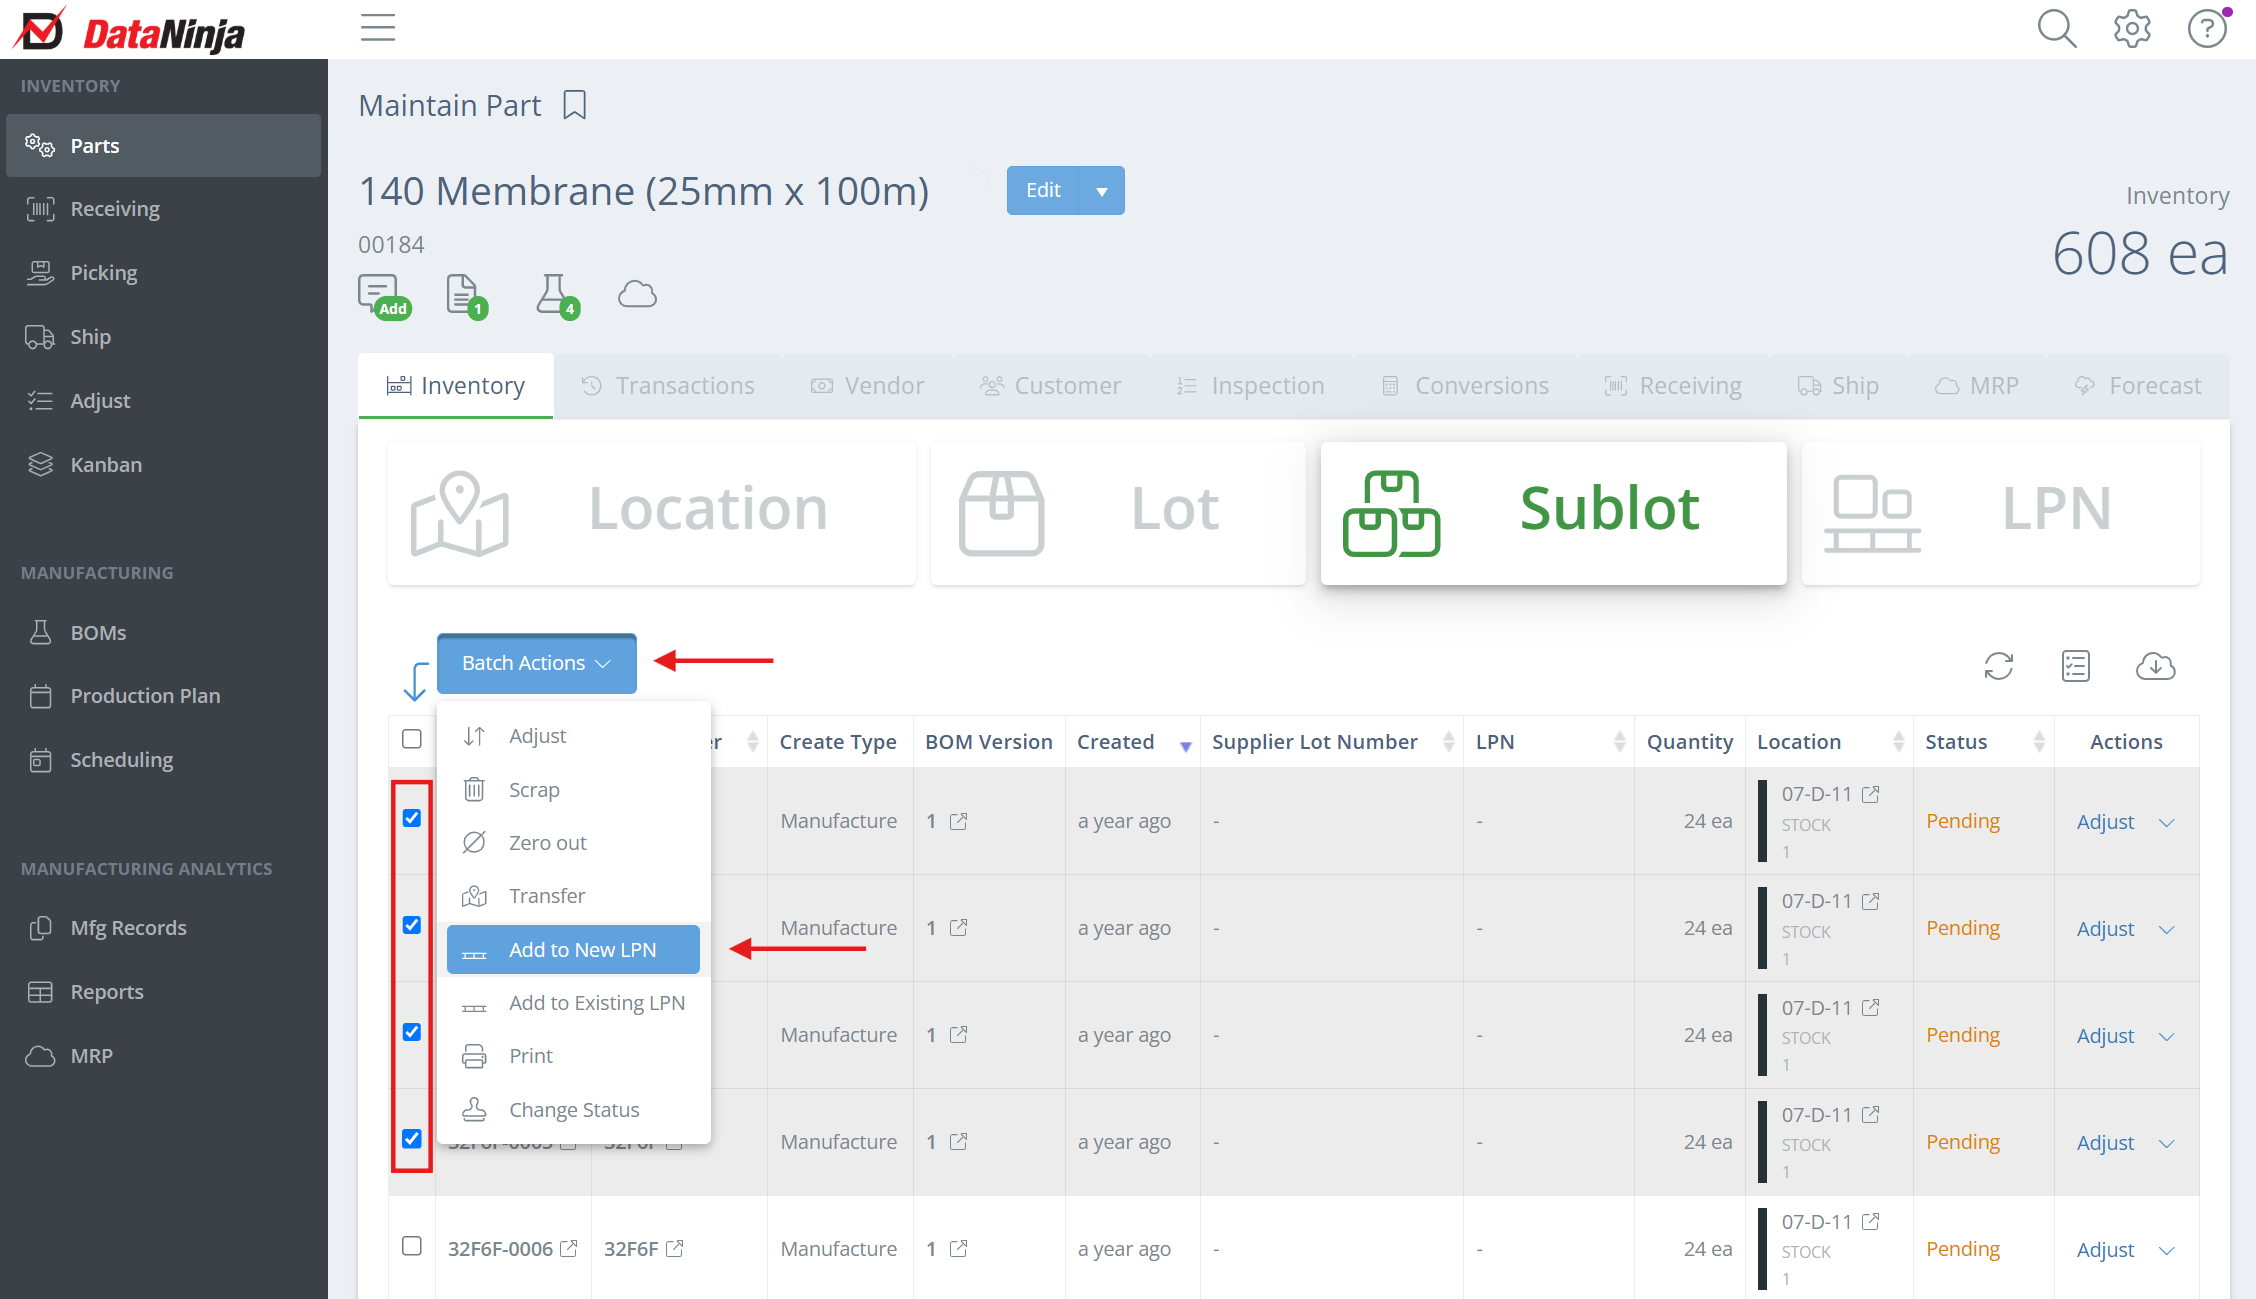
Go to the Parts page, then search for the part that you want to add to the LPN. Click "View" under the Actions column to open the "Maintain Parts" page, then go to the "Sublot" subtab under Inventory. Check the box next to each sublot that you want added onto the LPN, then click "Batch Actions" and select "Add to New LPN" or "Add to Existing LPN".
If you want to add only one sublot, you can also click the dropdown arrow next to "Adjust" in the Actions column and you will see the same options as above.
If you are adding to an existing LPN, a new sidebar will show on the right side of the screen. Search for and select which LPN the items should be added to, then click "Move To LPN".
Printing License Plate Labels
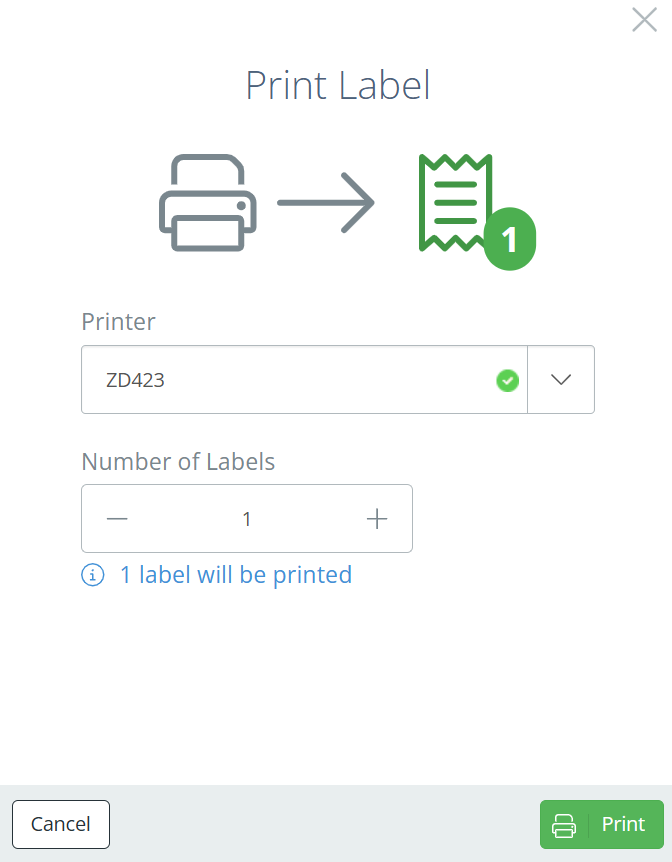
To do this first select "Adjust" on the far left menu, then select "LPN".
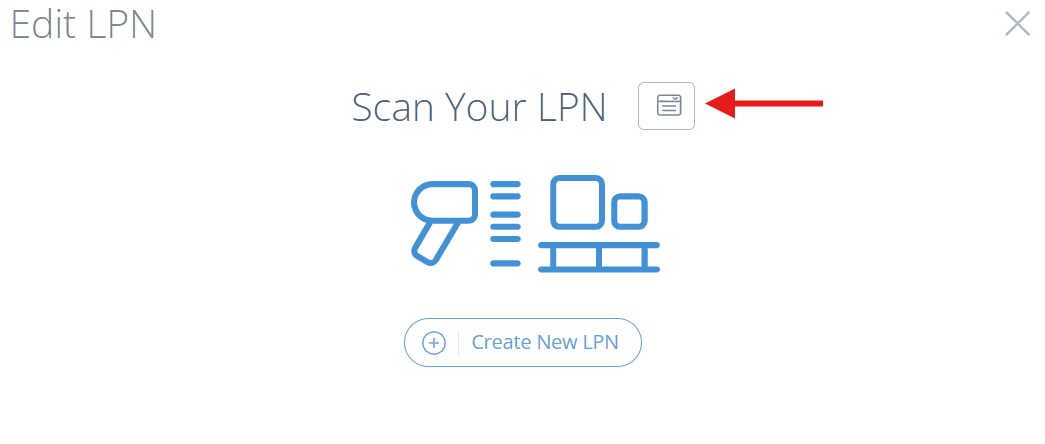
Now you can create a new LPN, or scan an existing one. You can also manually type in the LPN by clicking the icon next to "Scan Your LPN".
Click "Print", then select the printer you want the label(s) to print from, and the number of labels to print, then hit "Print".
View License Plates
From the Parts Page
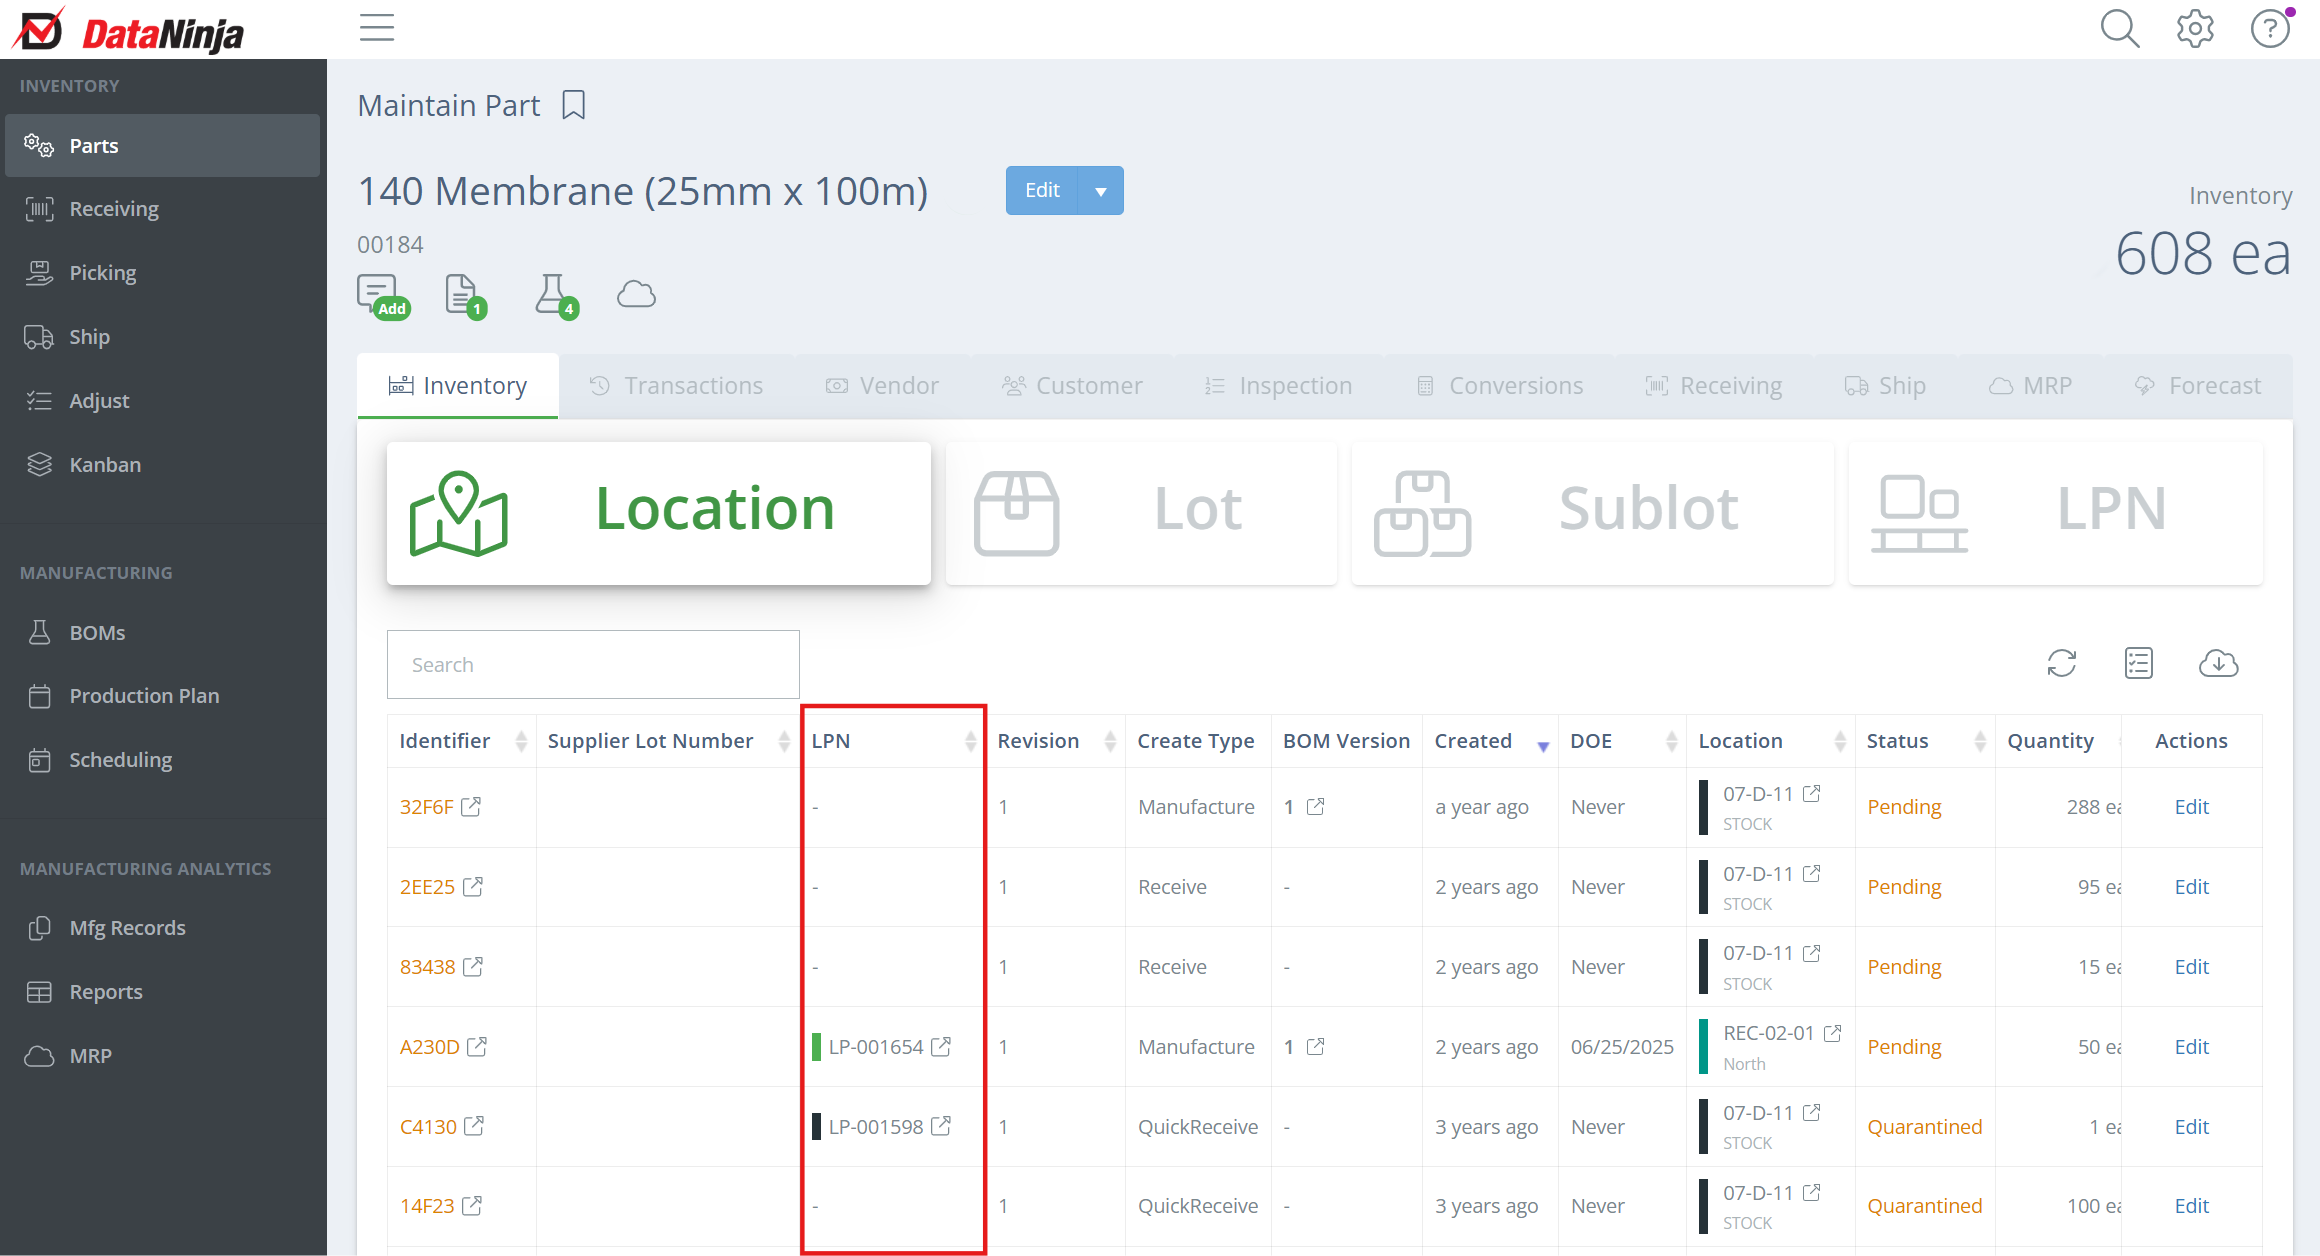
License plates can be viewed from the "Maintain Part" page, which is accessed by going to the Parts tab and clicking "View" under the Actions column. From this page, in the Inventory tab, you can see what LPN (if any) each lot/sublot is associated with.
From the Search Page
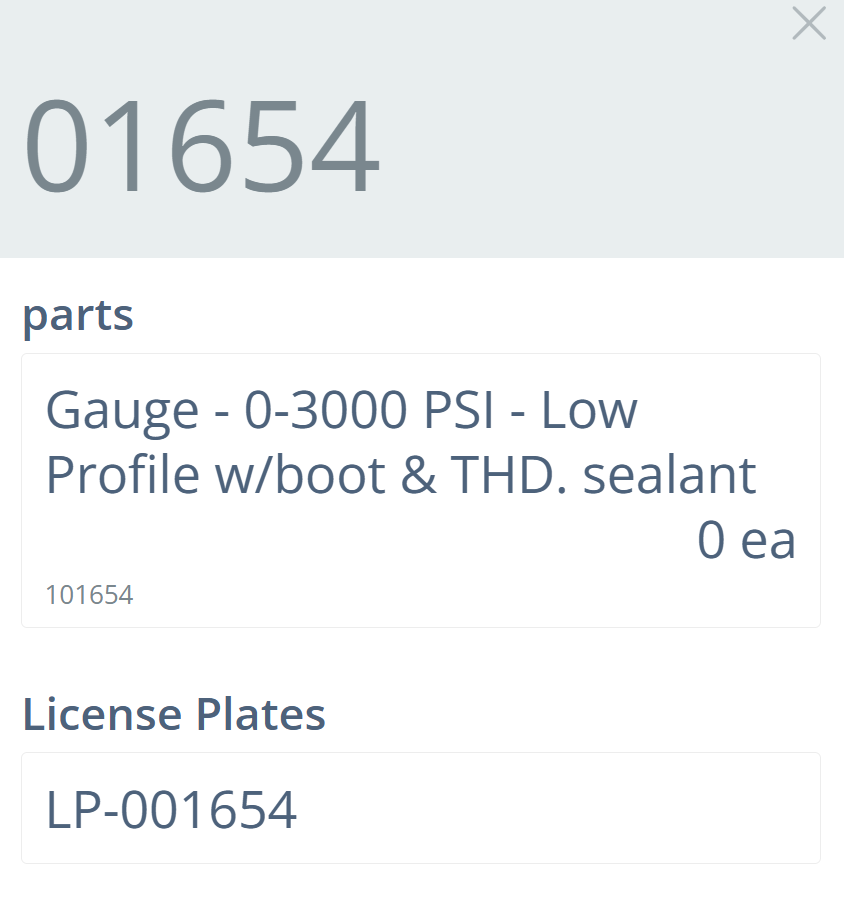
If you already know the license plate name/number, click the search icon in the top right and start typing it in, then click on the relevant result.
From the Manufacturing Record
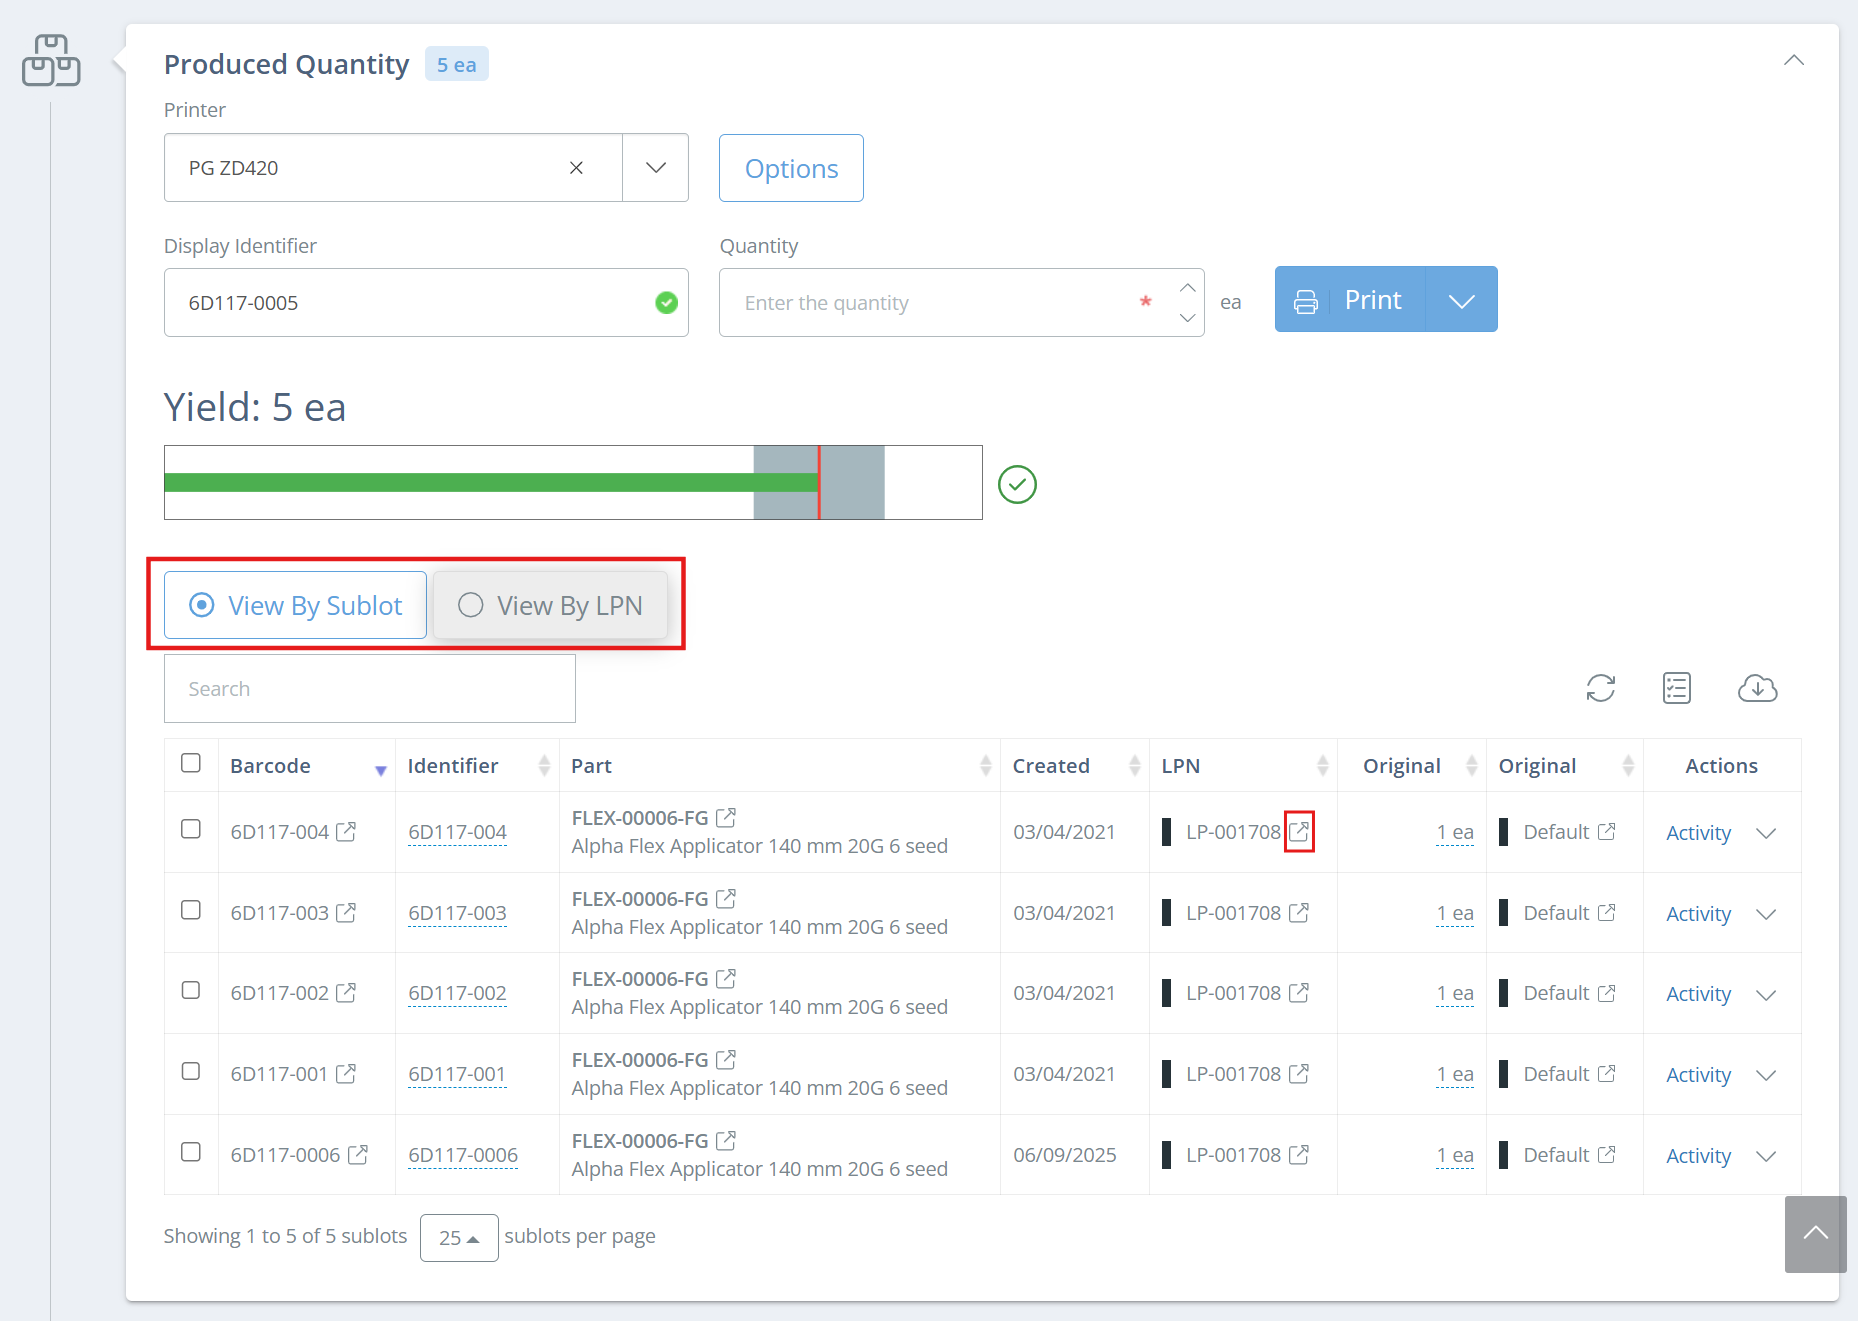
This can be done either during manufacturing, or after the record has been fully signed. Go to Production Plan in the left-hand sidebar, then search and find the batch you want to add to the LPN (typically in the WIP or Completed tabs). Click "View" under the Actions column, then scroll down to the "Produced Quantity" section.
You can then select to view either by Sublot or by LPN, and can view the LPN by clicking on the box with an arrow next to the LPN in the LPN column.
Multi-Batch Process TraceabilitySome processes run multiple batches through machinery fill and packaging lines in a single day without stopping the line between batches. You can assign a days worth of batches to a LPN to keep the batches associated for traceability and mock-recall situations.
License Plate Label Example

Example Image from a 2x4 inch label template
Updated 8 months ago