Locations Management
Inventory Management by Warehouse and Zone
It can be challenging to both keep track of where inventory is at and effectively manage how that inventory is used. DataNinja's Locations Management tools allow you to instantly pinpoint inventory locations and control inventory usage.
Within DataNinja, a Location is made up of two parts: a Zone and a Warehouse. Warehouses typically refer to buildings, or a portion of a building, and a Zone can encompass the entirety of the Warehouse or just a portion of it. You can have any number of Warehouses and Zones, or in other words- any number of Locations.
NetSuite Locations and BinsNetSuite and DataNinja have different definition of a "location": NetSuite location = DataNinja Warehouse. Within NetSuite, bins cannot be used, as DataNinja maintains inventory at the bin level and does not recognize inventory in NetSuite bins.
Adding a Location
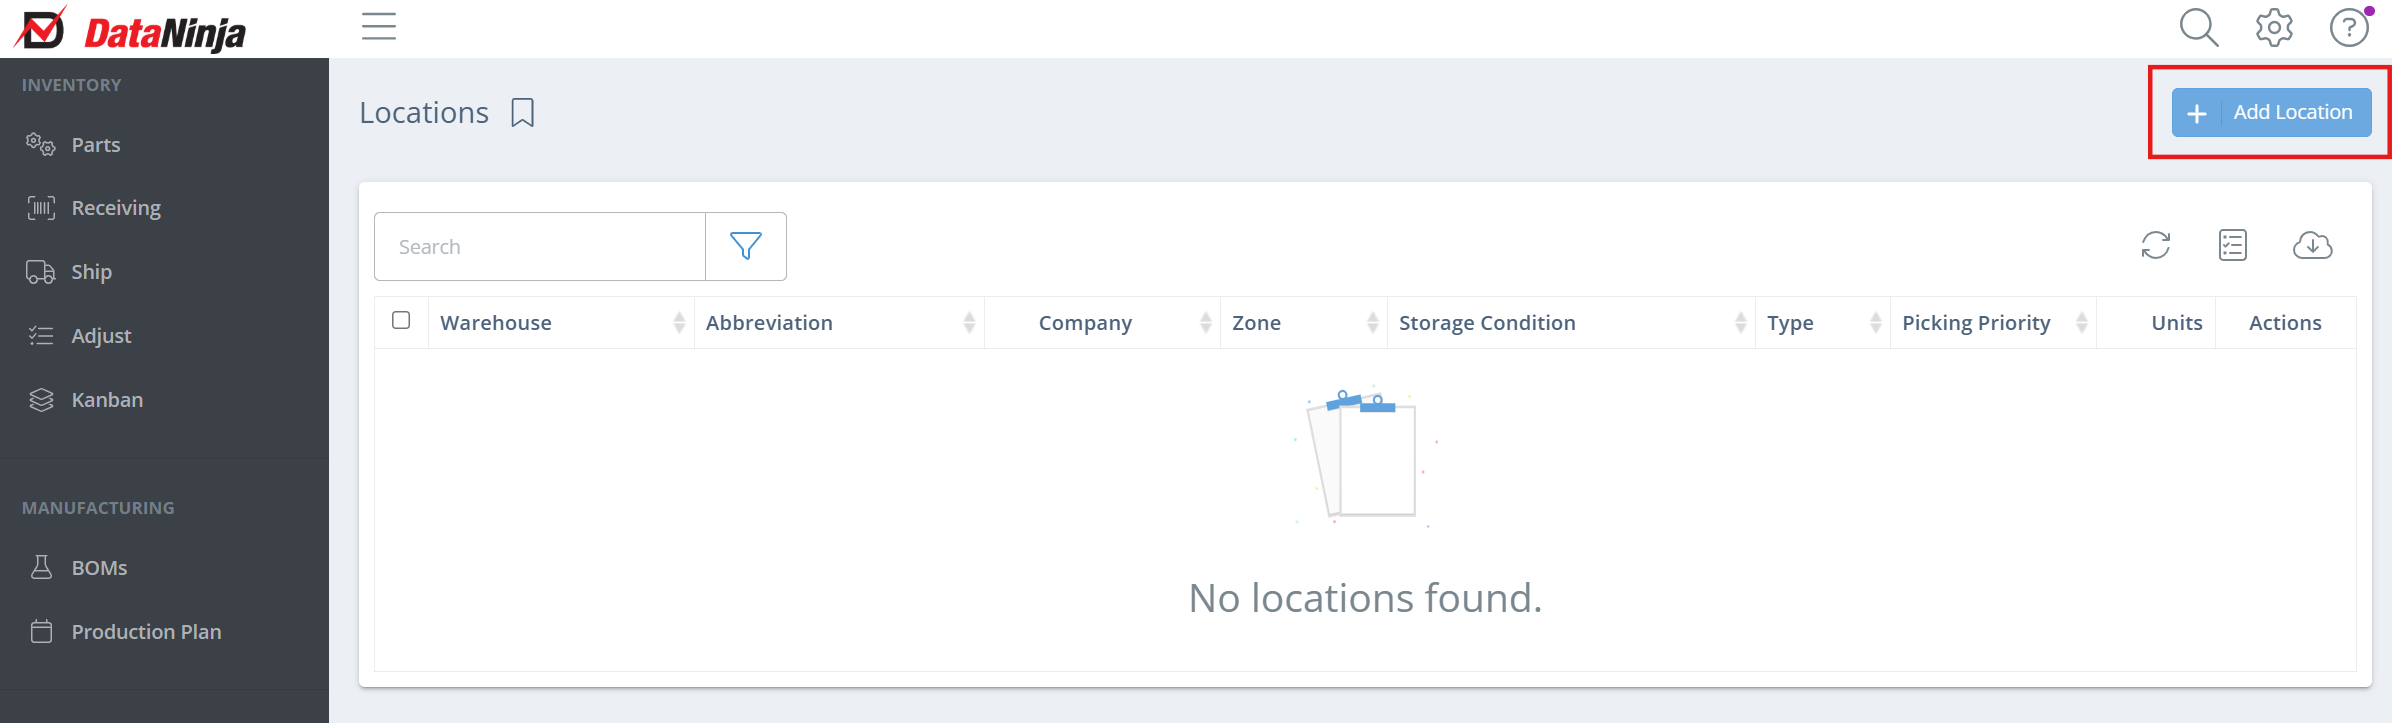
To get started with Locations, click on the gear in the top right of the page and go to "All Lists", then open "Locations". From the Locations page, click "Add Location" in the top right.
A new sidebar will appear, and you will need to fill in the Warehouse. If the Warehouse already exists in DataNinja, select it from the dropdown list. Otherwise, click in the "Warehouse" field and select "Add New Warehouse", and a new sidebar will ask for the Warehouse and address name, and the physical address of the Warehouse. Once the new Warehouse information is filled in, hit "Save" and you will return to the Add Location sidebar, as pictured below.
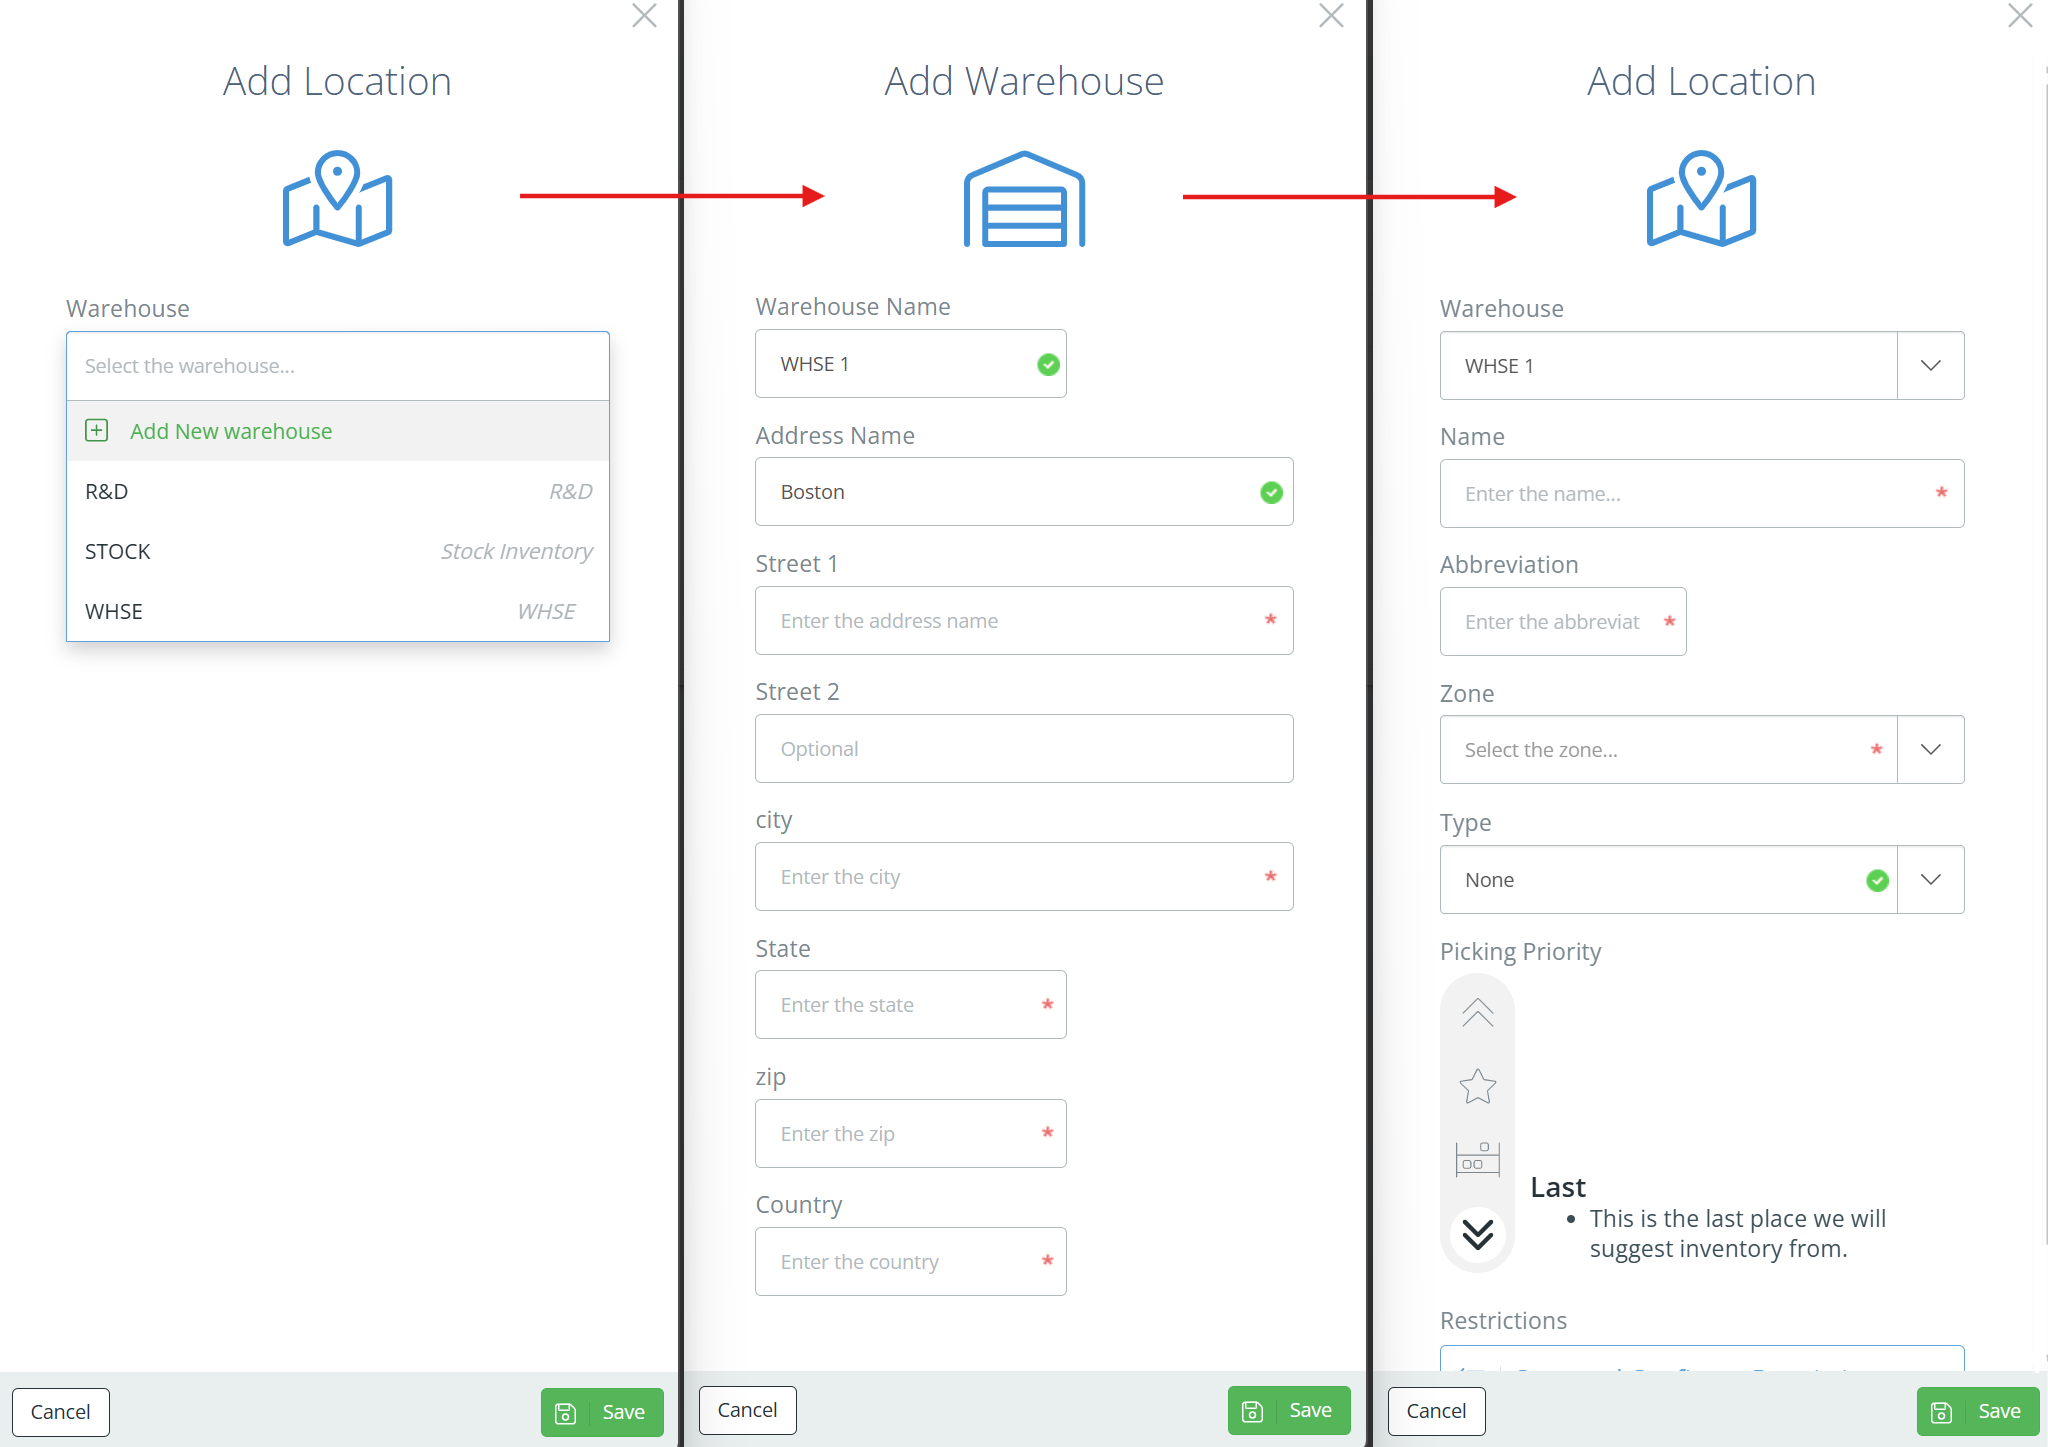
Creating a new Warehouse
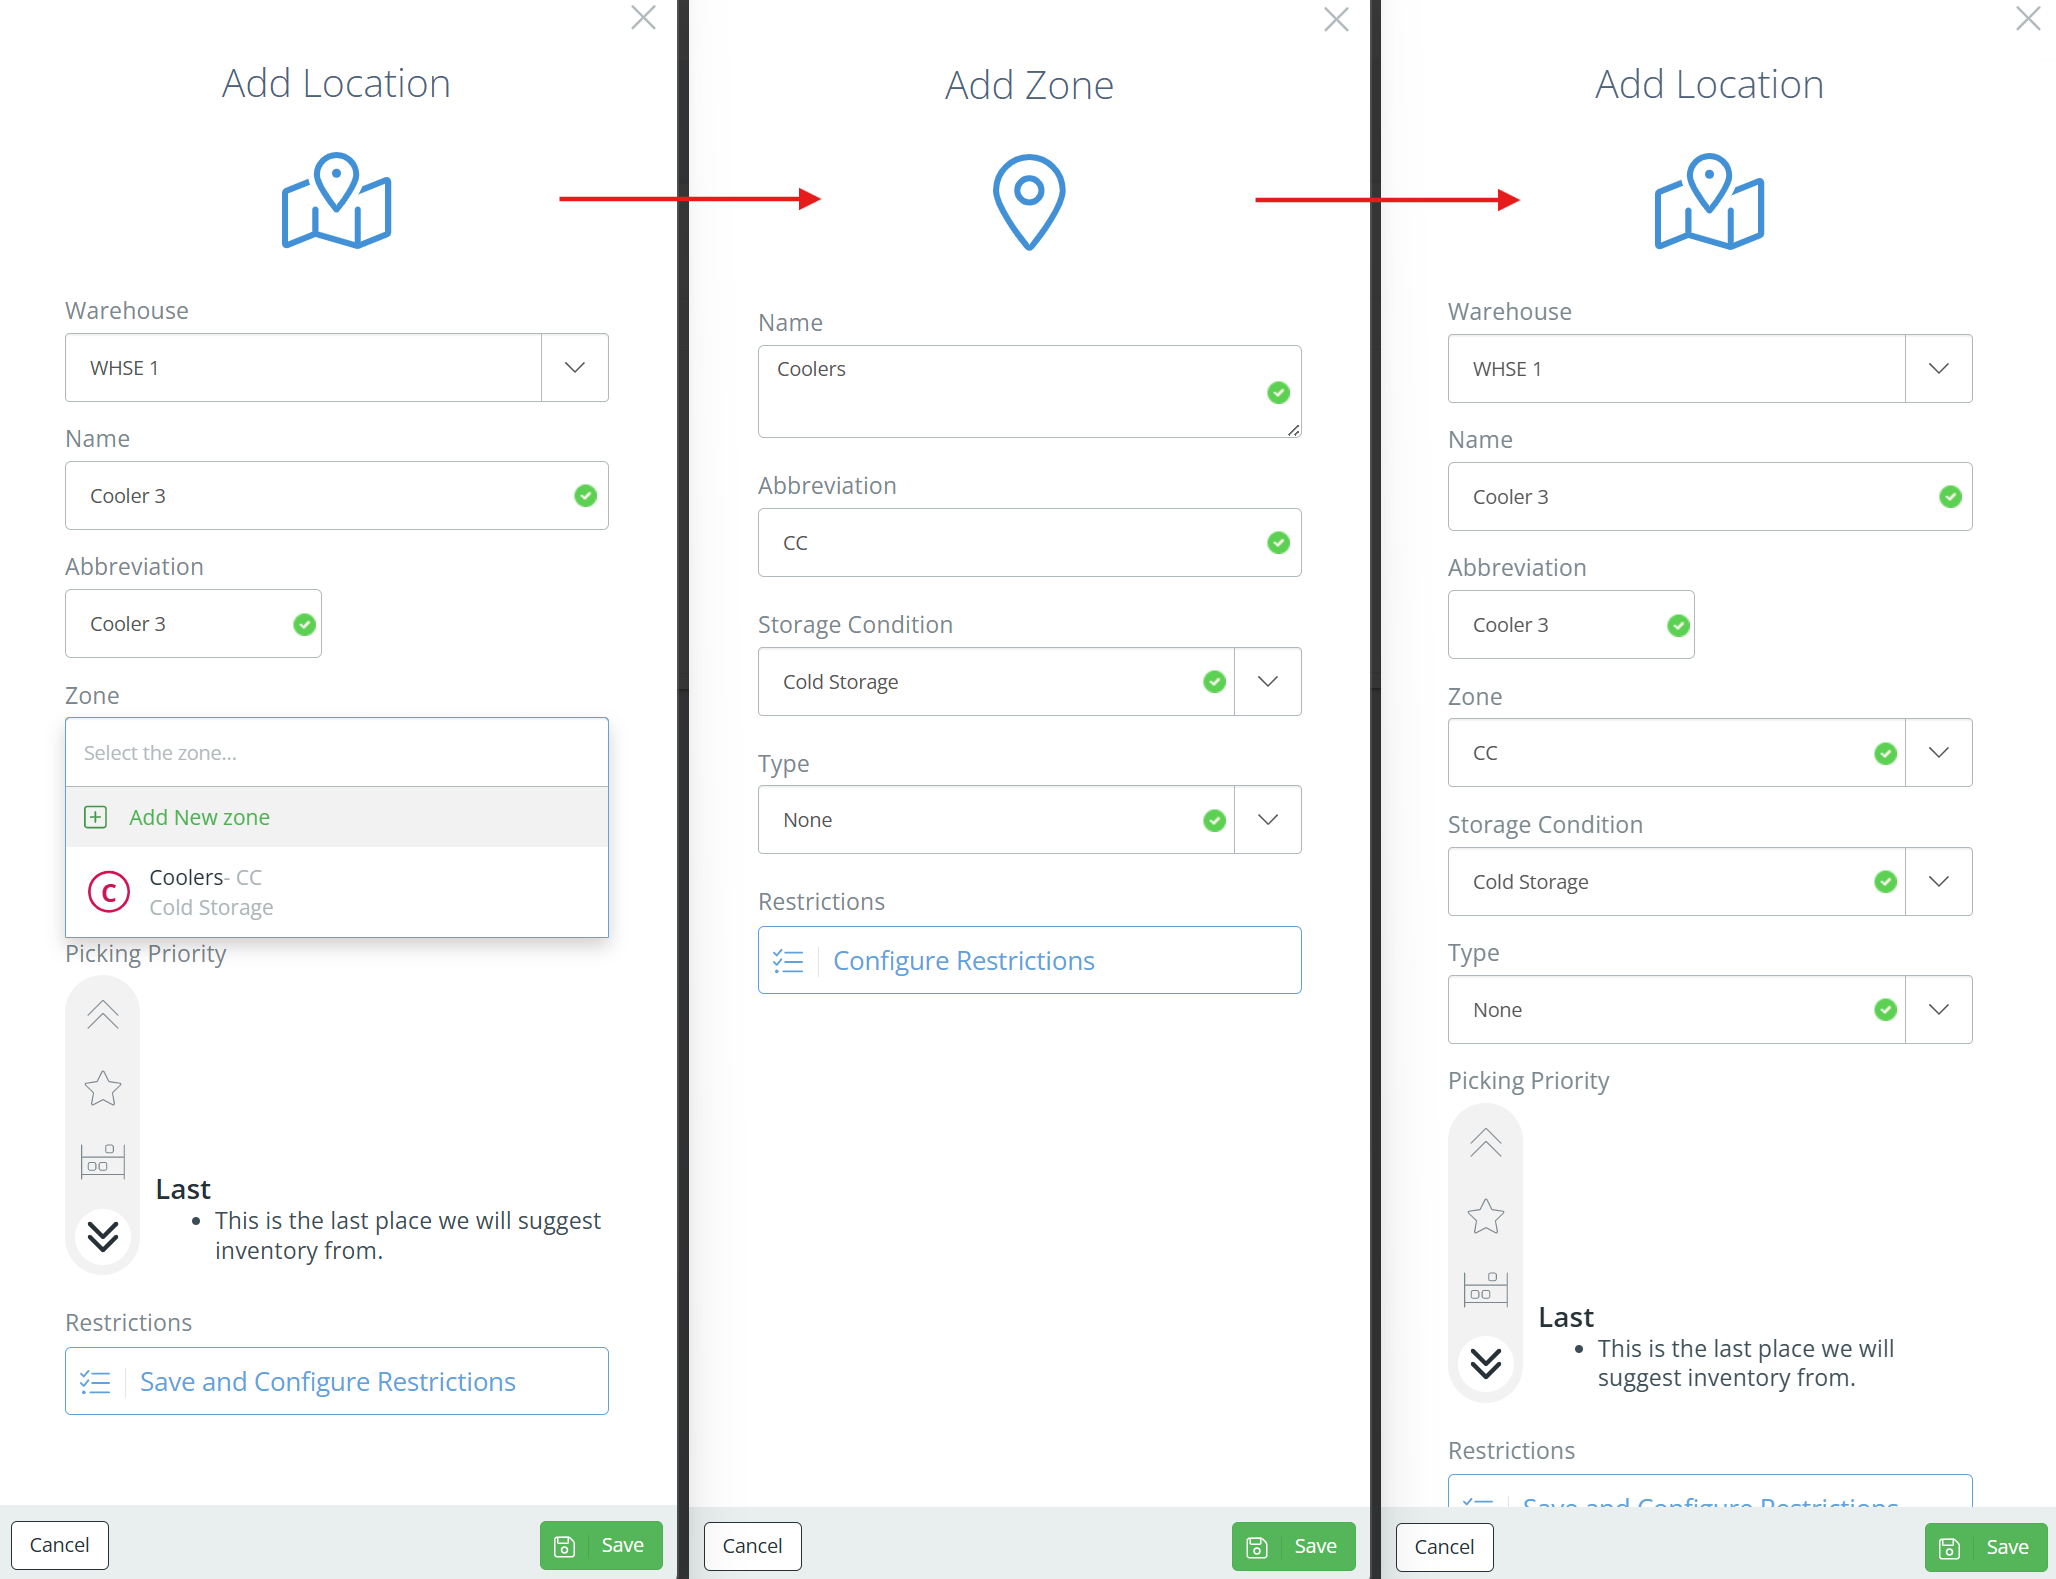
Once the Warehouse is selected, new fields will appear. Enter the Location name, abbreviation, and select the Zone. If the Zone doesn't exist in DataNinja, click "Add New Zone" and the sidebar will ask for the Zone information. Fill in the required fields and hit "Save" to return to the Add Location sidebar.
Zone Types and Restrictions (optional)DataNinja allows you to specify what kind of Zone you are creating- this is just a way to track the expected kind of inventory that will be in the location, and it doesn't restrict inventory from being transferred in. New zone types cannot be created, only the default options can be used. If you don't need to specify the Zone type, just leave it as "None".
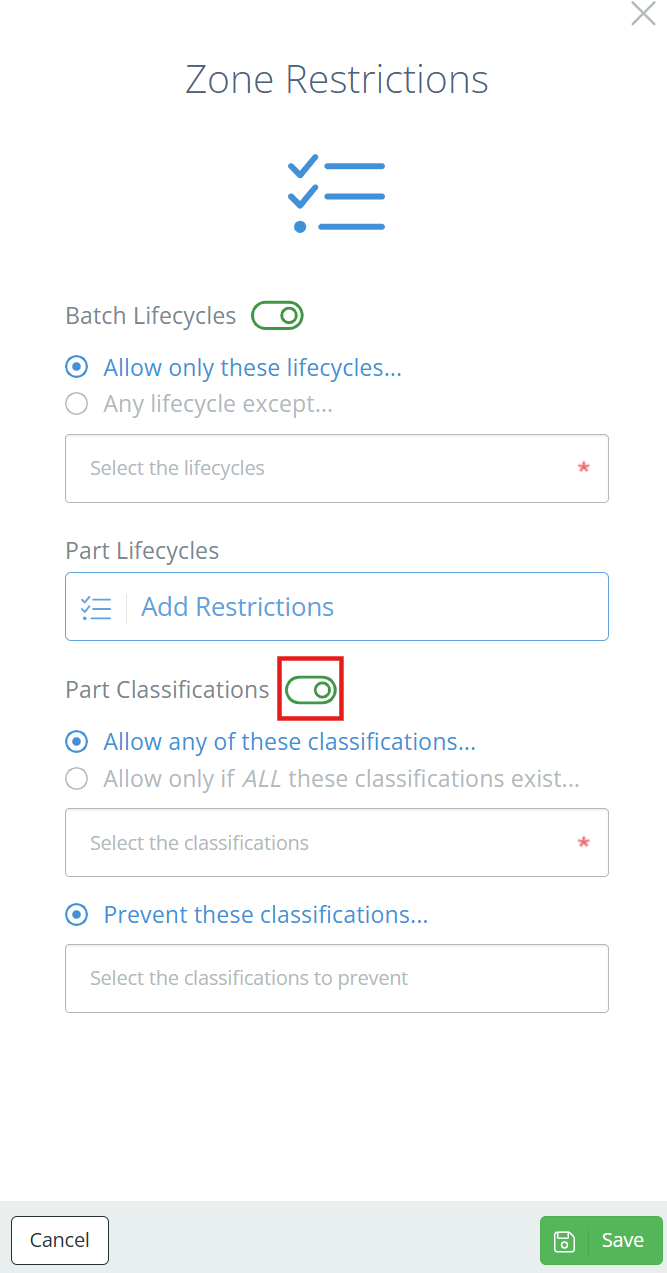
To prohibit certain inventory from being transferred into a Zone, click on "Configure Restrictions" when creating the Zone. You can require inventory to have specific batch/part lifecycles, specific part classifications- or, if you want to accept the majority of lifecycles and classifications but want to reject a certain few, use the "Any lifecycle except..." and "Prevent these classifications..." options. To turn off a restriction, click the green toggle next to the category.
To view and manage all existing Zones, click the gear icon in the top right, go to "All Lists", then click on "Zones". From this page, you can edit/update existing Zones or create new ones.

Now all that needs to be added is the storage condition, Location type, picking priority, and restrictions, and the Location is ready to be saved.
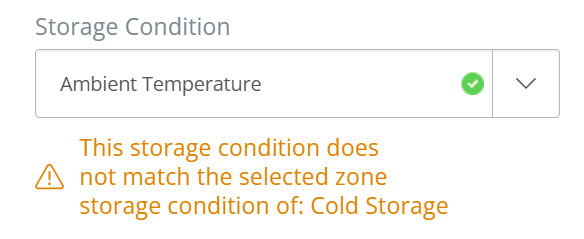
Location Storage ConditionThe Location storage condition will autofill based on the Zone selected. You can change the storage condition, but if it is different from the Zone's storage condition, you will see a notification that the conditions don't match. This won't stop you from saving the Location, just be aware that it could cause issues down the line.
Picking Priority Uses
Picking priority automatically suggests inventory with the highest priority first for shipping or production.
When printing a pick list, inventory with the highest priority will be displayed first.
Part Tracked InventoryPicking priority is especially useful for inventory that is part tracked, because there is no expiration date to use for FIFO.
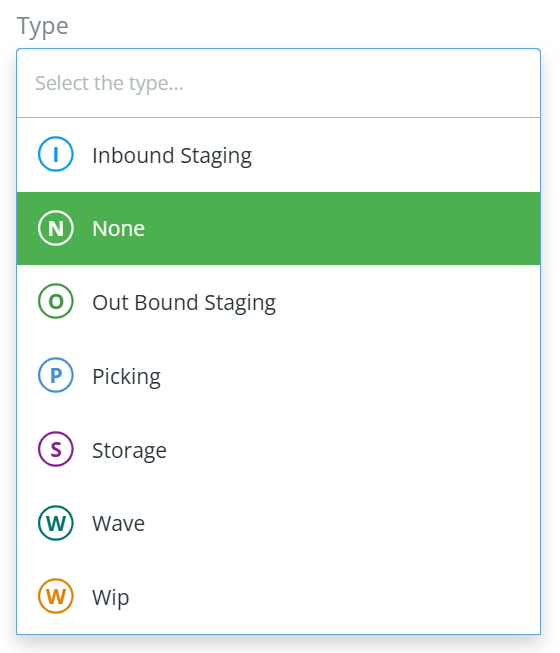
Location Types and Restrictions (optional)DataNinja allows you to specify what kind of Location you are creating- this is just a way to track the expected kind of inventory that will be in the Location, and it doesn't restrict inventory from being transferred in. New location types cannot be created, only the default options can be used. If you don't need to specify the Location type, just leave it as "None".
To prohibit certain inventory from being transferred into a Location, click on "Configure Restrictions" when creating the Location. You can require inventory to have specific batch/part lifecycles, specific part classifications- or, if you want to accept the majority of lifecycles and classifications but want to reject a certain few, use the "Any lifecycle except..." and "Prevent these classifications..." options. To turn off a restriction, click the green toggle next to the category.
Once all required fields have been filled in, hit "Save" and your new location will be available to put inventory in!
TipStart with high-level locations. Going too fine-detailed too fast can cause operational inefficiencies as your teams get accustomed to scanning in and out of barcoded bin locations.
Barcodes for Inventory Locations
Once your Locations are in the system, we recommend that you print the barcodes. Barcodes are a great way to link the physical space of your warehouse to your inventory system, that way you can scan to transfer and Cycle Count inventory rather than manually keying in the inventory location.
This is what a typical inventory barcode looks like:

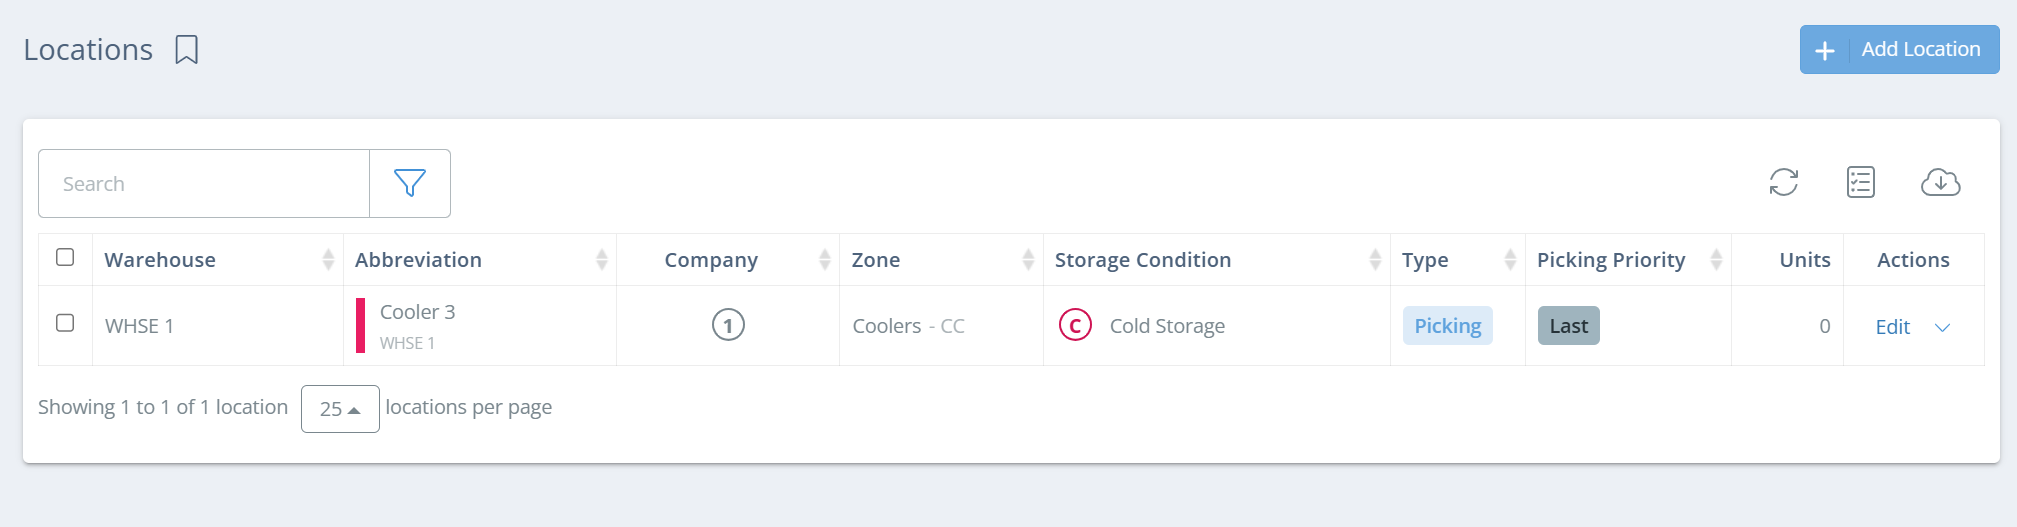
To print a Location barcode, click on the gear in the top right, then go to "All Lists", then "Locations". From this page, select each of the relevant Locations, then click "Batch Actions" and "Print".

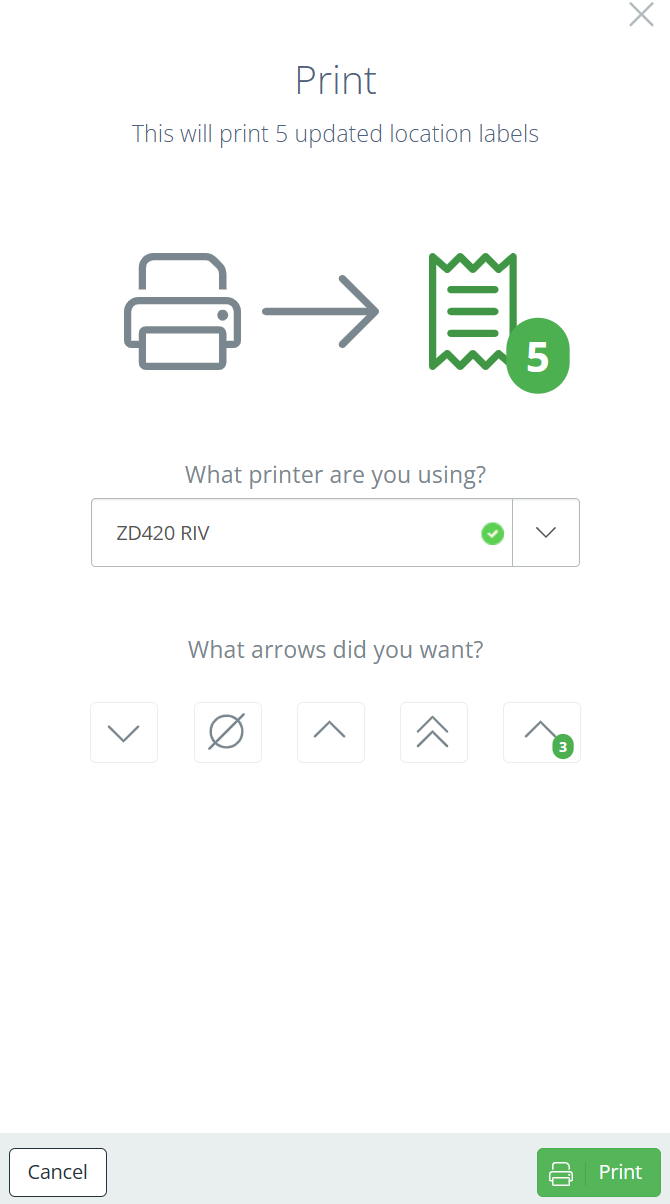
This will open a sidebar where you will select the printer the labels will print from, and choose what arrows will be on the label. The number of arrows is typically used in shelving areas to indicate which level the inventory is on.
TipMost location barcodes are down low where team members can scan even for inventory locations that are up high. Unless you are using a long-range barcode scanner, consider using arrows to indicate the specific location where the location barcode applies.
Updated 9 months ago