
Inventory Transfer
Transfer inventory from one DataNinja location to another
Español: Lee esta página en español.
Français : Consultez cette page en français.
Inventory transfers move inventory from one DataNinja location to another without changing the inventory quantity. Use this workflow when the physical inventory is moving between bins, rooms, warehouses, production areas, or any other tracked location.
Transfer Inventory to Another Location
To transfer inventory, tap "Adjust" and select "Inventory".

Scan the inventory identifier you want to move, then click "Transfer" in the dropdown next to "Adjust". Finally, scan the destination location barcode and tap "Transfer".

Notes and Reason CodesAdding a note to an inventory transfer is a helpful way to explain why the inventory moved, and will appear in the transaction log. If your team wants notes to be required, go to the Reason Code Actions page in DataNinja, click Edit on the relevant line and mark "Requires Note" on each of the actions you want to require a note on.
Reason Codes allow for categorization of specific actions within DataNinja. See our Reason Codes page for more details.

Transfer Into a Location From Global Search
You can also start a transfer from the location the inventory is moving into. Click the search icon in the top right corner.

Scan or type the location's abbreviation, then select the location under "Location" to open its quick actions.
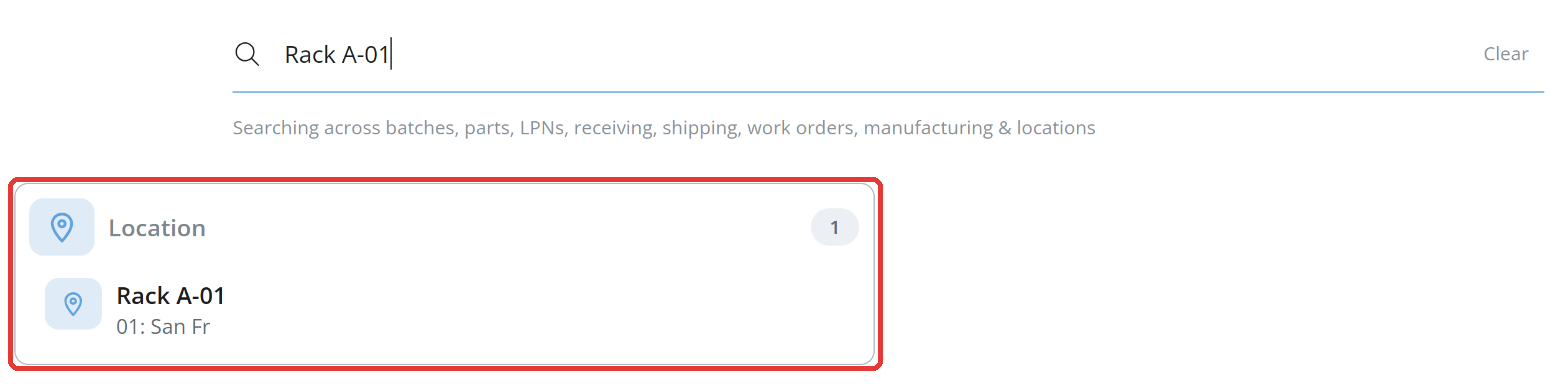
While the quick actions are open, a "Ready to scan" banner shows at the top. Scan the inventory identifier, and "Transfer into location" opens with that inventory already added. Then complete the transfer. You can also click "Transfer into location" first and scan the inventory there.
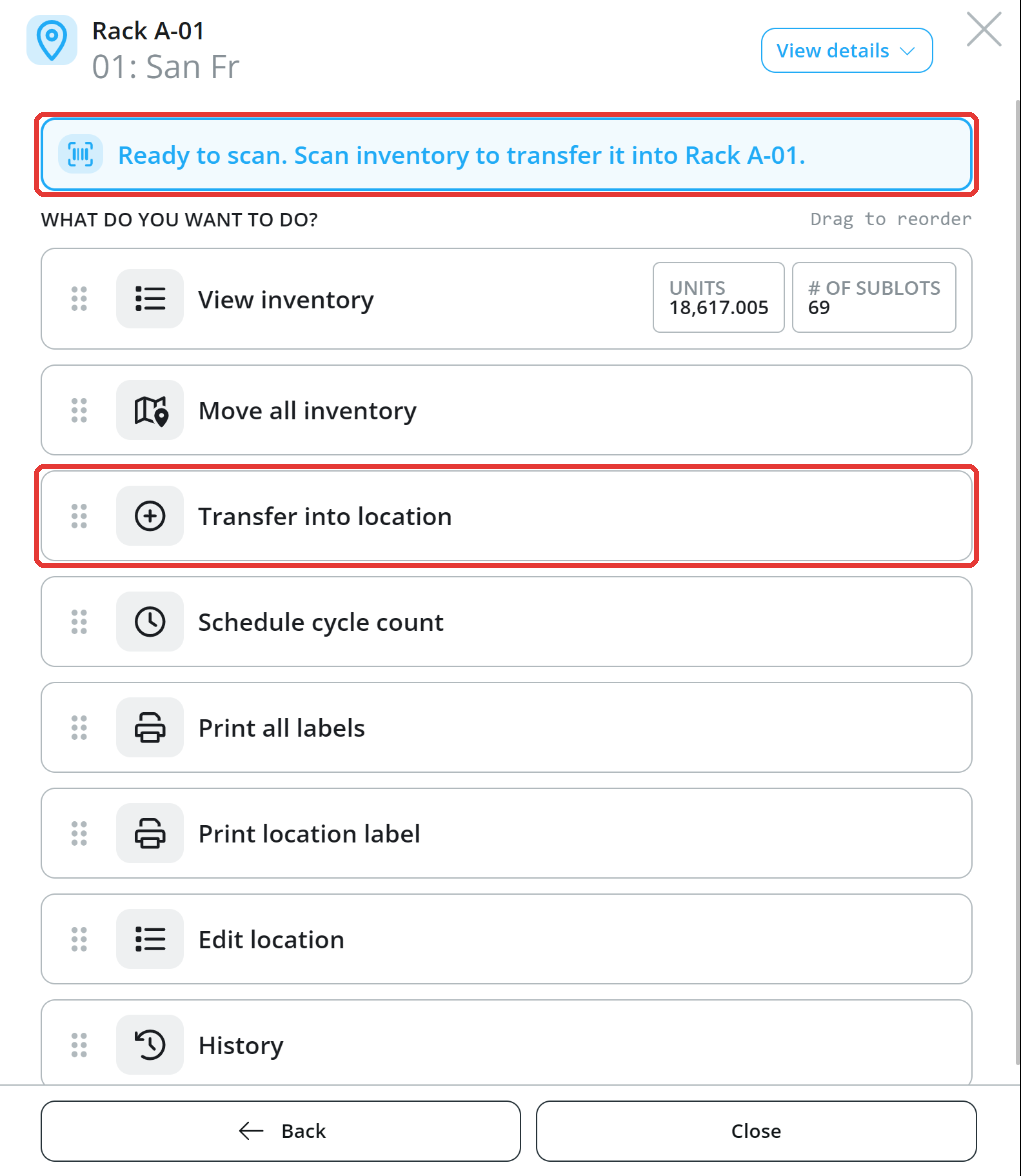
Scan With a Barcode ScannerThe quick actions only listen for a barcode scanner, and not while you're typing in a field. If the scanned code isn't inventory, DataNinja shows "No inventory was found."
Partial Transfers
Use a partial transfer when you only want to move part of the available inventory quantity.
Scan the inventory identifier, click "Transfer" in the dropdown next to "Adjust", and choose where the inventory is going. Under "How much are you moving?", select "Custom Amount", then enter the amount to move under "Set Custom Transfer Amounts". DataNinja shows how much is moving and how much will remain in the original location. Click "Transfer" to finish.
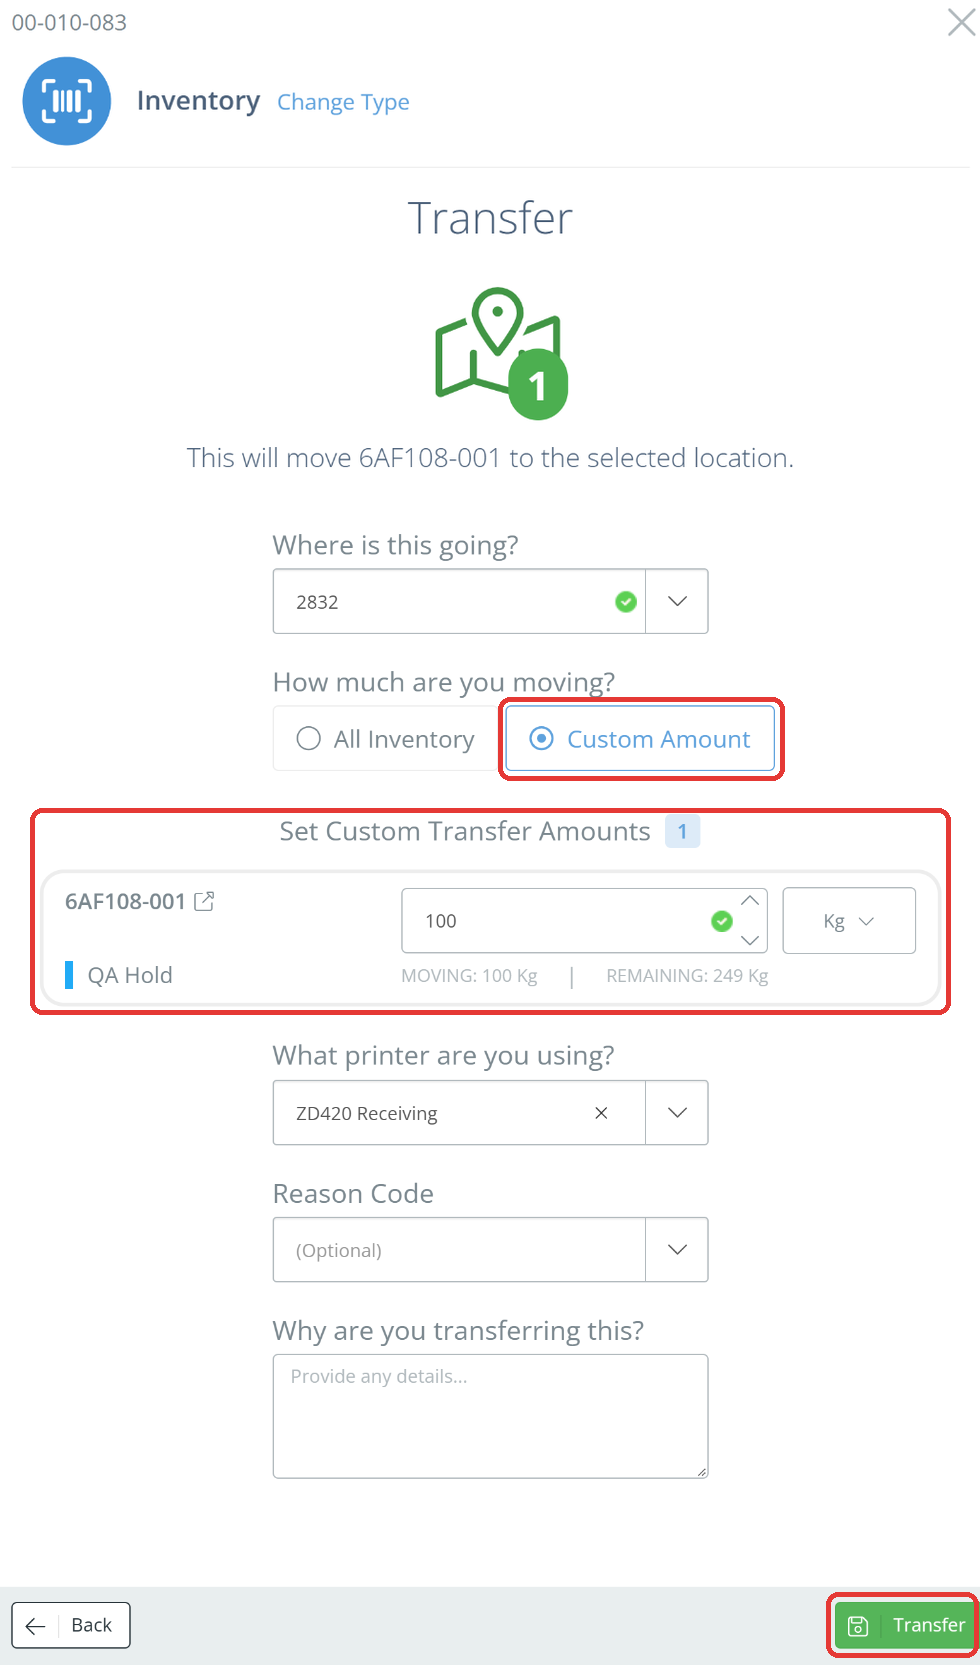
After you complete the transfer, DataNinja may print a new barcode for the transferred quantity, depending on your Tracking Type settings. The new barcode remains traceable back to the original inventory identifier.
Indirect Transfers
Some workflows transfer inventory as part of another action. The most common examples are license plate transfers and cycle counts.
License Plate Transfers
If inventory is assigned to a License Plate Number (LPN), the inventory moves with the license plate when the license plate is transferred.
To transfer a license plate, tap "Adjust" and select "LPN". Scan the license plate, or click the list icon next to "Scan Your LPN" to pick it from a list.
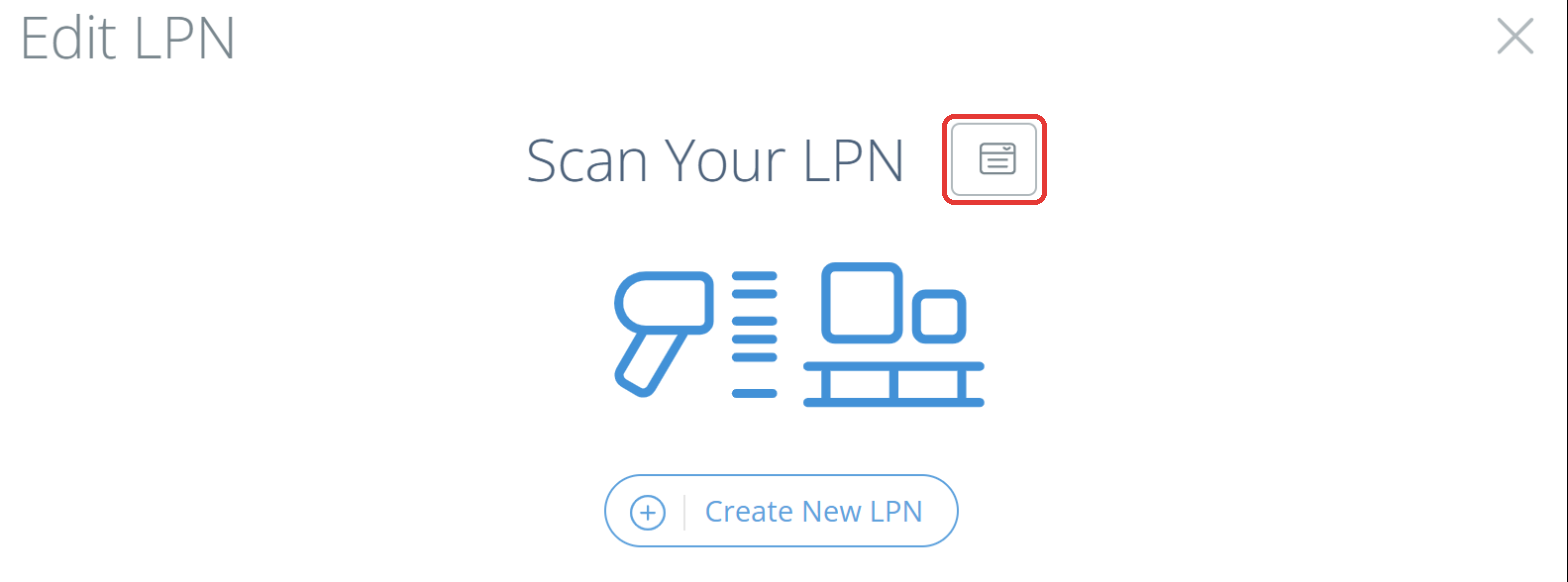
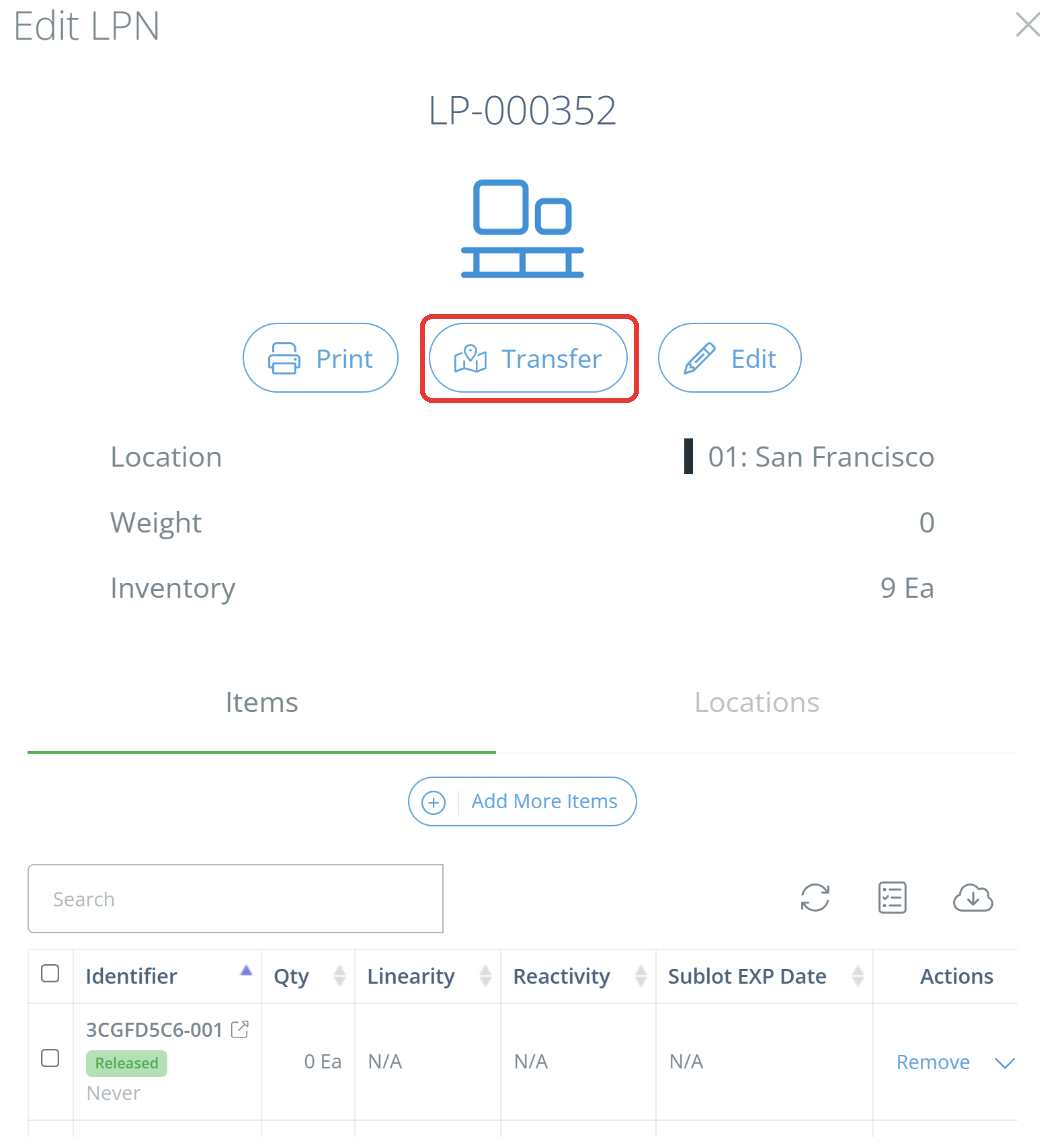
The Edit LPN panel opens. Click "Transfer".
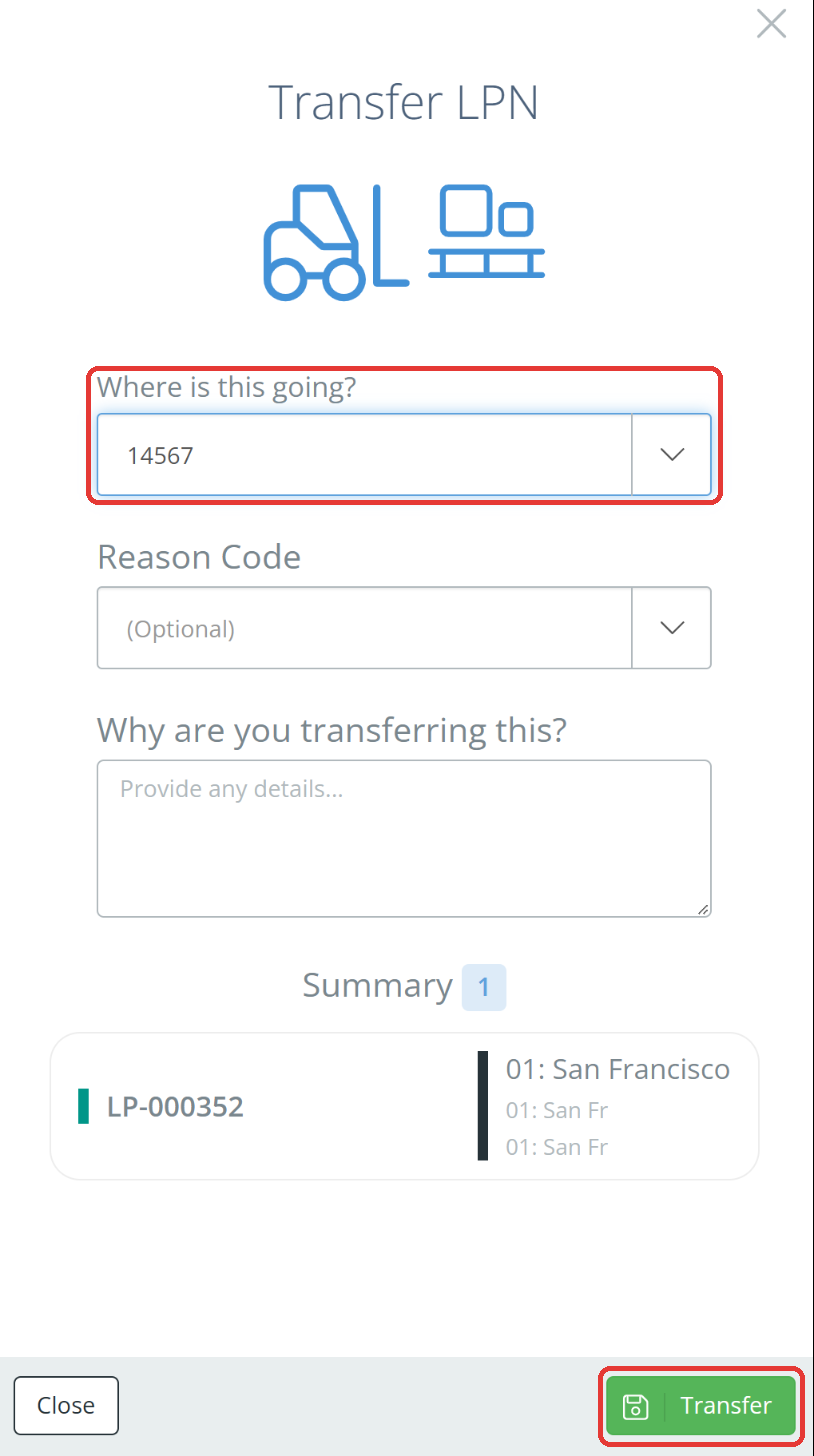
Choose where the license plate is going, add a reason code or note if needed, then click "Transfer".
Cycle Counts
A Cycle Count can also move inventory, depending on your site's settings. When automatic transfers during cycle counts are turned on, counted inventory that DataNinja has recorded in a different location is transferred into the count location when you complete the count. To have this turned on or off for your site, open a chat with our Support team.
Use Kanban when you need item-location alerts for safety stock or replenishment. A Kanban creates a threshold for a specific part in a specific inventory location.
Updated 10 days ago