Build a manufacturing record template with process steps
Process steps are manufacturing instructions and include data that needs to be recorded during a production run for a part. Critical steps can be set to require second person verification, and calculations can be automated so long as all numeric variables are on the record.
Add a Process Step
To add a process step, open the relevant BOM go to the Process tab. In the Process tab, click 'Add a process step' and a new aside will open. Name the step, select a Work Center, and add any necessary instructions for completing the step. If the process needs to be repeated periodically throughout production, mark Yes under 'Is Repeated?' (see Repeating Process Steps for additional details).
The additional fields allow for more in-depth tracking and organization on the batch record; review each of them and click 'Save and Close' when all fields have been filled out.
Operation
Operations typically refer to a step of manufacturing (cleaning, mixing, packing, etc.) and can be created directly in this field. Just type the name of the operation, then click the add option in the dropdown once the name is complete.
Screencap from v4.21.264.294
Track Actual Time
If set to 'Yes', then a timer can be started and stopped on the manufacturing record when the process step has been started. This will create an "interval", and multiple intervals can exist on each process step. This allows granular, live tracking of the time a production crew spends on a production process.
You can also issue cost based on the tracked time, just select 'Yes' on the new Issue actual costs based on time field that shows after clicking to track actual time.
Show on Resource Scheduling
If your DataNinja site has Advanced Scheduling enabled, then you can view scheduled production runs based on work center, batch, or individual/line assignment (see Advanced Scheduling). So if you want this process step to show on the schedule, then you must assign a Labor time of 15 minutes or more and select 'Yes' to show on resource scheduling.
Labor
Labor can be tracked by either the batch or individual unit using fixed and variable labor tracking, respectively.
Labor Type
Definition
Example
Fixed
The total time required to complete the process, independent of batch size
It takes 12 minutes to mix the materials
Variable
The time required to make one individual unit
It takes 1 minute for a single bottle to be capped and labeled
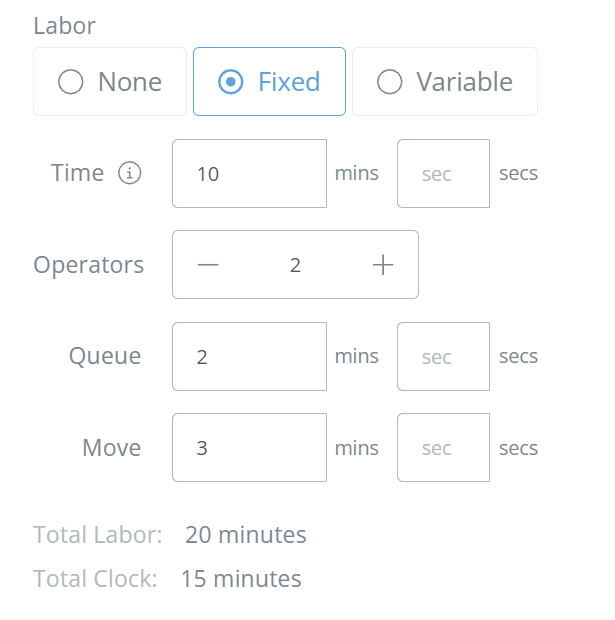
The 'Time' is how long the actual labor for this step takes, per operator. Total labor is calculated off 'Time' and the number of 'Operators', but you can also track setup and adjustment times under 'Queue' and 'Move'. So while the fixed labor for the step could be 20 minutes (10 per operator), the total clock time could be only 15 minutes (Time+Queue+Move).
Screencap from v4.21.264.294
Add Attributes to a Process Step
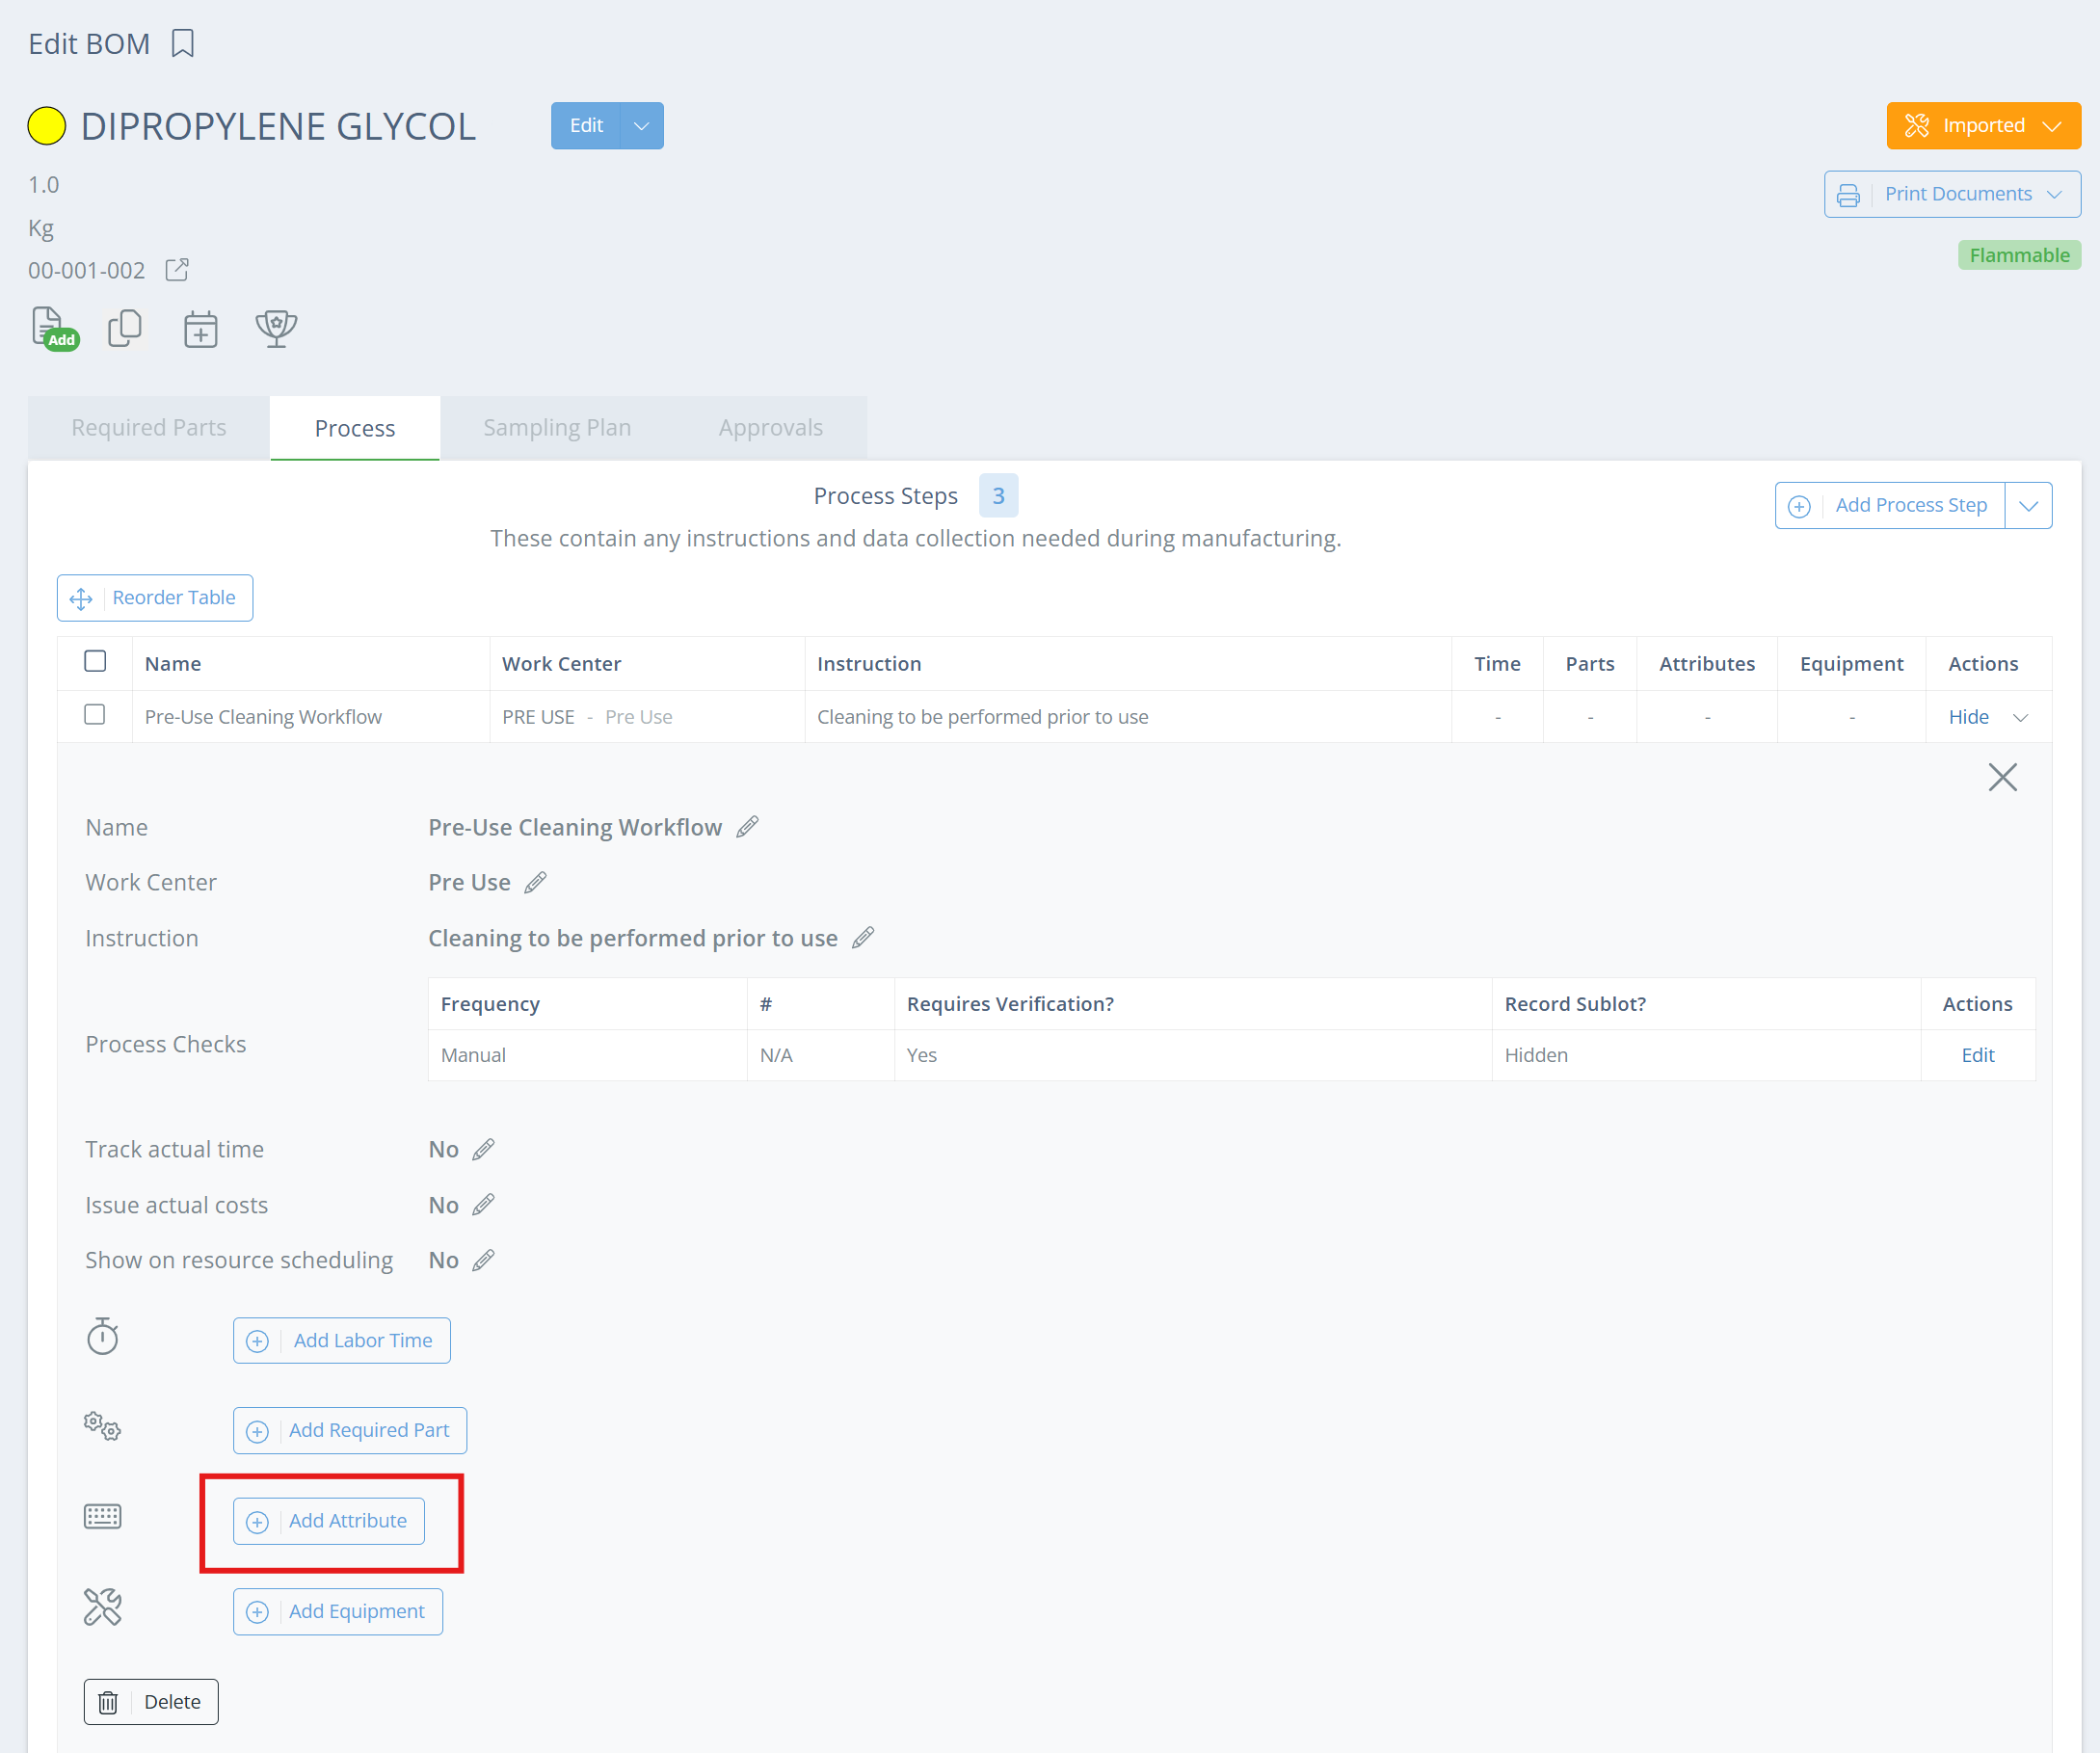
Attributes are the actual data/confirmations that you want to record on the batch record, and they are tied directly to a process step (aka process check). To add an attribute to an existing process step, click 'View' in the Actions column on the Process tab of the BOM, then click 'Add Attribute'.
Screencap from v4.21.264.294
In the new aside, put the instructions in the Name field, then mark if the attribute is required, if it requires second-person verification, and select a Type.
🚧
The 'Requires Verification' field will not show in the Edit or Create Attribute aside if the process step is repeatable. If you want a repeated process step to use second person verification, that will need to be set at the process step level. See Repeating Process Steps.
Second Person Verification
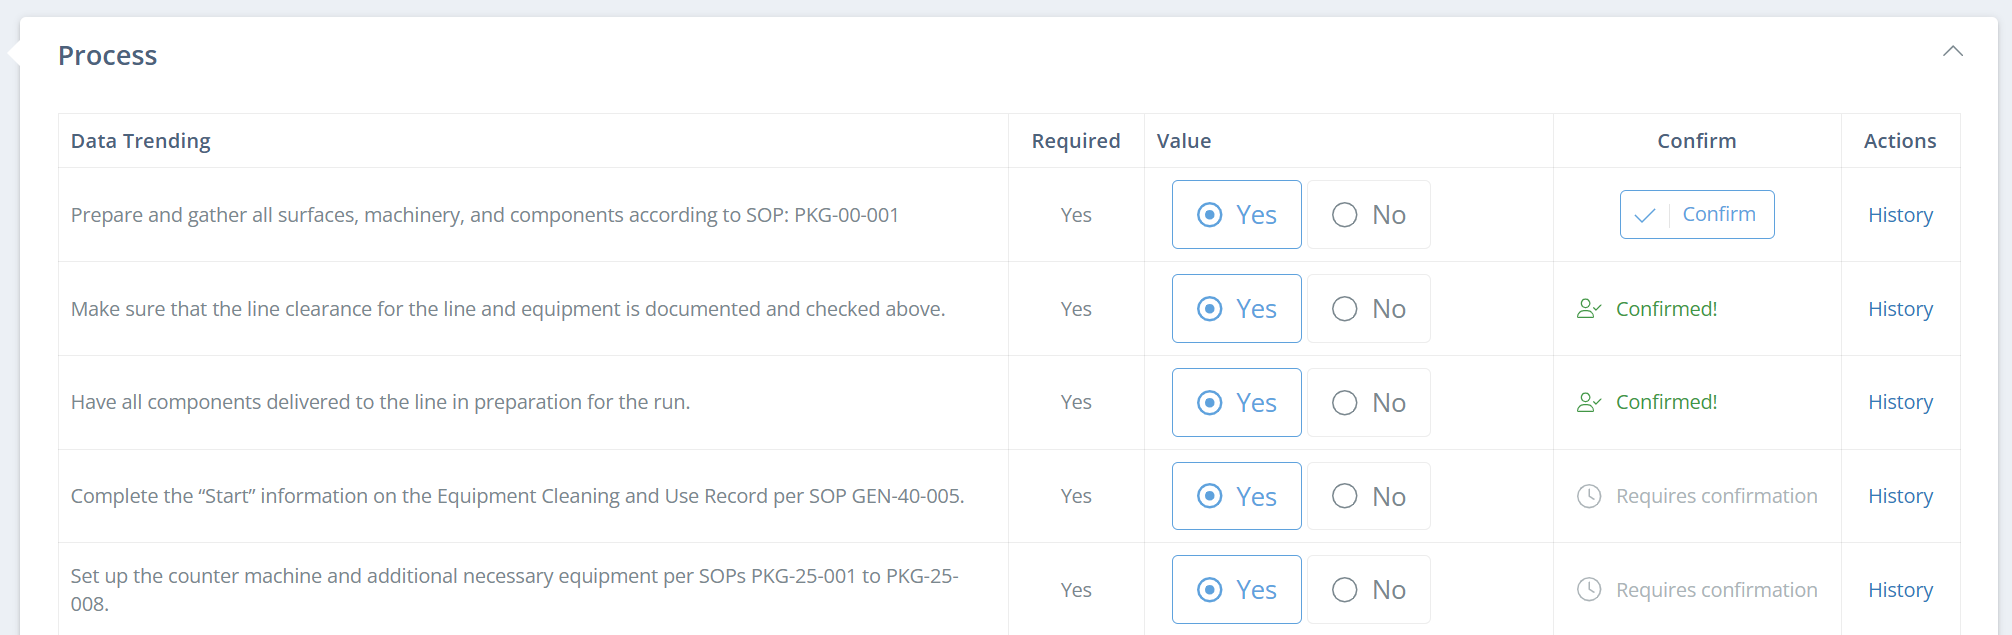
For each trackable attribute on a Process Step, you can require a second person to verify that the attribute was completed correctly. Just select "Yes" under "Requires Verification?" when setting up or editing the attribute. Be aware that this means that a second user with a different DataNinja login must hit "Confirm" on the attribute in order to complete it.
Screencap from v4.21.264.294
Attribute Types
Attribute Type
Description
Calculation
Using numeric fields from either a particular process step/check, or the entire manufacturing record, formulas can be auto-calculated. Decimal precision can also be set (see details below)
Checkbox
Records a Yes/No selection
Date
Records a calendar date
File
A file can be uploaded
Number
Only a numeric response is accepted; decimal precision and an acceptable range (i.e. 1-5) can be set
Select Box
Select an option from a list; expected value(s) can be set and will trigger an escalation if not selected
Text
Any alpha-numeric response is accepted
Weight
Records a weight value; a lower and upper limit can be set and an escalation will trigger if entry is outside the limits
Calculations
Calculations are a relatively new feature, and permit you to auto-calculate formulas to reduce human error when calculating numbers. You can also test a calculation before saving it on the attribute, to make sure that it reaches the expected conclusion. Decimal precision can be set, and while fewer decimals can be entered, additional ones beyond the precision limit will be ignored.
Calculation Scope
The calculation scope adjusts what fields are accessible to a calculation; any numeric field, including another calculation, can be utilized in a calculation. View each of the tabs below for information on each of the calculation scope types.
Scope: Process Step
The 'Process Step' scope gives the calculation access to all numeric fields in the process step in which it is created. If 'Process Step' is selected as the scope, the process step cannot be set to repeated or the calculation will break. When there are multiple process checks, the calculation will not know which Interval the variable data should be sourced from, so the field will remain blank.
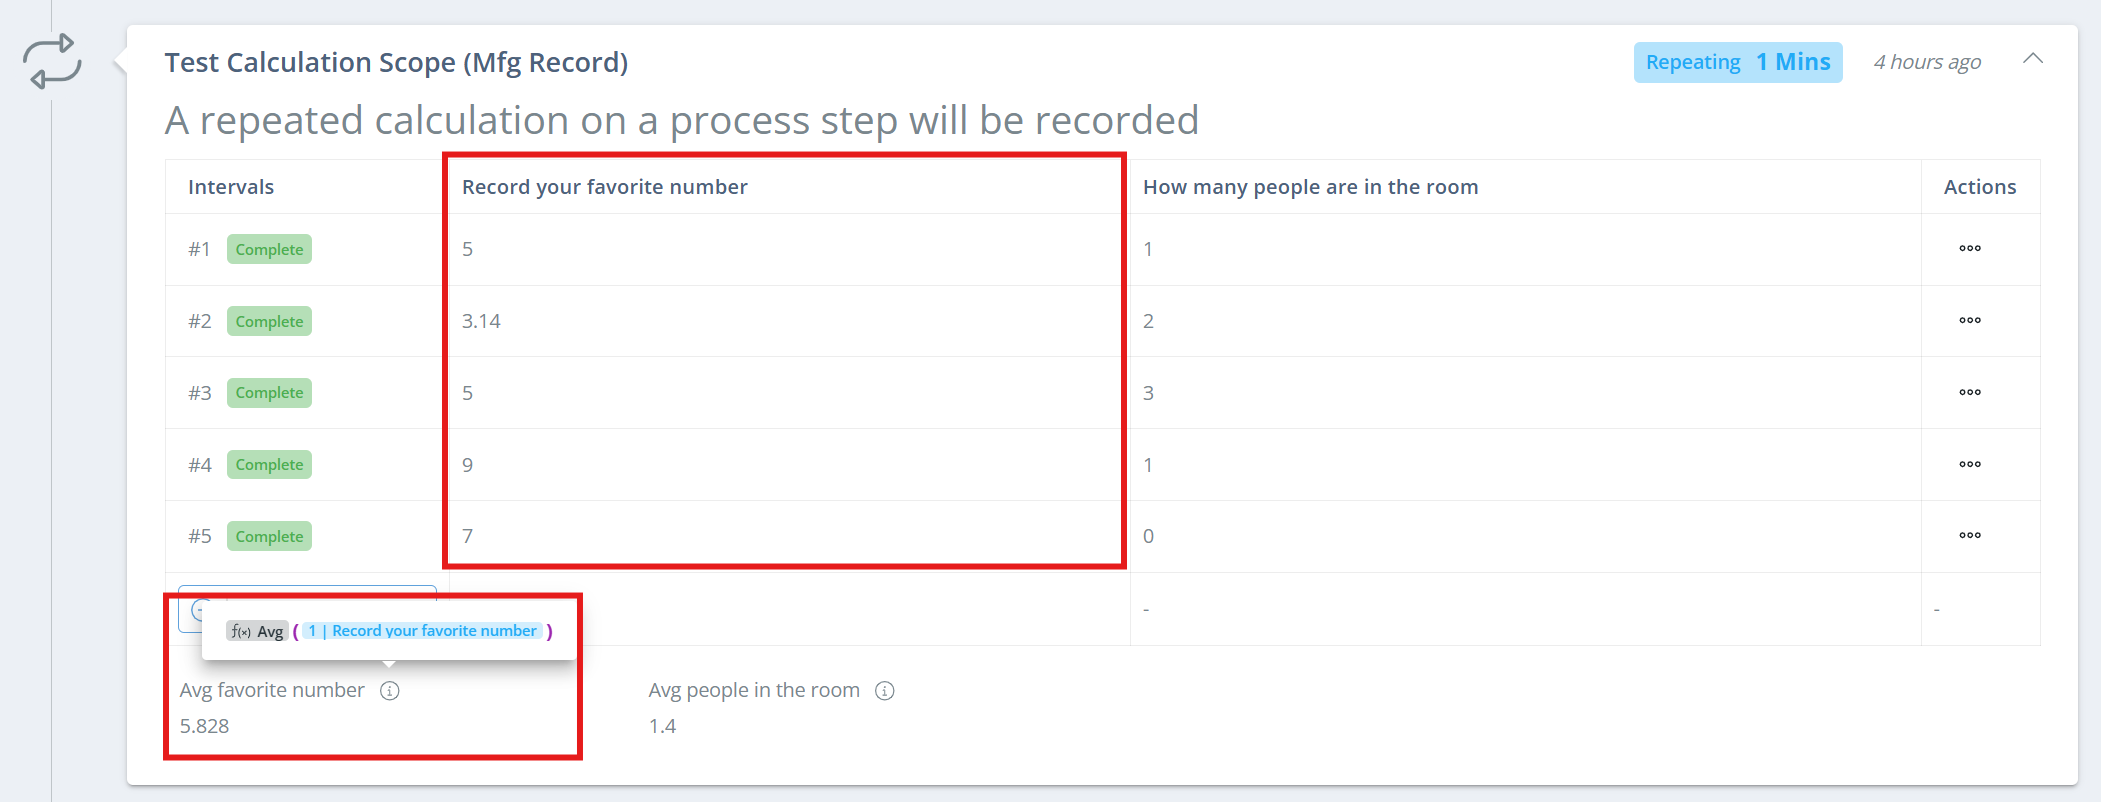
Scope: Process Check
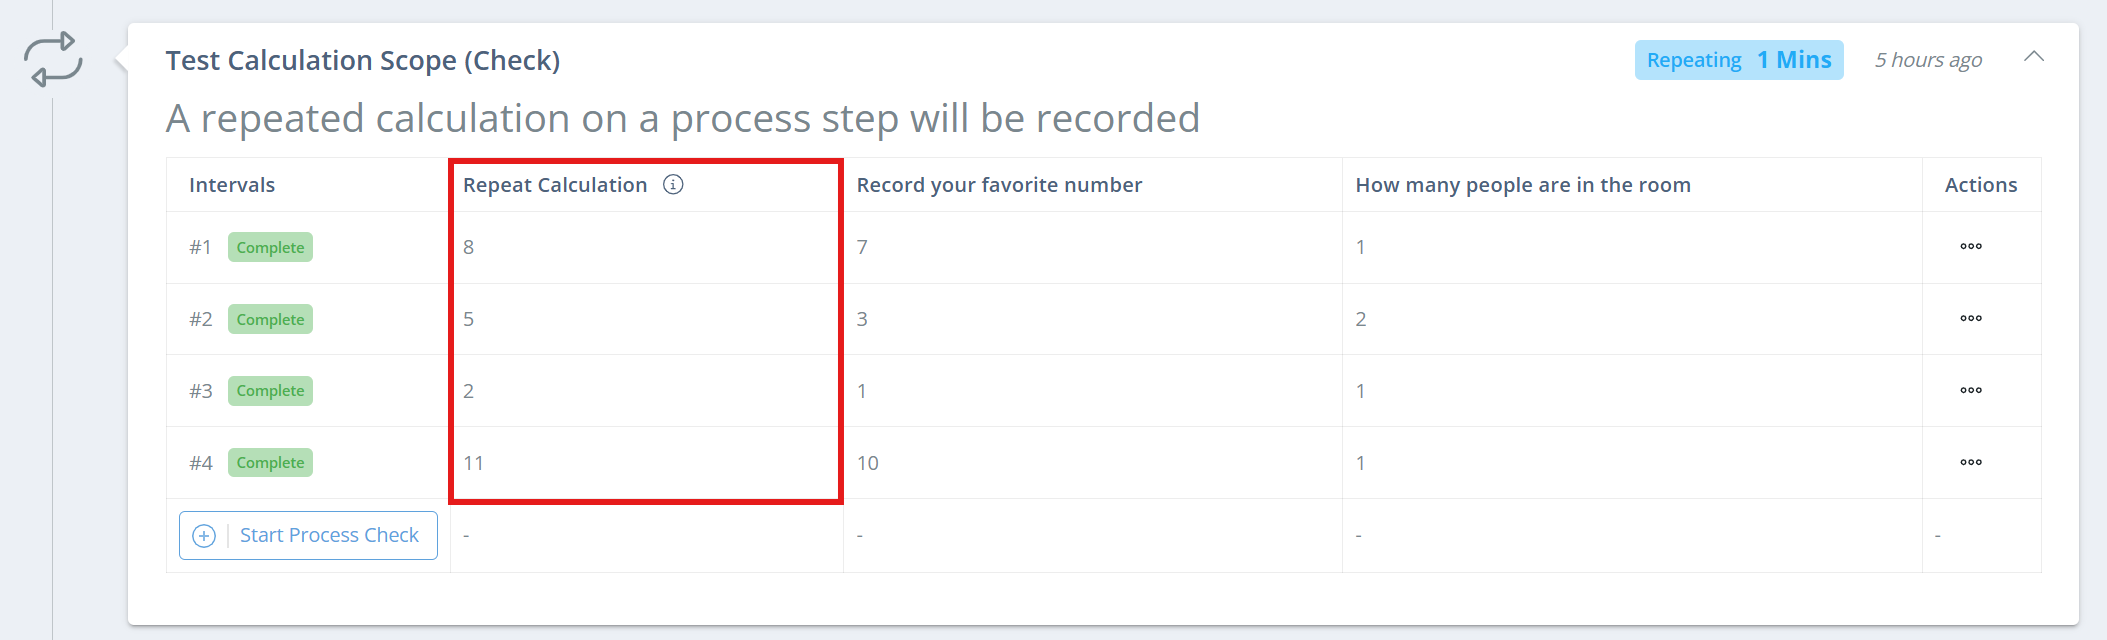
The 'Process Check' scope gives the calculation access to all numeric fields in the process step in which it is created, per process check. The calculation will be performed on each process check and show in it's own column. This scope is best used on repeating process steps, if the calculation should be performed during every process check.
Note that the calculation must first be saved as 'WIP' in order for the calculation to be completed. Once the calculation field is populated, the process check can be edited and saved as 'Complete'.
Scope: Manufacturing Record
The 'Manufacturing Record' scope allows access to the planned quantity, produced quantity (batch yield), and any numeric field across process steps in the record. This scope should be used if your calculation needs the planned quantity, batch yield, or if it needs data from multiple process steps or process checks.
📘
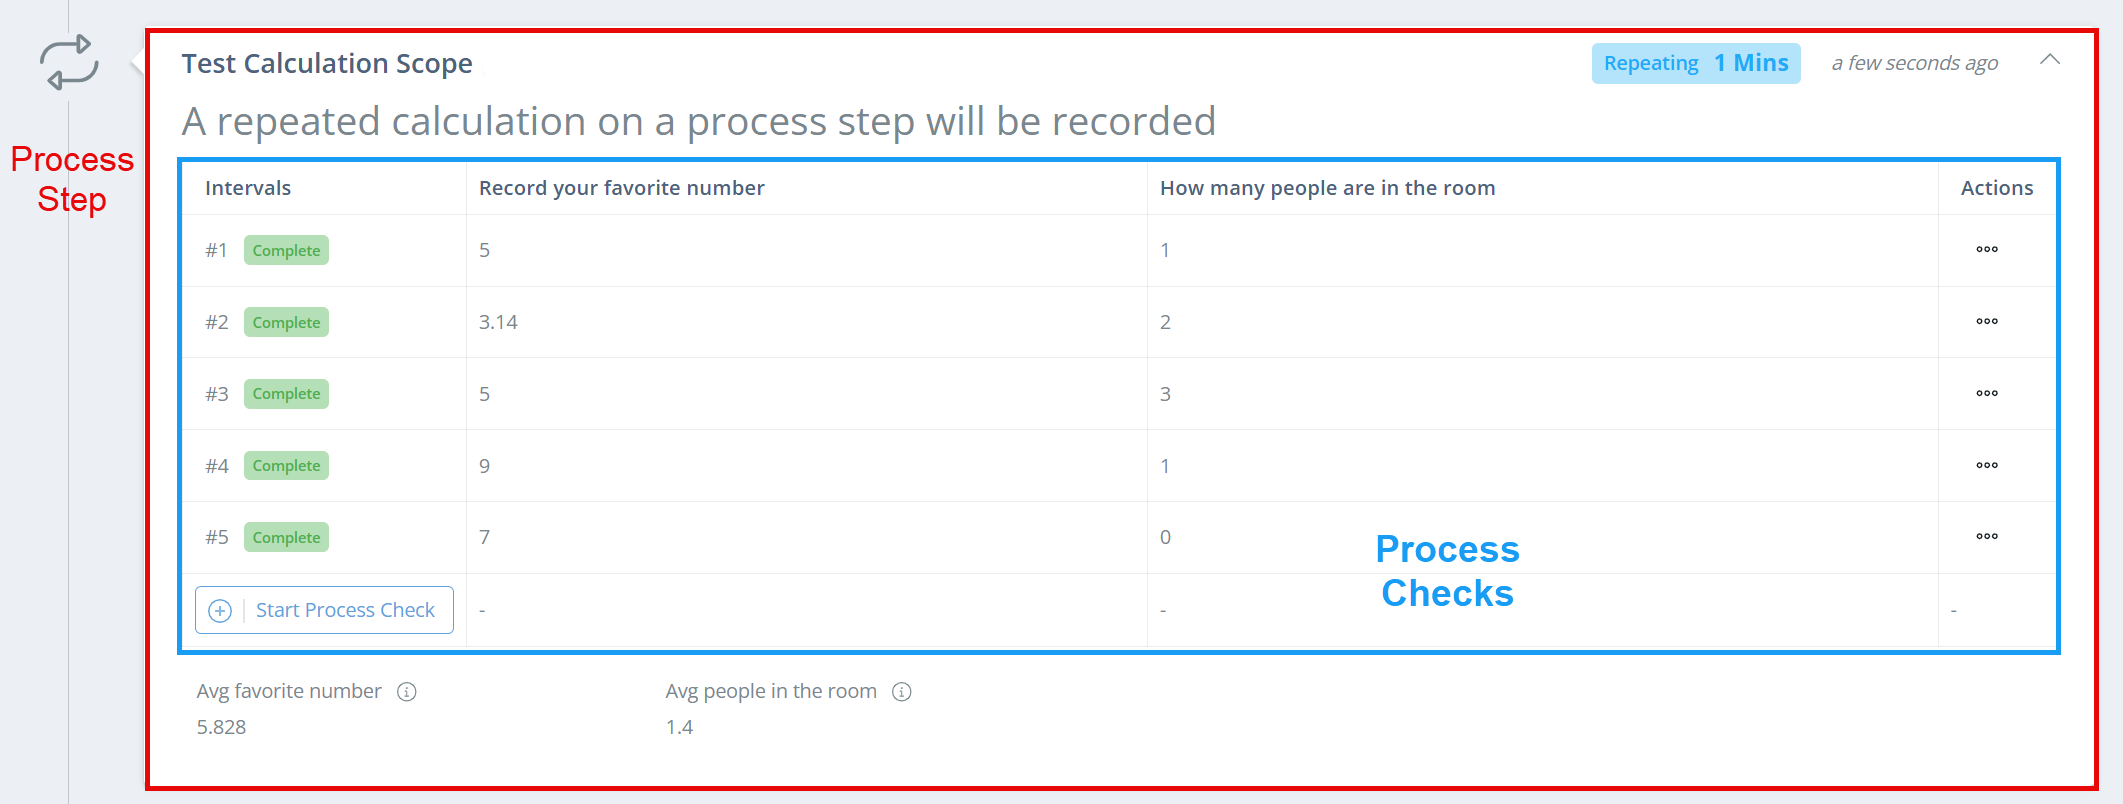
Process Steps vs. Process Checks
A process step is an individual section of a manufacturing record, and can contain multiple attributes/recorded fields. A process check is when a process step is repeatable, and each field can be recorded multiple times; the checks are then categorized as 'Intervals'.
Screencap from v4.21.264.294
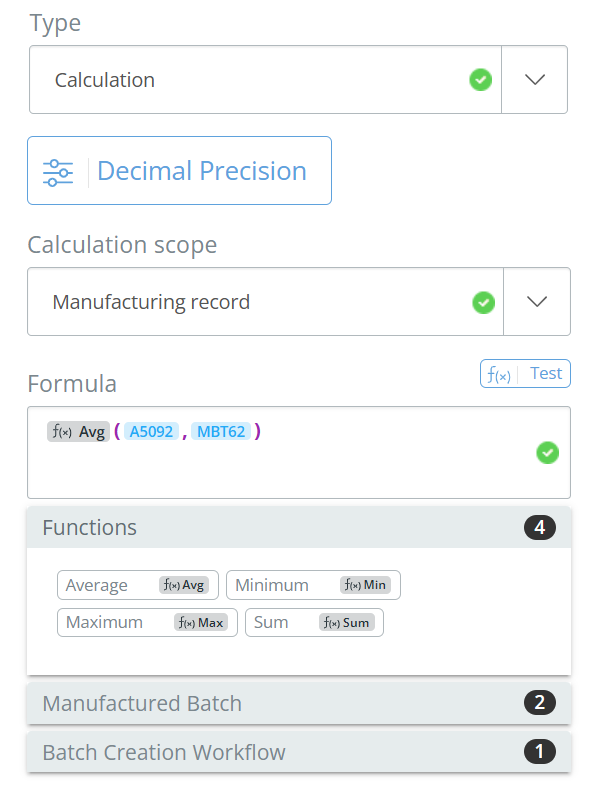
Build a Formula
Click on a function, then on each variable necessary for the calculation. Make sure the variables are comma-separated and in the function parenthesis. The variable identifier will be shown in blue next to each option, for easier visual tracking when building the formula.
Screencap from v4.21.264.294
If the needed calculation doesn't fit with one of the functions, you can also build your own formula using hard-coded numbers, live variables and +-/* to perform standard math.
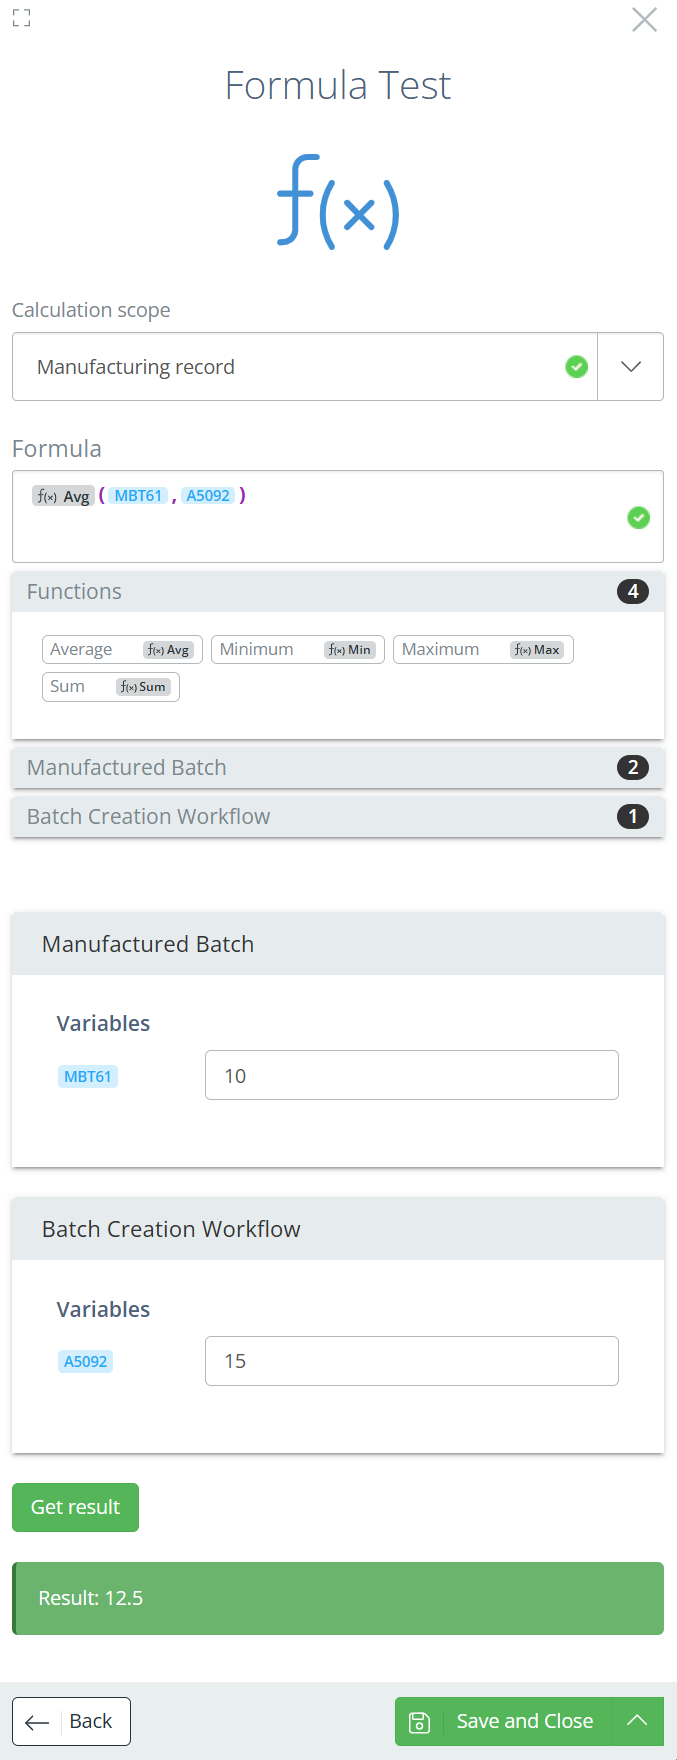
Test a Formula
Click 'Test' to the right of the Formula to input test numbers and verify that the calculation yields the expected result. Click 'Back' to close out of the test and return to the Add Attribute aside.
Screencap from v4.21.264.294
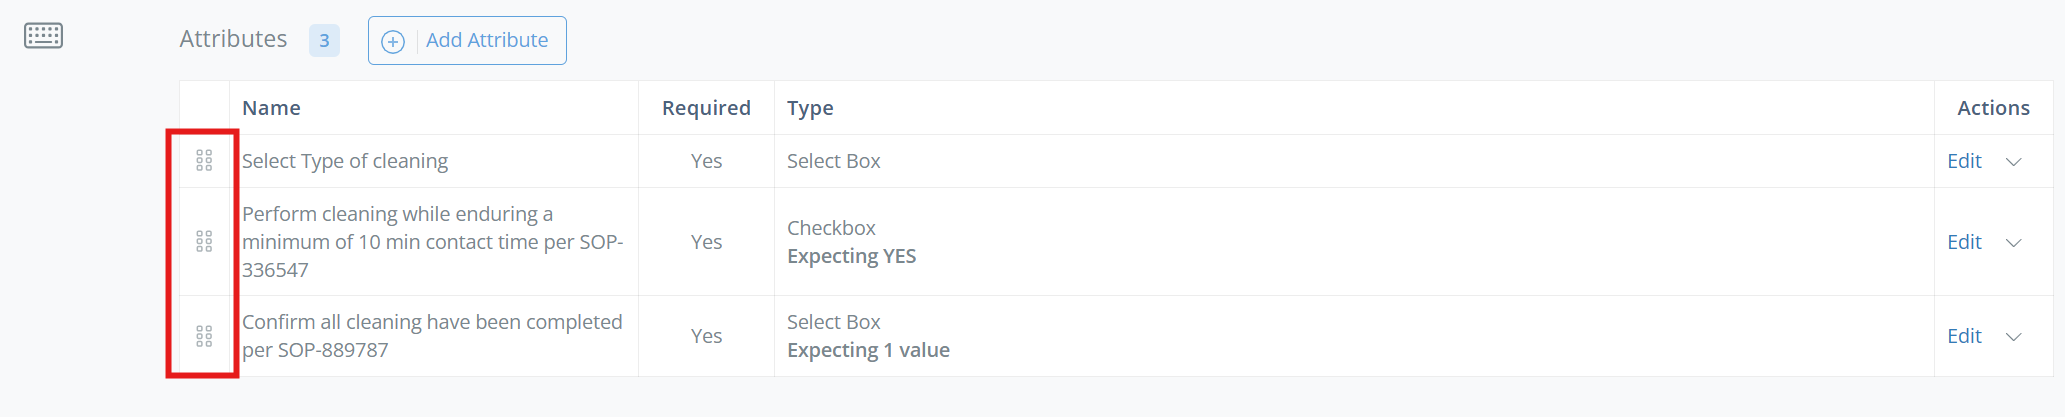
Arrange Attributes
Once multiple attributes have been added, click and drag on the left-most column to re-arrange the order of the attributes.
Screencap from v4.21.264.294
Additional Options
Add Required Part
If a required part should be consumed during a specific stage of manufacturing, you can add the part to a process step. If the required part is already listed on the BOM, click Edit on the part in the Required Parts tab and then select the process step it should be associated with.
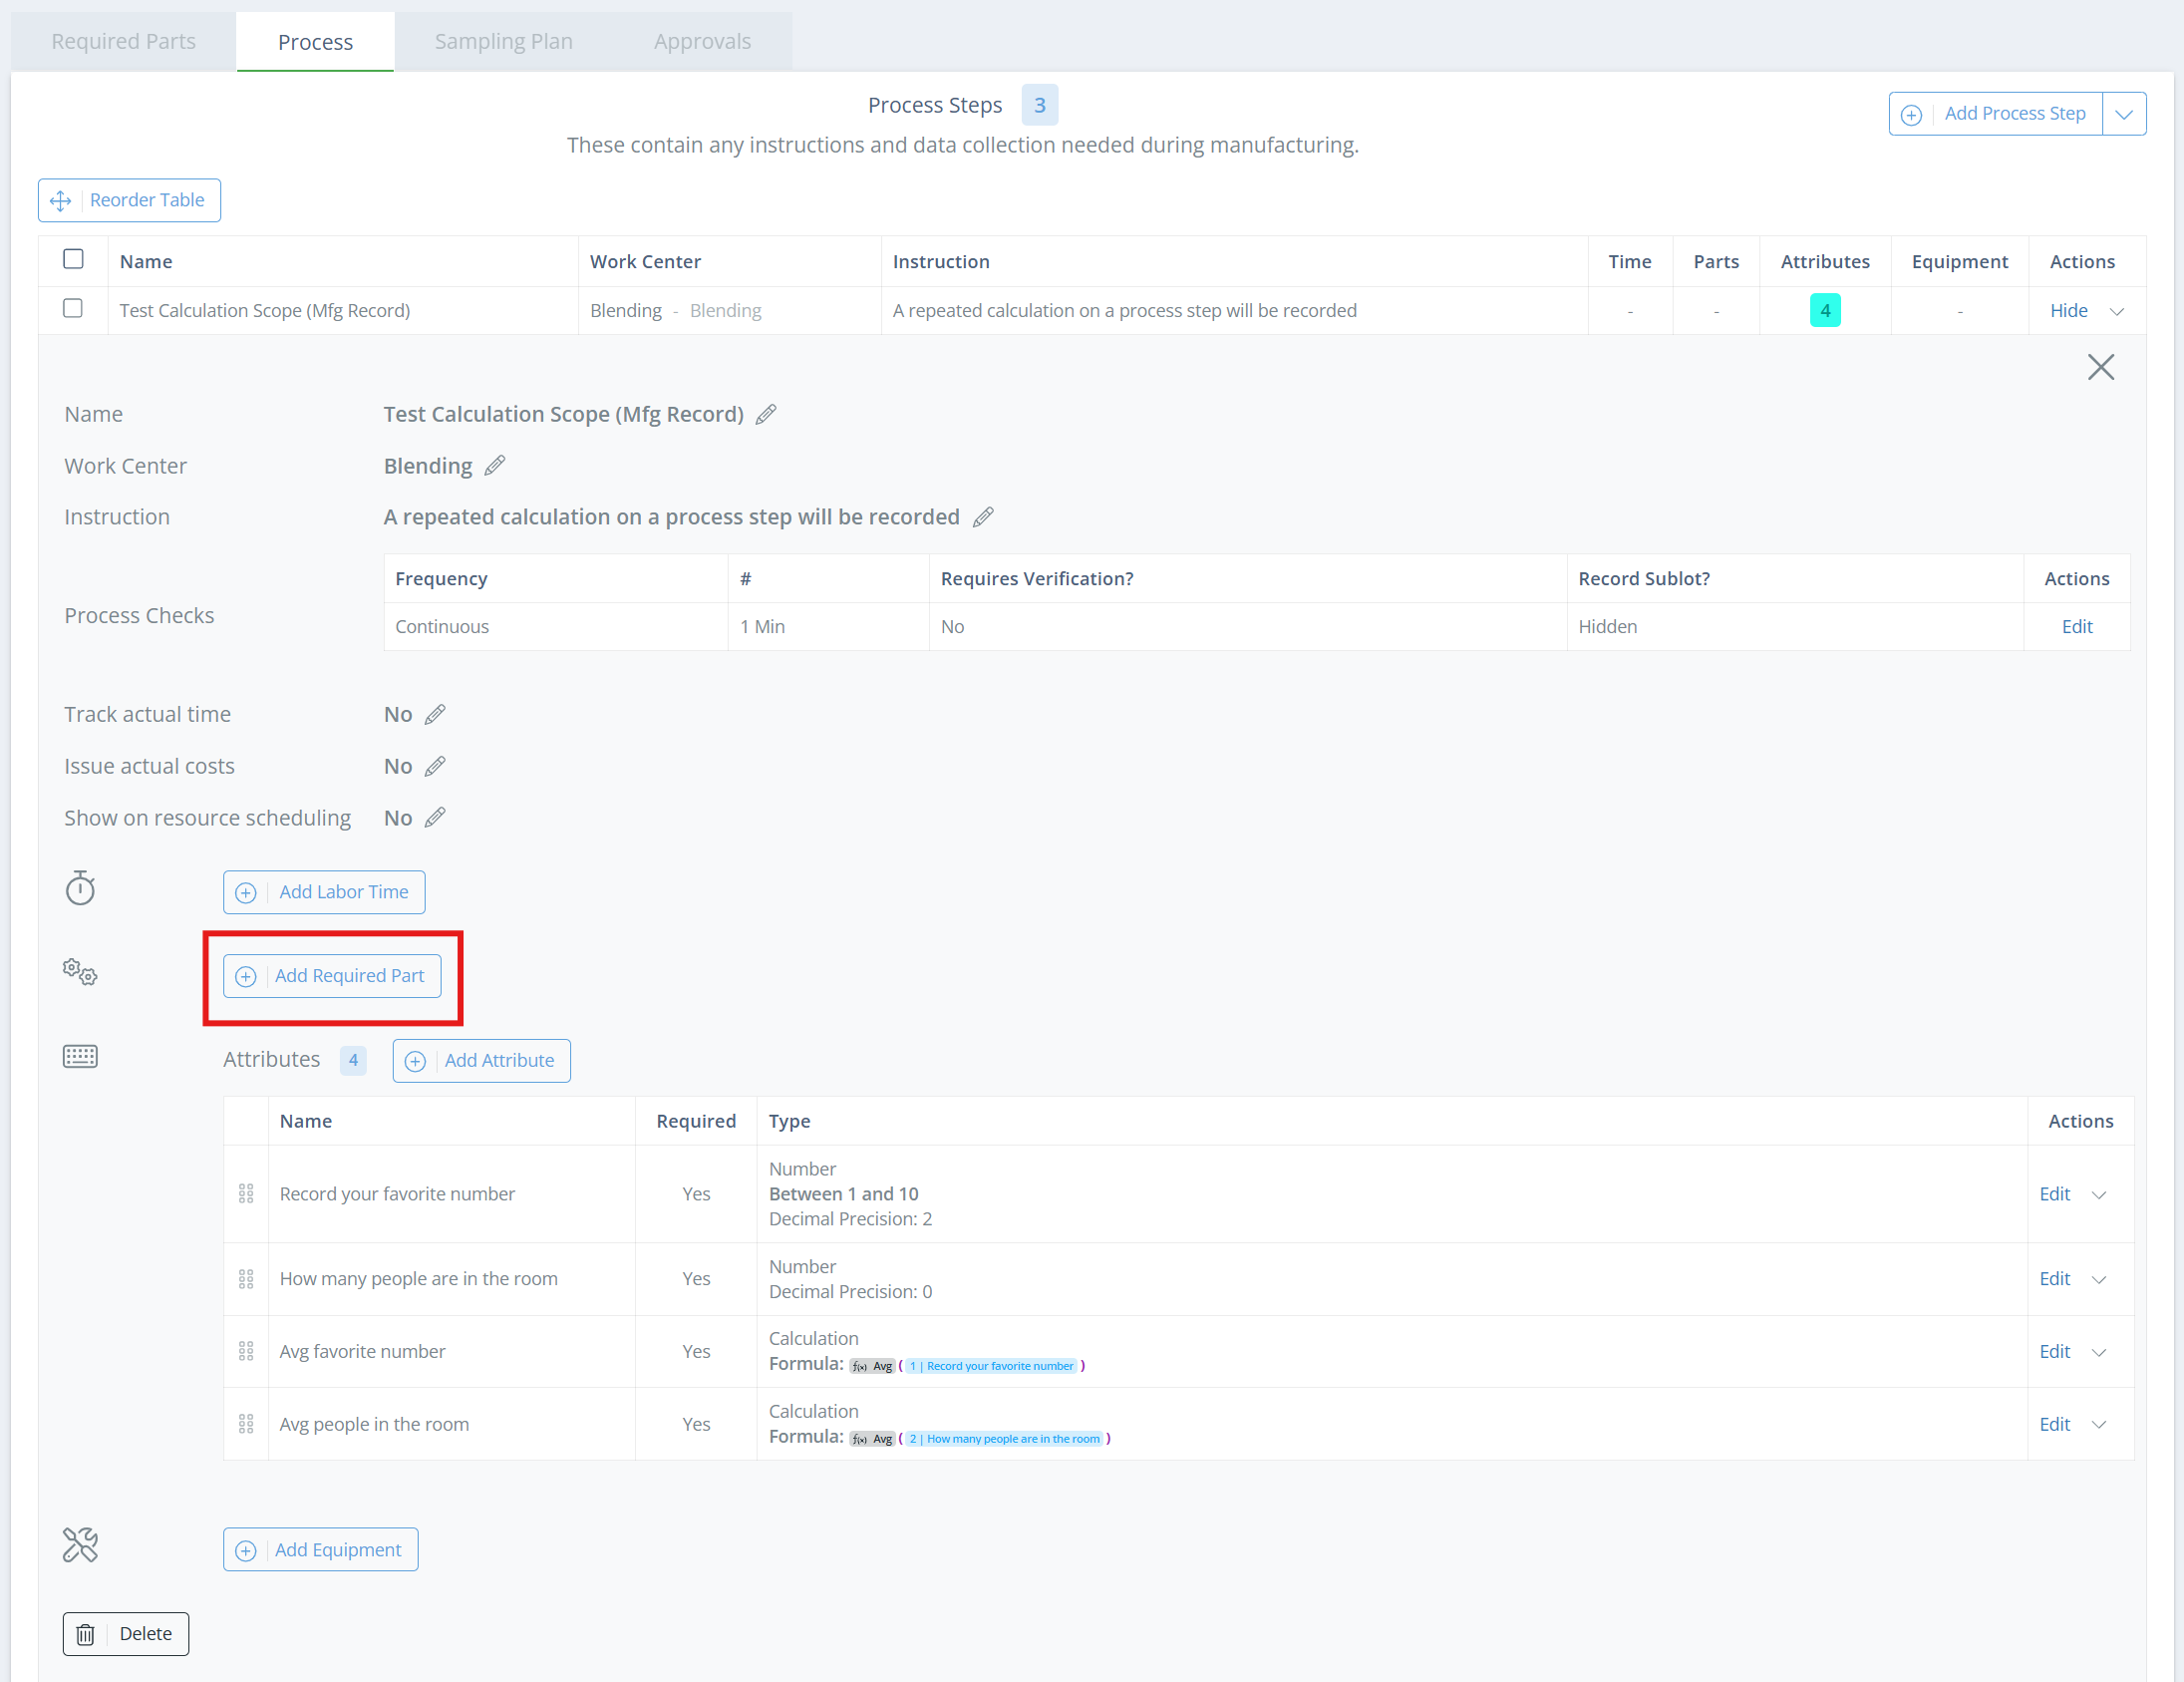
Otherwise, if the part hasn't been added to the BOM yet, open the process step and click 'Add Required Part'. In the new aside, select the part and fill out the fields. See Required Parts for setup information.
Screencap from v4.21.264.294
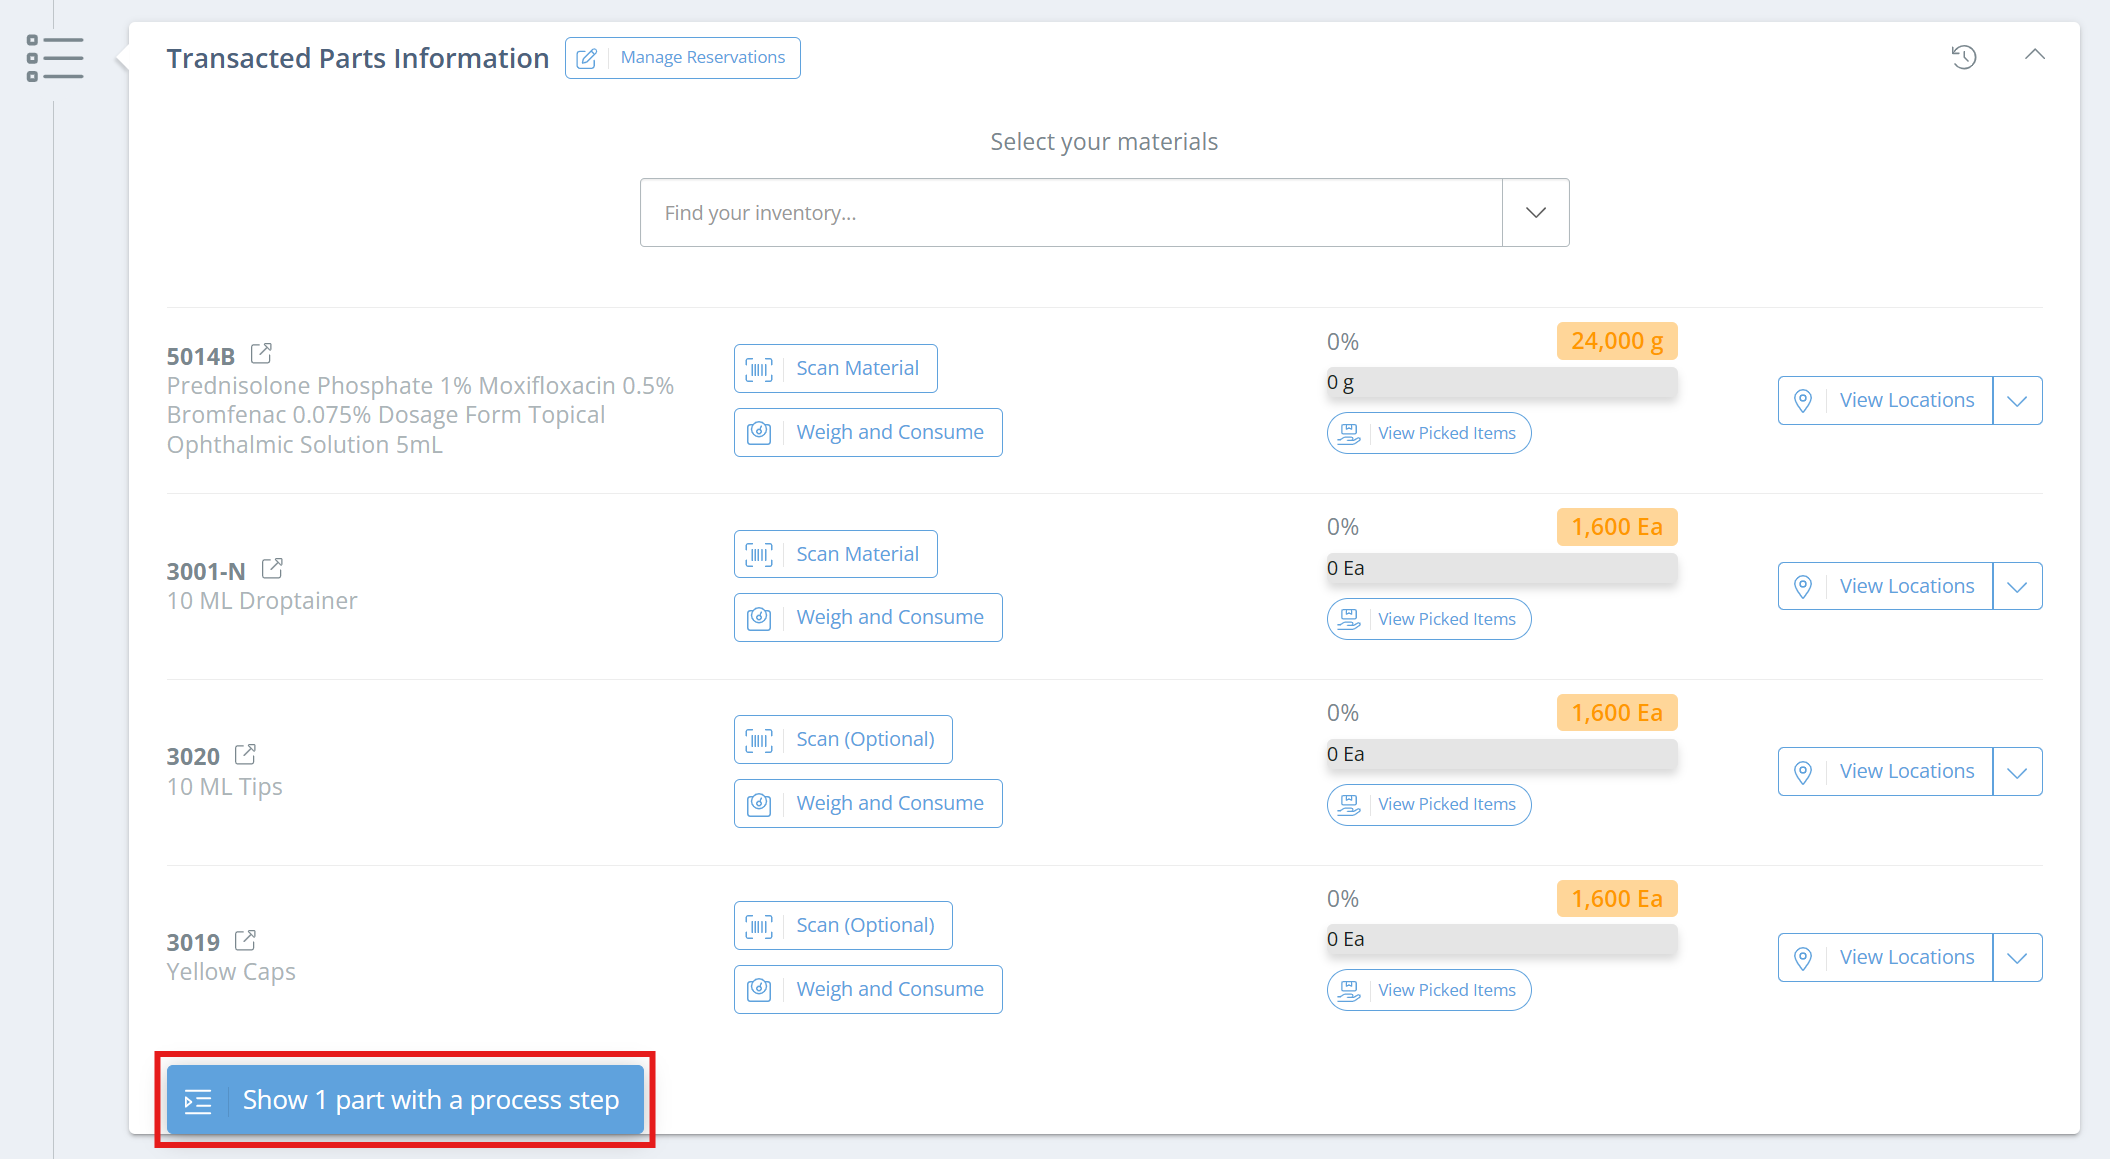
The part can still be viewed and consumed in the Transacted Parts section of the manufacturing record, but will be hidden by default. Click 'Show X part with a process step' to view the hidden required parts.
Screencap from v4.21.264.294
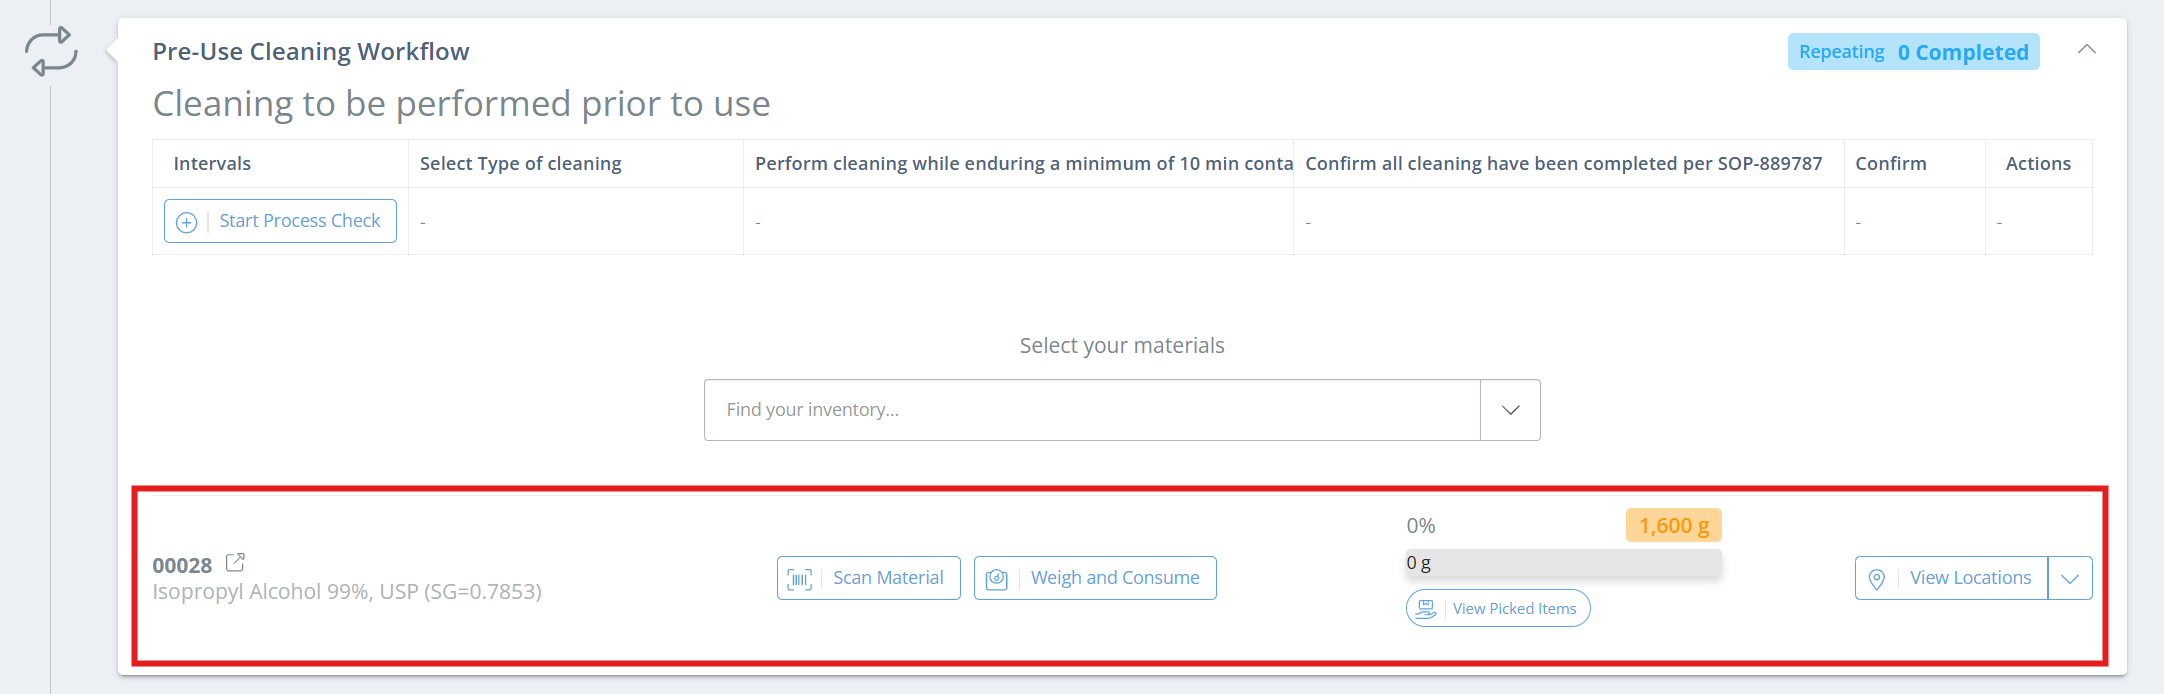
The required part will also show as part of the process step, and can be consumed there as well. Both sections will be updated when the part is consumed, regardless of what section the consumption is performed in.
Screencap from v4.21.264.294
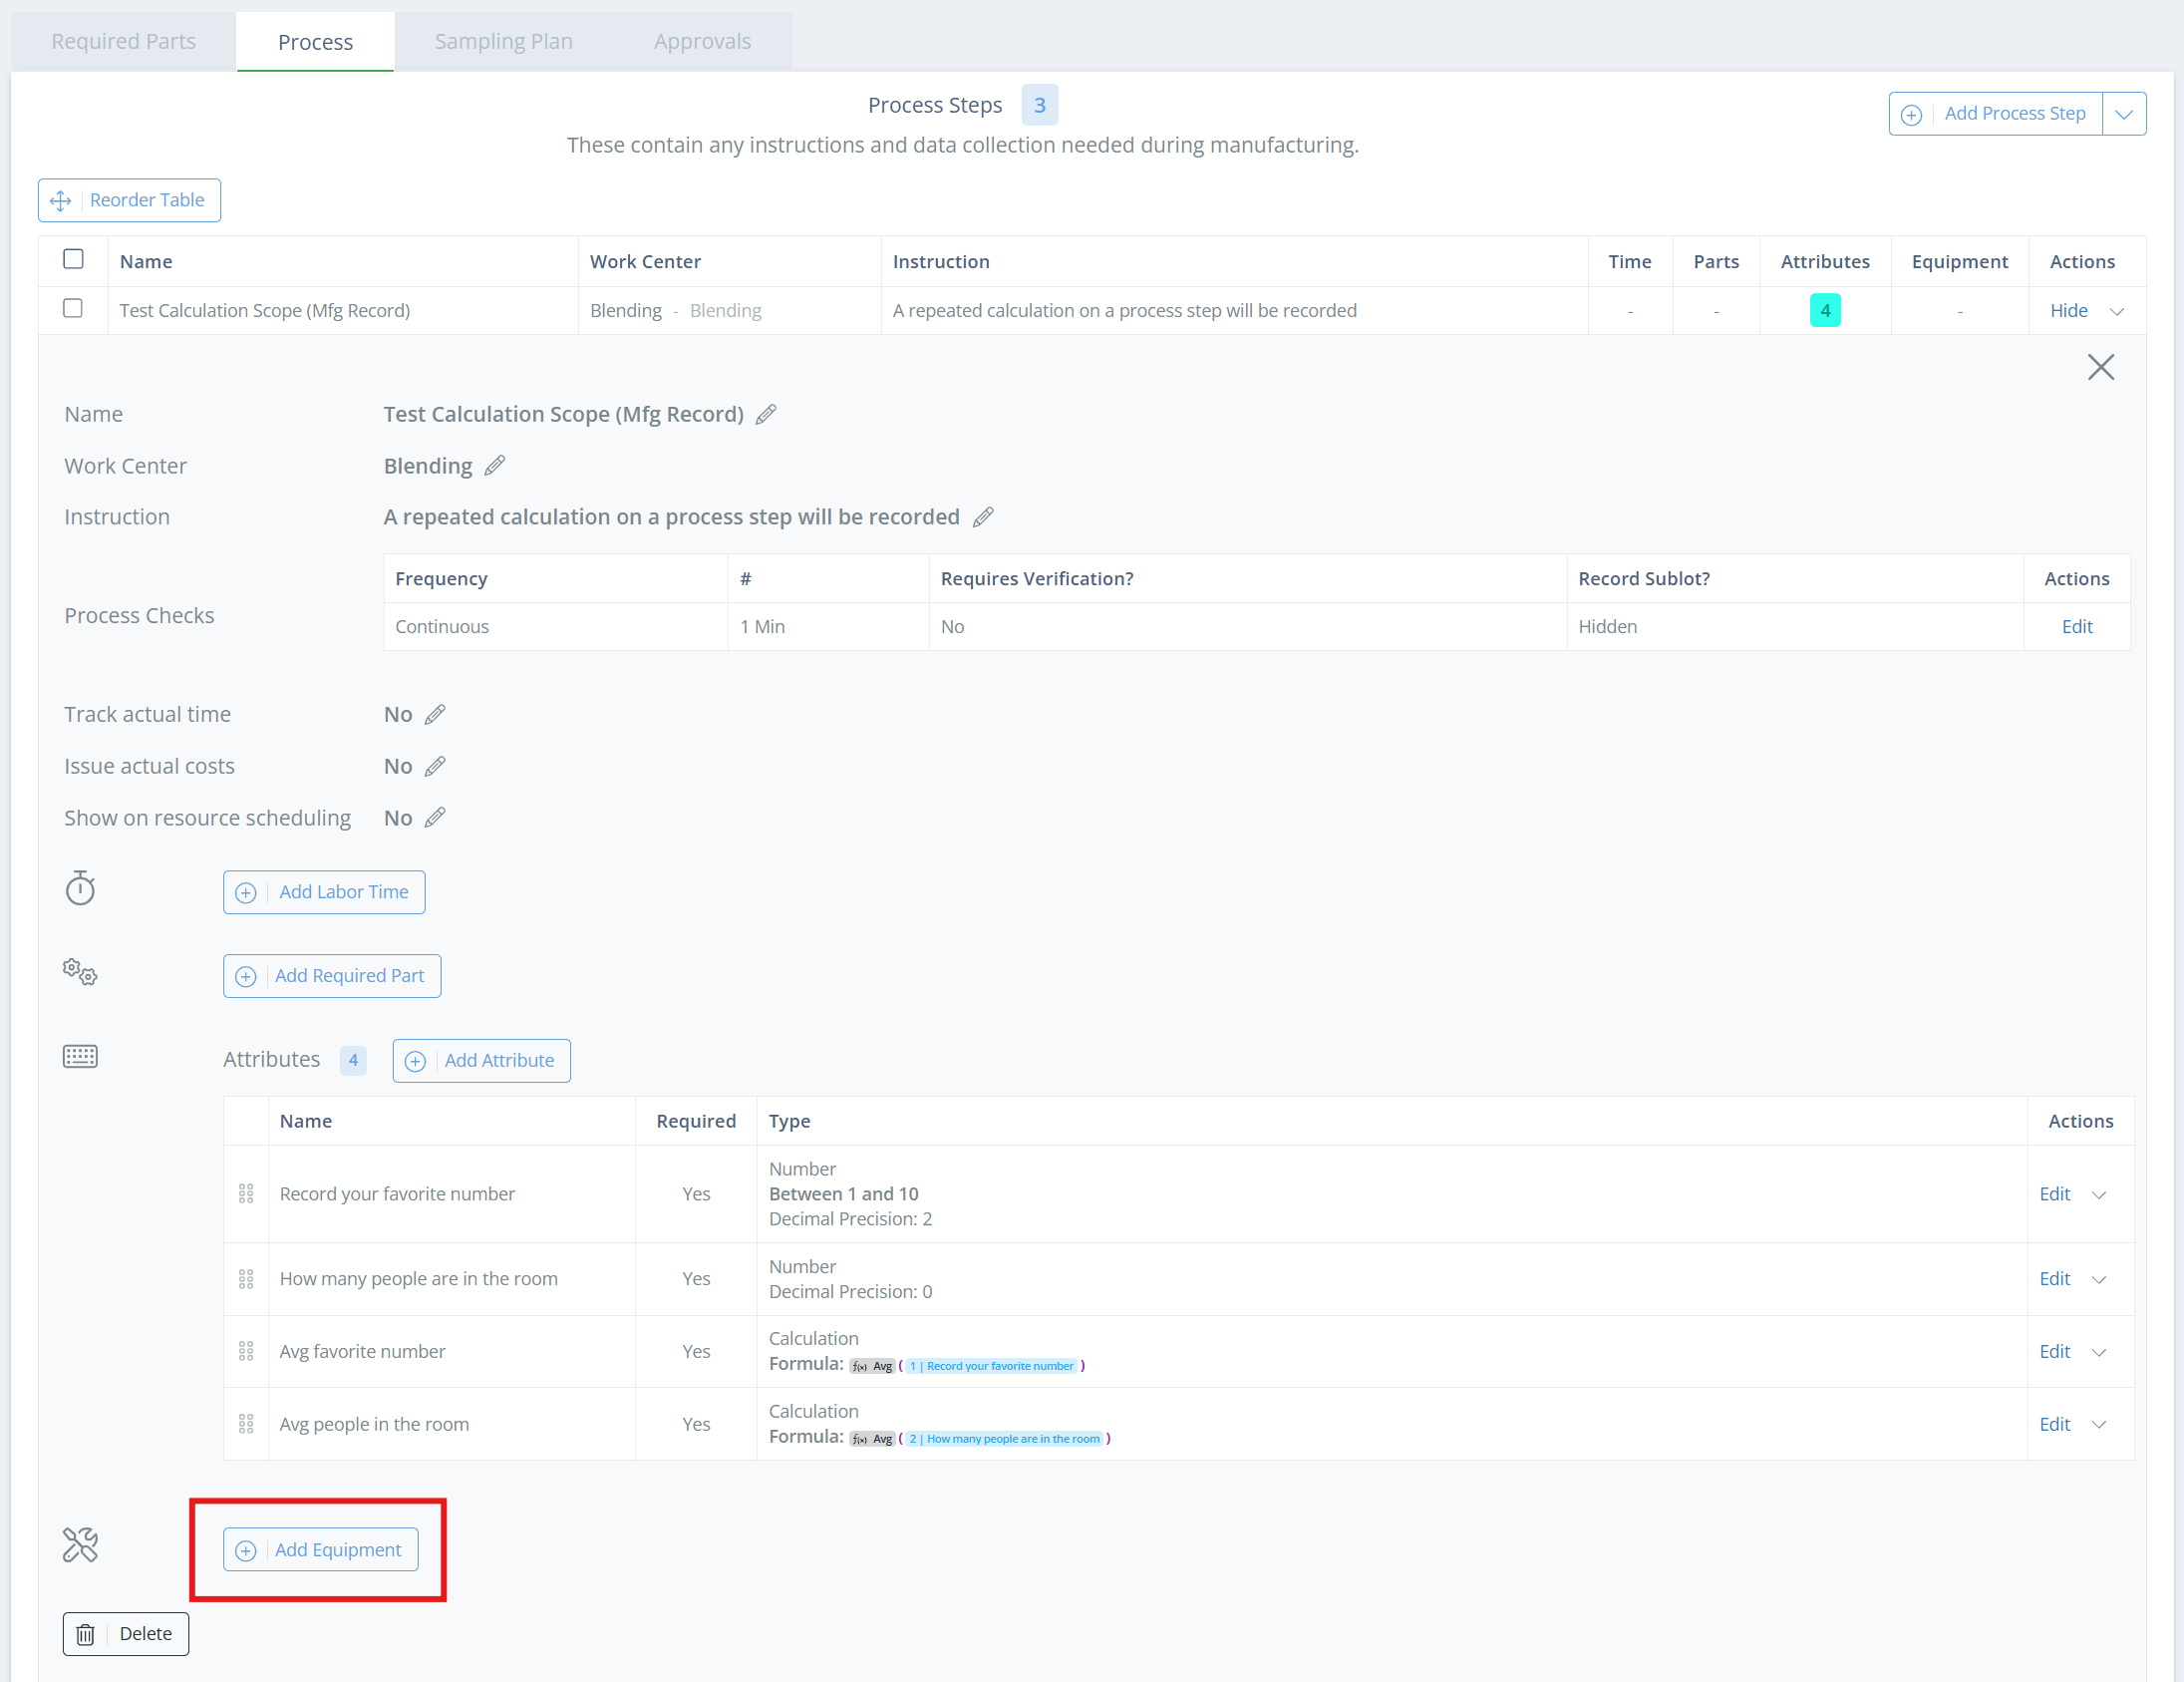
Add Equipment
Equipment used during manufacturing can be recorded at the bottom of the record, but you can also associate equipment types with each process step and require that they be recorded, or leave them optional.
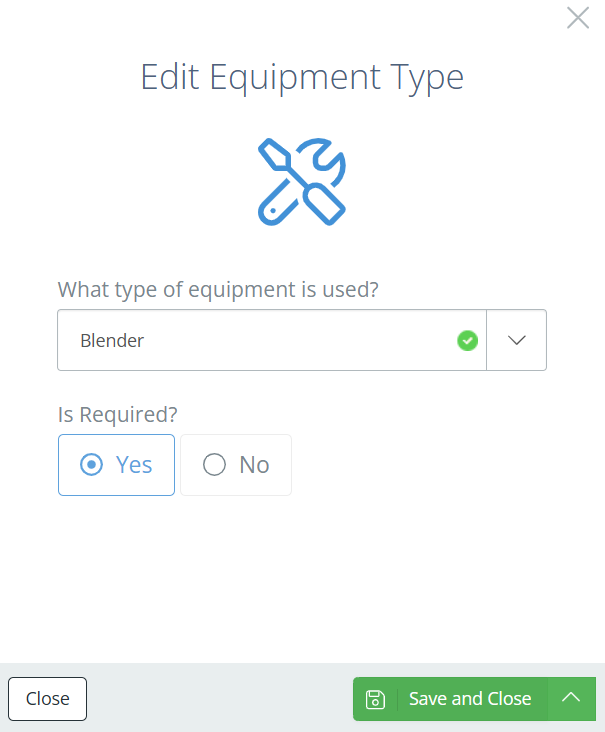
To add the equipment type(s), open the process step and click on 'Add Equipment'. In the new aside, select what type of equipment should be recorded, and if the equipment is required or optional. Multiple of the same equipment type can be added to the process step, but cannot exceed the number of equipment that are part of the Work Center set on the process step.
Screencap from v4.21.264.294
Screencap from v4.21.264.294
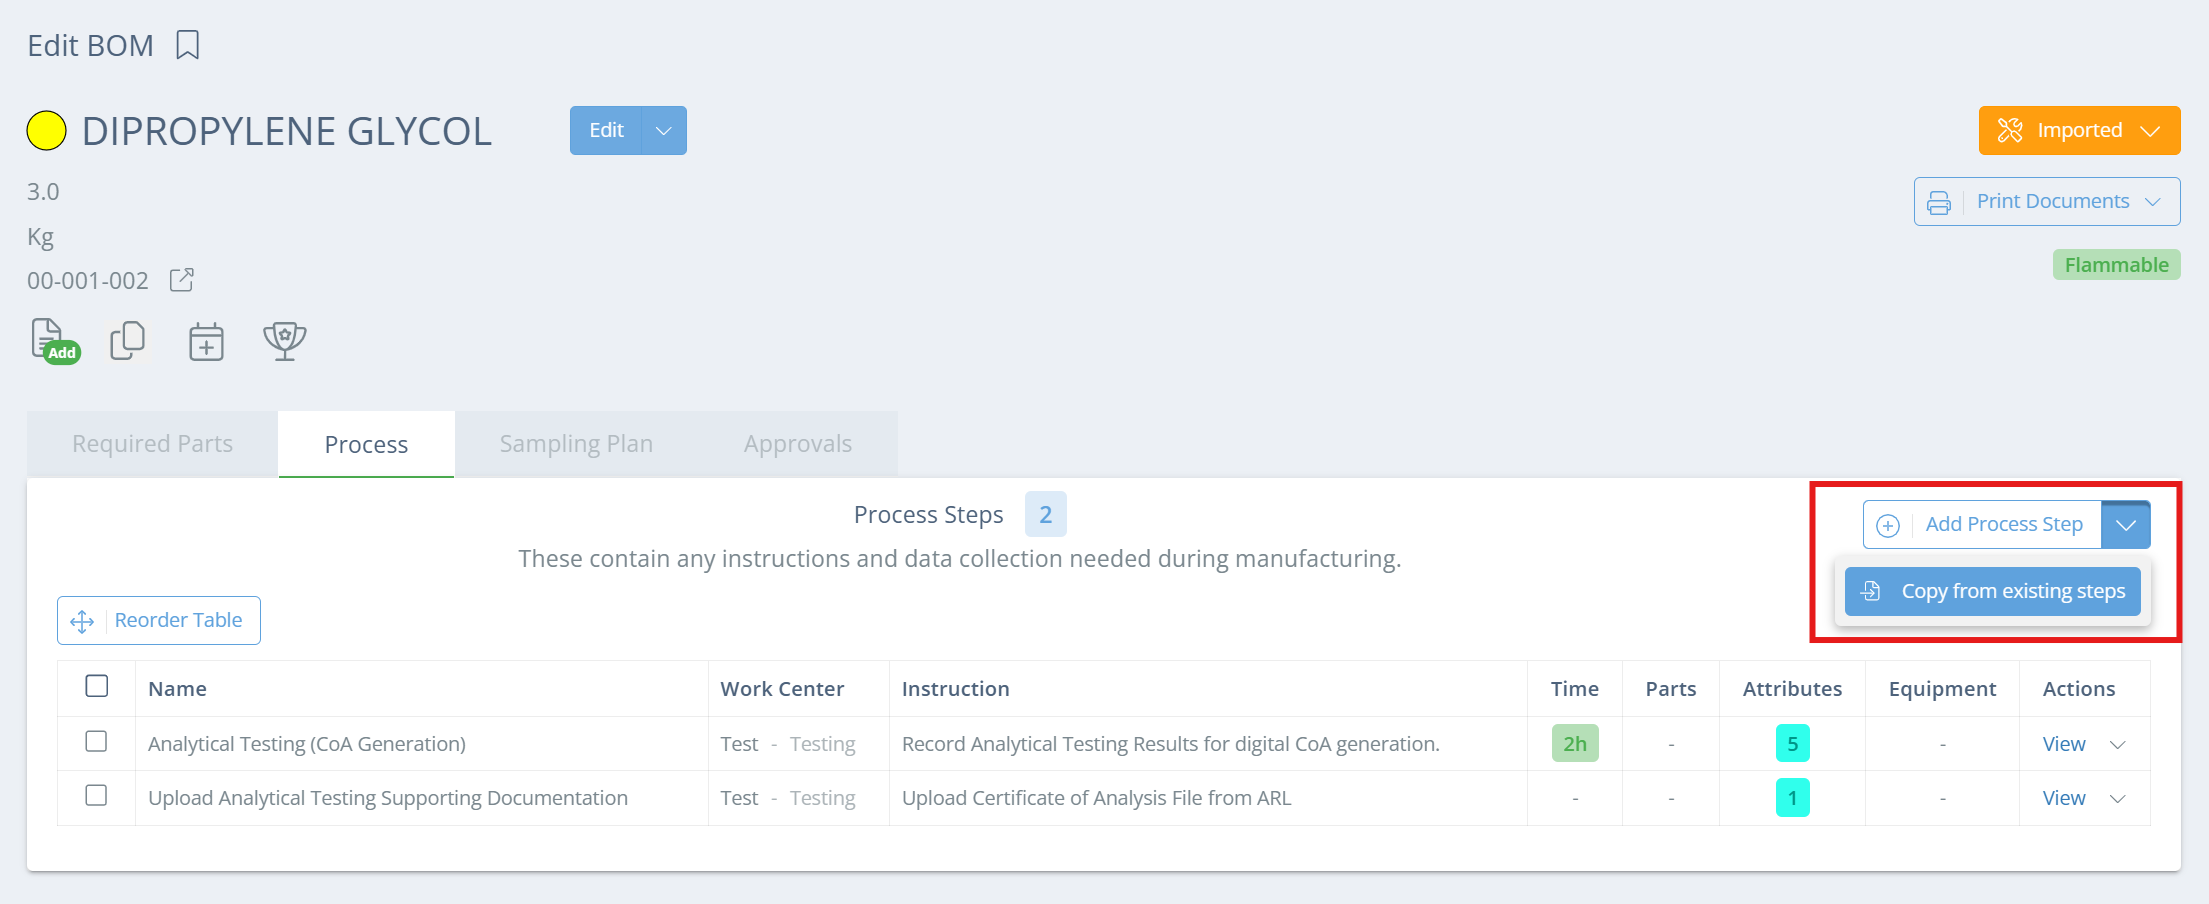
Copy Process Steps from another BOM
In the Process tab, you can choose to copy steps from an existing BOM if the steps already exist somewhere else. You can copy from multiple BOMs but all process steps on that BOM will be copied, so you will need to delete any irrelevant steps afterwards.
Screencap from v4.21.264.294
Screencap from v4.21.264.294
Screencap from v4.21.264.294
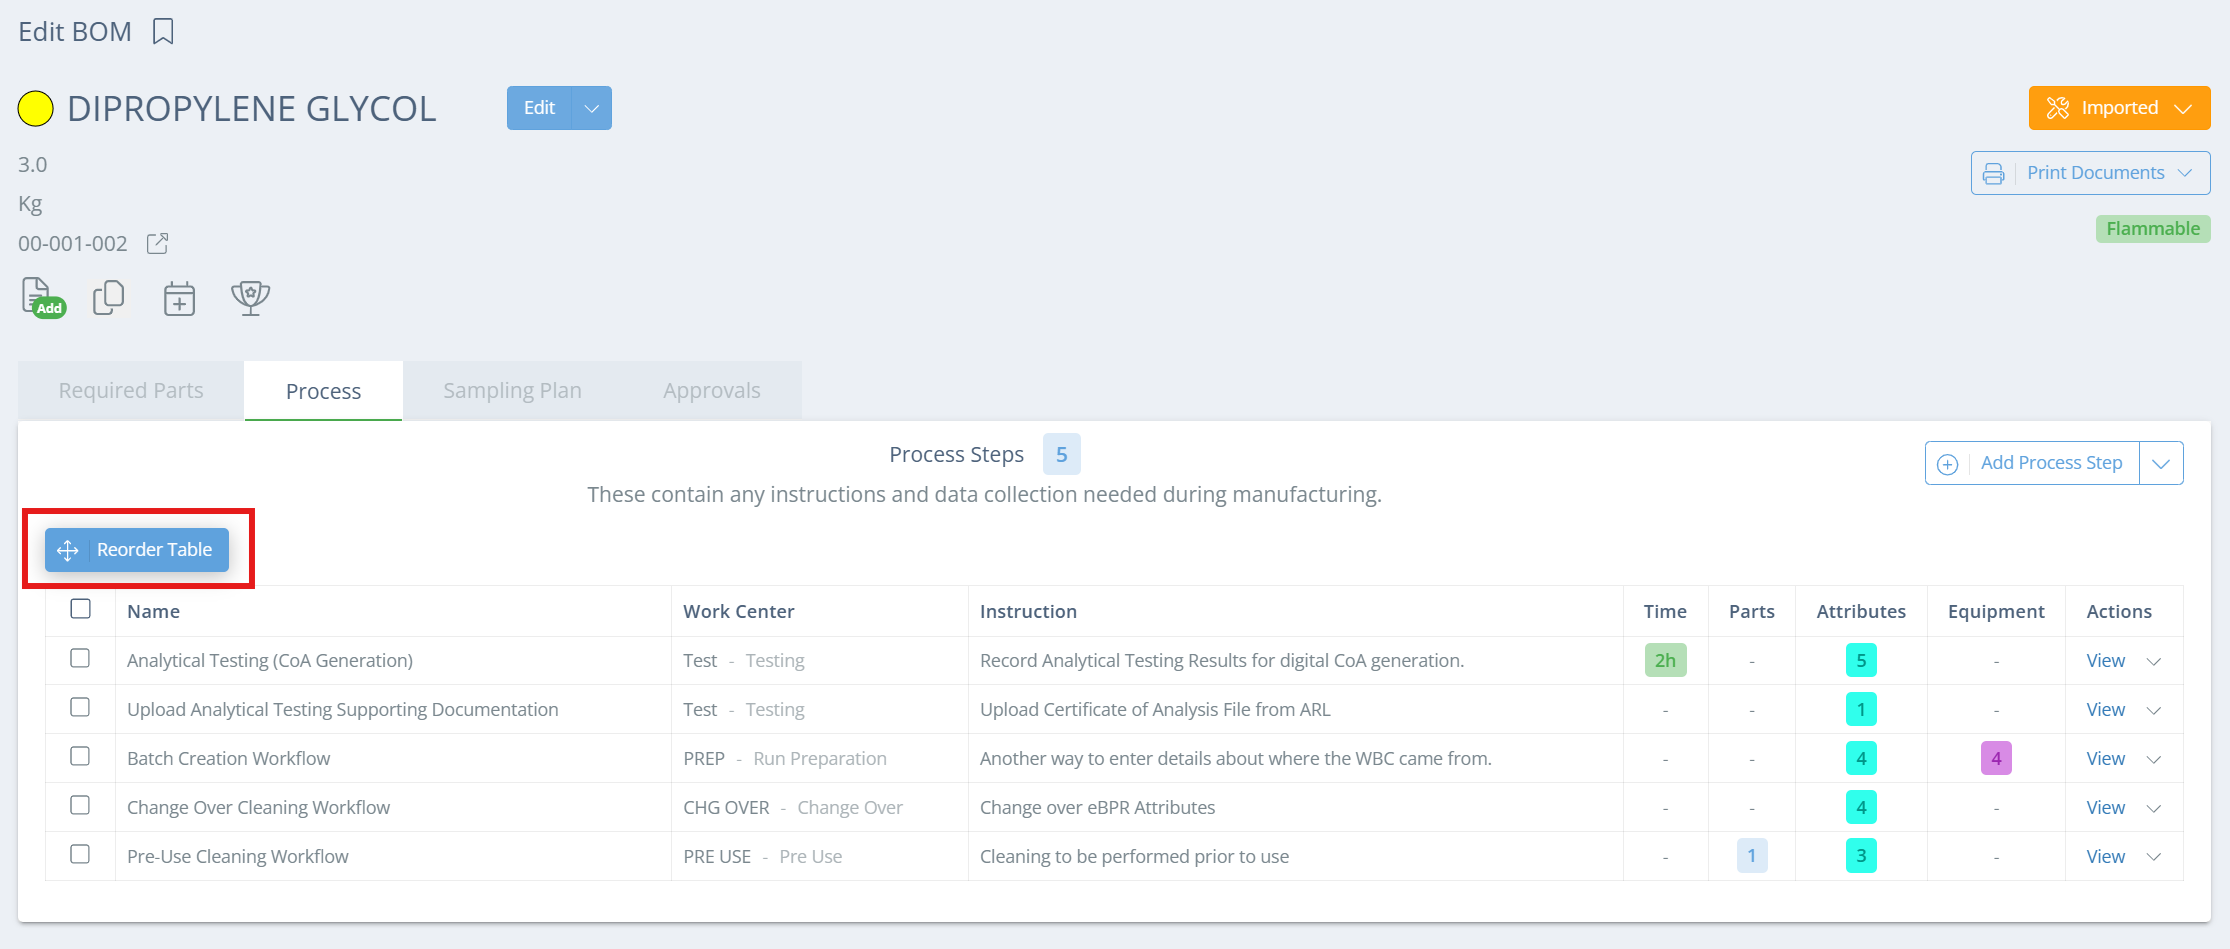
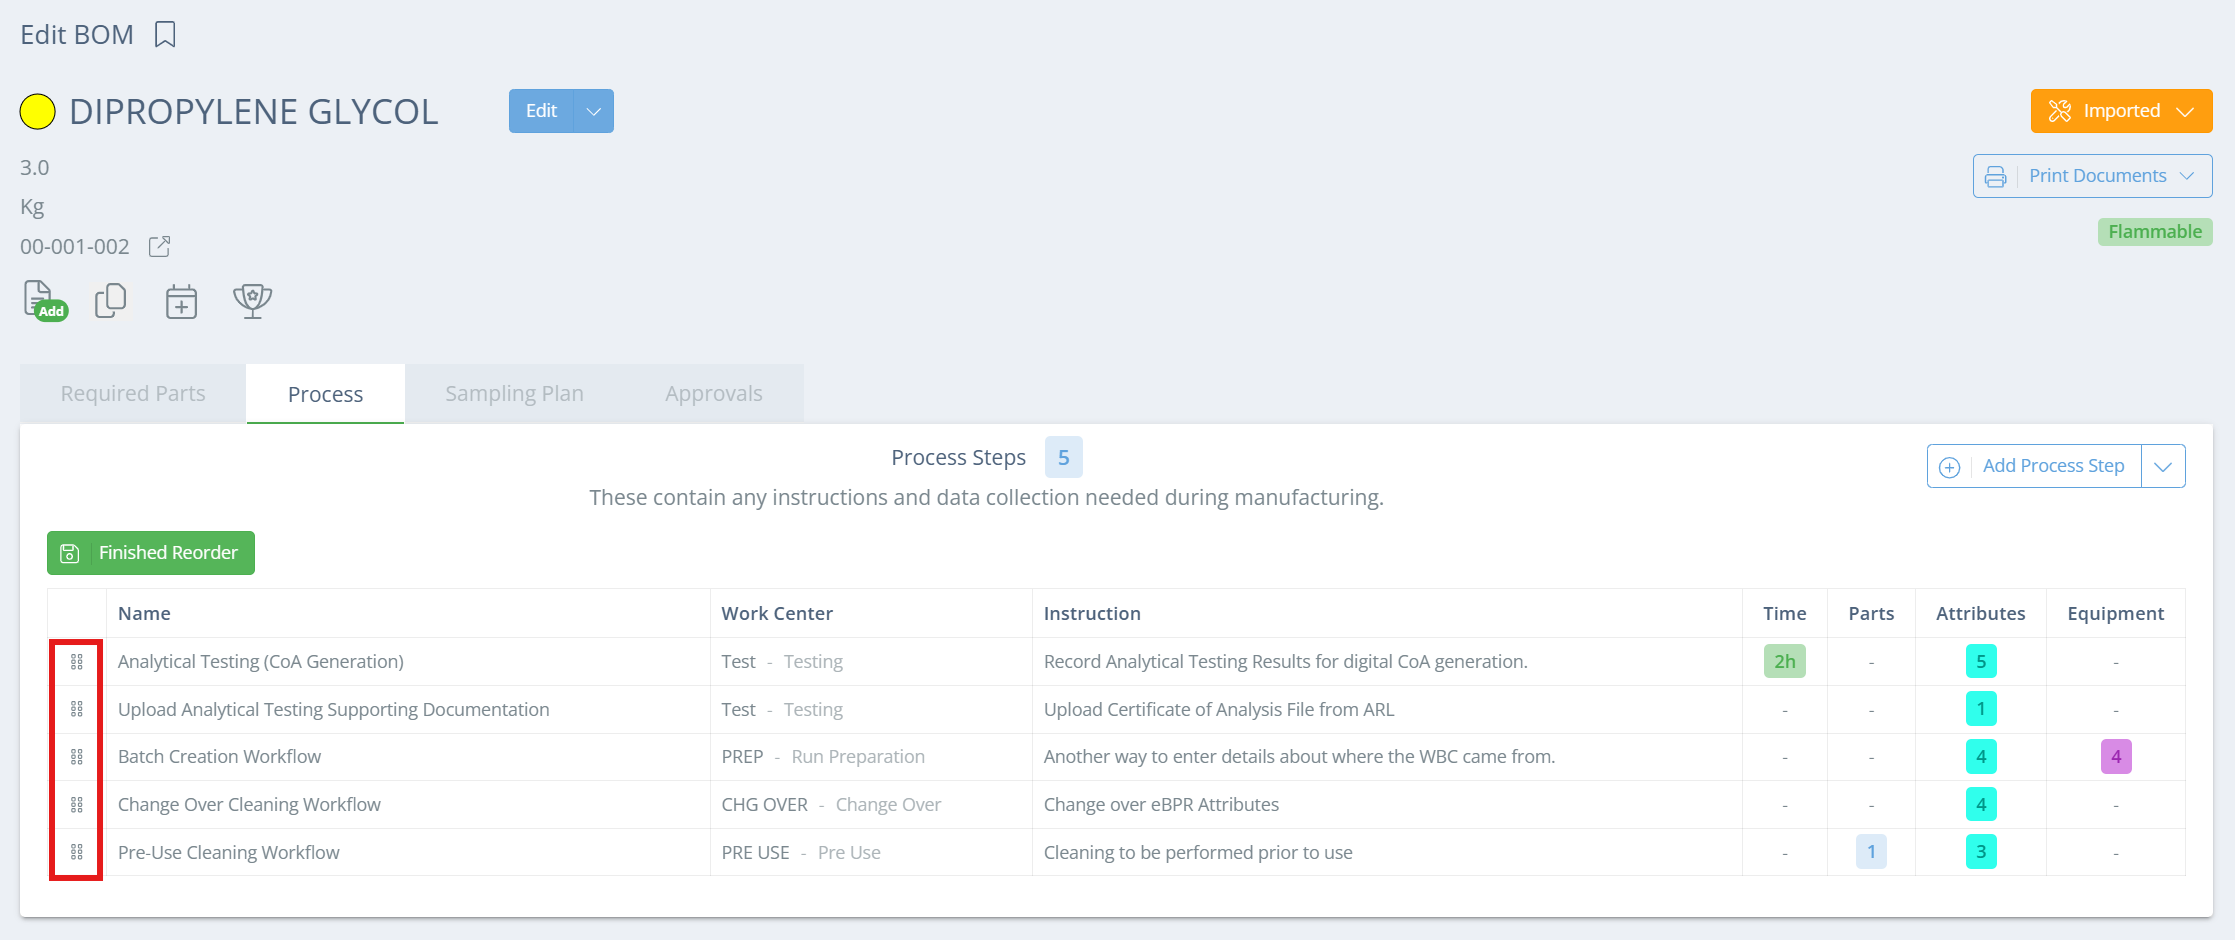
Arrange Process Steps
Process steps will be on the manufacturing record in the same order as in the BOM, from top to bottom. If the existing order of the process steps needs to be adjusted, click 'Reorder Table' then use the left-most column to drag the process steps into the correct order. Click 'Finished Reorder' when finished.
Screencap from v4.21.264.294
Screencap from v4.21.264.294
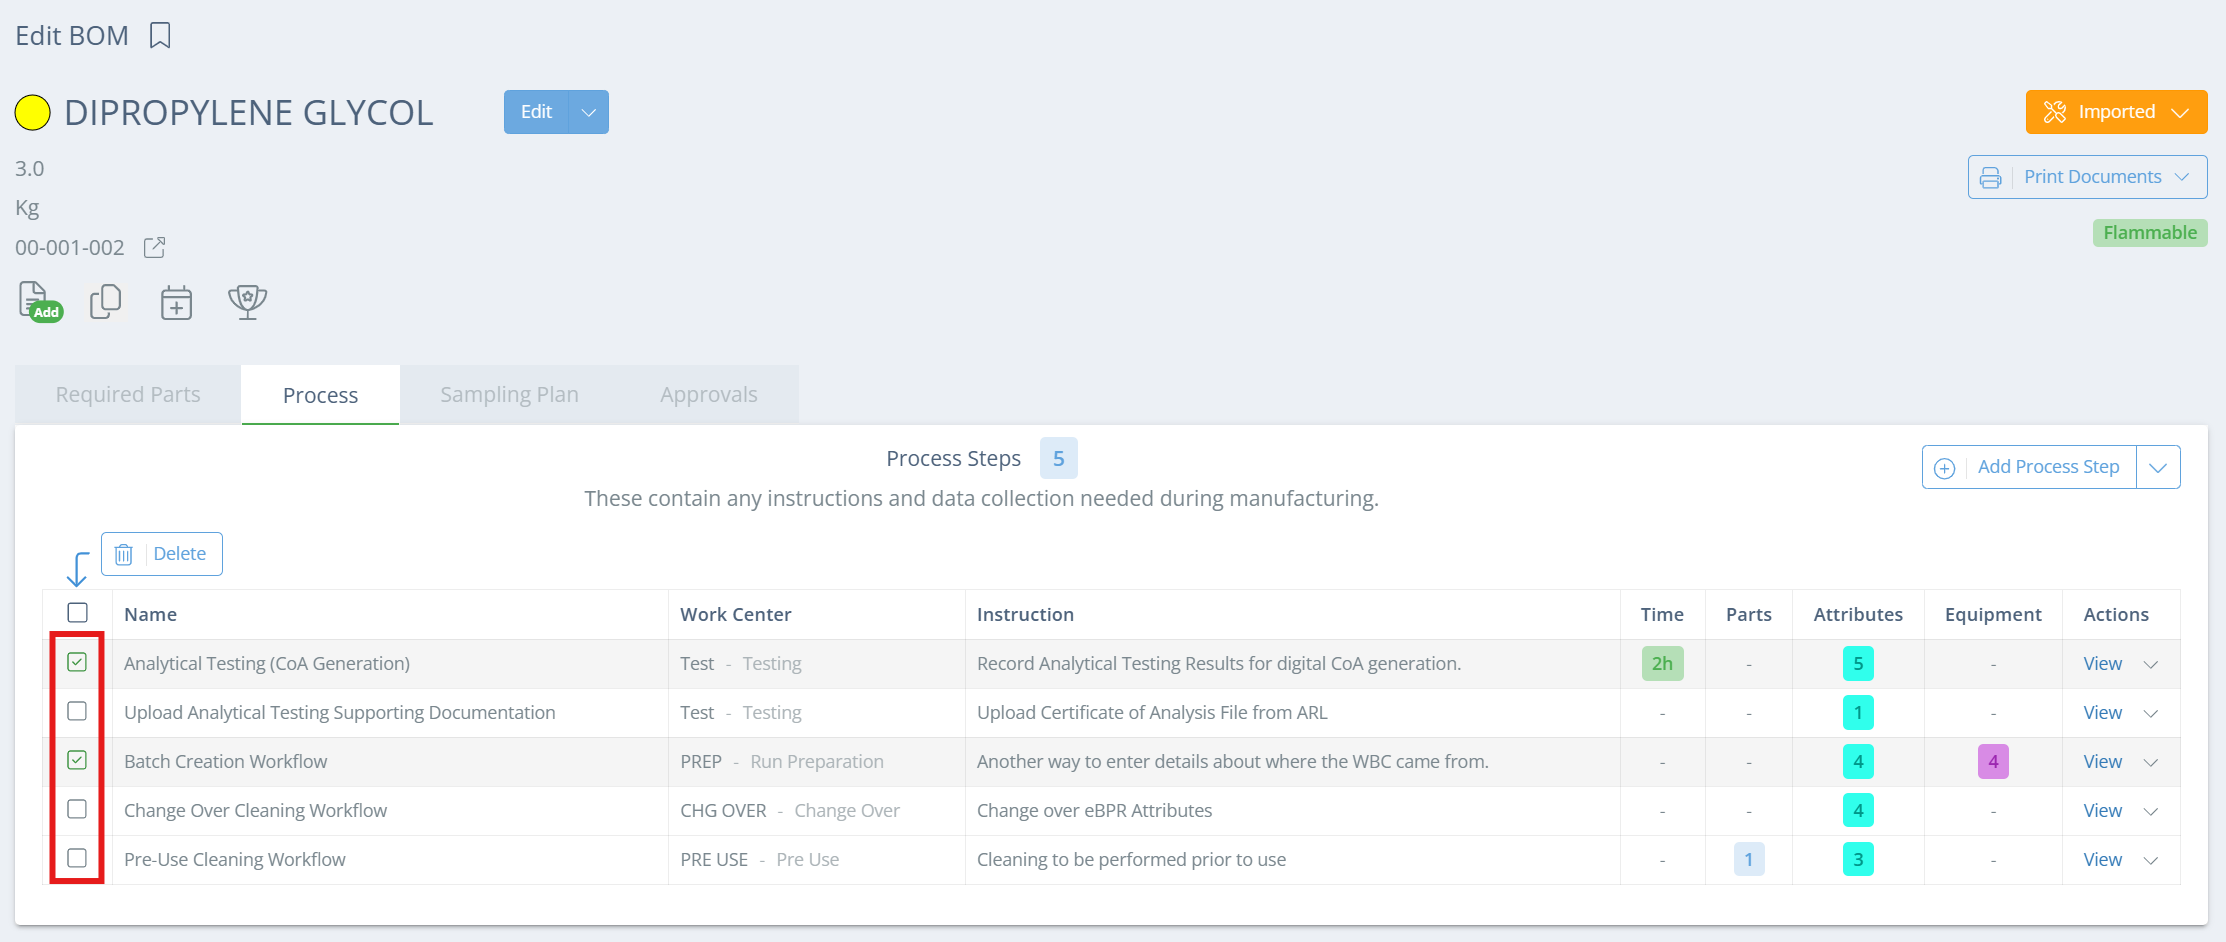
Delete a Process Step
To delete a process step, just click the checkbox next to the step(s) you want to delete, then click Delete.