Ethernet Printer Setup
Before setting up a printer, make sure your DataNinja Hub has been set up and successfully connected to the network. See the Hub Setup page for setup steps.
Before setting up a printer, make sure your DataNinja Hub has been set up and successfully connected to the network. See the Hub Setup page for setup steps.
Connect Printer to Internet
For ethernet printers, just power up the printer and connect an ethernet cable. Make sure the other end of the ethernet is connected to a working network jack.
When the printer's network icon is green, the printer is successfully connected to the network.

Printers and Hub must be on the same networkIn order for your Hub to send label prints to your printer(s), they must be on the same Wi-Fi, network, or subnet. Your IT person can help ensure this is the case.
Discover Printers in DataNinja
Manual SetupWhen connecting a new printer to DataNinja, you should always use Discover Printers. Manually added printers have a high chance of failing to receive print jobs from DataNinja.
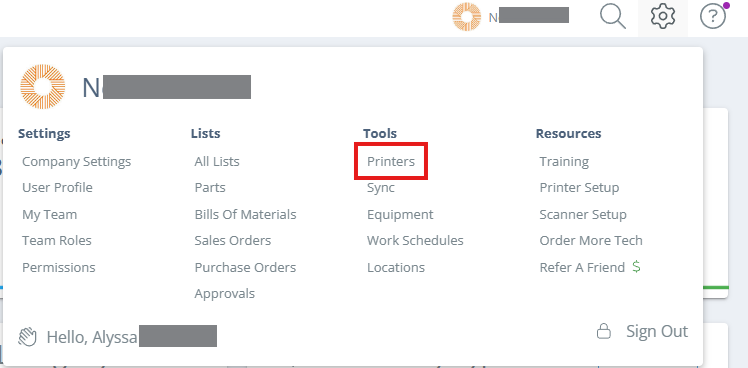
Once the printer is online, you will need to discover it in DataNinja. To do so, click on the gear icon in the upper right corner of DataNinja, then click on "Printers" in the Tools column.
Screencap from v4.21.264.294
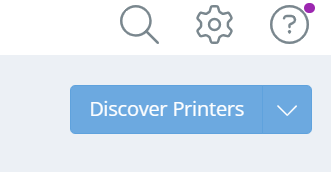
Once on the Printers page, click the "Discover Printers" in the top right corner of the page.
Screencap from v4.21.264.294
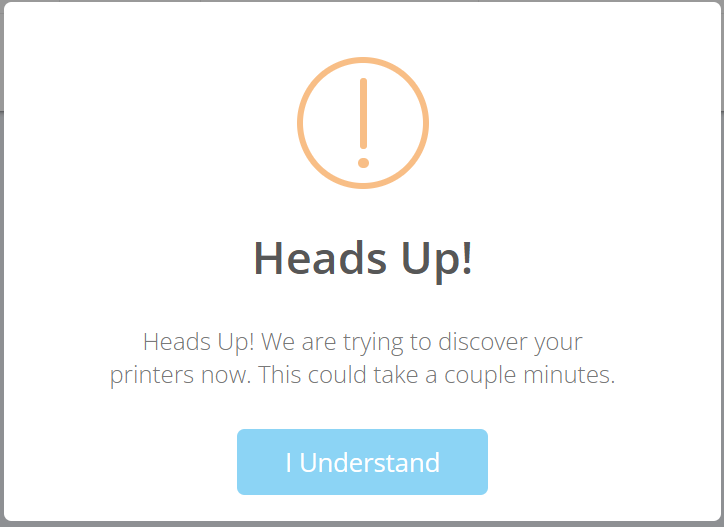
Click "I Understand" to begin discovering printers.
Screencap from v4.21.264.294
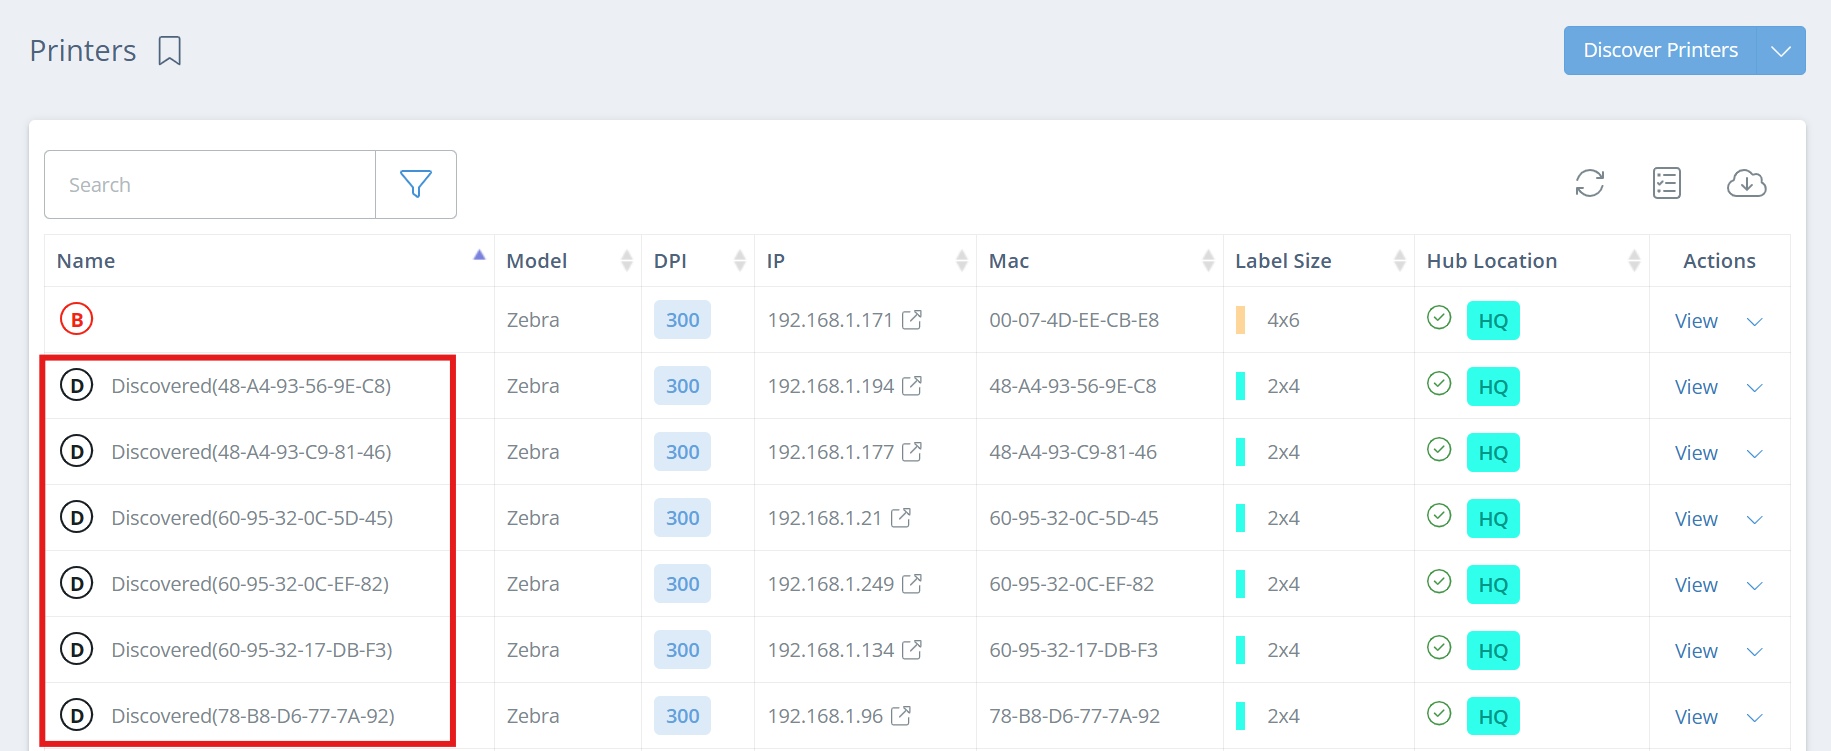
Printer discovery can take a few minutes. Once complete, discovered printers will appear on your Printers page.
Screencap from v4.21.264.294
Set Printer Details
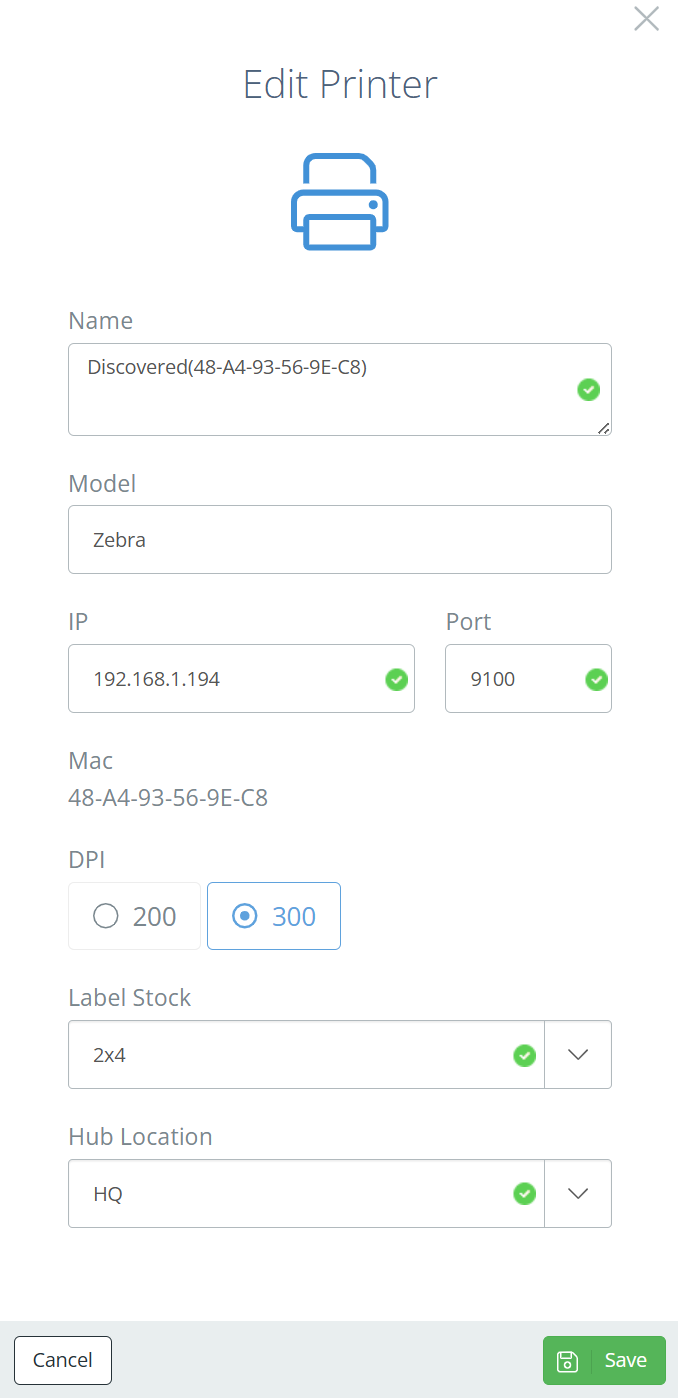
Find the discovered printer with the correct Mac address and double click on it, or click "View" in the Actions column. On the new Maintain Printer page, click "Edit" to view the printer information, then rename the printer, select the DPI and label stock size, and link the printer to the correct hub.
Screencap from v4.21.264.294
Static IP AddressIt's best to give your label printer a static IP address to stabilize printing. If the IP address on the Maintain Printer page doesn't match the actual IP address, the printer will not receive print jobs from DataNinja. Your IT person can help you assign a static IP.
How to Identify the Printer's IP Address
Hold down the "X" and "Feed" buttons on the printer at the same time for 2 seconds. The printer will print a label with its configuration settings, including the current network information.

You are looking for something on the label that looks like this:

To enable the printer to print labels from DataNinja, the IP address on the printed label must be added within DataNinja.
Select Label TemplatesThe final step to setting up a printer in DataNinja is to select label templates. For information on selecting templates, see the Printer Labels page.
Updated 2 months ago