Default Location
In DataNinja, you can set up part-specific default locations, which will set the default location that new inventory for each part is initialized into. Setting up a default into-inventory location is useful when you want to control the location of produced goods and is also beneficial for receiving raw materials. When the right default location is specified, it will save your operators from having to select an into-inventory location at receiving.
Set a Part's Default Location
Click into an existing part and select Edit, or begin creating a new part. Next, find the Receiving Location dropdown under Purchasing Class.
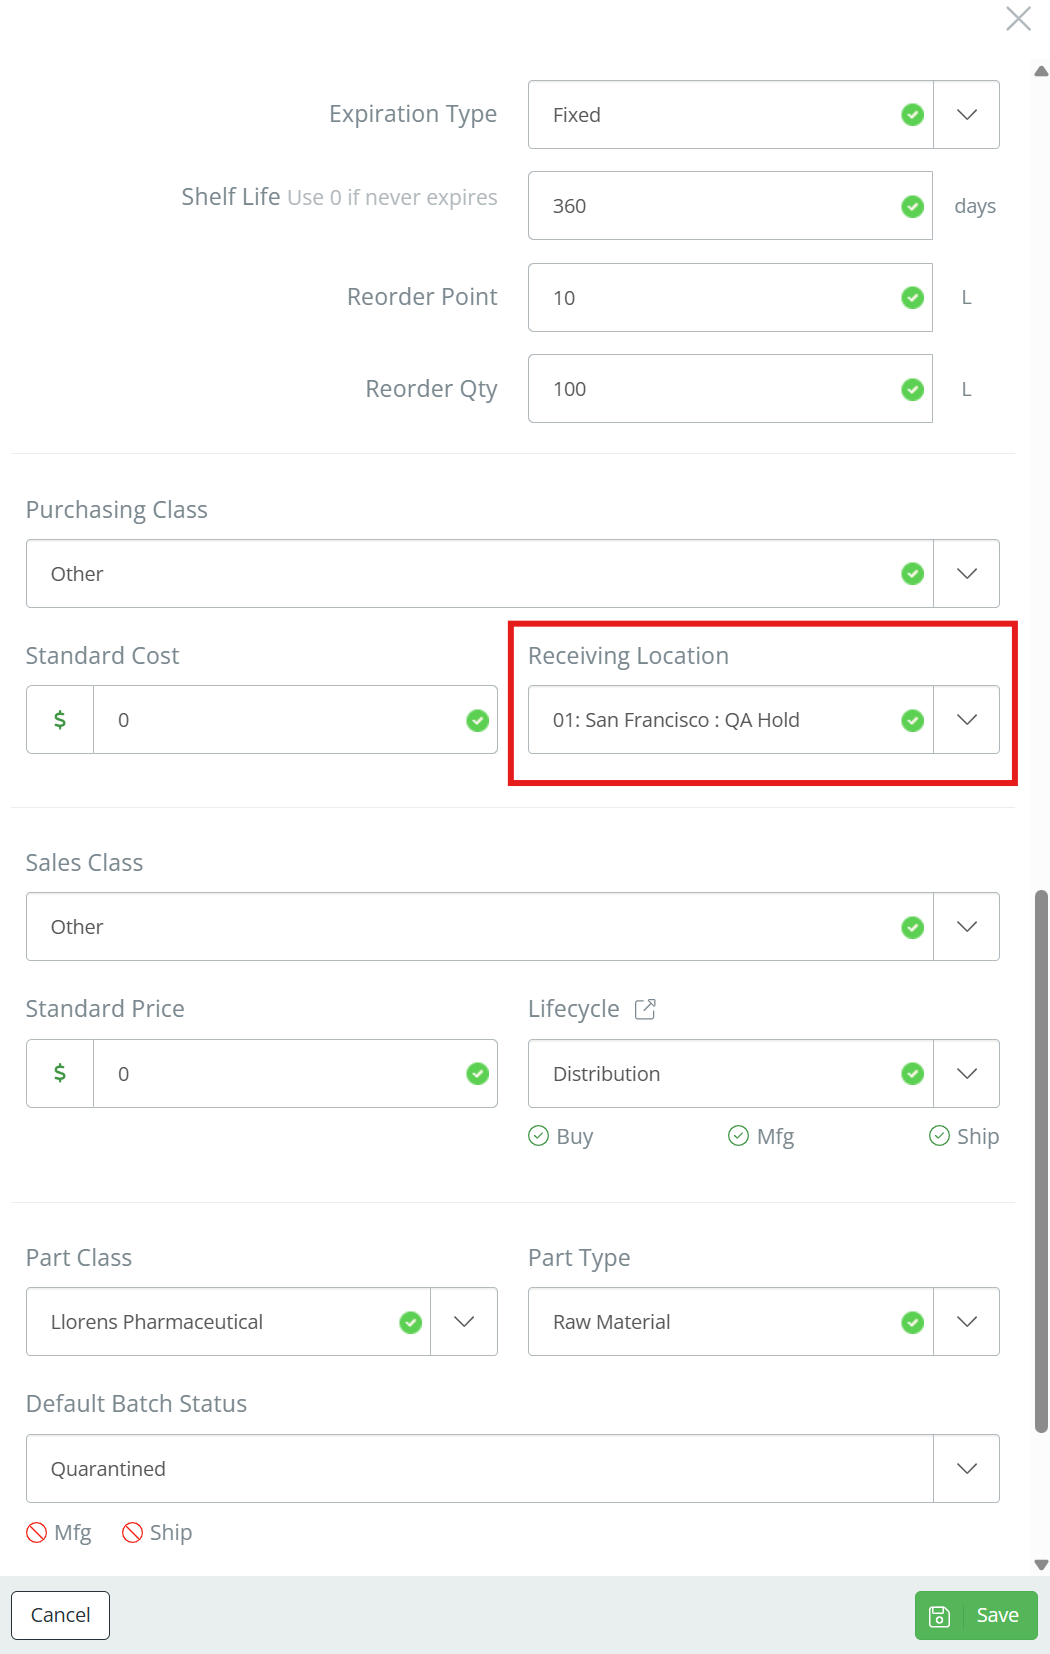
Screencap from v4.21.264.255
Choose from existing Locations or create a new Location as the into-inventory default for this part.
Crawl -> Walk -> RunPrecise, down-to-every-pallet location tracking is ideal. However, we recommend that you start with only a few inventory locations. Most companies begin with less than five. You can add hundreds of barcoded inventory locations later as your team gets more familiar with DataNinja.
How Default Location is Implemented
At Inventory Receiving
When staff are receiving raw materials, the inventory's location will automatically default to whatever location is specified in the part settings. If inventory needs to be received into a non-standard location, the operator can tap to edit the put-away location before printing the labels.

In Manufacturing
During Production, an operator generates labels to track Work in Progress (WIP) or Finished Goods through order fulfillment. When printing the labels, the inventory will be "produced into" the produced part number's default location.
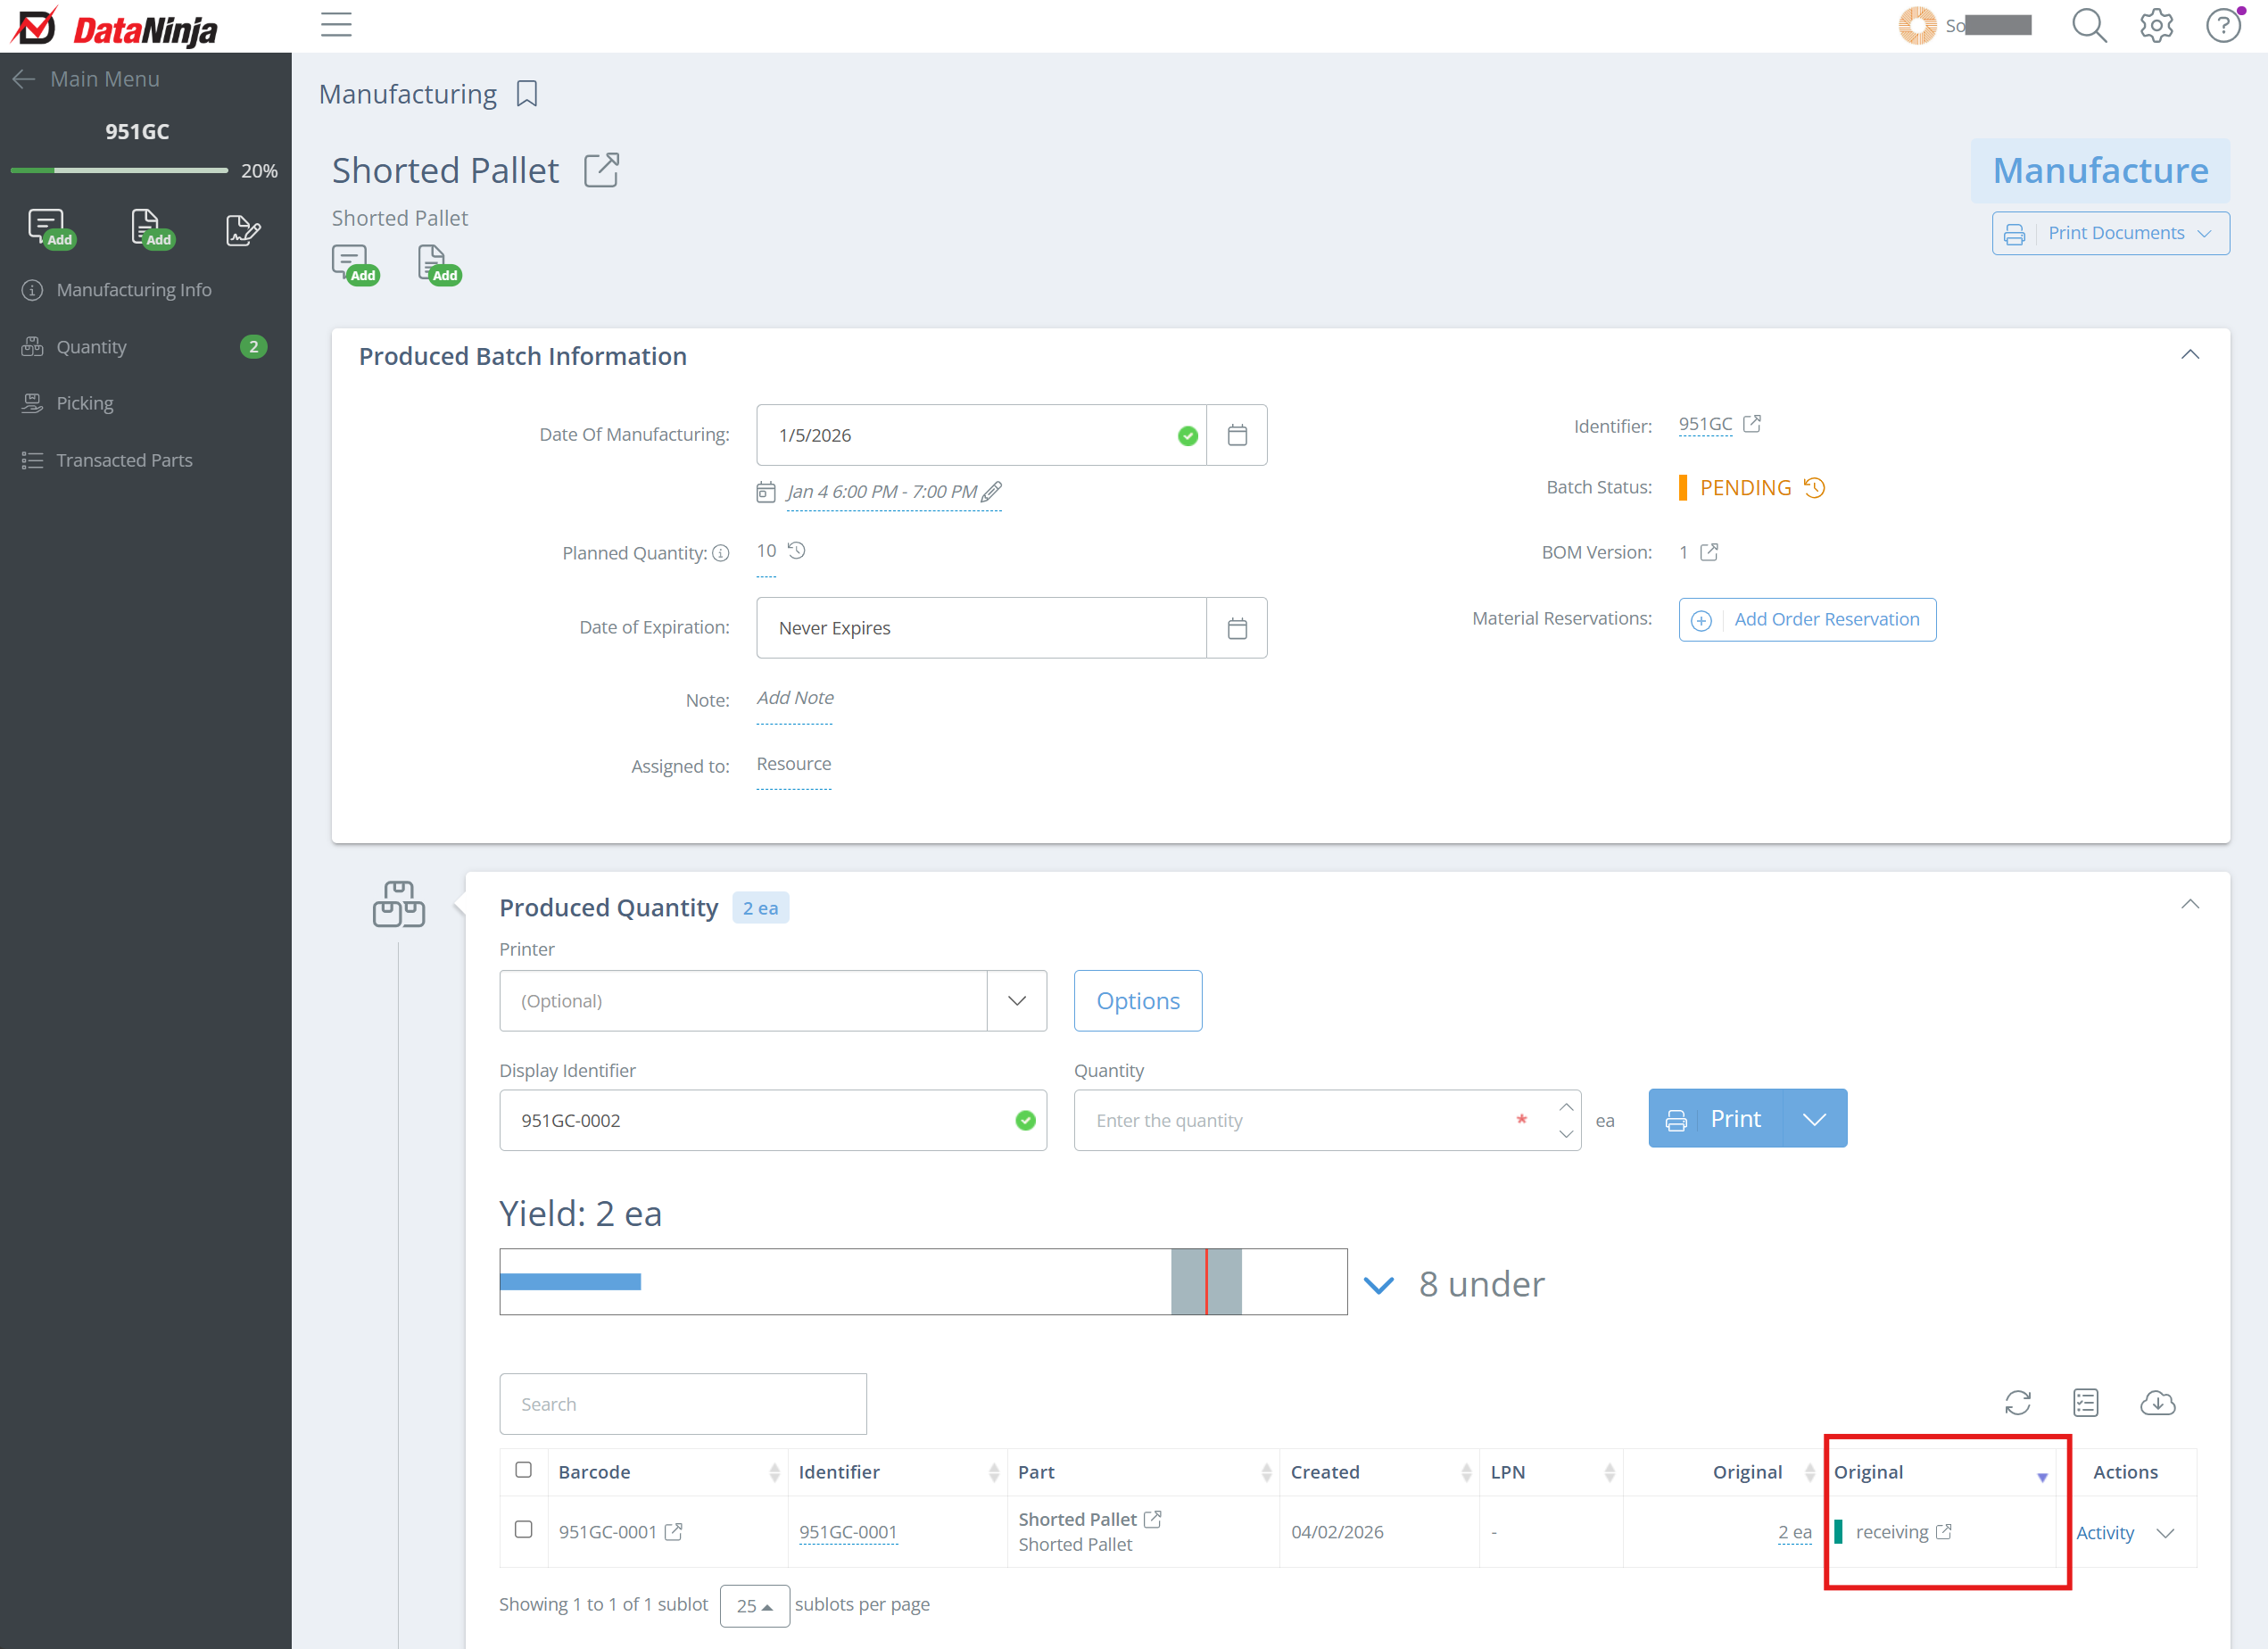
Screencap from v4.21.264.255
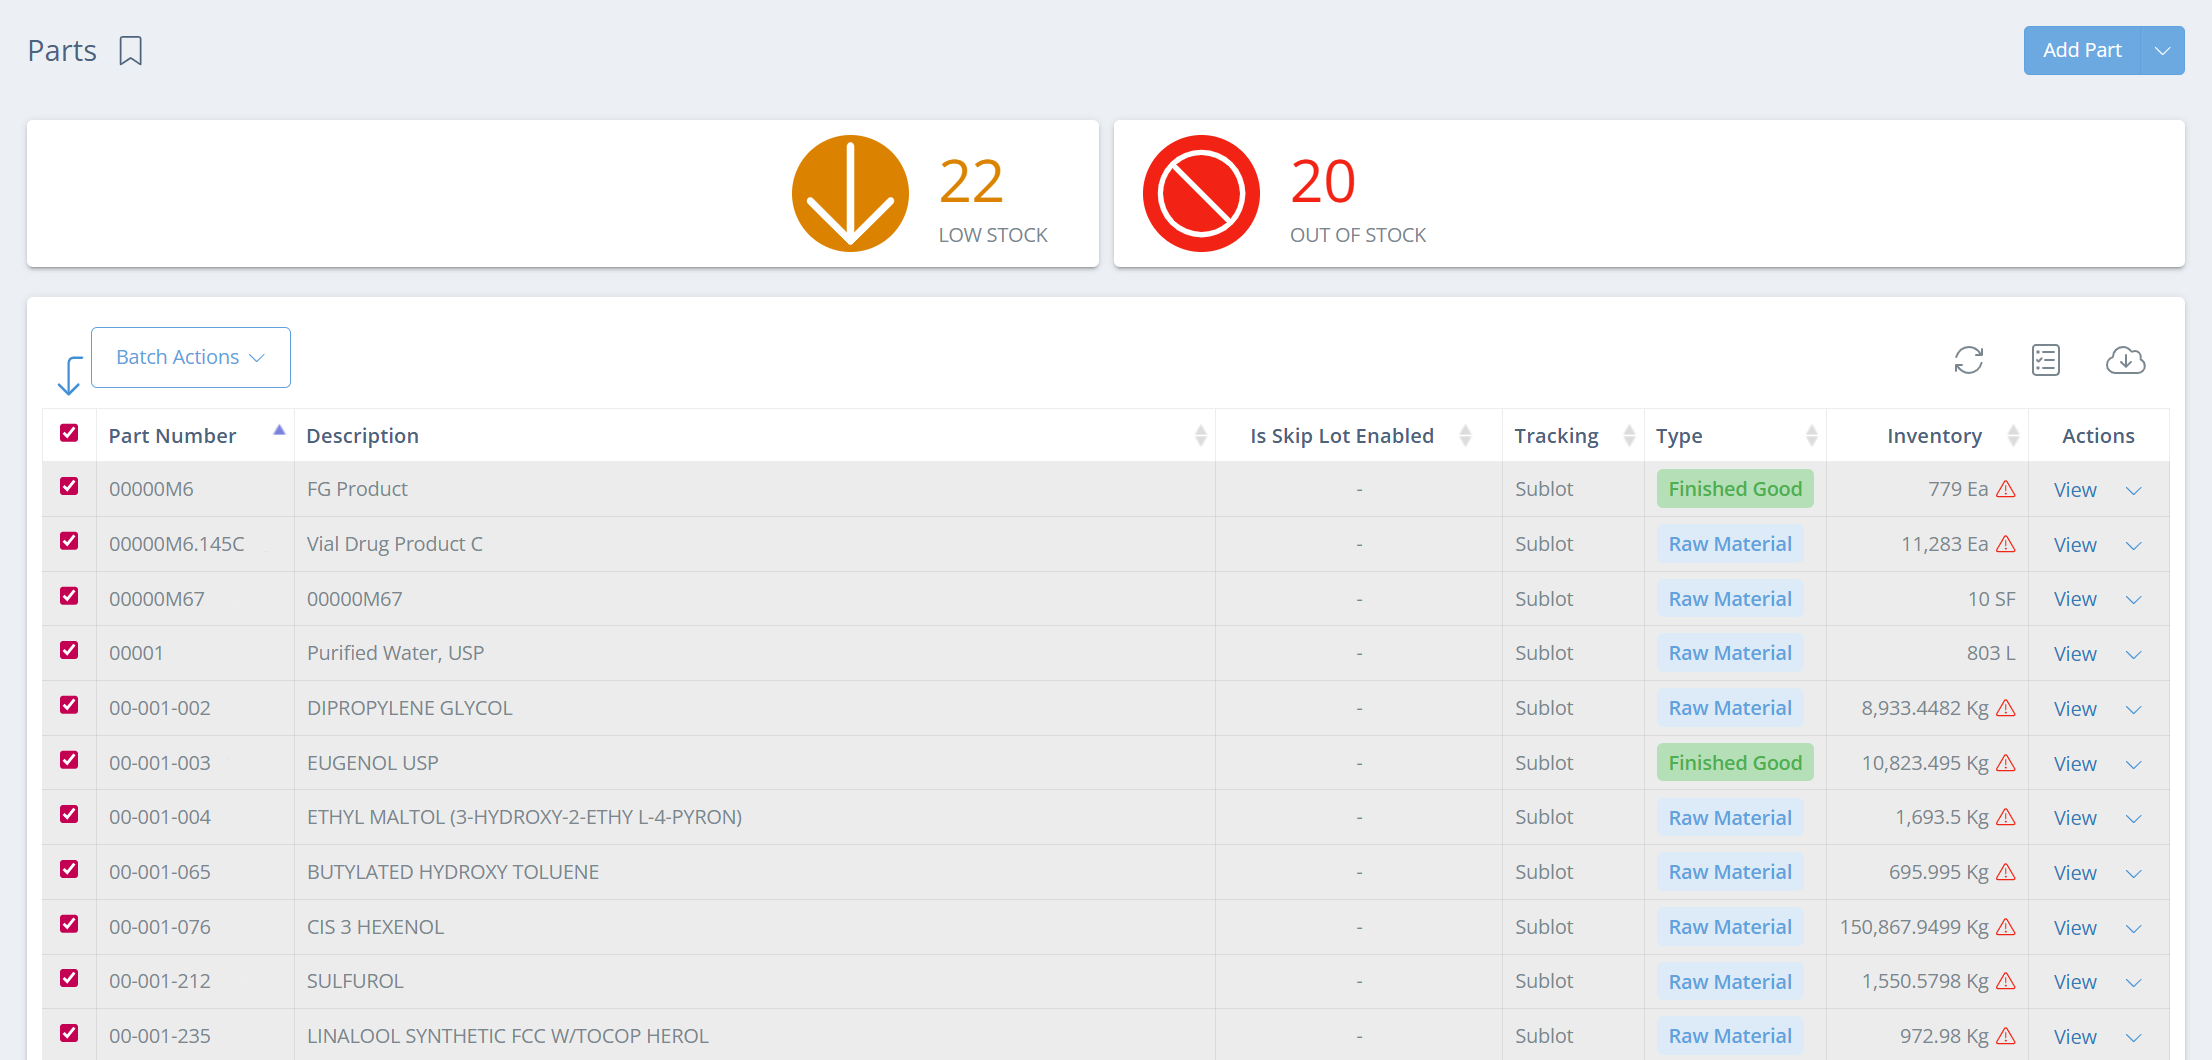
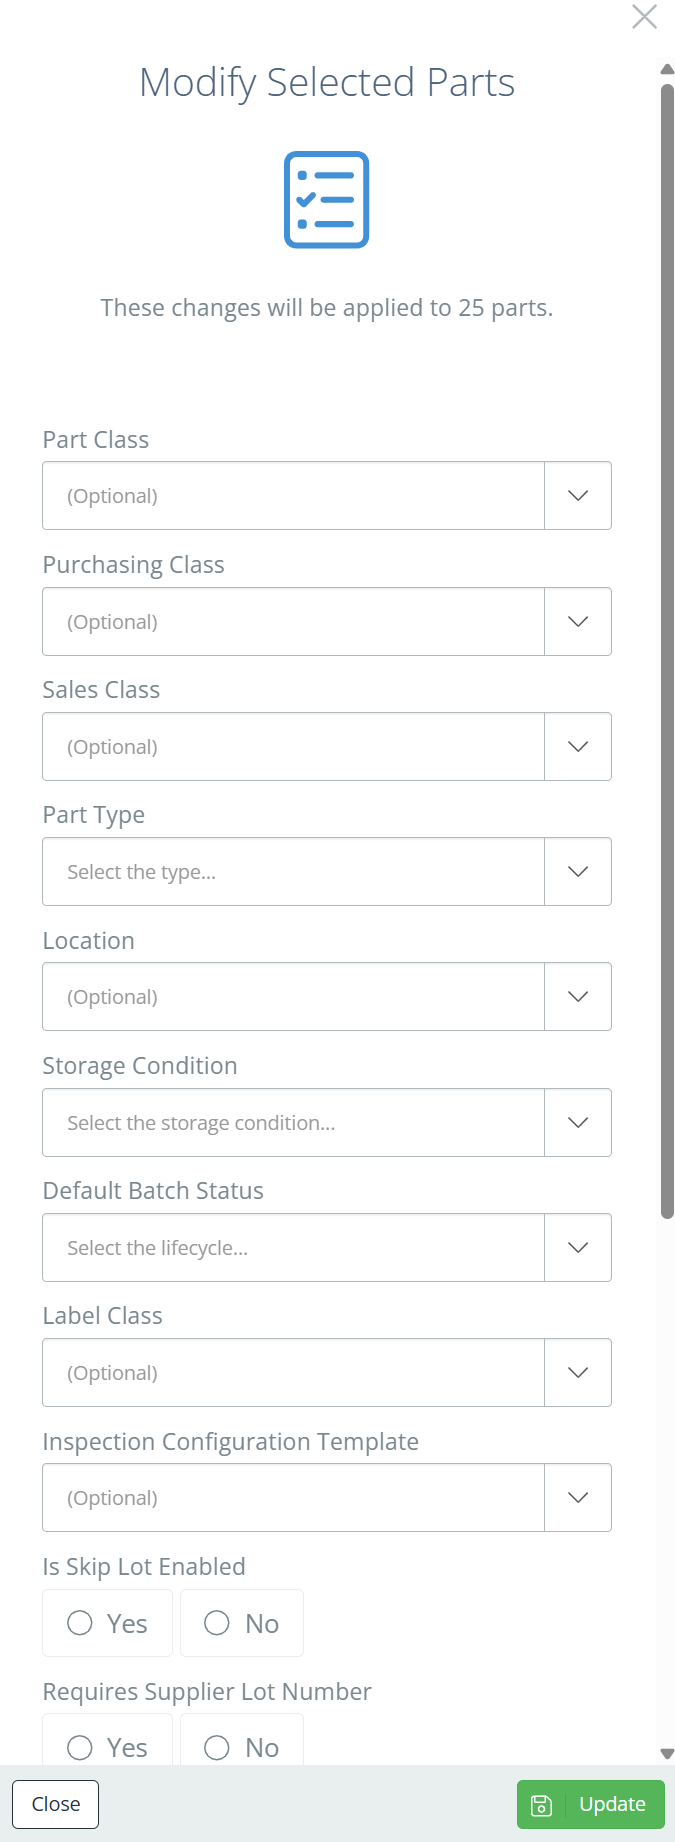
Bulk Editing Part Location
If changes to Class information (Part, Purchasing, Sales), Part Type, and/or Location need to be changed for more than one part, use the bulk edit feature on the Parts page to make the changes. Check the box next to each part that you want to edit, or check the box in the header row to automatically check (or un-check) all of the boxes on the page. Once the parts have been selected, click "Batch Actions" and make the necessary changes. Once you click "Update", the information will be saved to all of the selected parts.
Screencap from v4.21.264.255
Screencap from v4.21.264.255
Updated 4 months ago