
Default Shelf Life
Set up Shelf Life to prevent using or shipping any expired product
Español: Lee esta página en español.
Français : Consultez cette page en français.
This page applies to DataNinja tenants integrated with NetSuite or QuickBooks Online, and to tenants with no finance system integration. The workflow in DataNinja is the same across integrations; where a financial system changes behavior, the integration-specific note calls it out.
Items that are synced with an integration will show the relevant integration's logo. Screenshots on this page may show the NetSuite logo, but tenants integrated with QuickBooks Online will see that logo instead. Tenants with no financial integration won't see any logo.
Auto-verification can alert operations if bad product is about to be consumed or shipped to fulfill a customer order.
Shelf life determines the default number of days past inventory creation that the inventory of a part can be consumed or shipped. Setting up Shelf Life is useful when you want to minimize repetitive data entry during inventory receiving or production.
How to Set a Part's Shelf Life
Click into an existing part and select Edit, or begin creating a new part. Next, find the 'Expires' field beneath the Part Classifications section. If the part never expires, don't make any changes to the field. The default expiration is Never.
Once you click on the Expires field, the field will now show as Shelf Life.
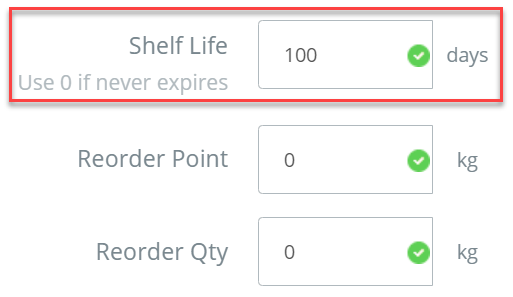
Shelf Life for Raw Materials vs. Finished GoodsRaw Materials: A Shelf Life of 400 days for a Raw Material means that if you accept the default expiration date at receiving, the Shelf Life will be exactly 400 days from the day it is received (when the barcodes are printed).
Finished Goods: A Shelf Life of 90 days for a Finished Good means if you accept the default expiration date in the manufacturing record, the Shelf Life will be exactly 90 days from the moment the Finished Good is made (when the barcodes are printed).
How Shelf Life is Implemented
At Inventory Receiving
When raw materials are received, the part's Shelf Life will be added to the current date and defaulted into the Expires field.
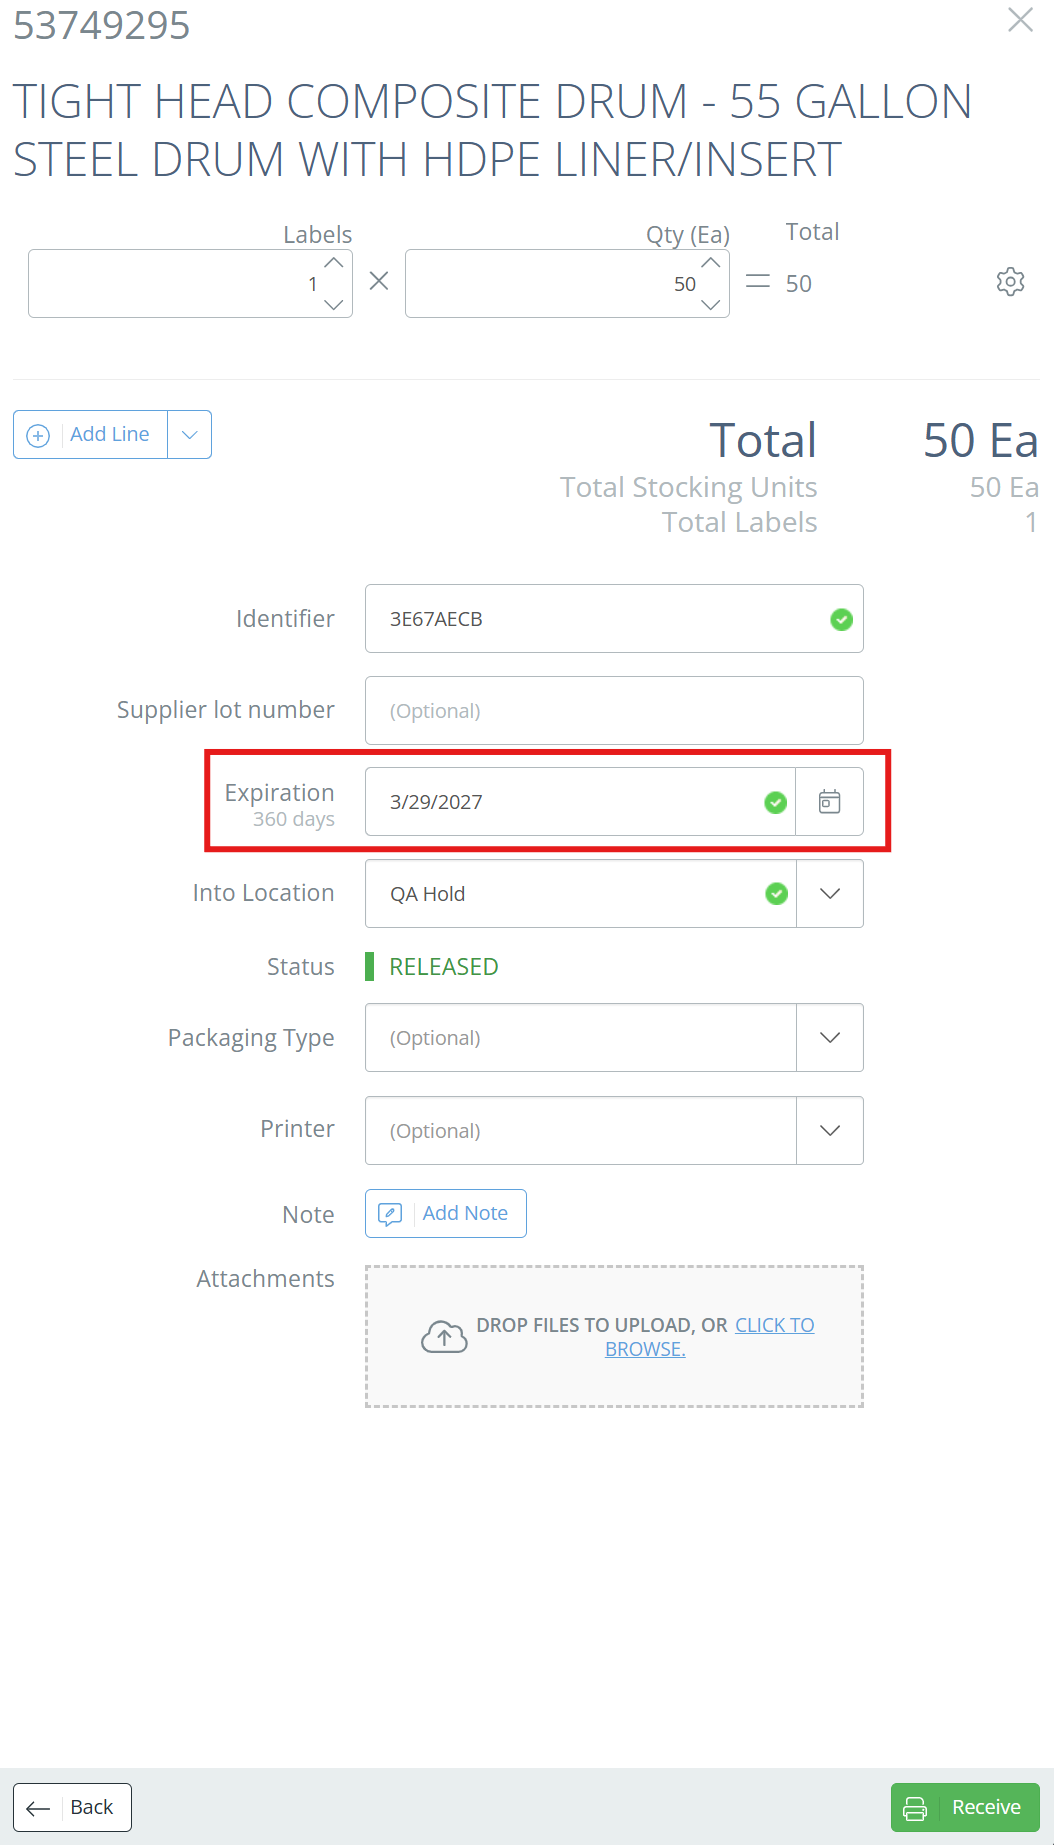
The expiration date can also be manually adjusted by clicking on the calendar icon in the Expiration row during receiving.
In Manufacturing
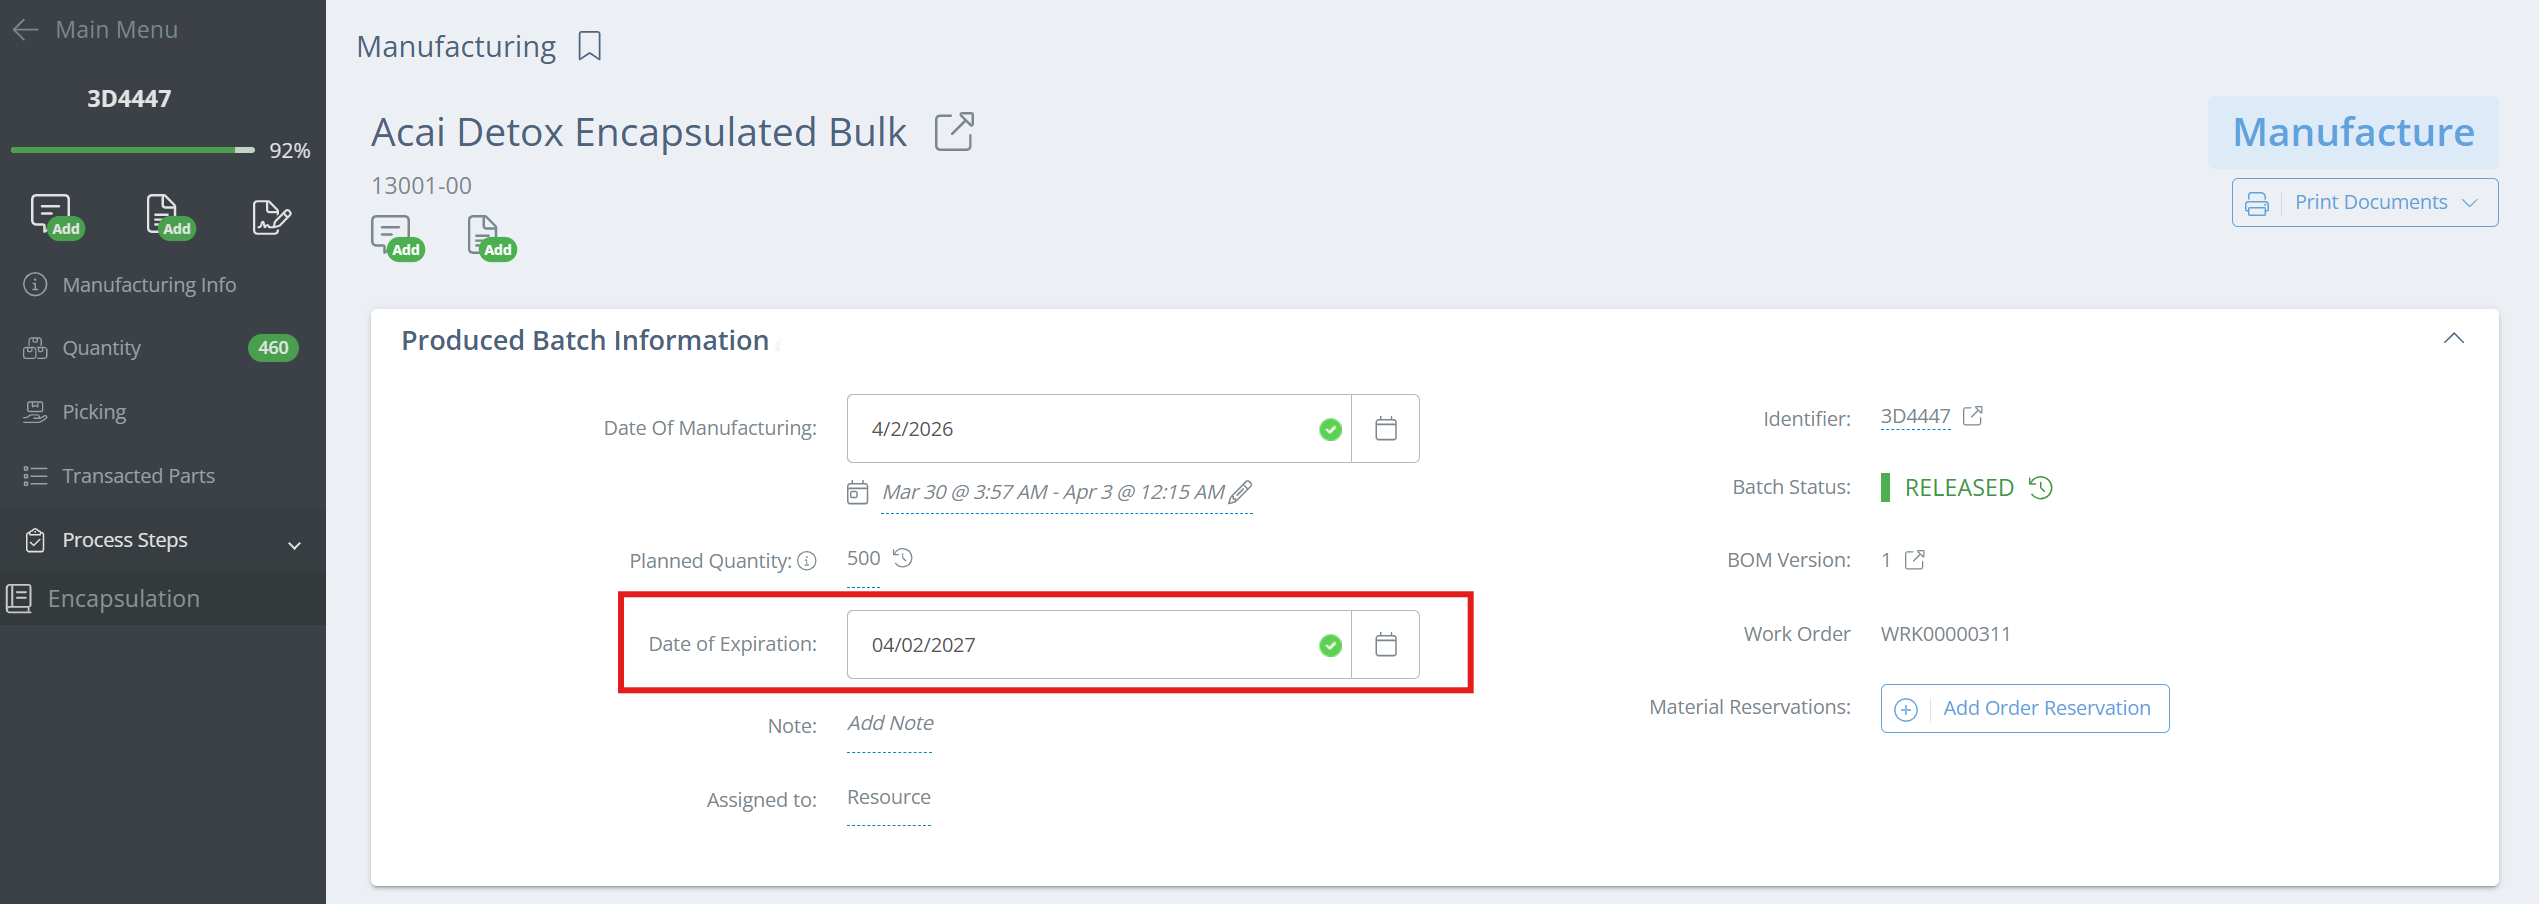
In a manufacturing record, the Shelf Life will be added to the date of manufacturing and populate into the date of expiration field. The date of expiration can be manually adjusted by clicking on the calendar icon to the right of the field.
Updated 3 days ago