Design New Labels
A DataNinja label template starts as a Zebra label design and ends as a ZPL template stored on a printer in DataNinja. The template can include placeholders in {FieldName} format, which DataNinja replaces with live values when the label is generated.
A DataNinja label template starts as a Zebra label design and ends as a ZPL template stored on a printer in DataNinja. The template can include placeholders in {'{'}FieldName{'}'} format, which DataNinja replaces with live values when the label is generated.
This workflow has three parts:
- Create the label layout in ZebraDesigner.
- Validate the output in Labelary to confirm that the ZPL renders correctly.
- Paste the ZPL into the DataNinja label template editor, map it to a printer, and confirm that all referenced fields are valid.
We recommend using ZebraDesigner for Developers as it has the easiest interface, and you can download it here.
Before You BeginBefore creating the template, make sure you know the label size you want to support and the fields you expect DataNinja to provide at print time.
Field names in DataNinja are case-sensitive and cannot contain spaces, so the placeholder in the ZPL must match the field name exactly.
For example:
- {'{'}PartNumber{'}'} is valid
- A variation such as {'{'}partnumber{'}'} or {'{'}Partnumber{'}'} or {'{'}part number{'}'} will not resolve correctly
Design the Label
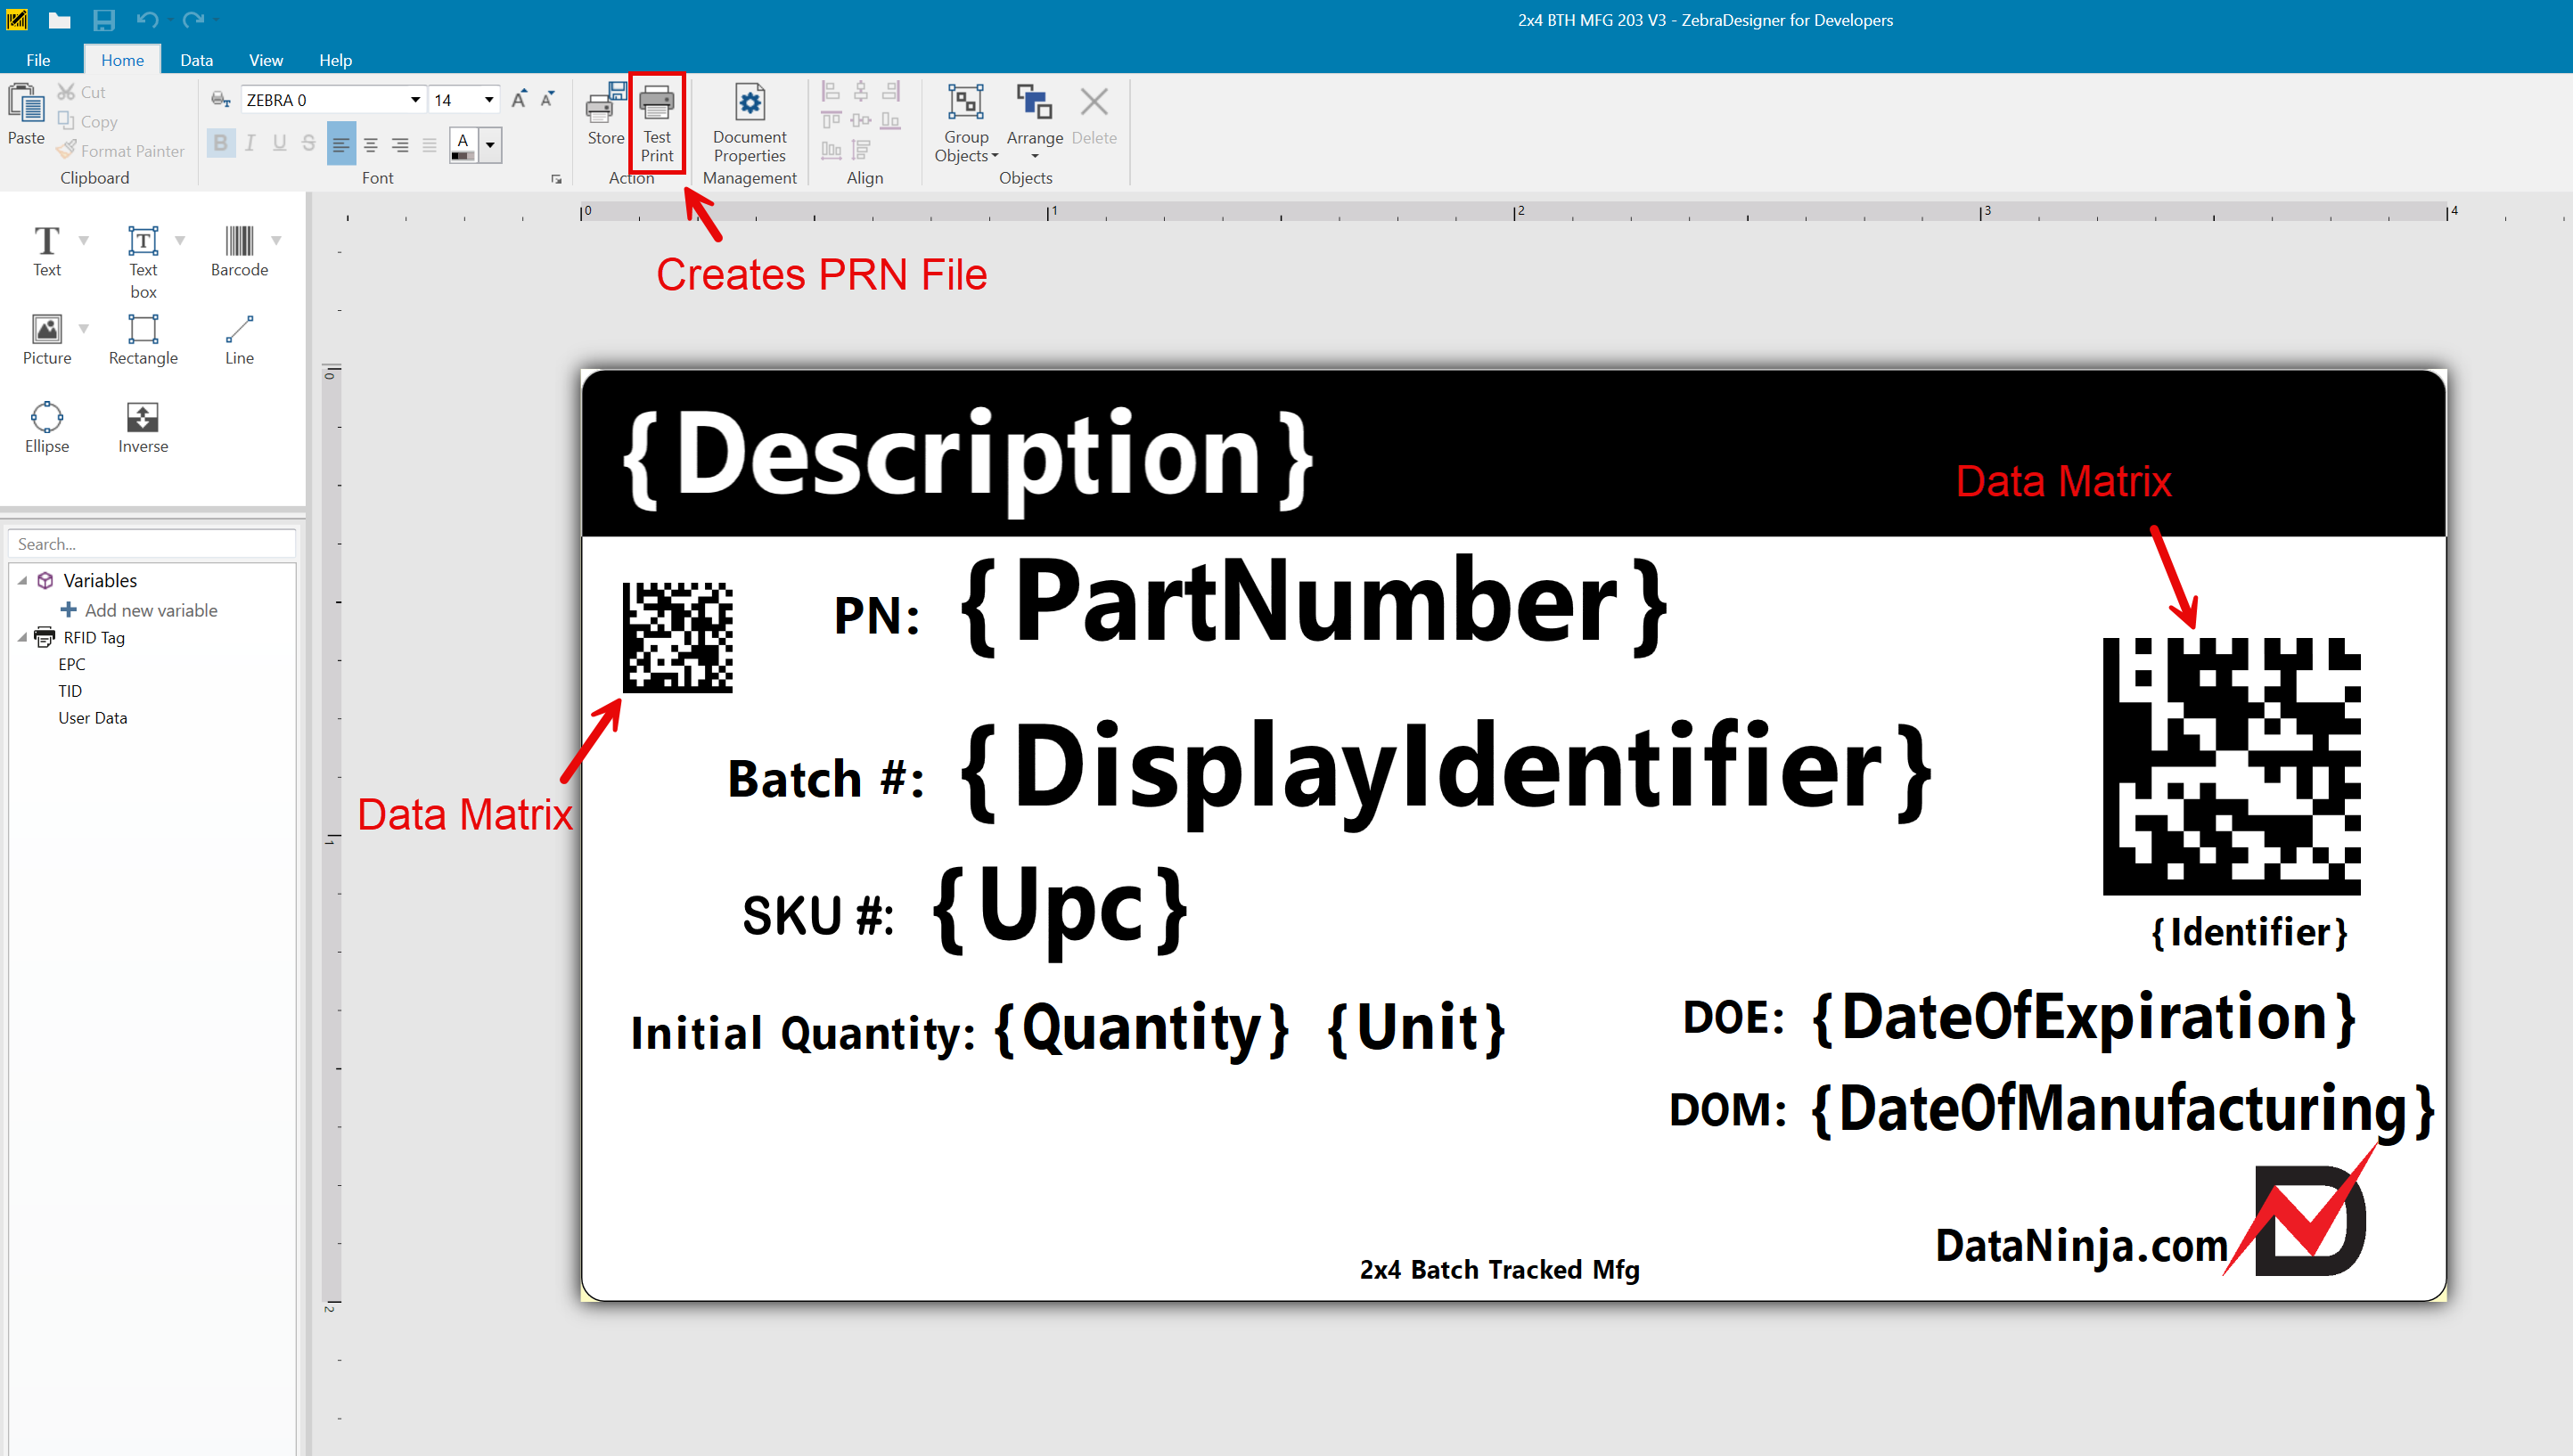
Begin in ZebraDesigner by creating a label with the correct dimensions, such as 2x4. Add the static layout elements you want to print, including text blocks, barcodes, QR codes, and any fixed branding or formatting.
Wherever the label should display live data, use placeholders in curly brackets instead of hard-coded values. These placeholders should follow the {'{'}FieldName{'}'} pattern. A label might include values such as {'{'}Description{'}'}, {'{'}PartNumber{'}'}, {'{'}DisplayIdentifier{'}'}, or {'{'}DateOfExpiration{'}'} depending on the type of label being created.
The goal at this stage is to create the visual layout and position each dynamic field where it should appear on the final printed label. The field name and information can easily be edited later, the focus should primarily be on visual arrangement and field placement in ZebraDesigner.
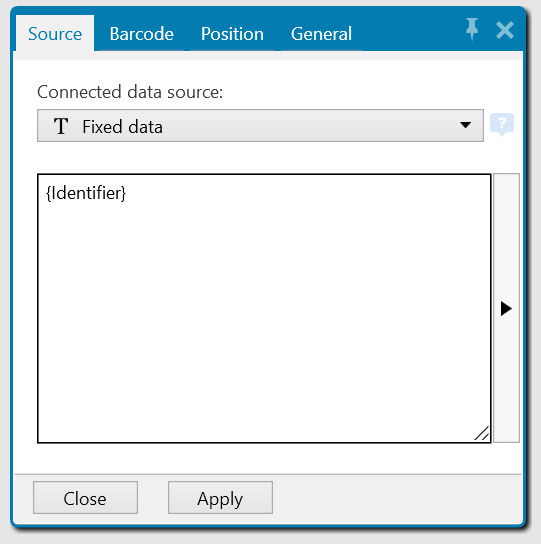
TipsTo get a black box with white writing, click 'Inverse' and draw the object, then add a text field on top of it. The software will automatically make the text white if it is over the inverted object, and black if it is not. Additionally, DataNinja typically uses Data Matrix barcodes instead of QR codes, and standard barcodes where applicable. For any type of scannable barcode, the Connected data source should be 'Fixed data' and the {'{'}DisplayIdentifier{'}'} placed in the field. This is the data that will be encoded in the Data Matrix/barcode.
Export the ZPL
After the layout is complete, export the label from ZebraDesigner as ZPL by clicking 'Test Print' in the Action menu of the Home tab. The ZPL will be contained in a .PRN file; this ZPL becomes the source template that you will test and then paste into DataNinja.
Open the newly-saved PRN file in Notepad (or another available application), and delete everything above the second ^XA line. These lines control the print settings like darkness and speed, and it's best to let the printer determine the print settings rather than the label template.
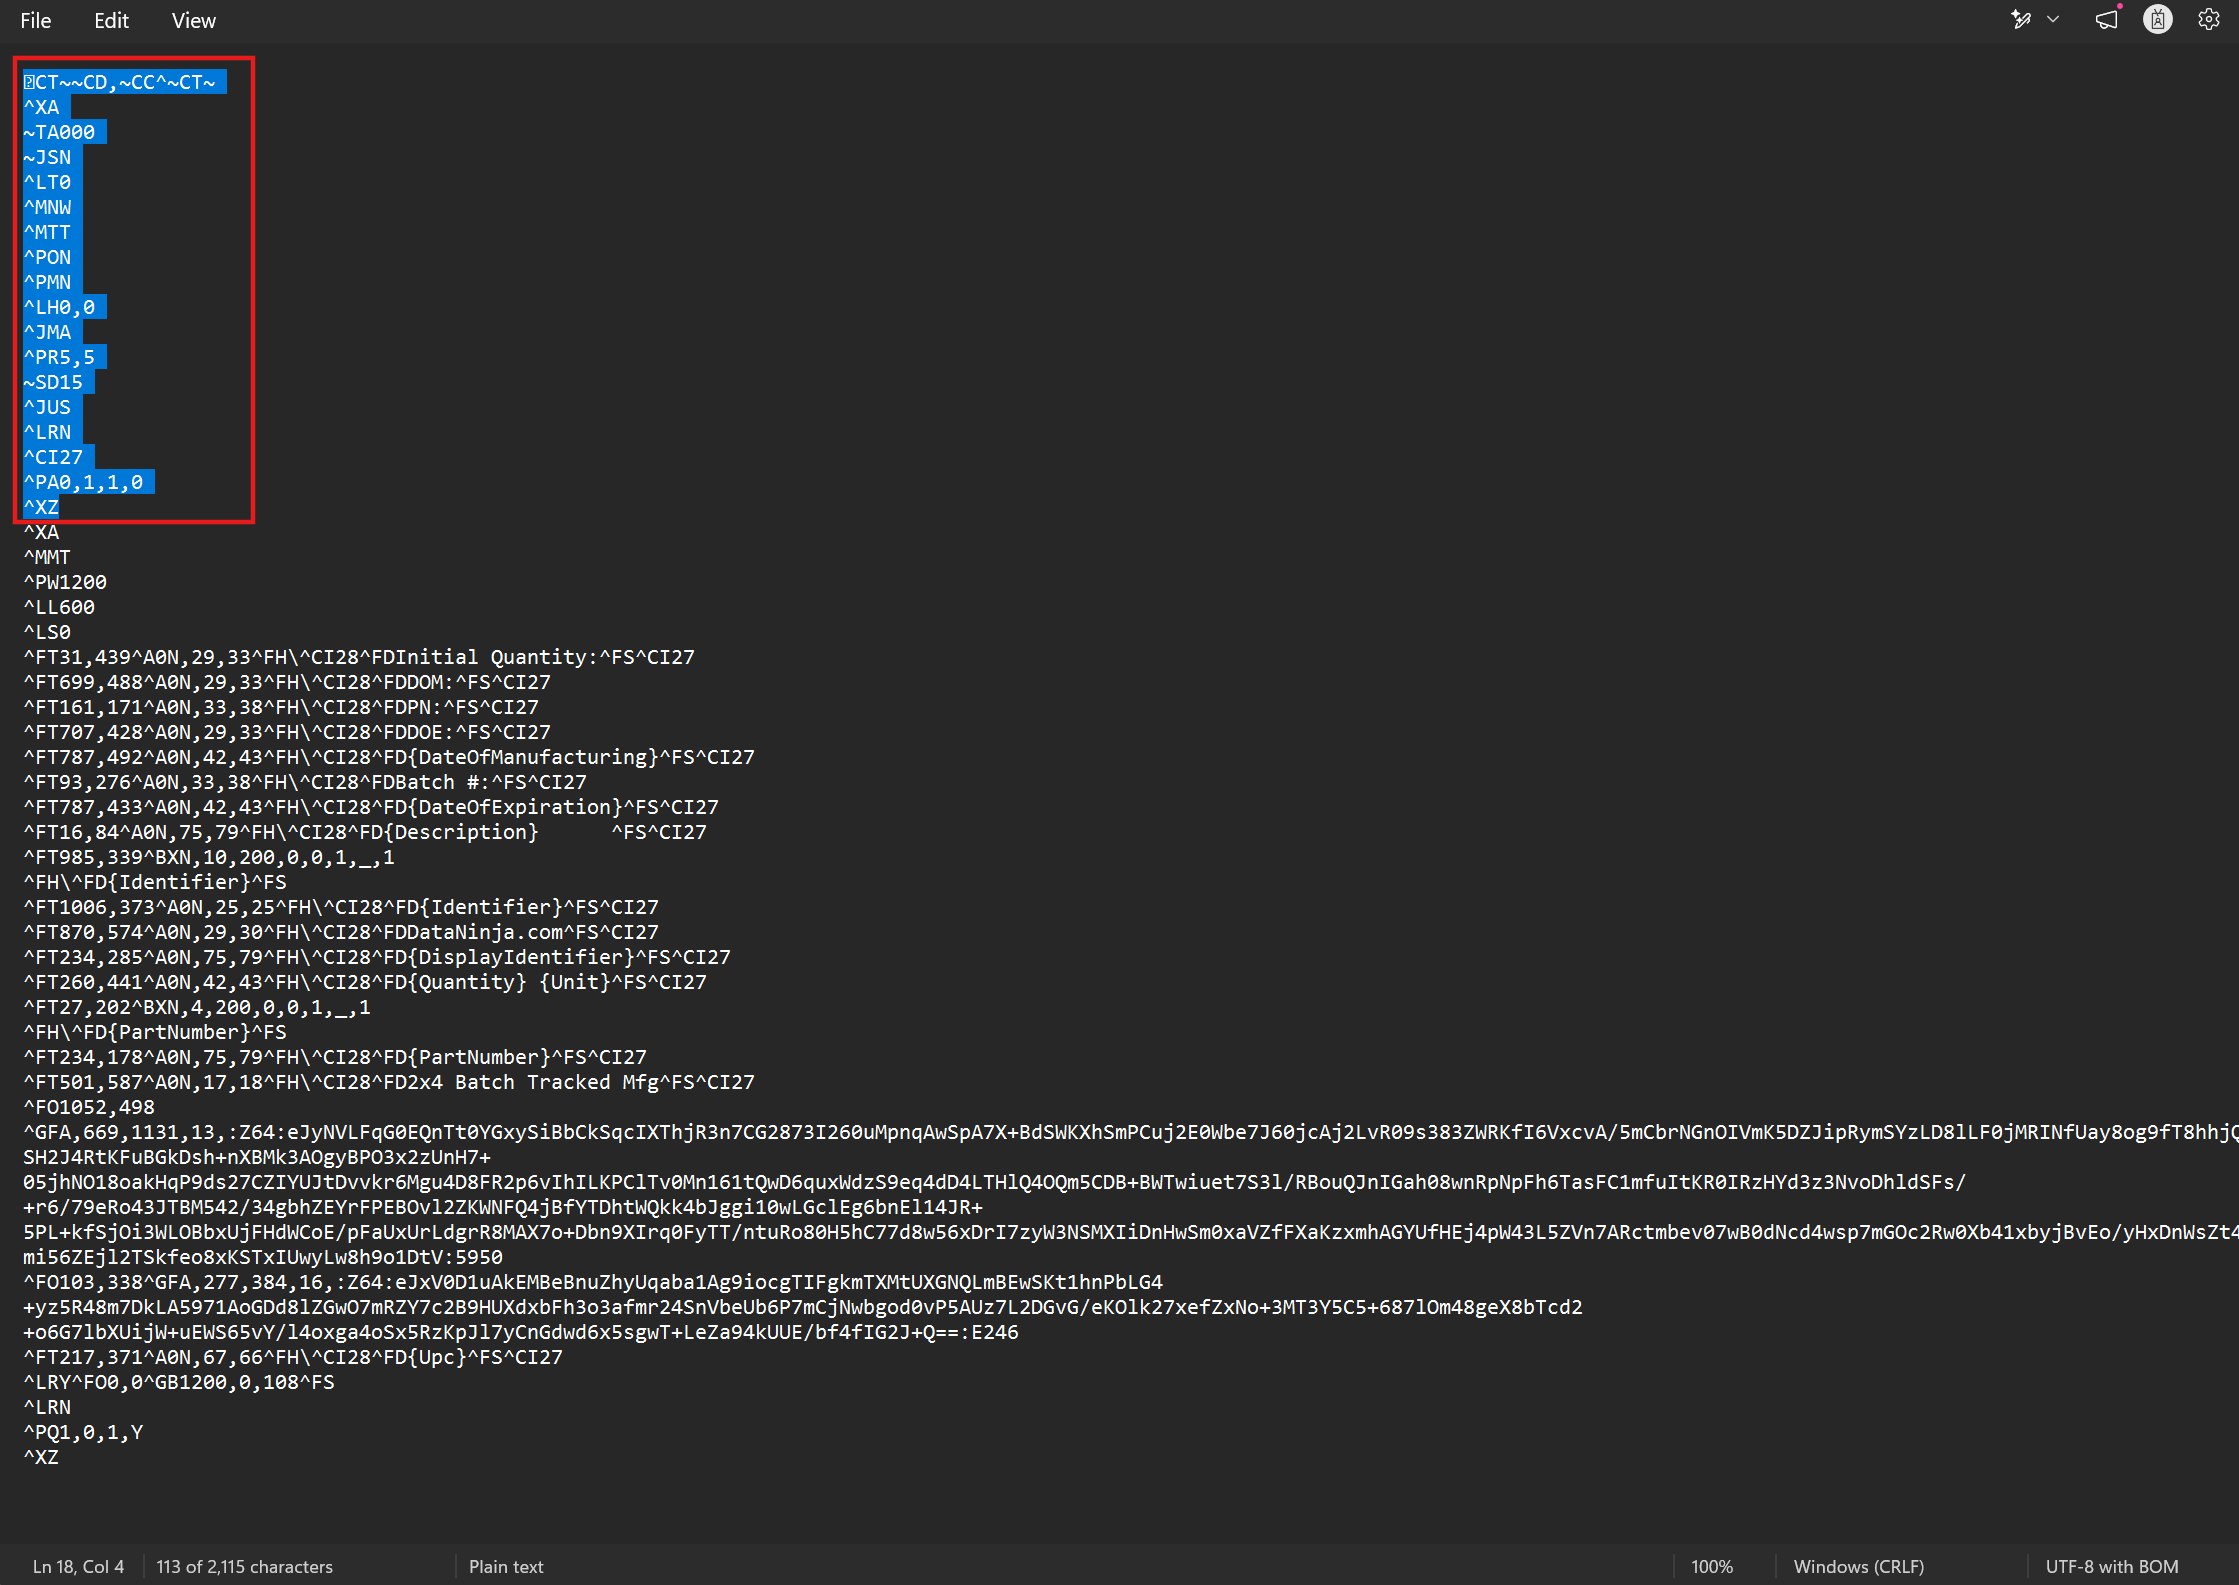
Once the lines are removed, update the ^PQ line at the end of the ZPL code and save the PRN file.
Update the ^PQ LineIf the ^PQ line reads ^PQ1,0,1,Y, update it to be ^PQ{'{'}NumberOfLabels{'}'},0,1,Y instead. The {'{'}NumberOfLabels{'}'} field allows DataNinja to actively control how many labels get printed, so don't remove it from the label. If the field is not on the ^PQ line, then only 1 label will print out at a time, regardless of whether you use Print Multiple or enter a greater quantity in DataNinja.
The ^PQ line is typically the second to last line in the PRN file.
Add Label to DataNinja
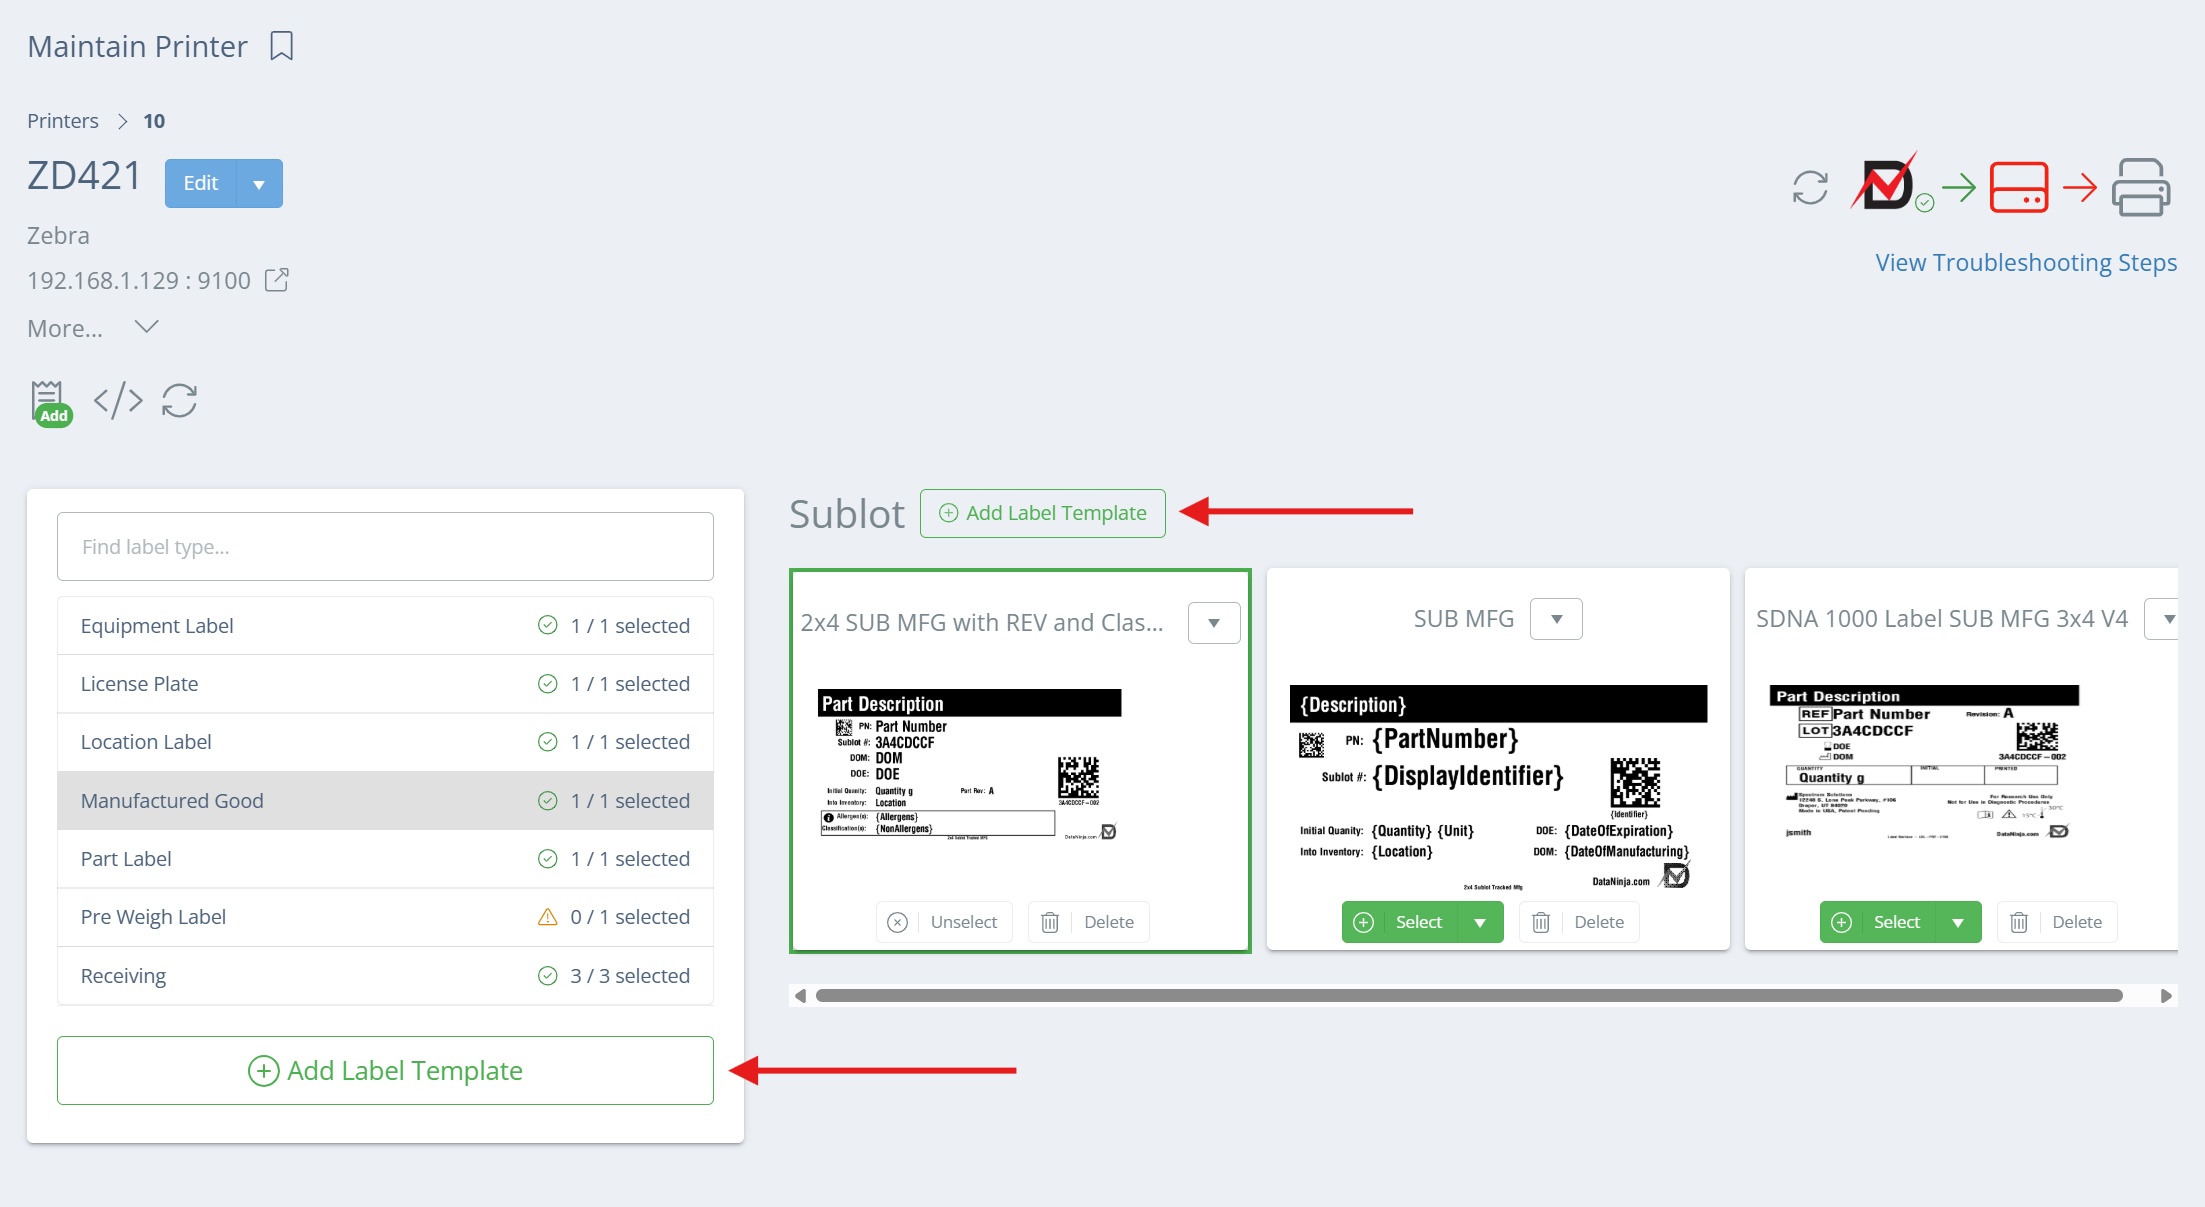
Open the Printers page and click on the printer you want to add the label template to. Make sure the printer is the same DPI as your label. From the Maintain Printer page, you can either click immediately on 'Add Label Template' or you can click on a label type and click 'Add Label Template' next to the tracking type for that label type.
If you click the button under the list of all template types, you'll have a couple extra fields to fill out on the next page. Clicking on a label type, then 'Add Label Template' next to the tracking type will automatically set the label type and tracking type of the label template you're creating to be exactly the same, so those fields will not show. In the example below, it would create a Manufactured Good label for Sublot tracked parts.
Screencap from v4.21.264.294
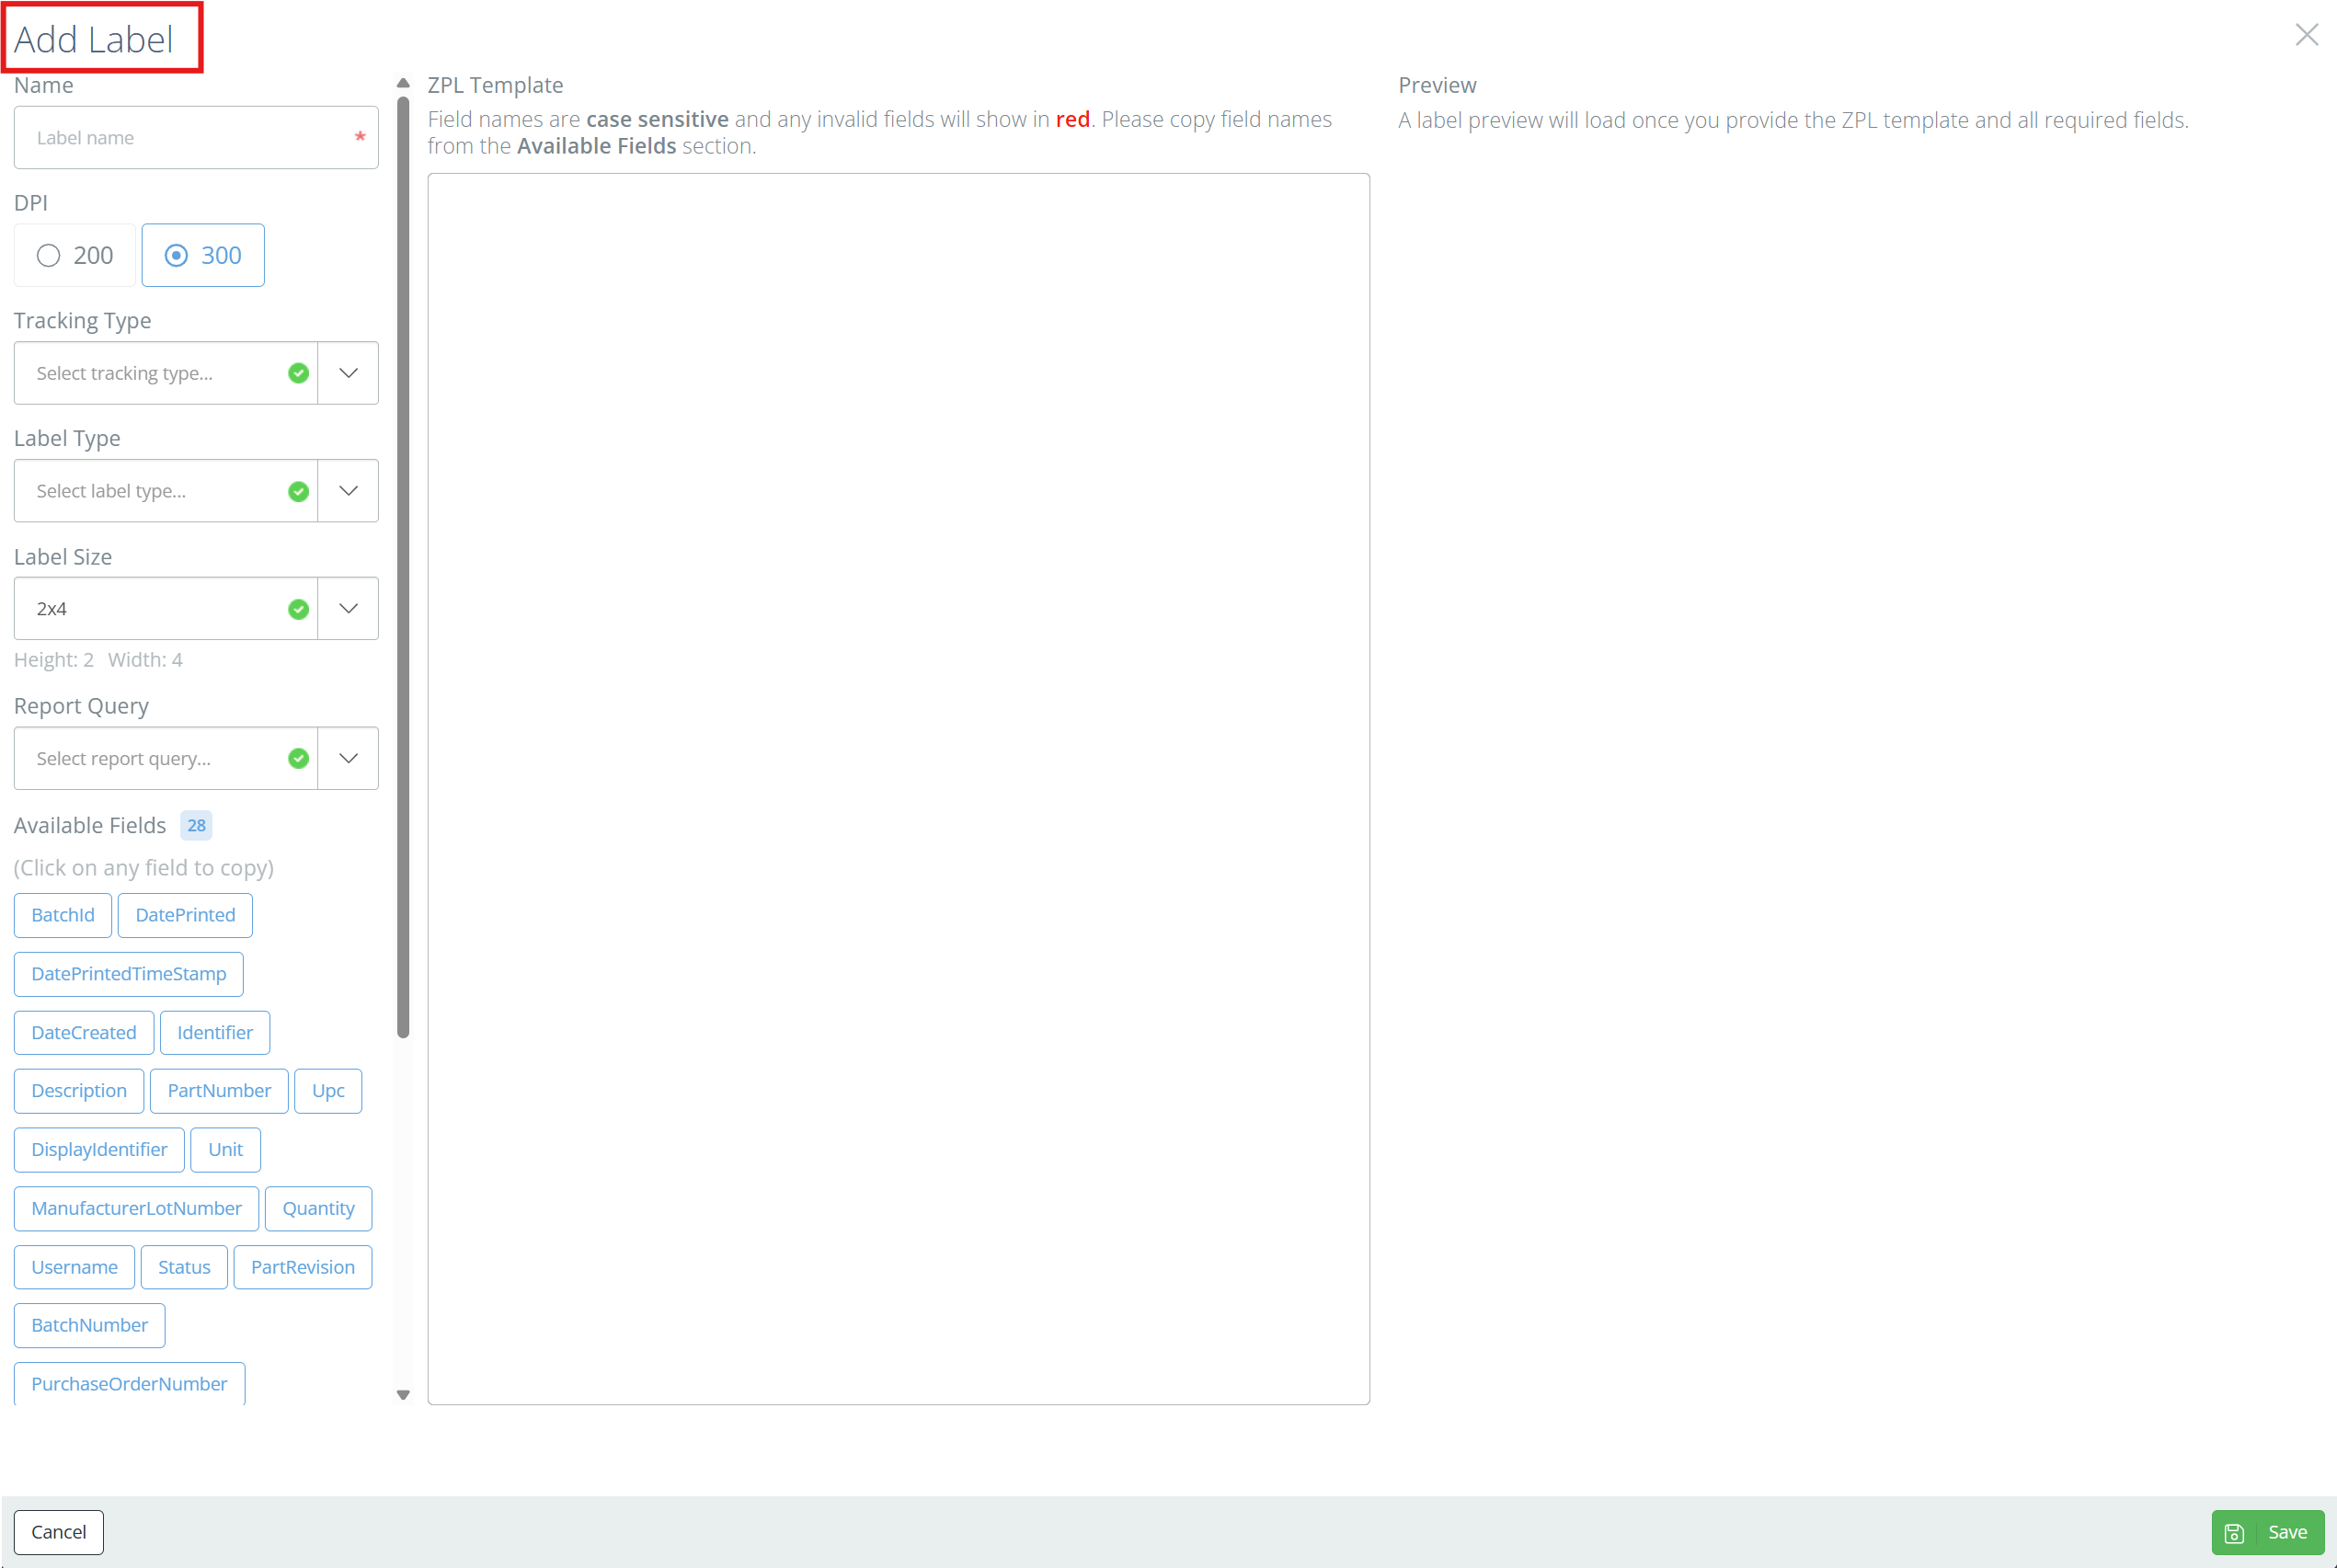
Settings
The settings are the same as when editing an existing label template- the differing factor is that when editing a label template, the name of the template will show in the header bar, and while creating a new template the header will show 'Add Label'.
Screencap from v4.21.264.294
Name
Name the label something like '2x4 MFG Batch 300dpi v1' so the size, type, and dpi of the label are easily recognizable in case of future changes.
Tracking and Label Type
If the Tracking Type and Label Type fields show, make the relevant selections, then double check the label size as the default if 2x4. These fields will not show if you clicked 'Add Label Template' next to the tracking type after clicking on a label type on the Maintain Printers page.
DPI
Make sure that the DPI is set correctly- look for the '^PWxxx' and '^LLxxx' lines in the ZPL- these control the Print Width and Label Length, respectively. If they are both easily divisible by 300, then the template is for a 300 DPI- otherwise, it's a 200 DPI label.
Label Size
Adjust the label size if needed. If you do change the label size, be aware that that field spacing on the label will be off until you adjust the ZPL accordingly. Double check that the Height and Width showing under the field match your label stock.
Report Query
Unless this is a 'custom' label (i.e. the DataNinja team had to create a custom query so non-standard fields would fill on the label), the Report Query space should be blank. Most labels will not be 'custom', even if they visually differ from the default templates.
Available Fields
These are fields that are immediately available for use on the label. Take the field name and put it between curly brackets (like {'{'}PartNumber{'}'}) and DataNinja will replace it with the appropriate live data when the label is printed. Not all possible fields are listed here, just some of the most common ones. The field names are similar to the ones found on the API page, but when used on a label the fields will use Pascal Case instead of Camel Case. Reach out to the DataNinja team via chat if you need any fields added to your label(s) that aren't listed under Available Fields.
Add ZPL
Open the saved PRN file and copy all the contents; make sure that you have removed all the printer settings from the PRN file. Paste the ZPL from the PRN into the ZPL Template section of the label creation page.
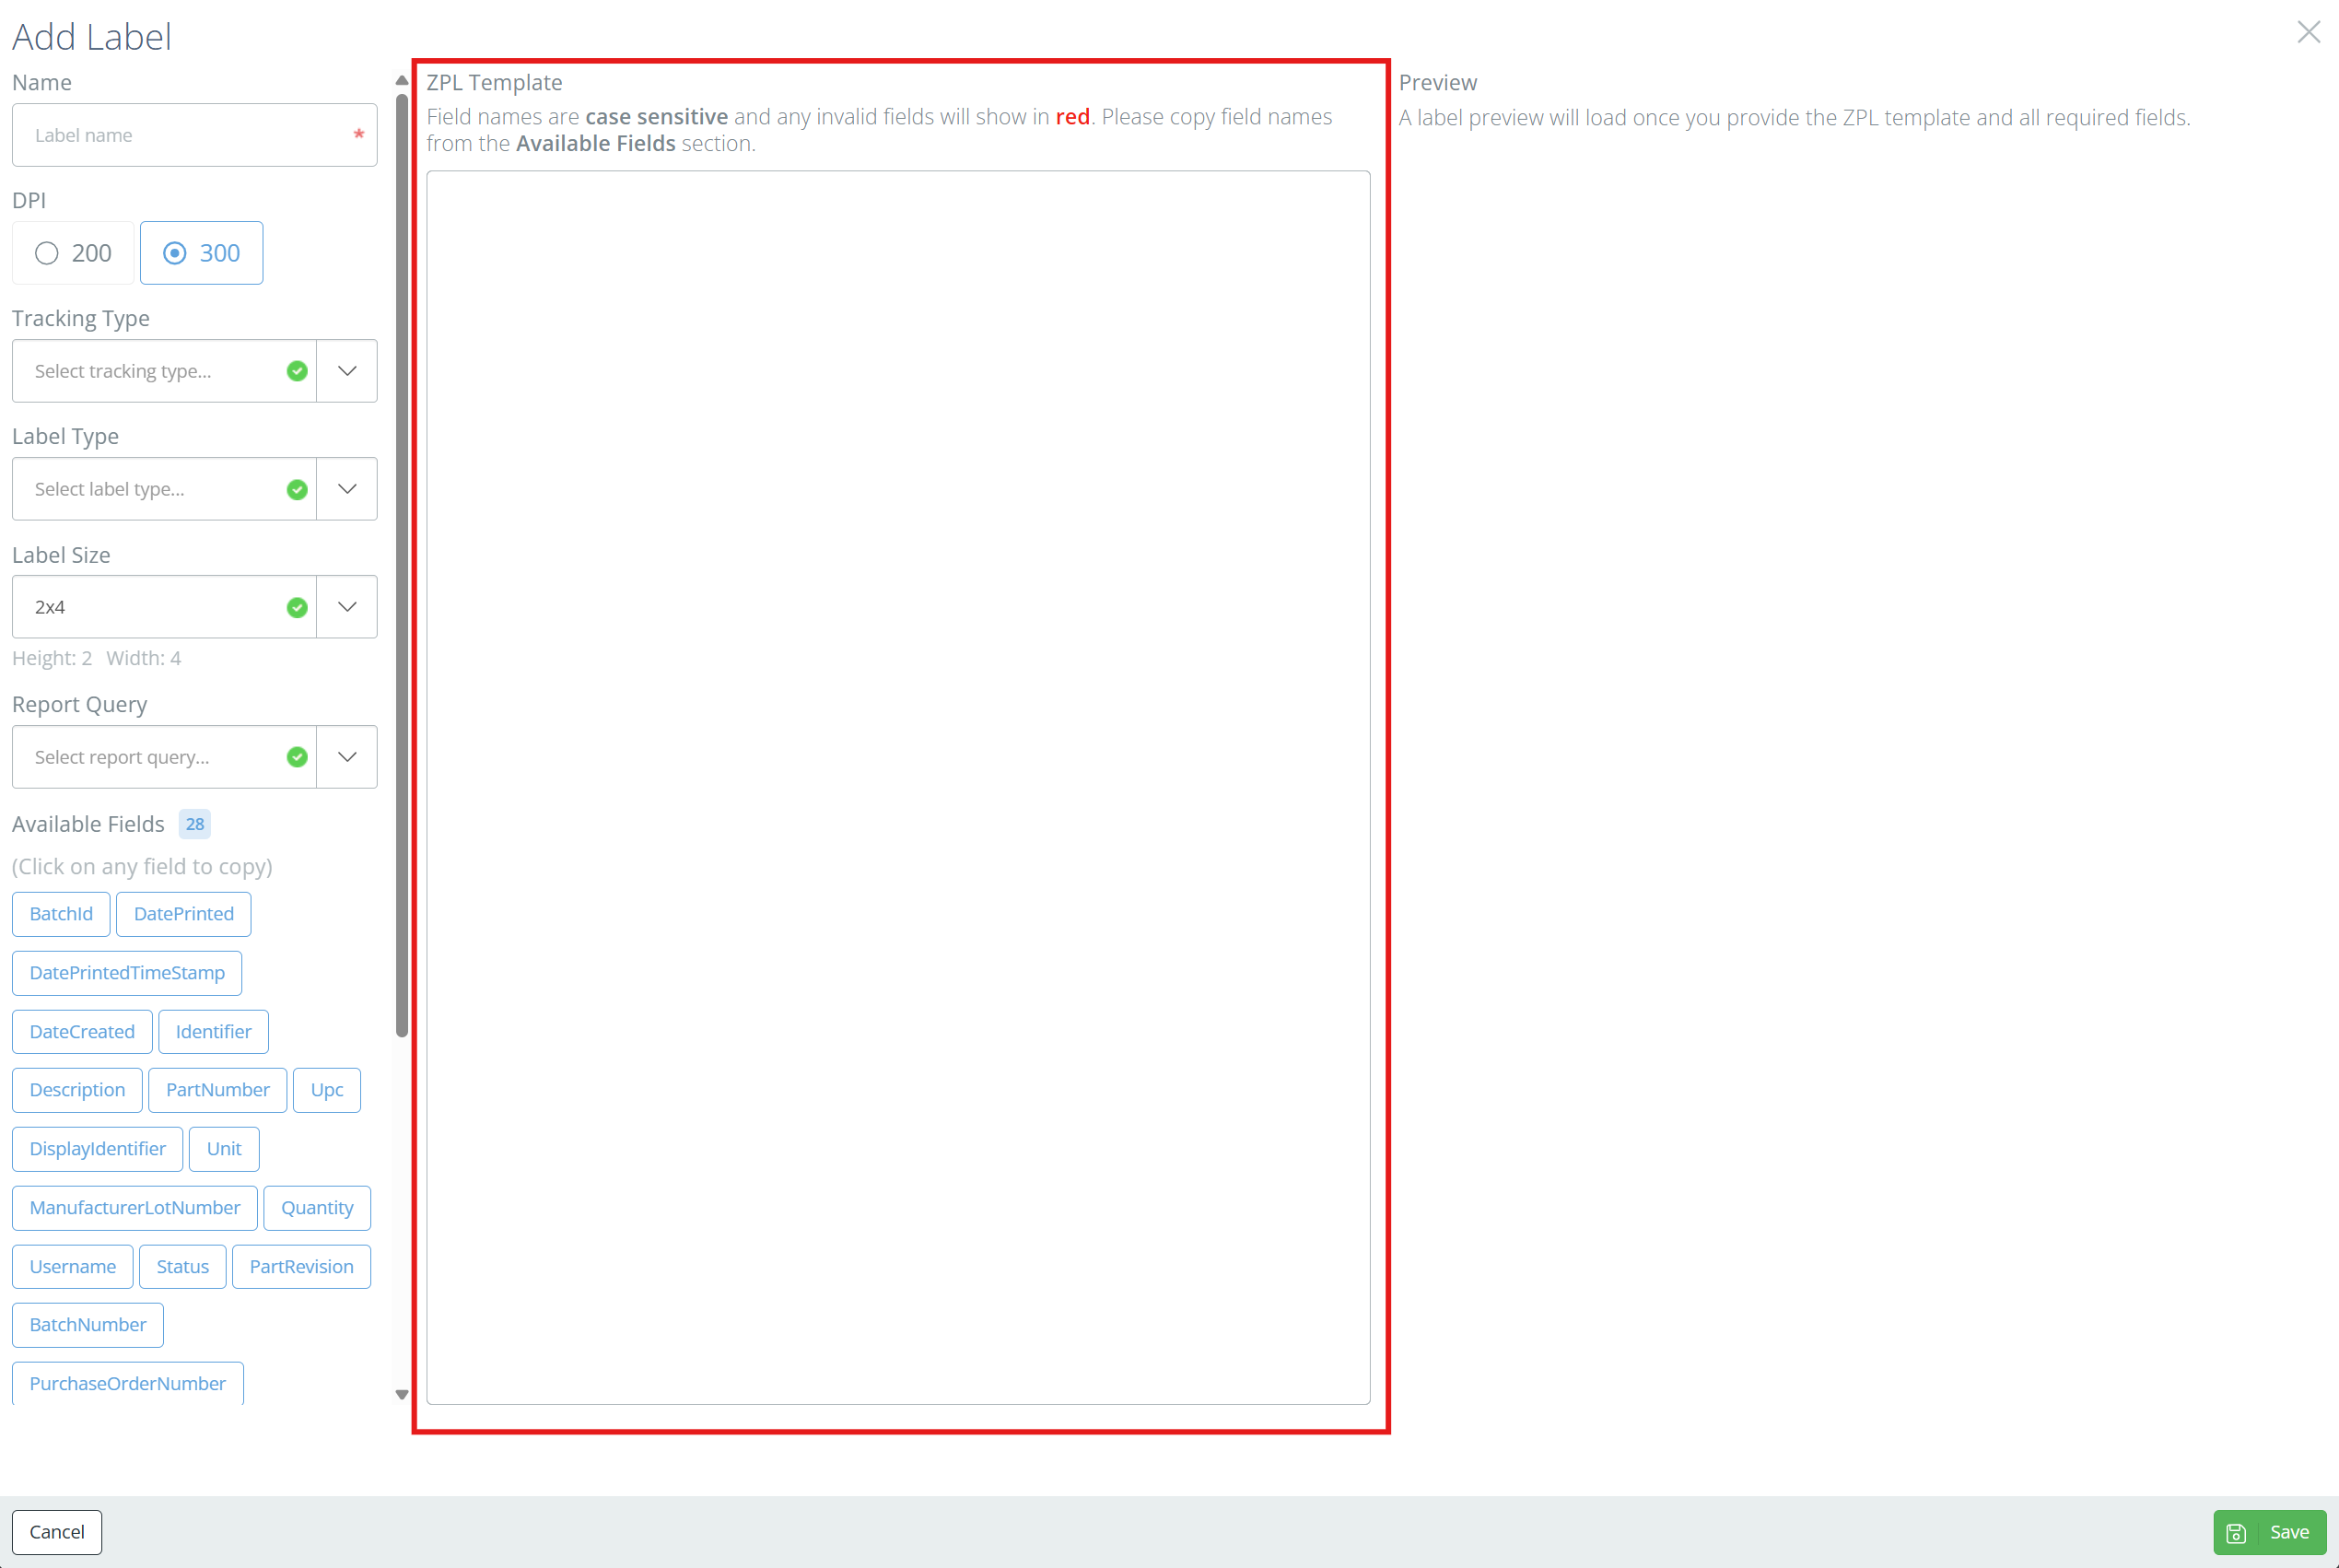
Screencap from v4.21.264.294
A preview of the label will show on the right side of the page, based on the ZPL added to the template. Confirm that everything looks correct and review any fields marked in red. Use the Available Fields list as a reference for any live fields in your ZPL.
Invalid FieldsSome fields, like {'{'}NumberOfLabels{'}'} may show as invalid if they don't appear in the Available Fields list. This won't prohibit the label from printing, but some fields on the printed label may show in curly brackets if the field was truly invalid and the relevant data was unable to be pulled. If you have any questions or issues, reach out to the DataNinja team via chat.
When done, click Save and your new label template should be available for selection on any printer with a matching dpi and label size.
Updated 3 months ago