Reason Codes
Categorize Inventory Transactions with Reason Codes
Reason Codes are individual on each DataNinja site, and can be applied to any and/or all of the Reason Code Actions. Reason Codes are way to categorize certain inventory transactions within DataNinja and tie them to specific financial accounts for improved tracking of inventory costs.
Once Codes are set up, you can view the creation/edit history of the Code as well as all of the transactions where the code has been used. To view those, click the dropdown in the Actions column and select 'History' or 'Usage', respectively.

Screencap from v4.21.264.116
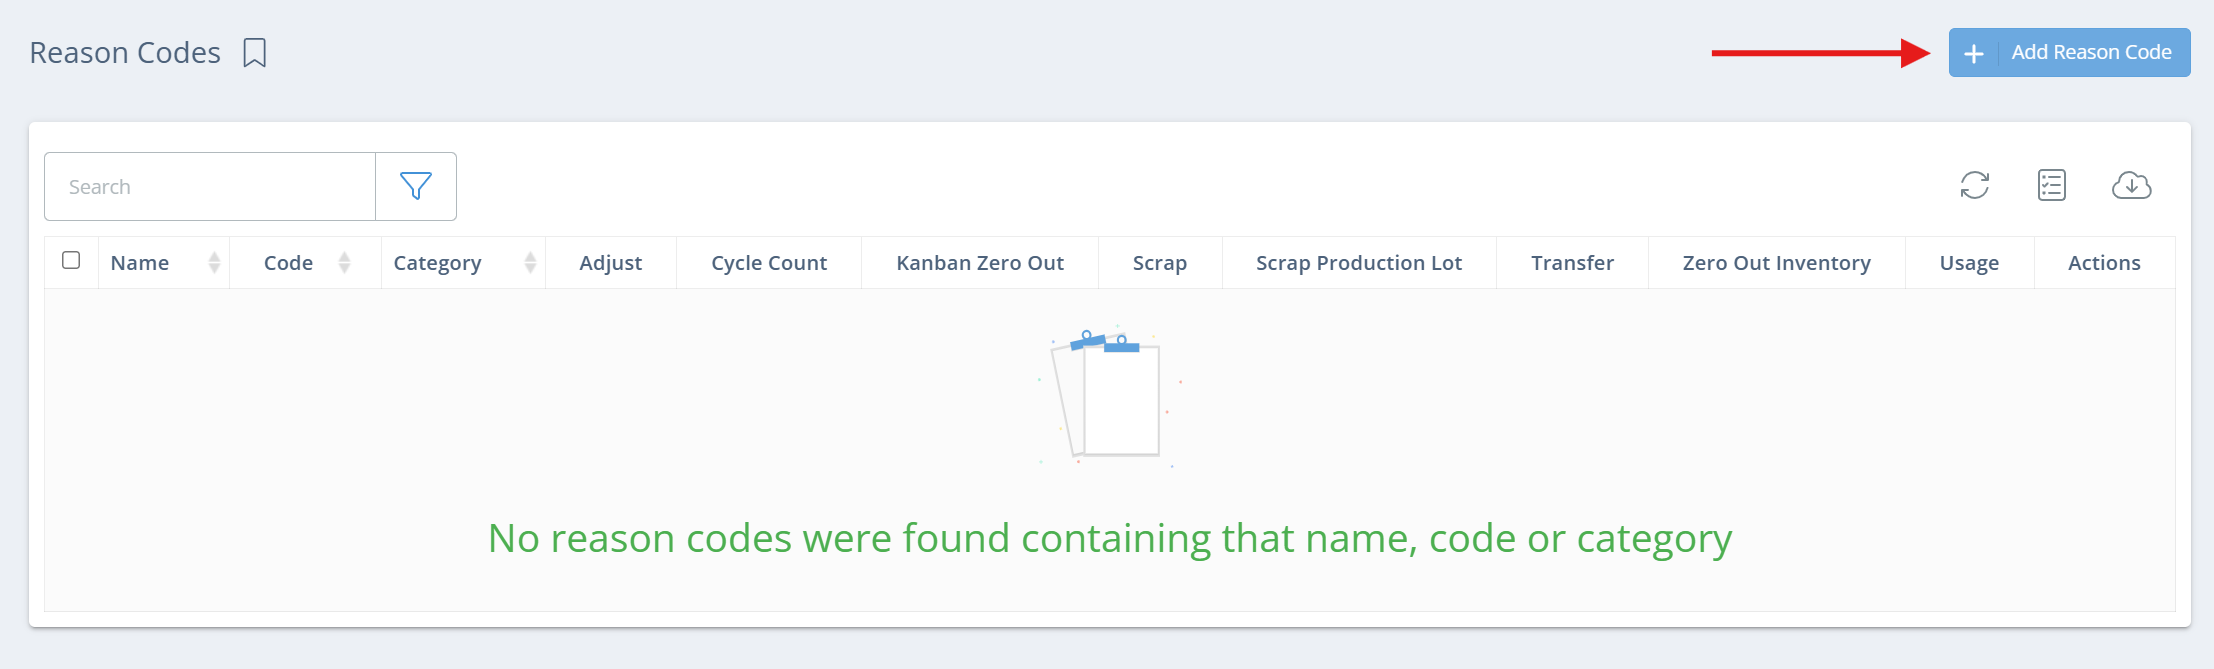
Creating a Reason Code
To create a Reason Code, click on the gear icon in the top right, click on All Lists, then click on "Reason Codes" on the new page. From the Reason Codes page, click the "Add Reason Code" button in the top right.
Screencap from v4.21.264.116
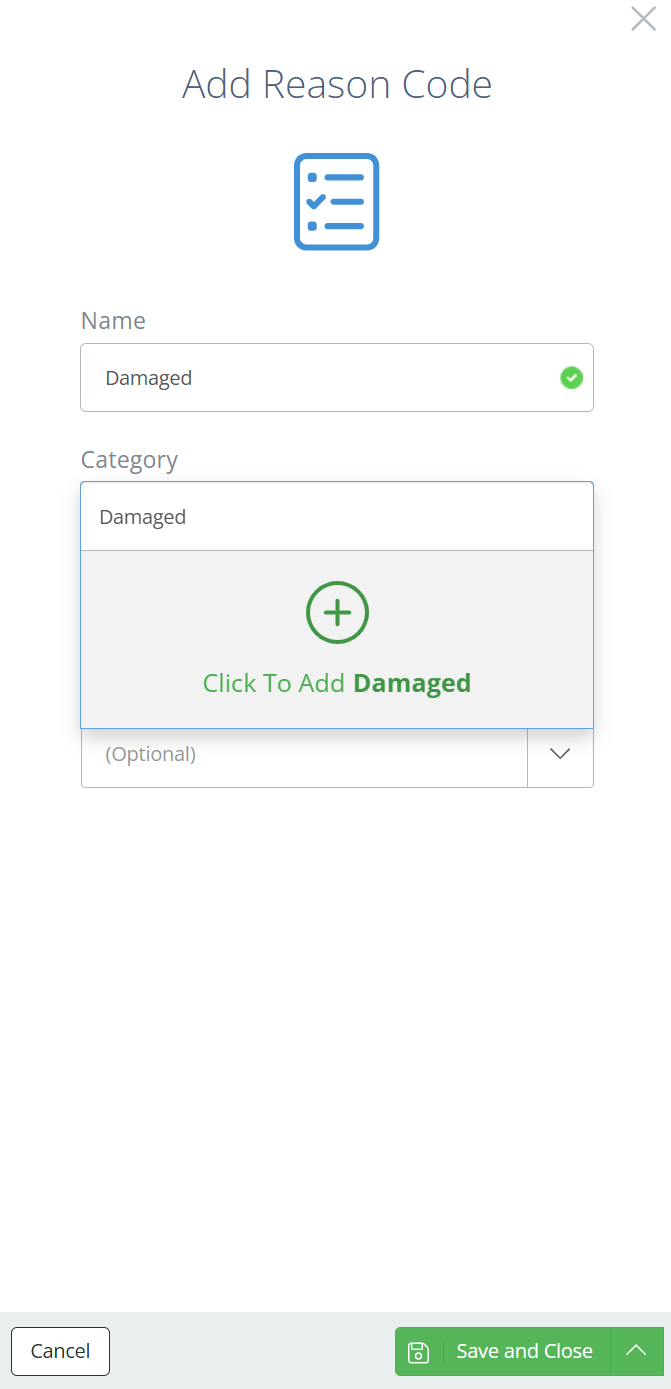
In the new aside, enter a name for the Reason Code, and select a category. If there are no categories, or you want to create a new one, just type the name of the category and click in the dropdown to create it.
Screencap from v4.21.264.116
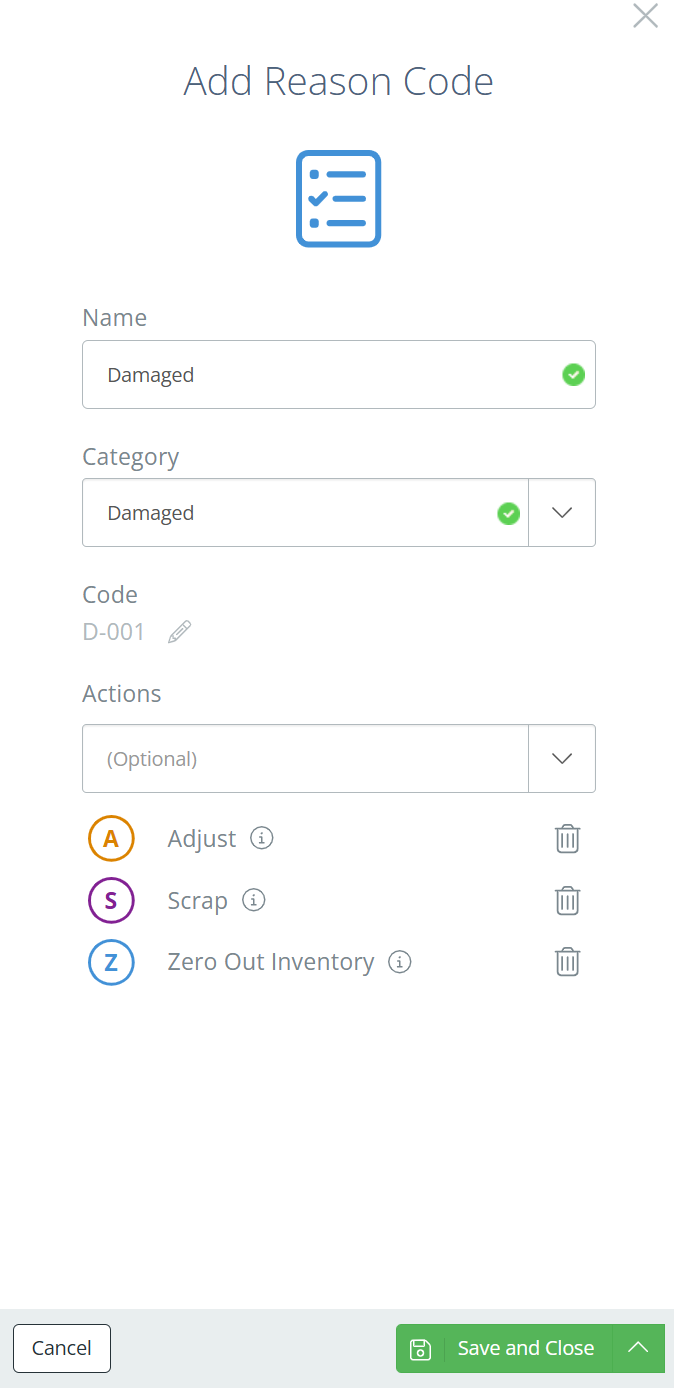
Now select the actions you want the Reason Code to be available during. Note that selecting at least 1 action will impact future transactions of that type, and the adjustment aside will then have the option to select that Reason Code.
Screencap from v4.21.264.116
For example, if the Reason Code is active on 'Adjust', then the next time an adjustment is attempted, an additional field will show in the aside, as shown below.
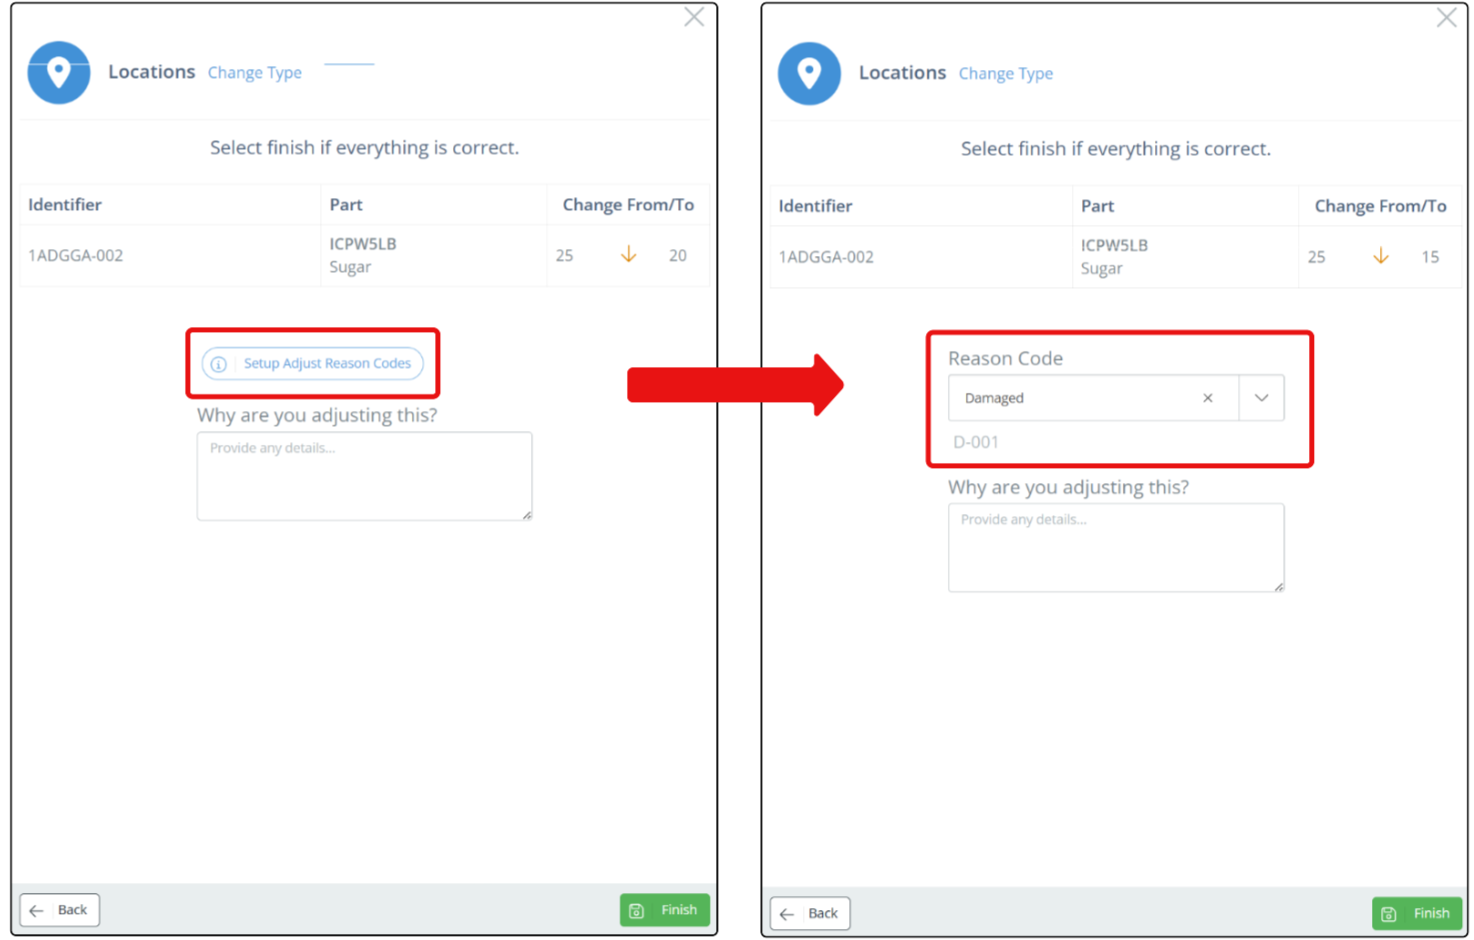
Screencaps from v4.21.264.116
If an account is specified on the Code, then that account will show any financial impact from the completed transaction.
Adding a Financial Account
Once the Reason Code(s) are set up, you can edit the Actions that each Code is used on by clicking on the '+' button in the corresponding column, or the green check mark if the Code is already active.
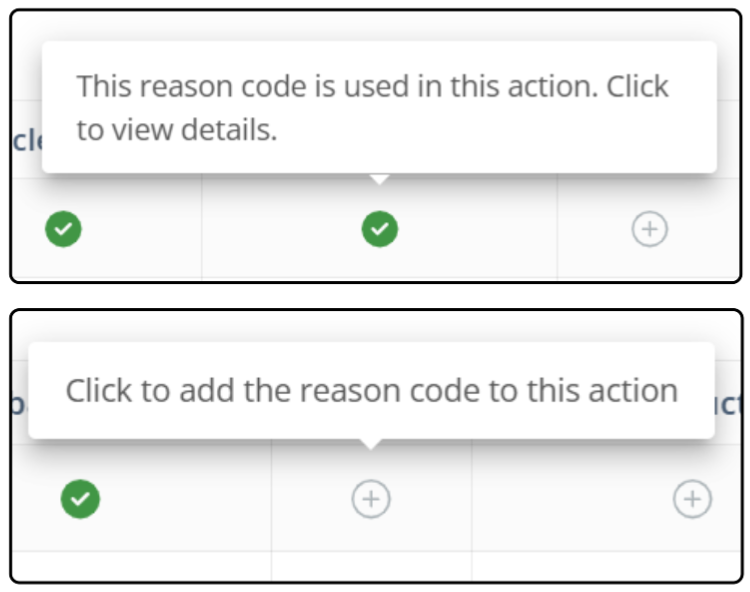
Screencap from v4.21.264.116
An aside will open, for managing the Reason Code Action. This aside can also be viewed by clicking "Edit" in the Actions column on the Reason Code Actions page (see the Reason Code Actions guides page). In the aside, you can select whether the Action requires a note, and which Codes are associated with the Action. A default Code can be selected by clicking the star icon under the Code, and the star will turn green when set as the default.
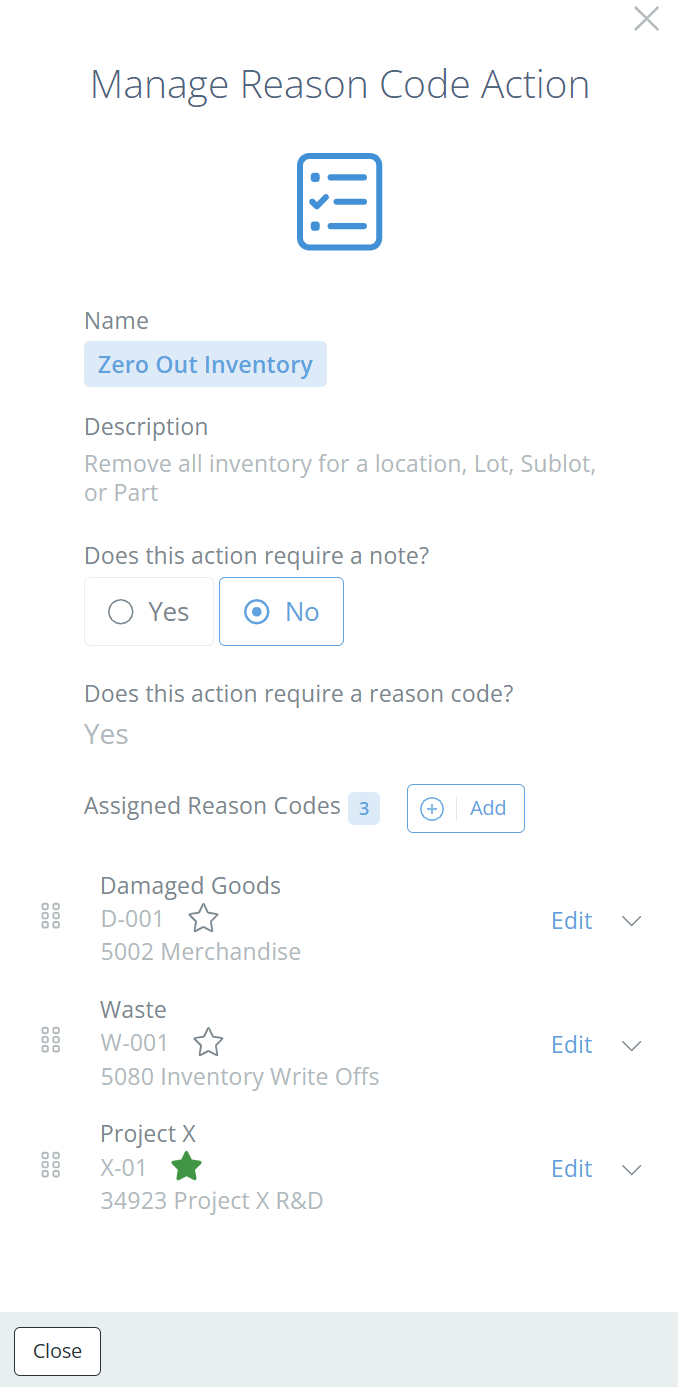
Screencap from v4.21.264.116
Find the Reason Code you want to make changes to, then click "Edit". In the new Reason Code aside, you can again choose if the Code should be the default for the Reason Code Action, but you can also select a financial account to associate with Reason Code. Any account within your Chart of Accounts should be available for selection.
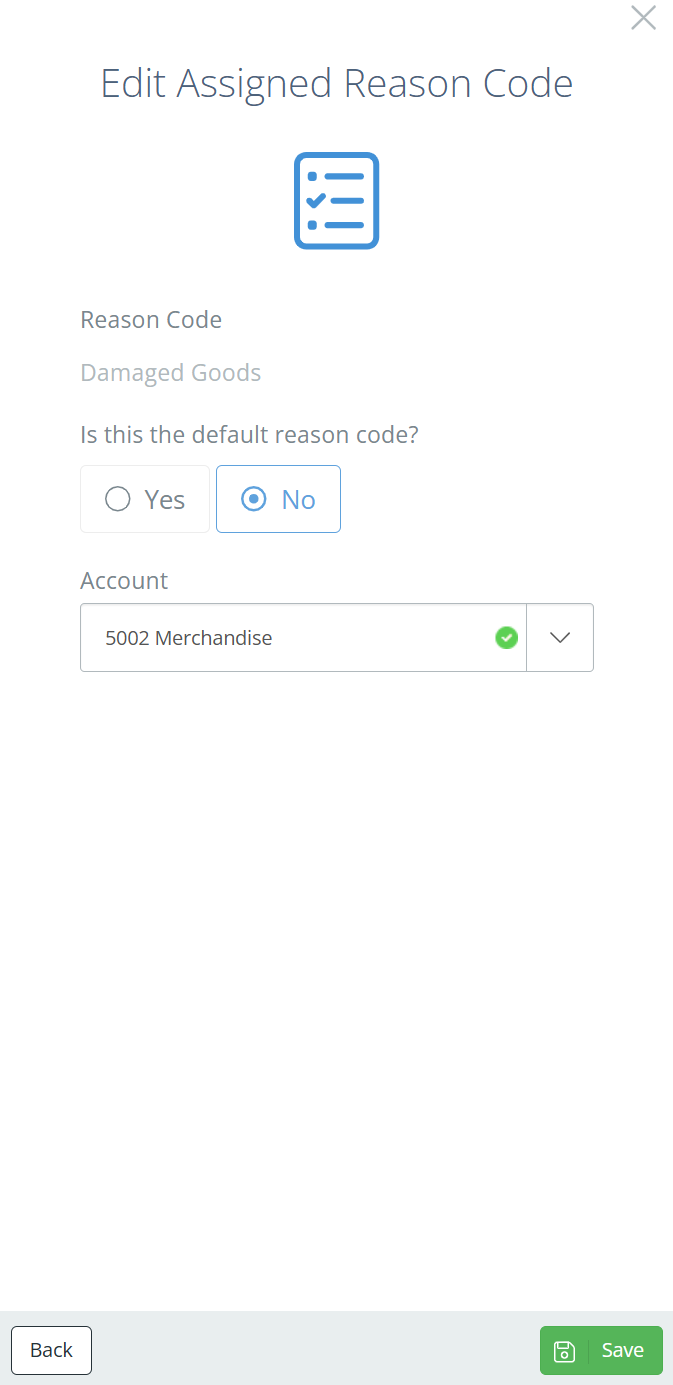
Screencap from v4.21.264.116
The account selected will determine which financial account is hit when transactions marked with this Reason Code are completed. This can help spread the load from inventory shrink and make tracking financial transactions easier. If no account is selected, the transaction will hit the default account- either inventory shrink or an account in the Company Settings, depending on the transaction type.
You can also access this aside from the Reason Code Actions page; see the Reason Code Actions page for more information.
Updated 5 months ago