
Inspection Configuration and Workflow
Build, maintain, and complete incoming inspection configurations
Español: Lee esta página en español.
Français : Consultez cette page en français.
Create a Blank Inspection Configuration
Each inspection on a part typically requires 3 things: approval steps, inspection criteria, and attributes. Below is an example of an approval step with 1 inspection criteria and 3 attributes.
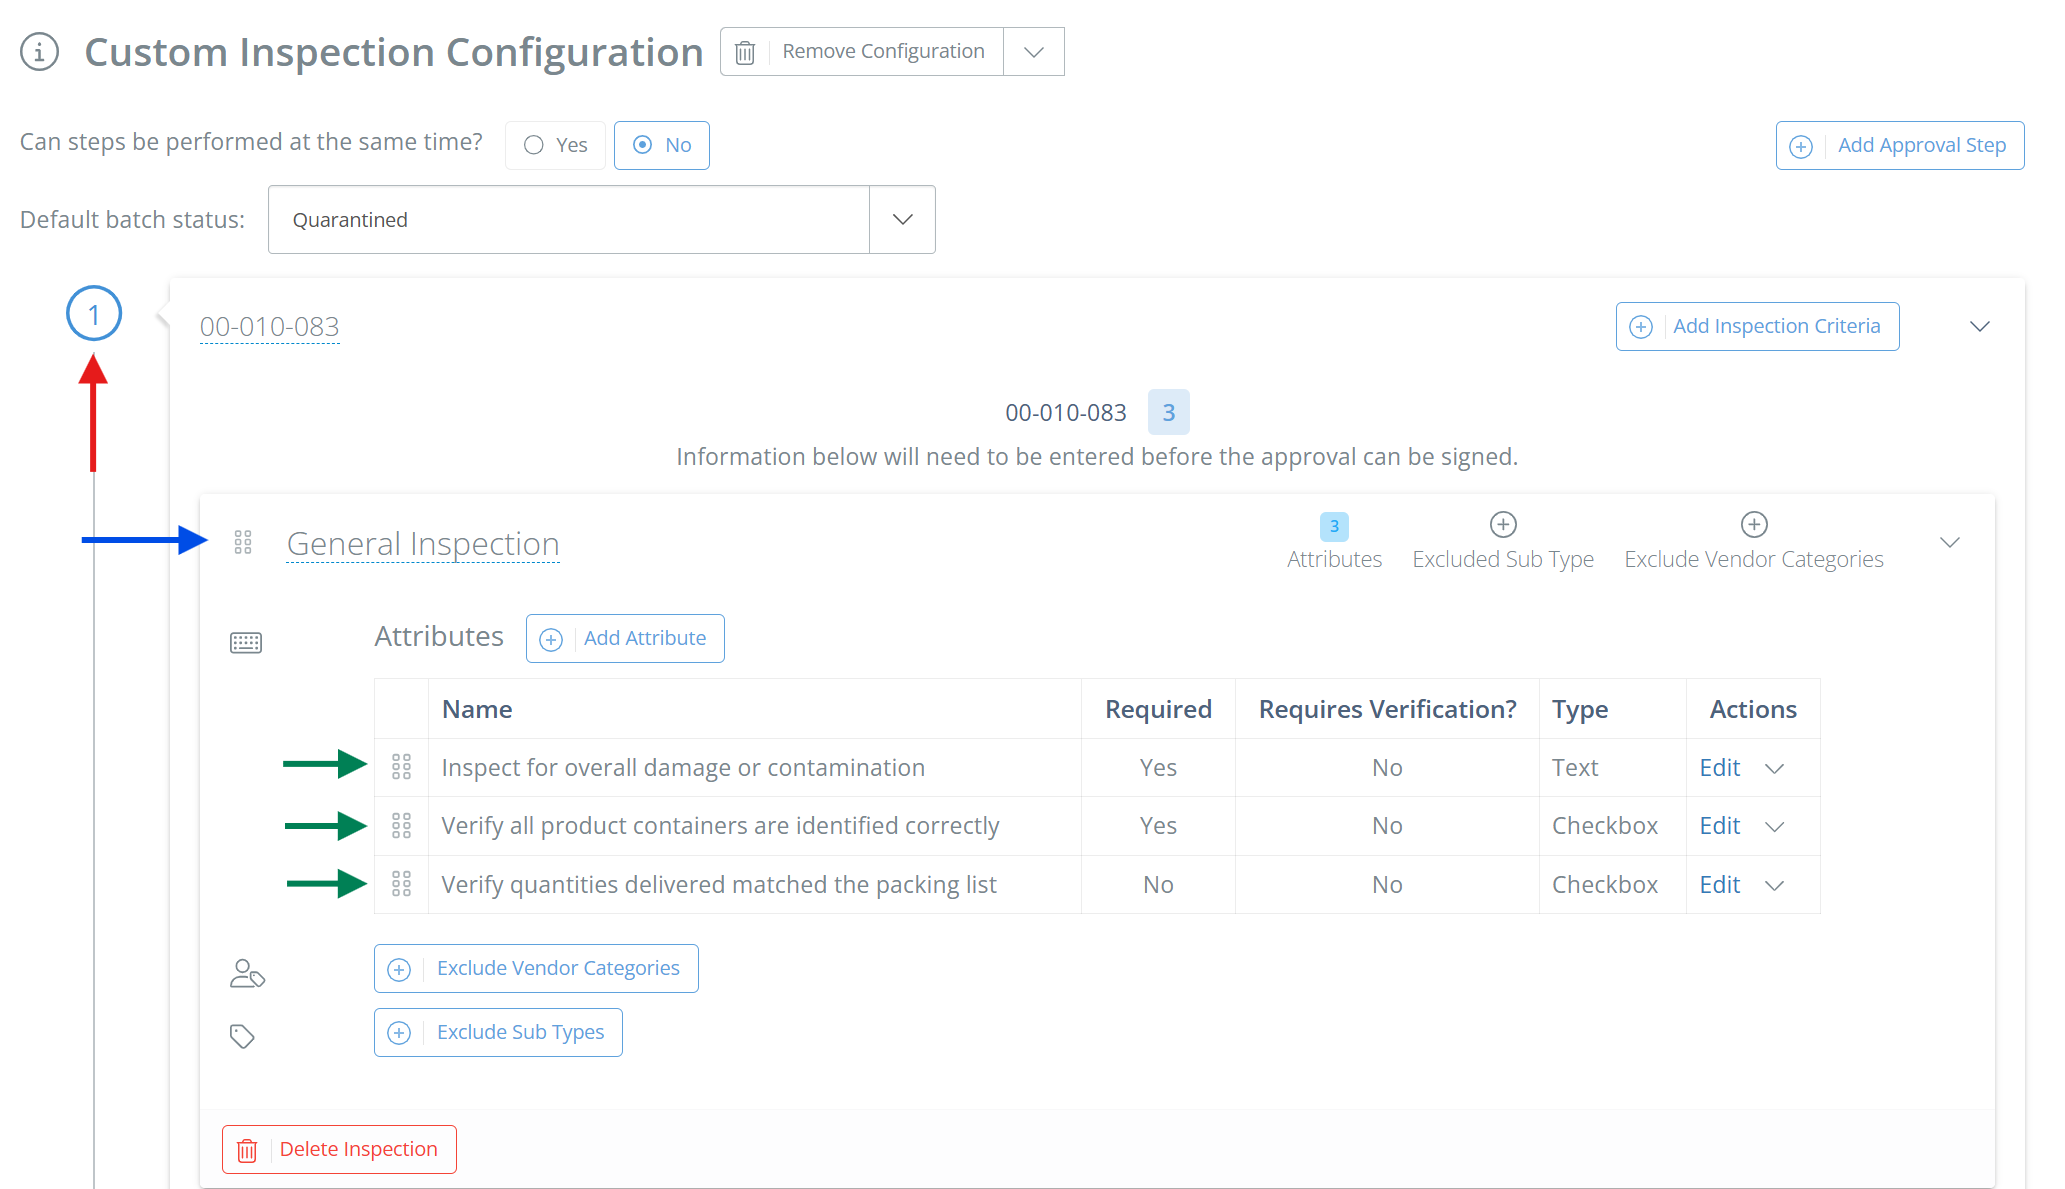
Approval step number (red), inspection criteria (blue), and attributes (green)
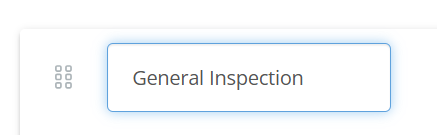
Easy EditsIf you see a blue-dotted line beneath words or numbers, that means the field can be edited just by clicking on the information! For example, if you were to click on "General Inspection" in the screenshot above, you would be able to edit the inspection criteria name.
Add Approval Step(s)
When you start creating a blank inspection on a part, the first step is to create an approval step. In the sidebar that appears after clicking "Create Blank Inspection", set the name for the approval step, then specify which role(s) can complete the approval and hit "Save".

The sidebar will close and you should now see the approval step on the page. You should now be able to see the "Default batch status" field- DataNinja will default to "Quarantined". This is the batch status that received batches of this part will be set to upon receipt, so be sure to change it from "Quarantined" if needed.
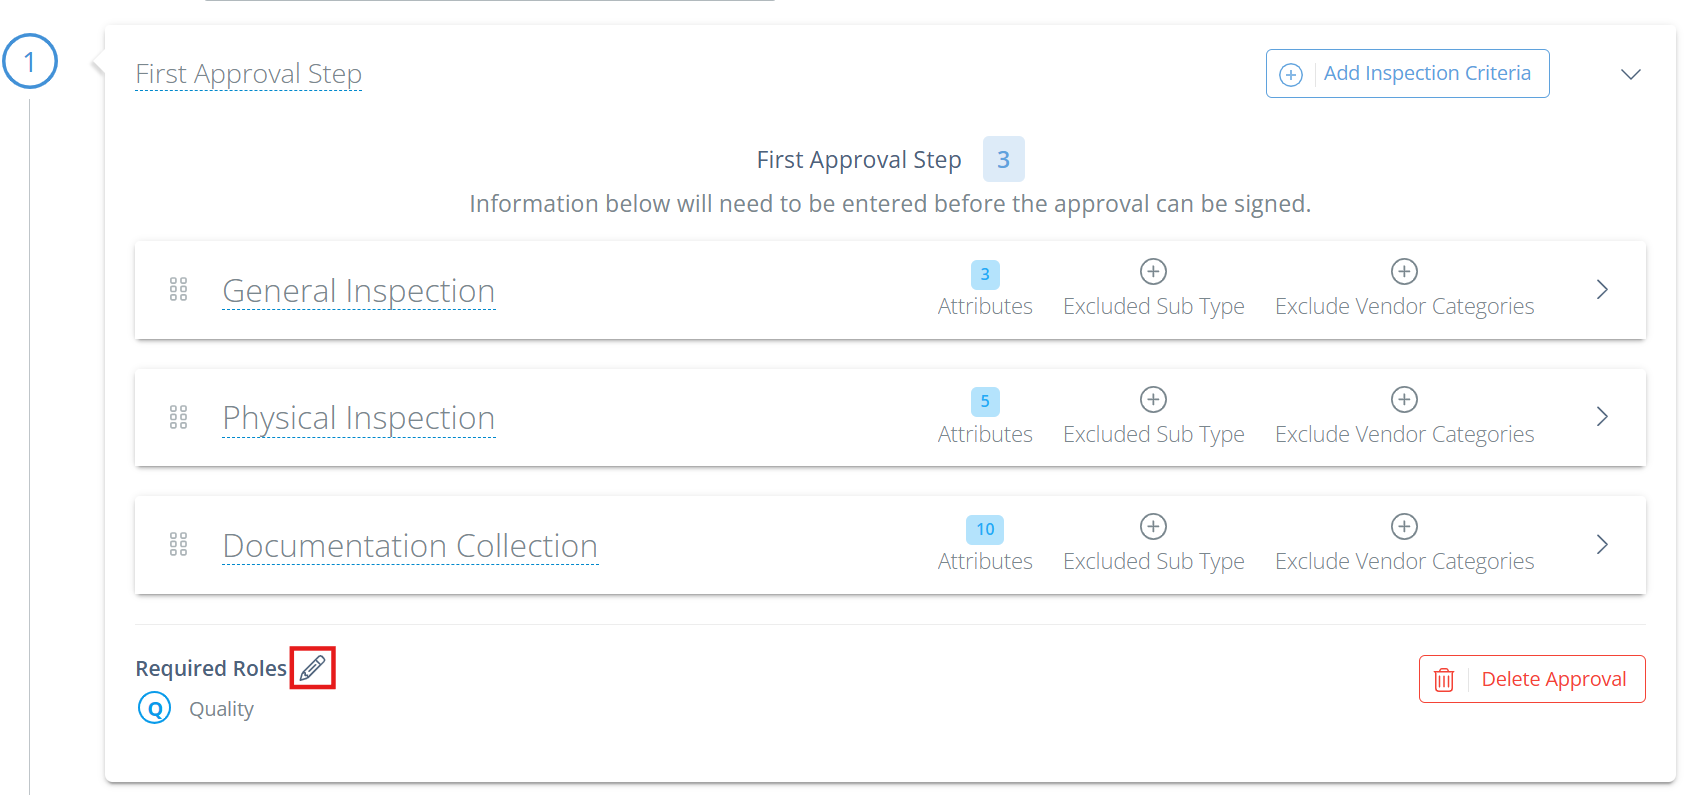
To edit the role(s) that need to sign off on a particular approval step, click the pencil icon next to "Required Roles".
Approval Step Completion Order
DataNinja has the capability to restrict the order in which approval steps are completed. Approval steps will show in different tabs when completing an inspection.

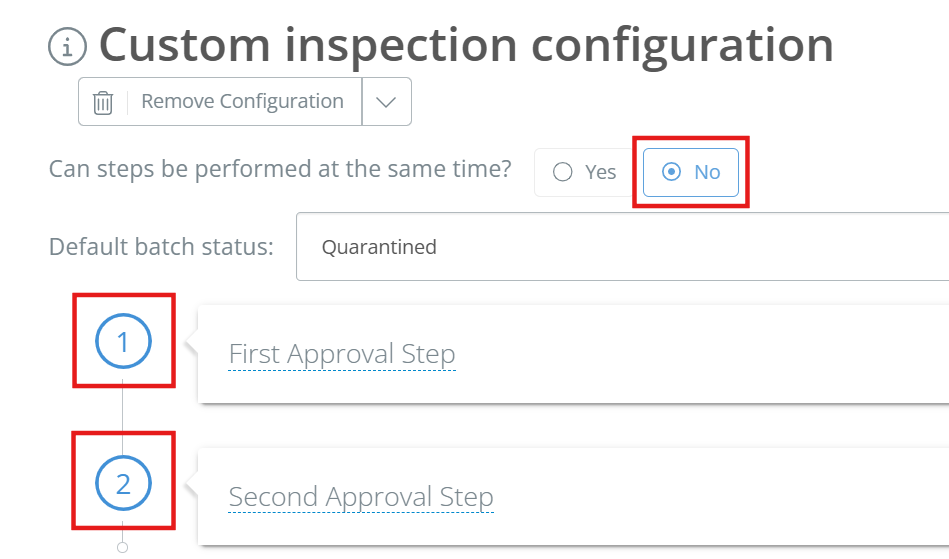
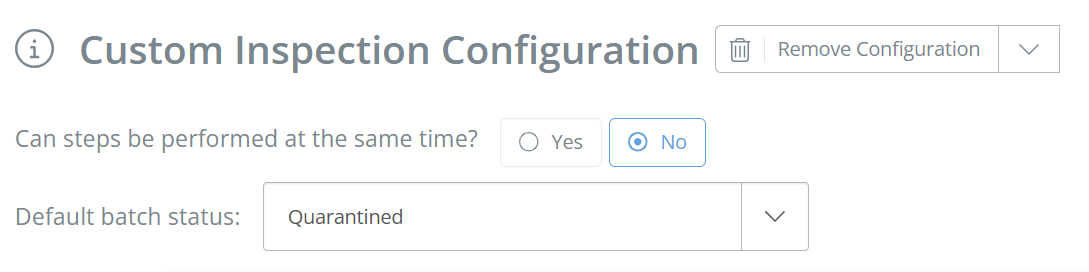
If "No" is marked next to "Can steps be performed at the same time?" then approval steps must be completed in sequential order. Until the first approval step is completed and signed, the next step will not show.
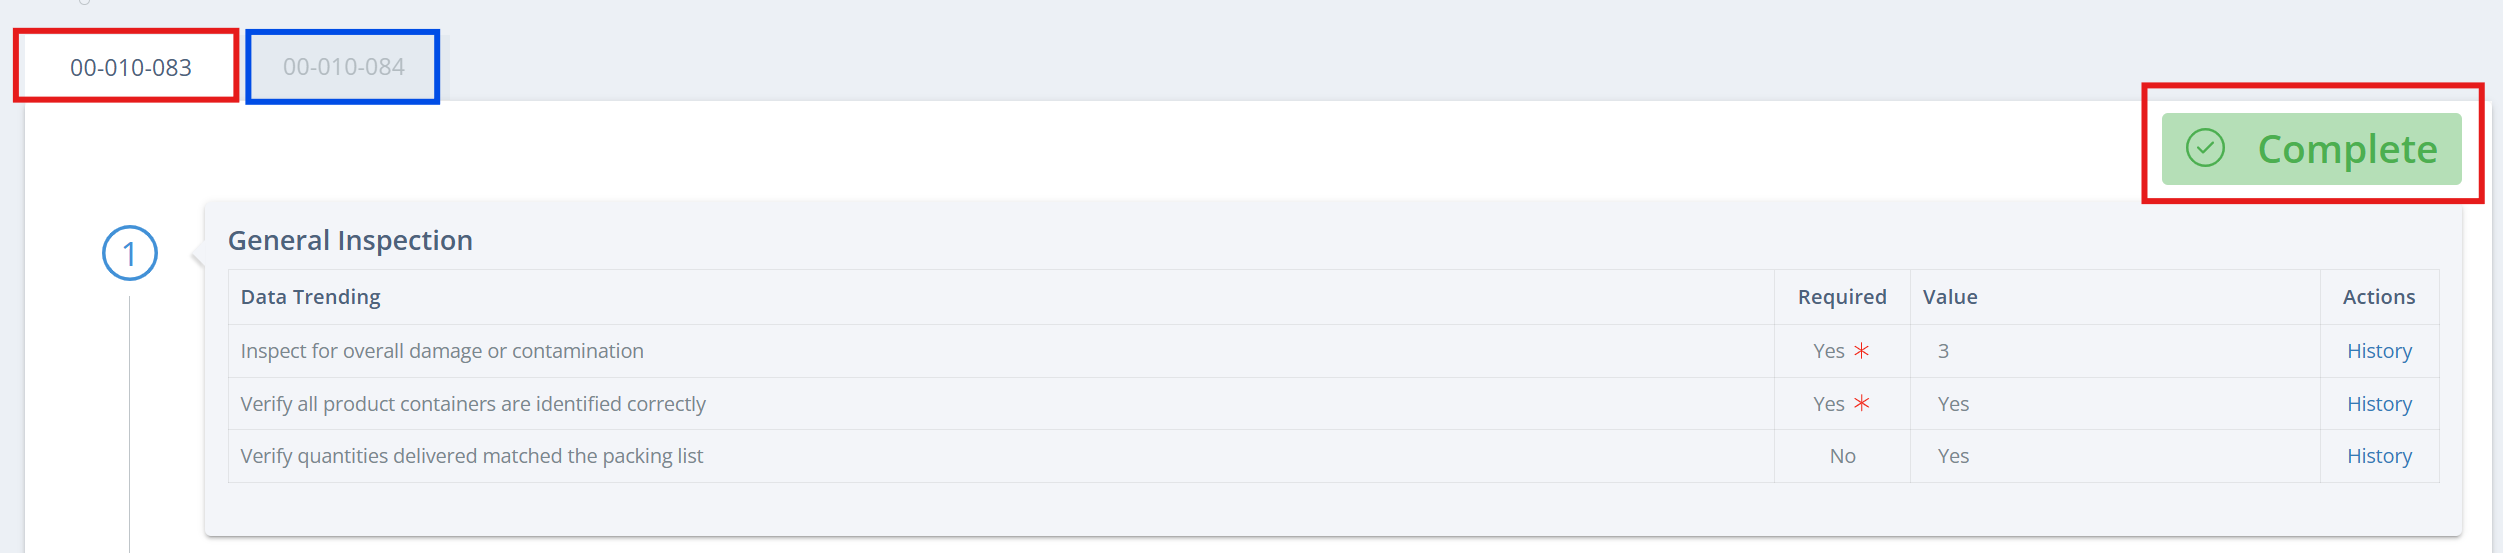
Approval step one completed (red), approval step two available to complete (blue)
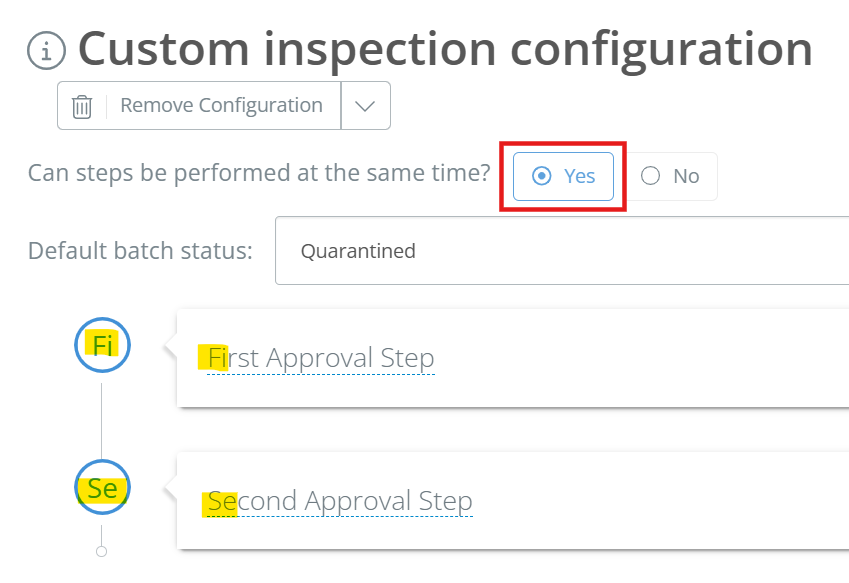
If "Yes" is selected, then any approval step can be updated/completed, regardless of sequential completion. Approval steps will still show in different tabs and require separate signatures, as pictured above.
Why Isn't There a Number Next to the Approval Step?If you have allowed approval steps to be completed at the same time, DataNinja will pull the first 2 letters of the approval step name and put them into the blue circle to the left, as seen below.
If you require sequential completion of the approval steps, sequential numbers (starting with 1) will show in the blue circles.
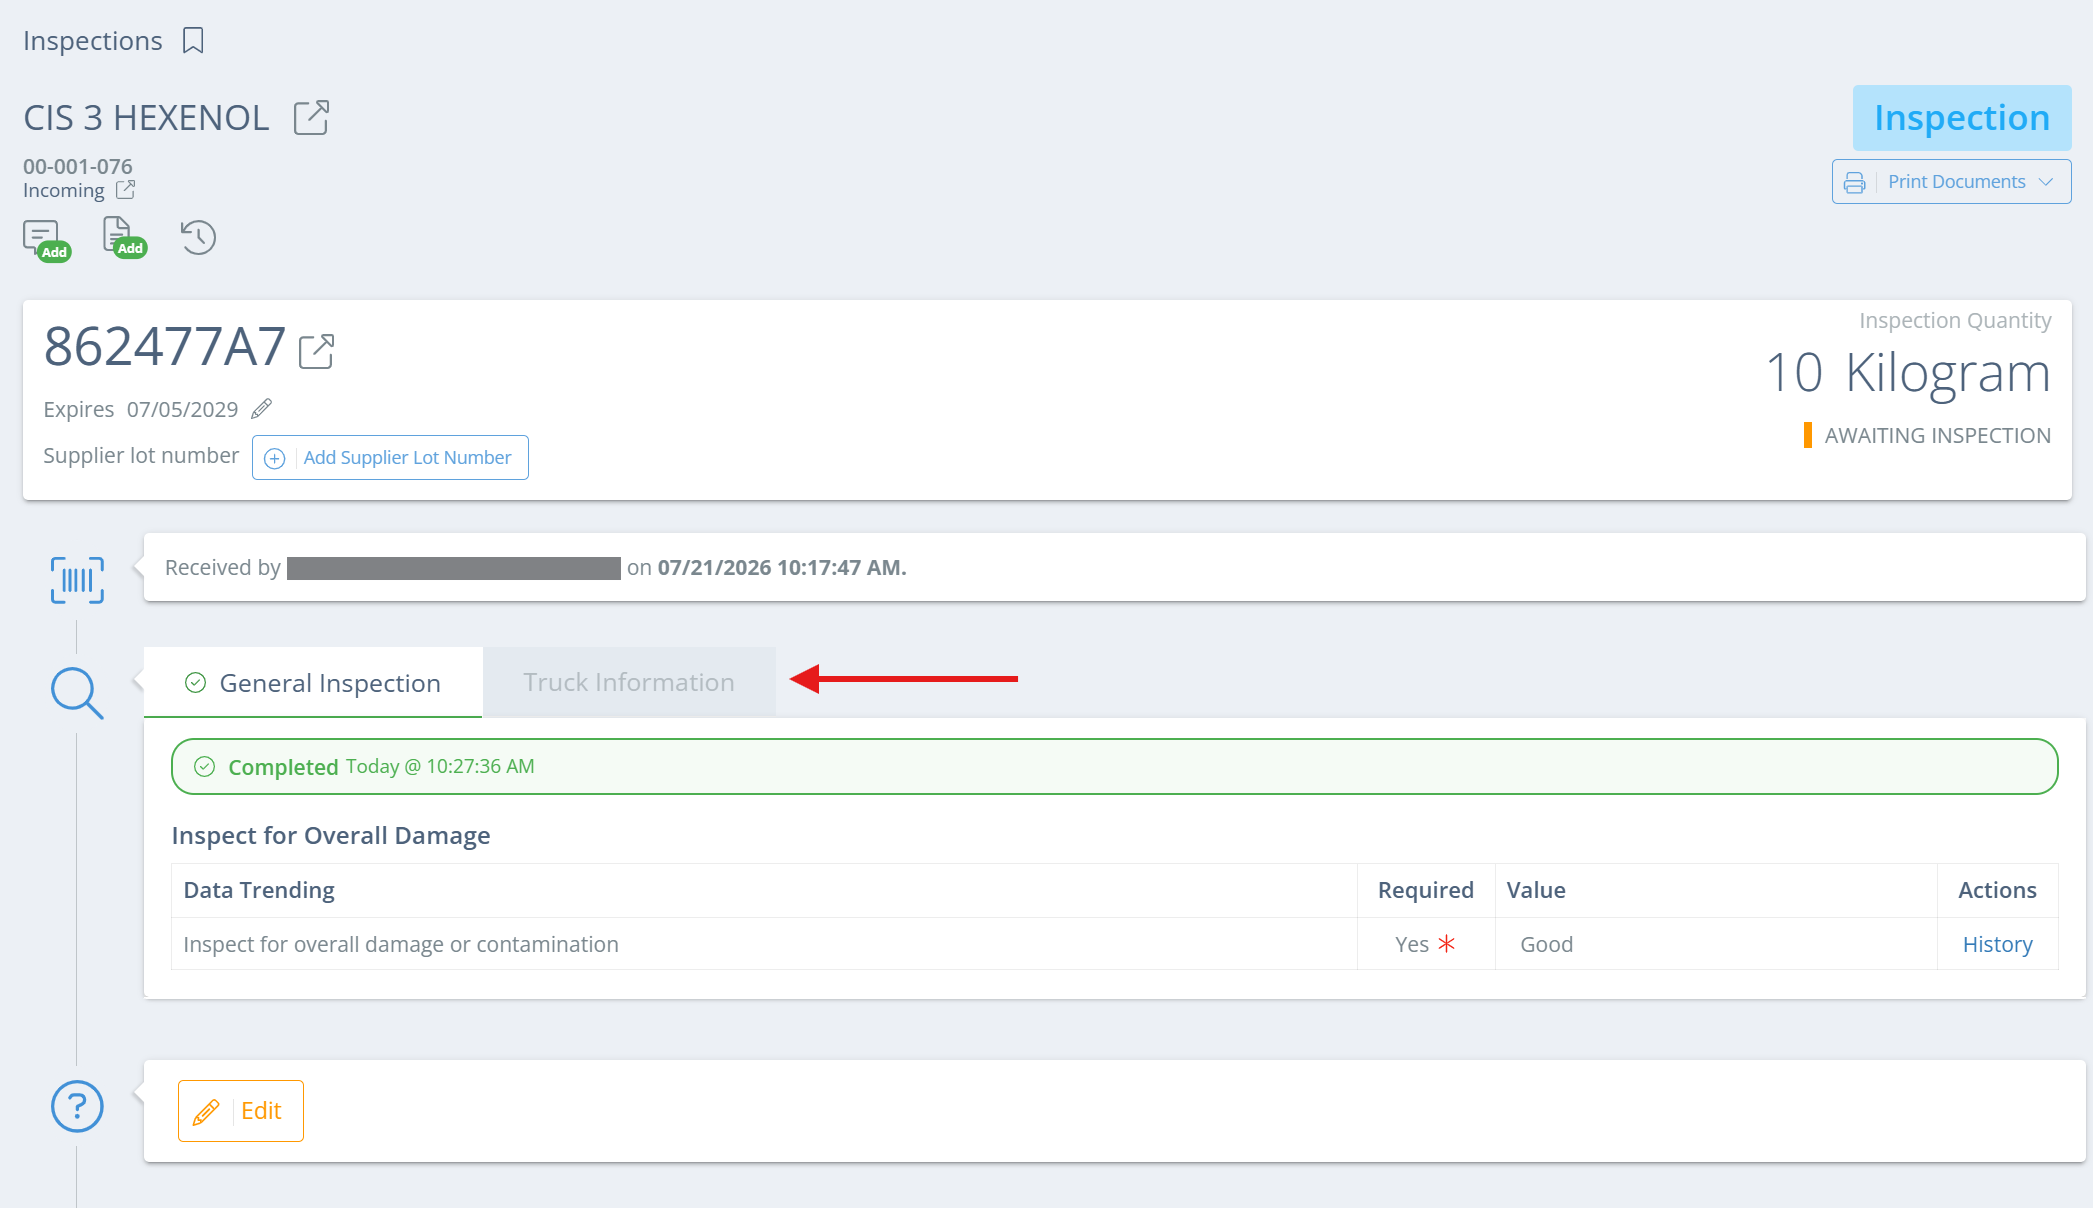
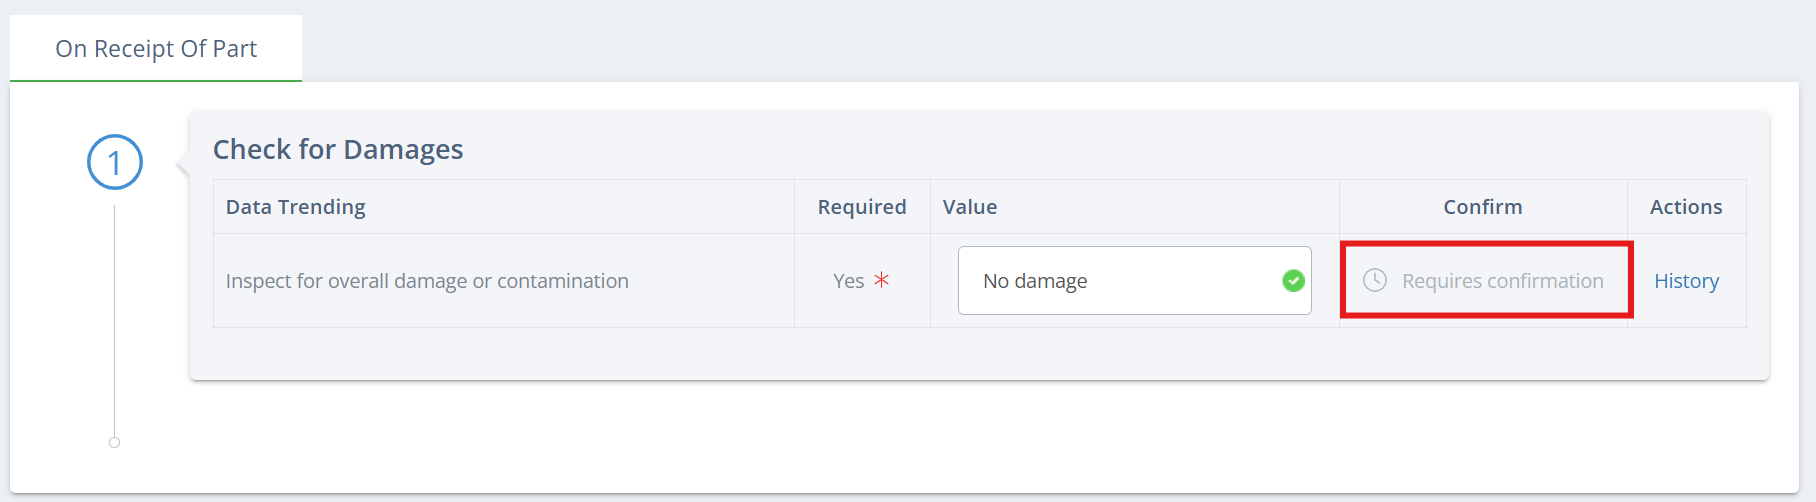
Note: this is only on the Inspections tab of a part. When actually completing the inspection, approval steps will be shown in tabs, with the tabs displaying the approval step name, as shown below. On a linear inspection, the next approval step tab will only show after the previous one has been signed.
Add Inspection Criteria
Click "Add Inspection Criteria" and enter the name for the criteria. The new inspection criteria should now show on the Inspections tab.
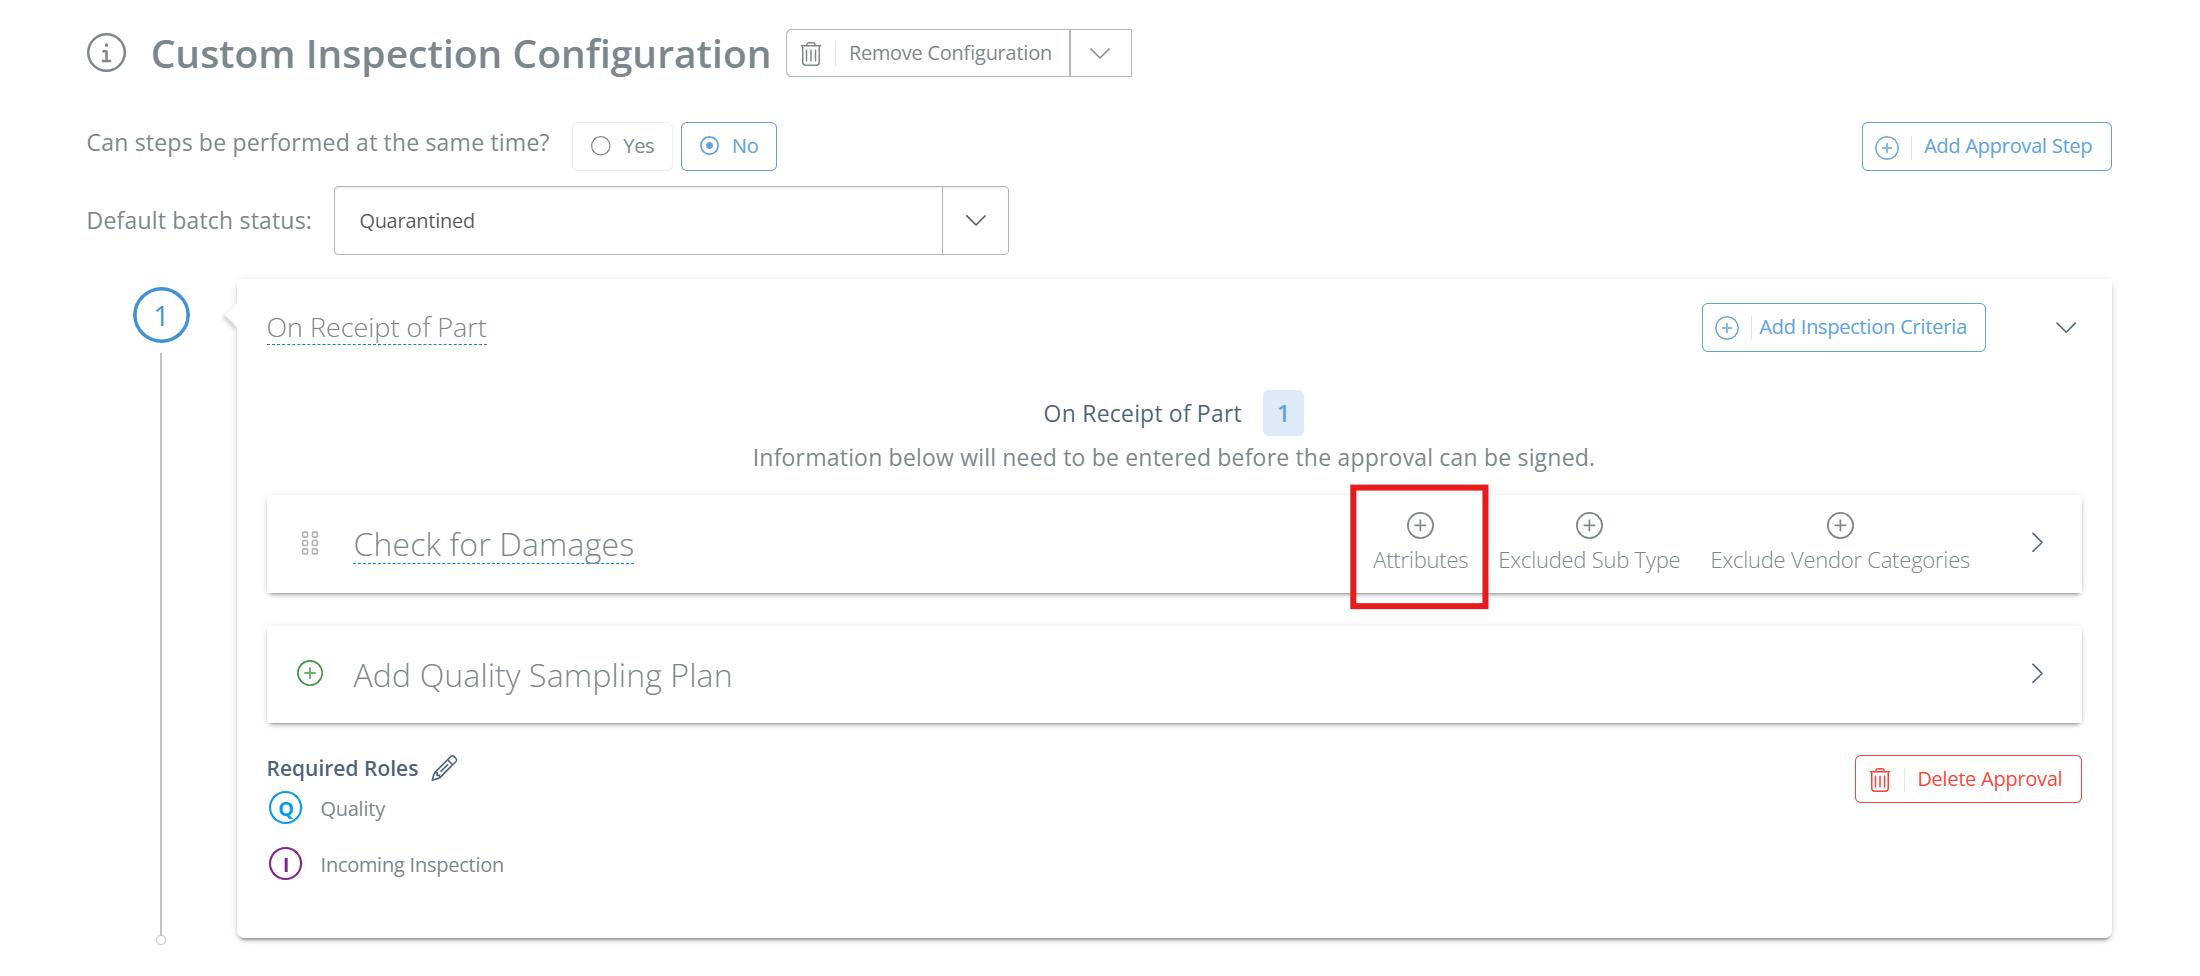
Notice that the inspection criteria doesn't have any attributes- this is what you will add next.
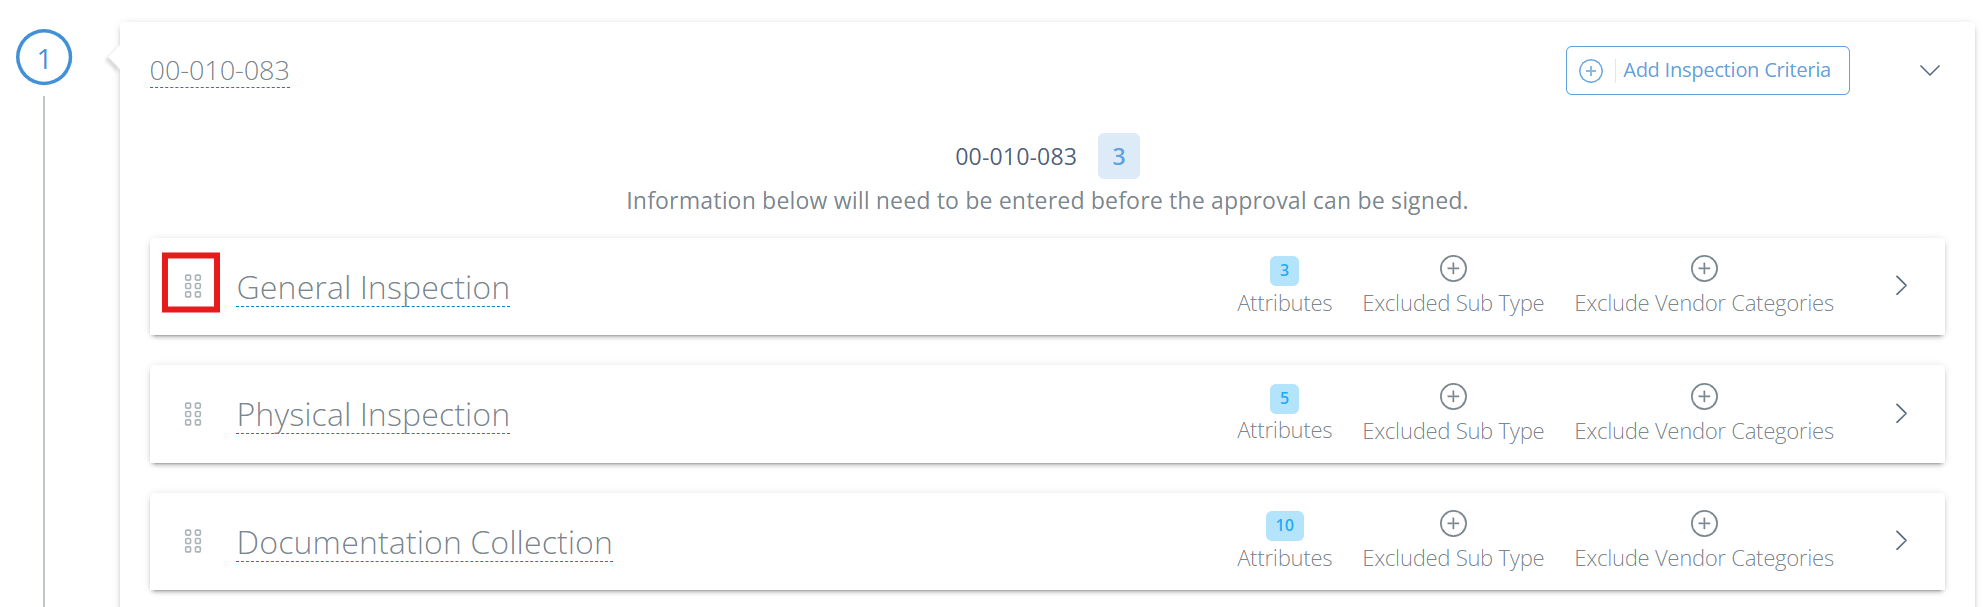
Changing Inspection Criteria OrderYou will see 6 dots to the left of the criteria name- you can click and drag on these dots to change the order of the inspection criteria.
If you have multiple approval steps, you can also click and drag (not copy) criteria between approval steps.
Add Attributes
Click on the Attributes button (or the arrow on the far right) and the inspection criteria will expand. Click "Add Attribute" and a new sidebar will open- enter a name for the attribute, then select if the attribute is required, if it needs verification, and the type.
Second Person VerificationFor each attribute on a Process Step, you can now require a second person to verify that the attribute was completed correctly. Just select "Yes" under "Requires Verification?" when setting up or editing the attribute. Be aware that this means that a second user with a different DataNinja login must hit "Confirm" on the attribute in order to complete it.
Types of Inspection Attributes
Attributes are specific actions/recorded actions needed to complete each inspection criteria.
| Attribute Type | Monitors | Alerts If |
|---|---|---|
| Check Box | Completion | Not Checked Off OR Incorrect Choice |
| Date Field | Date Entry | Blank OR Not Correct Format |
| File | Upload Success | No File/Image Uploaded |
| Number Field | Number Entry | Blank OR Outside Threshold |
| Select Box | Checked Entries | No Boxes Marked OR Incorrect Choice(s) |
| Text Field | Text Entry | Blank |
| Weight | Weight From Connected Scale | Blank OR Outside Threshold |
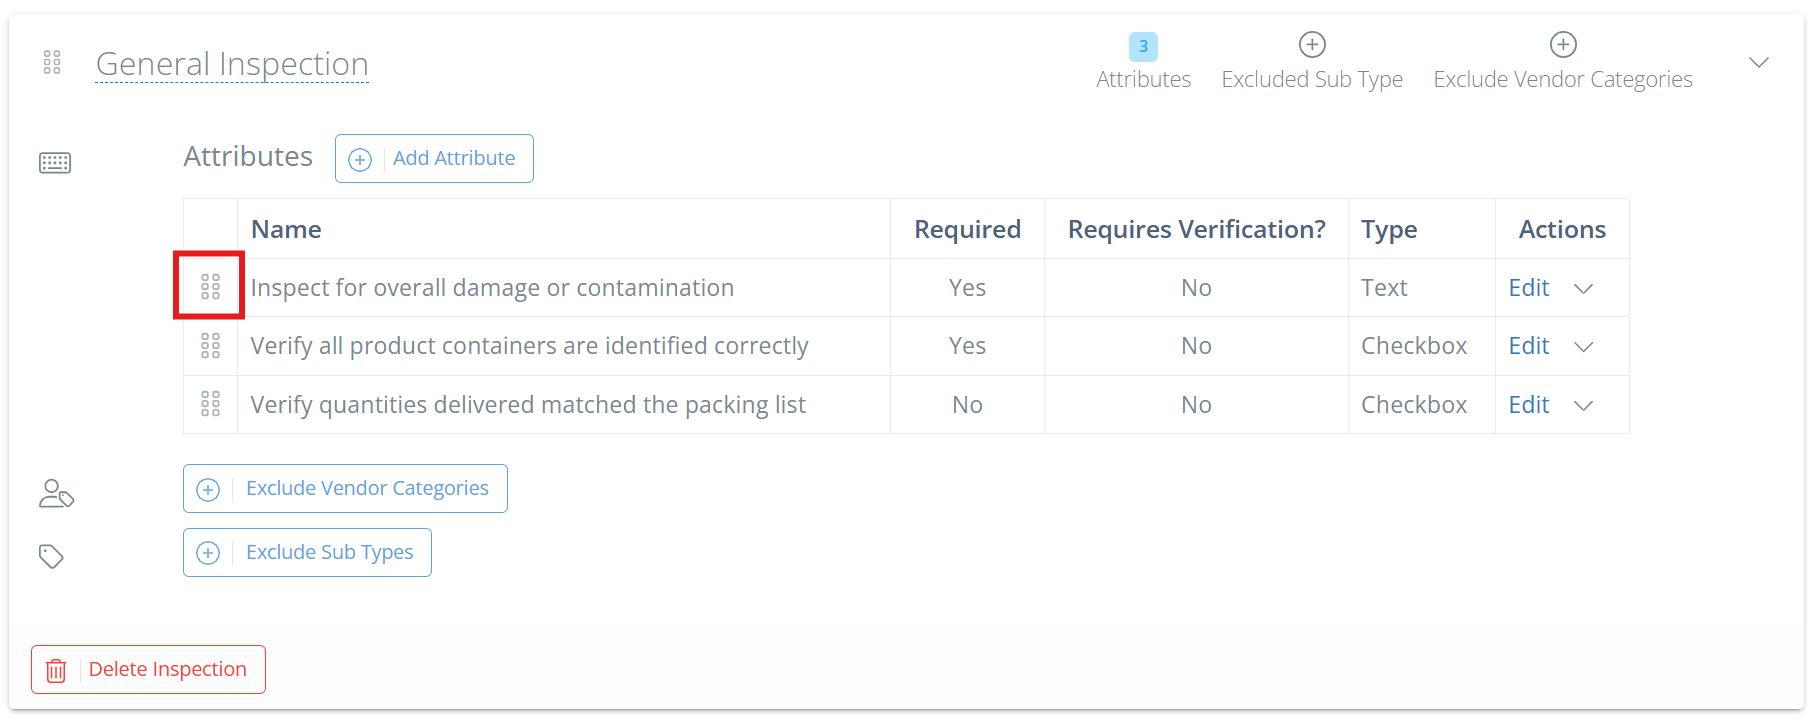
Changing Attribute OrderYou will see 6 dots to the left of the attribute name- you can click and drag on these dots to change the order of attributes.
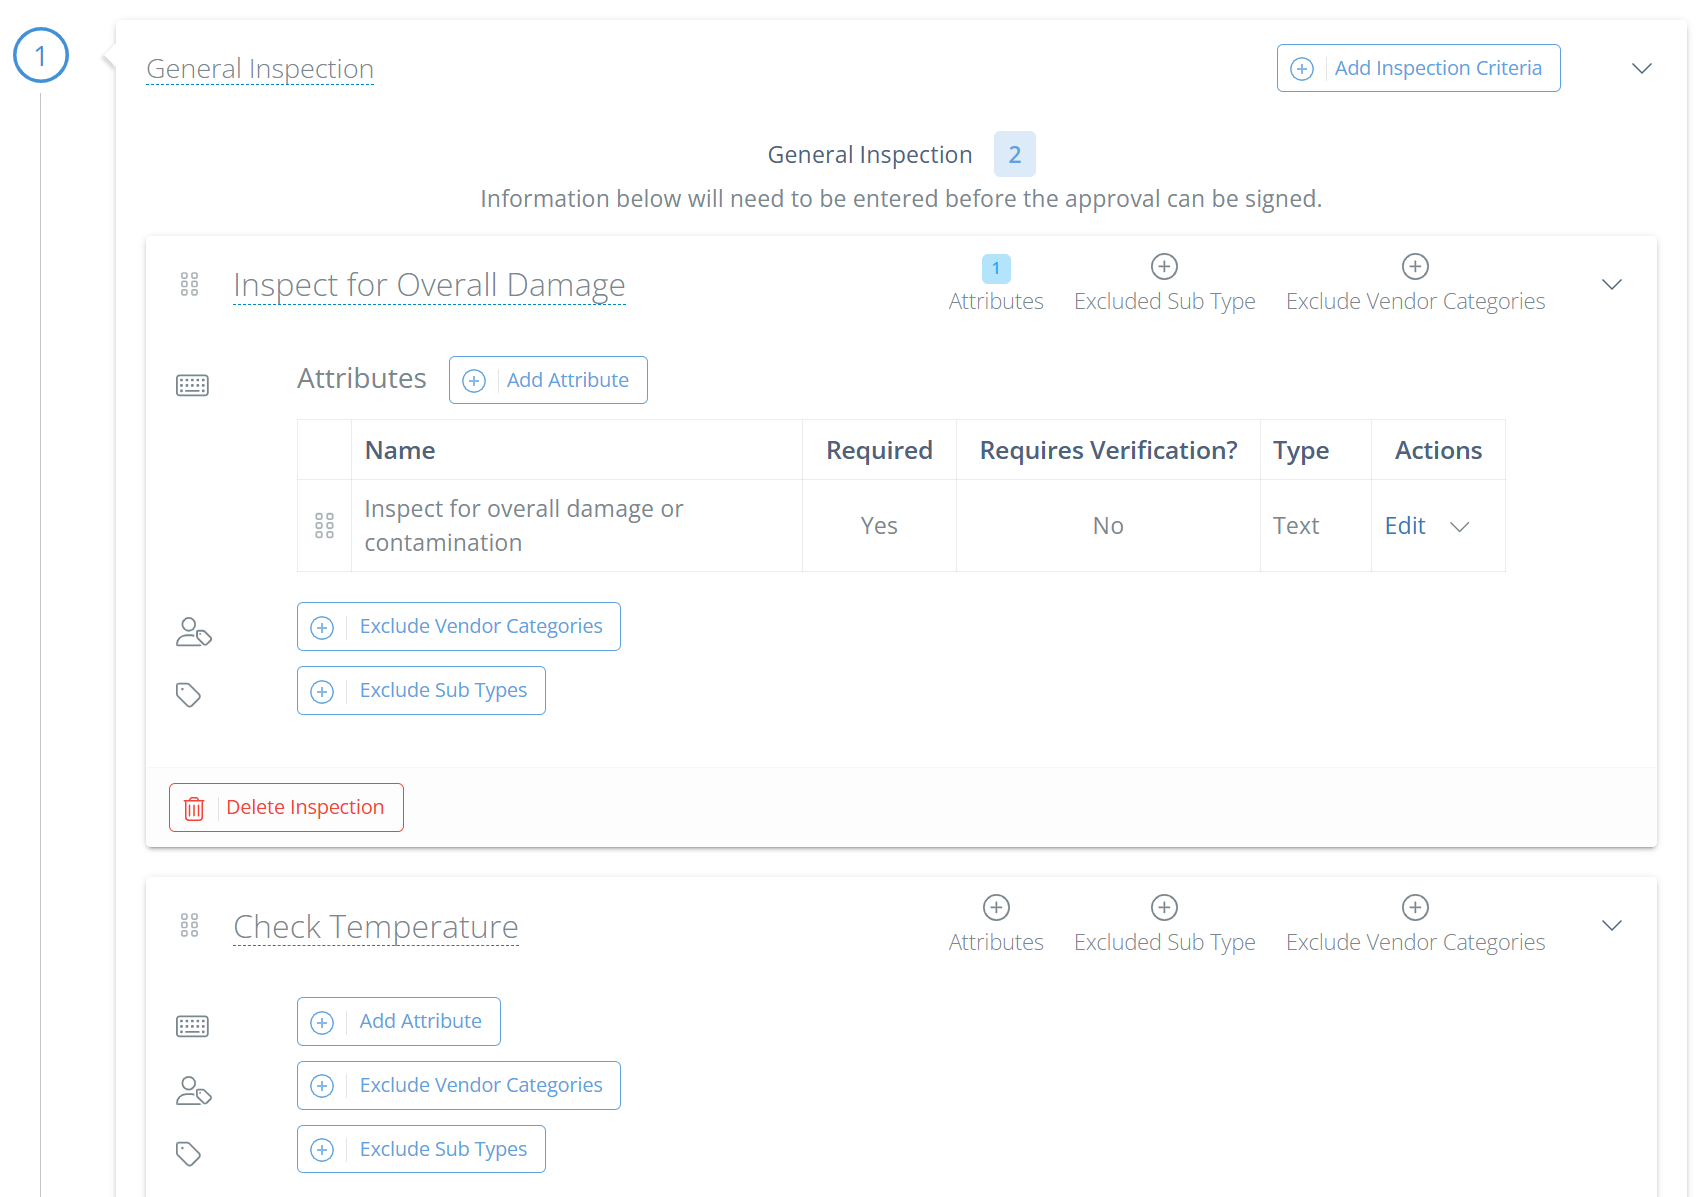
If you have multiple criteria on an approval step, you can click and drag attributes between criteria, so long as there is one or more attributes on the criteria the attribute is moving to. For example, in the image below, you wouldn't be able to move the "Inspect for overall damage or contamination" attribute to the "Check Temperature" criteria because "Check Temperature" does not have any attributes.
Exclusions
There may be cases in which you don't need to complete a particular incoming inspection criteria- DataNinja now allows you to exclude the criteria as a requirement under specific circumstances. Be aware that this does not remove the inspection as a whole (unless you mark all criteria to exclude a vendor category or sub type), only the specific criteria of an approval step.
-
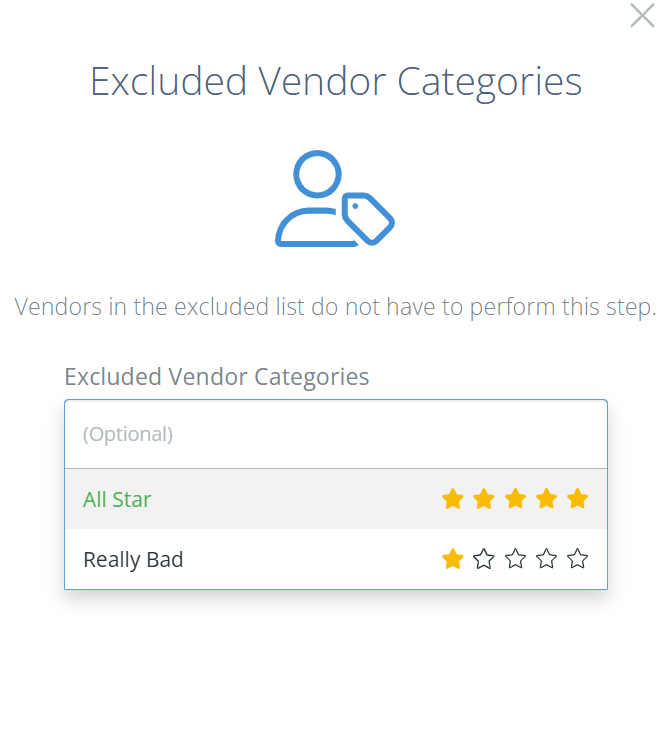
Vendor Categories
- Vendor categories are based on rating. If you do not have ratings on your vendors, you won't see any vendor categories to exclude.
Notes: To add vendor categories, click on the gear icon in the top right, go to "All Lists" and then open the Vendors page. Edit a vendor and add a category, or click "Create new category" after clicking in the category field.
-
Sub Types (NetSuite Only)
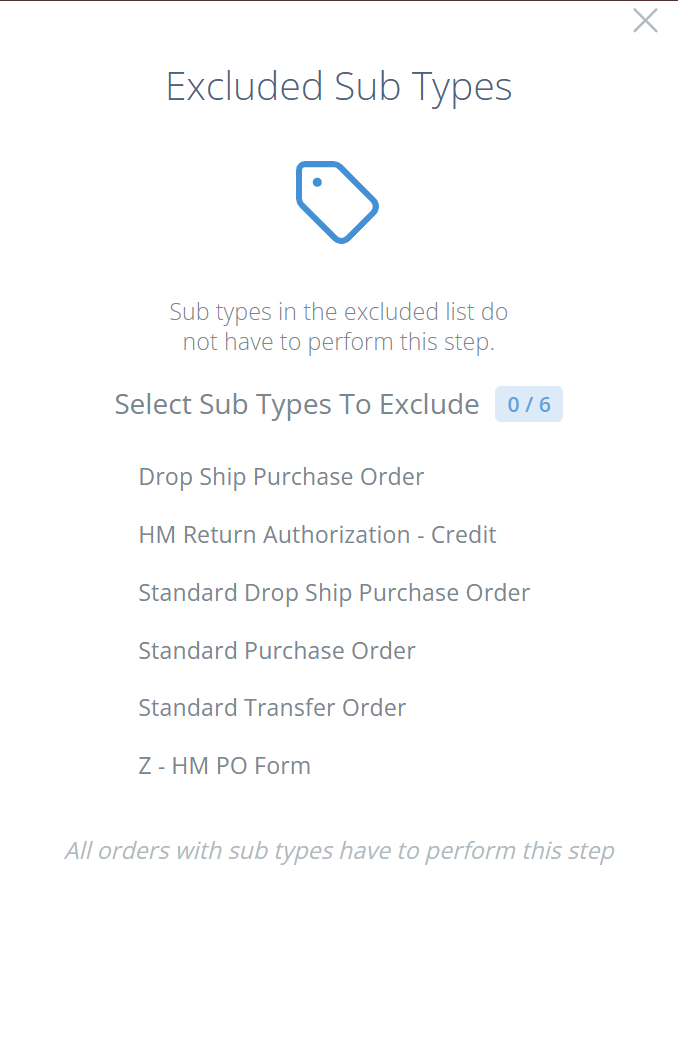
- Sub types are types of orders that may require an incoming inspection to be completed. If you want to exclude a type of order from requiring the inspection, click on "Exclude Sub Types" and then select the ones to exclude. Any sub types not selected will still complete the inspection.
Note: The sub types listed on your site may vary from the picture below, depending on your site settings.
Add Quality Sampling Plan (optional)
See the Inspection Sampling Plan page for instructions on how to add a quality sampling plan.
Delete an Inspection Configuration
If you want to completely remove an inspection configuration from a part, just hit "Remove Configuration". This will delete all inspection information from the part; if the part is using a template, the template will not be affected.
Delete an Approval Step
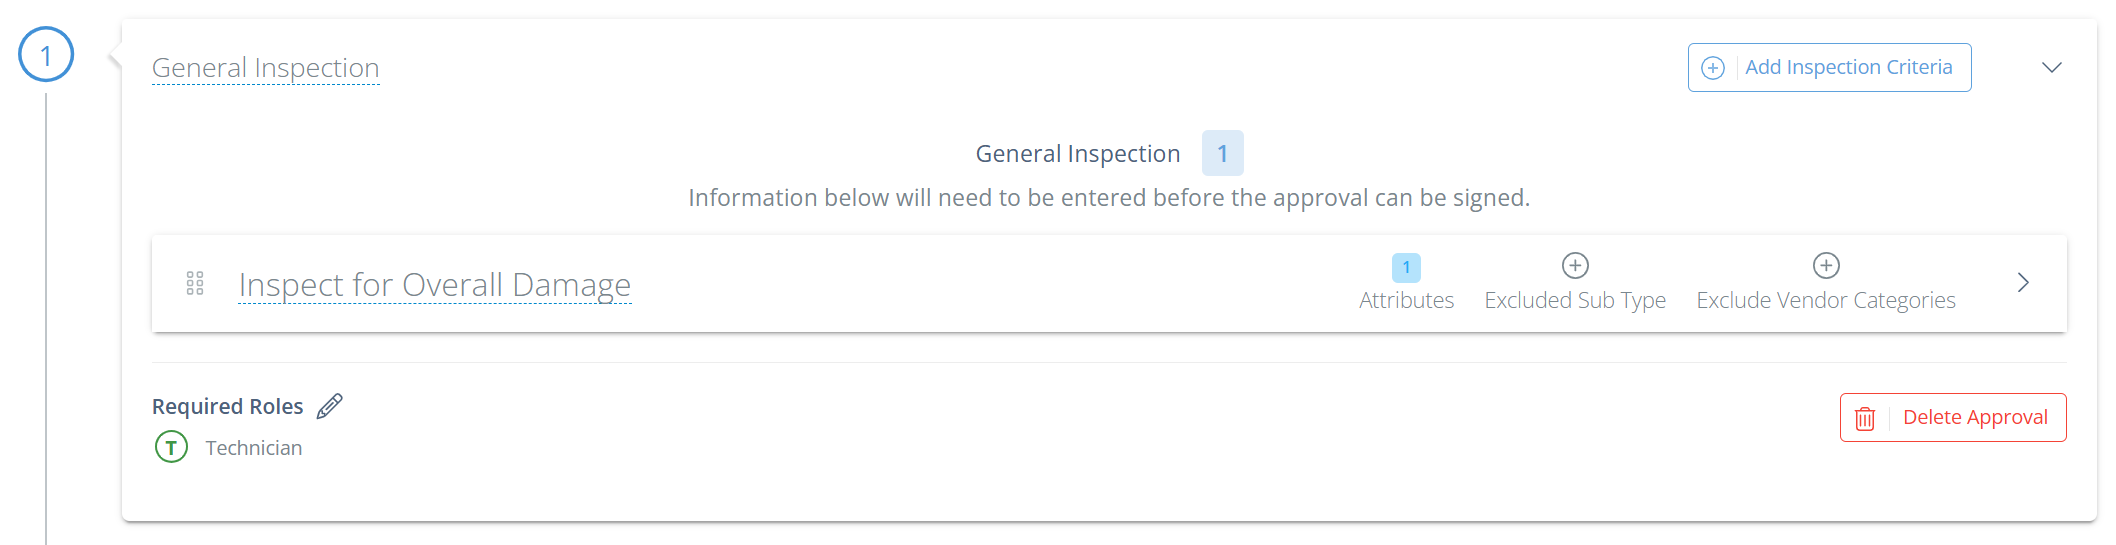
If you want to delete an approval step, expand the approval step by clicking the arrow on the far right, then click "Delete Approval". All inspection criteria and attributes associated with the attribute step will be deleted as well.
Delete an Inspection Criteria
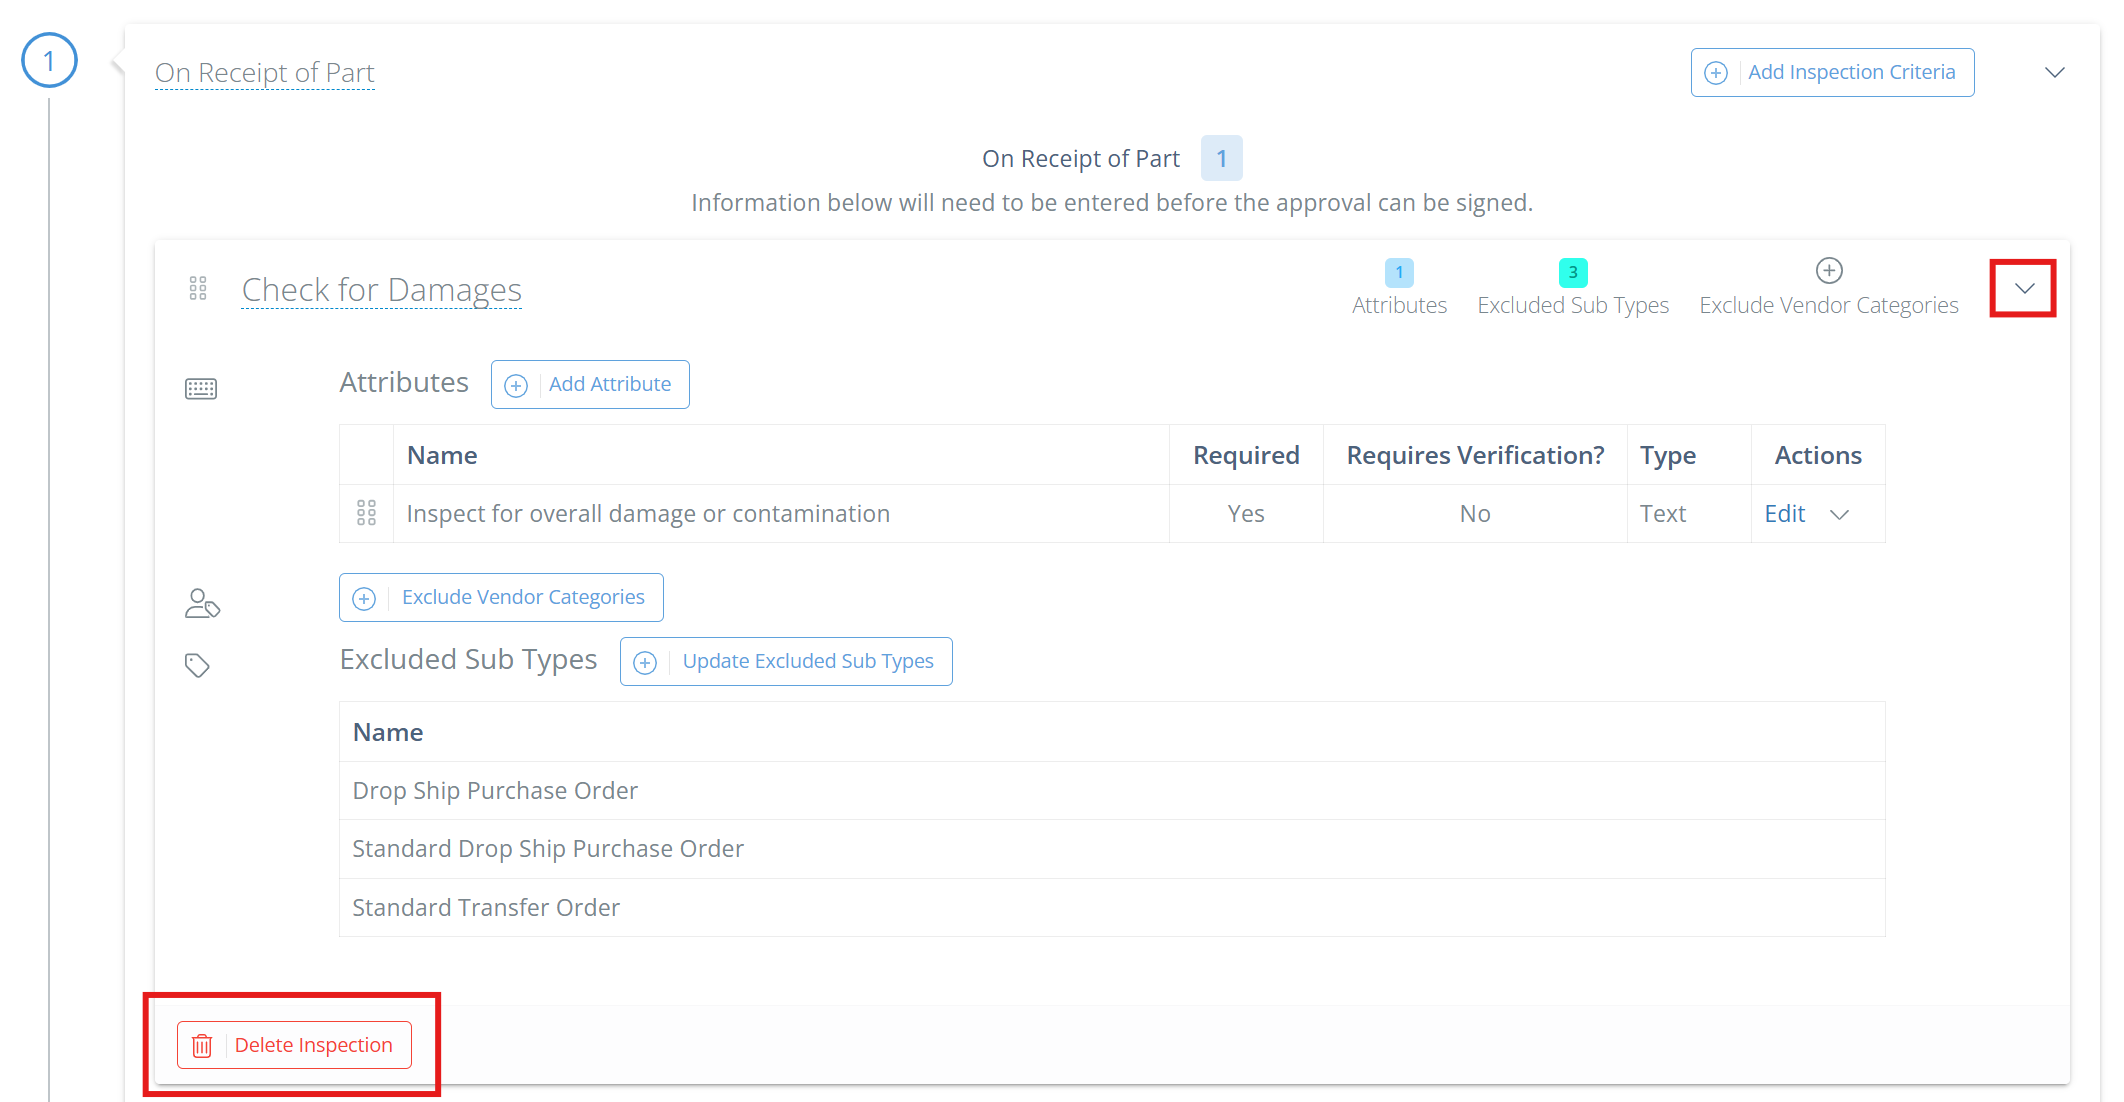
If you want to delete an inspection criteria from an approval step, expand the inspection criteria by clicking the arrow on the far right, then click "Delete Inspection". Associated attributes will be removed, but the approval step will remain.
Delete an Attribute
If you want to delete an attribute from an inspection criteria, click the dropdown arrow in the "Actions" column and select "Delete". The associated inspection criteria will not be deleted.

Updated 16 days ago