Forecast
Prevent part outages with DataNinja's Forecast feature.
Inventory planning can be a nightmare. DataNinja's Forecast feature coupled with MRP allows you to put planned or anticipated orders into DataNinja to see what inventory you will likely need for future sales.
Better production planning visibility leads to fewer rushed jobs and back orders. Forecast and MRP will even help plan for seasonal rushes, product launches, new markets, and scale-up scenarios.
Setting up a Forecast
Step 1
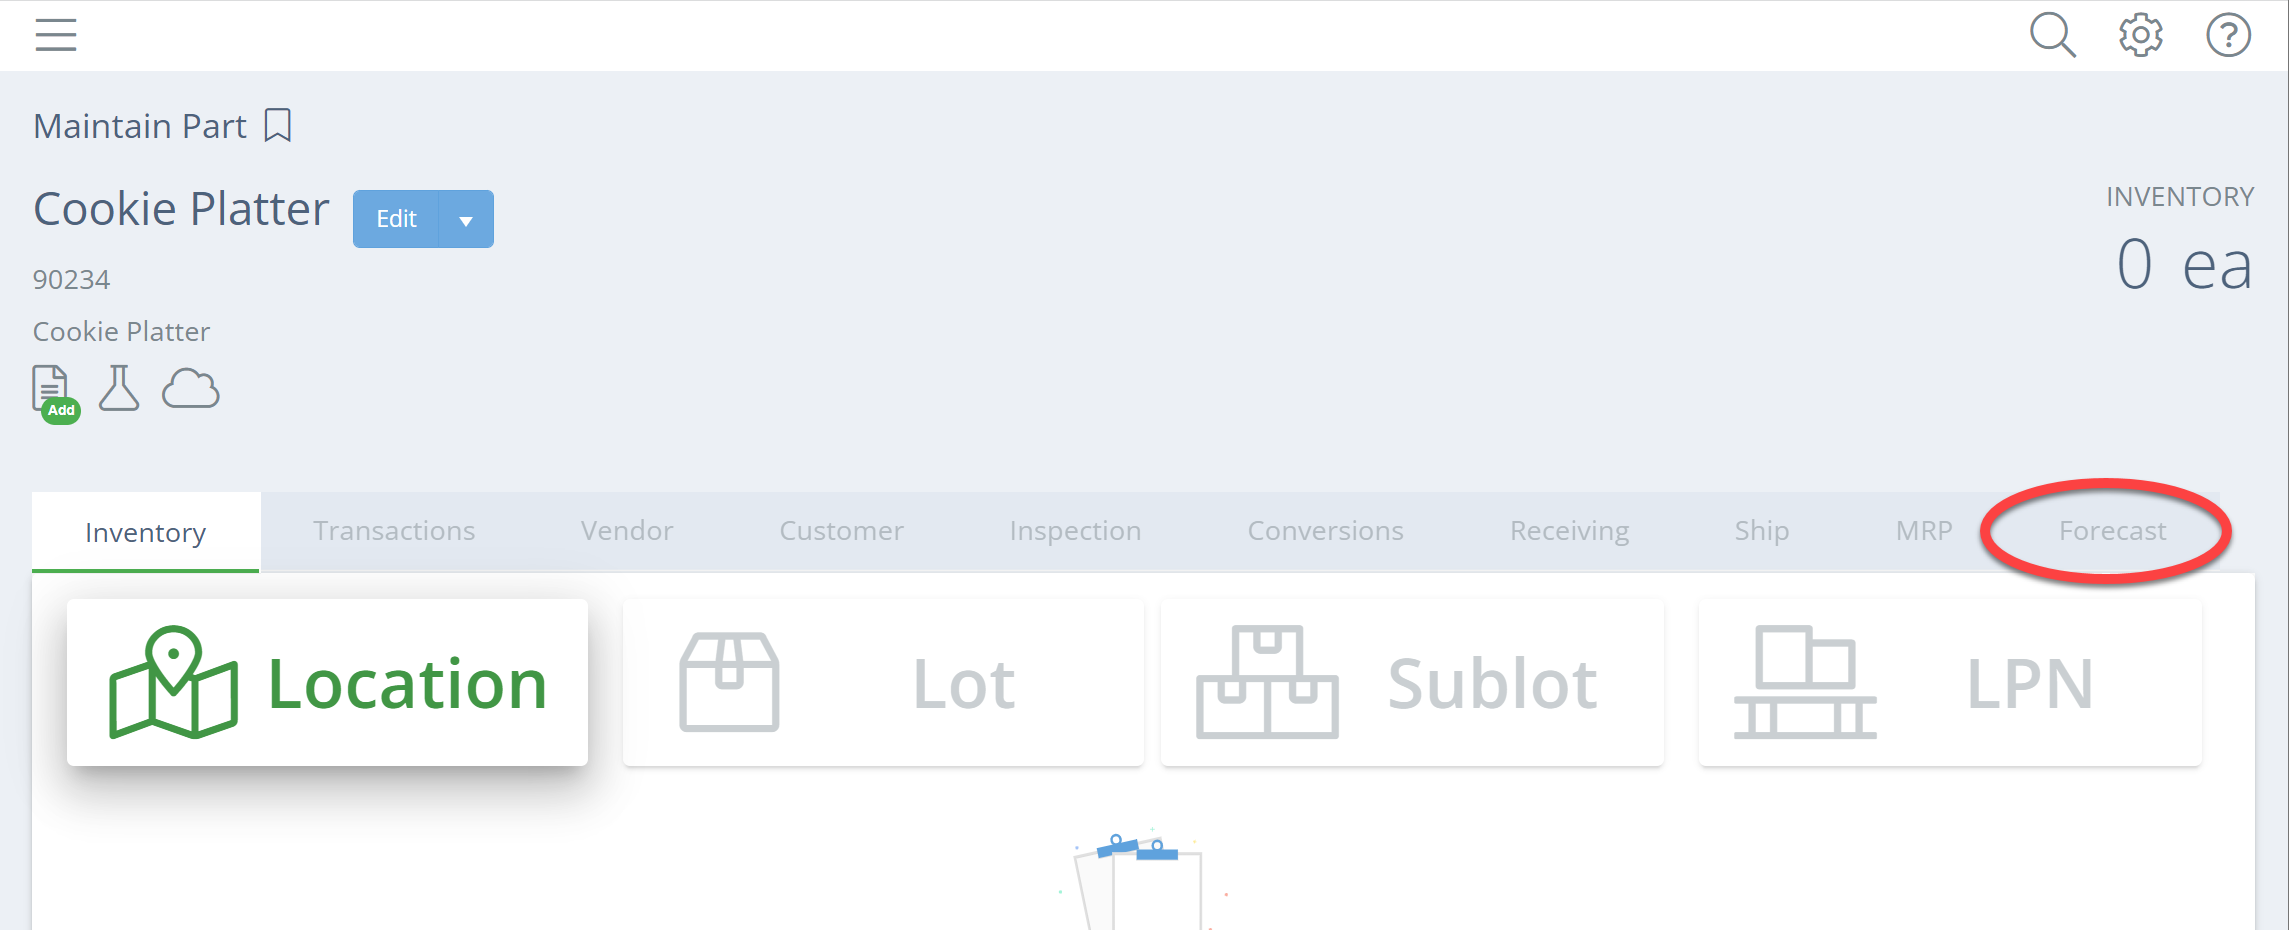
Start with a finished good. You can forecast any part, but by forecasting a finished good, the Forecast will automatically pass down to each part associated with the finished good, ensuring that you have sufficient inventory to produce the finished good. When you have your finished good, click on Forecast on the right side of your screen.
Step 2
Click "Add Your First Forecast" and fill out the fields on the right of your screen. If this is your first forecast, simply type in the name of your forecast. It will be saved so you can quickly add it to other parts.
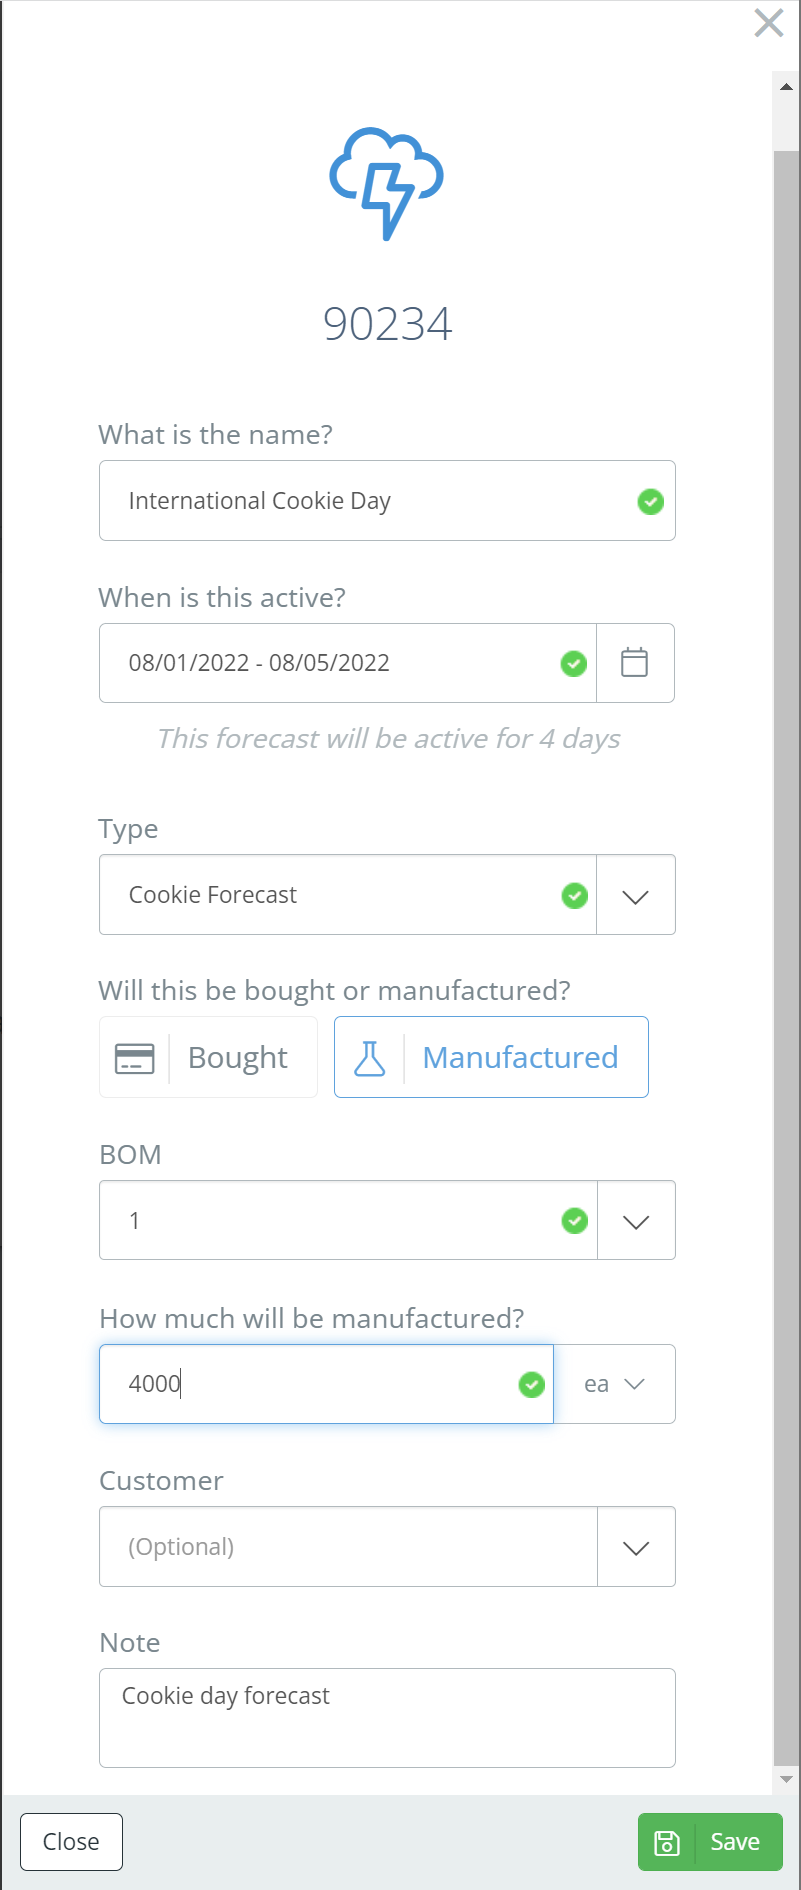
The Forecast will default to being active for 30 days. We give you 30 days just in case the order you were anticipating does not come in. By clicking in the date field, you can select the time frame the Forecast will be active. When the fields are filled click "Save".
Step 3
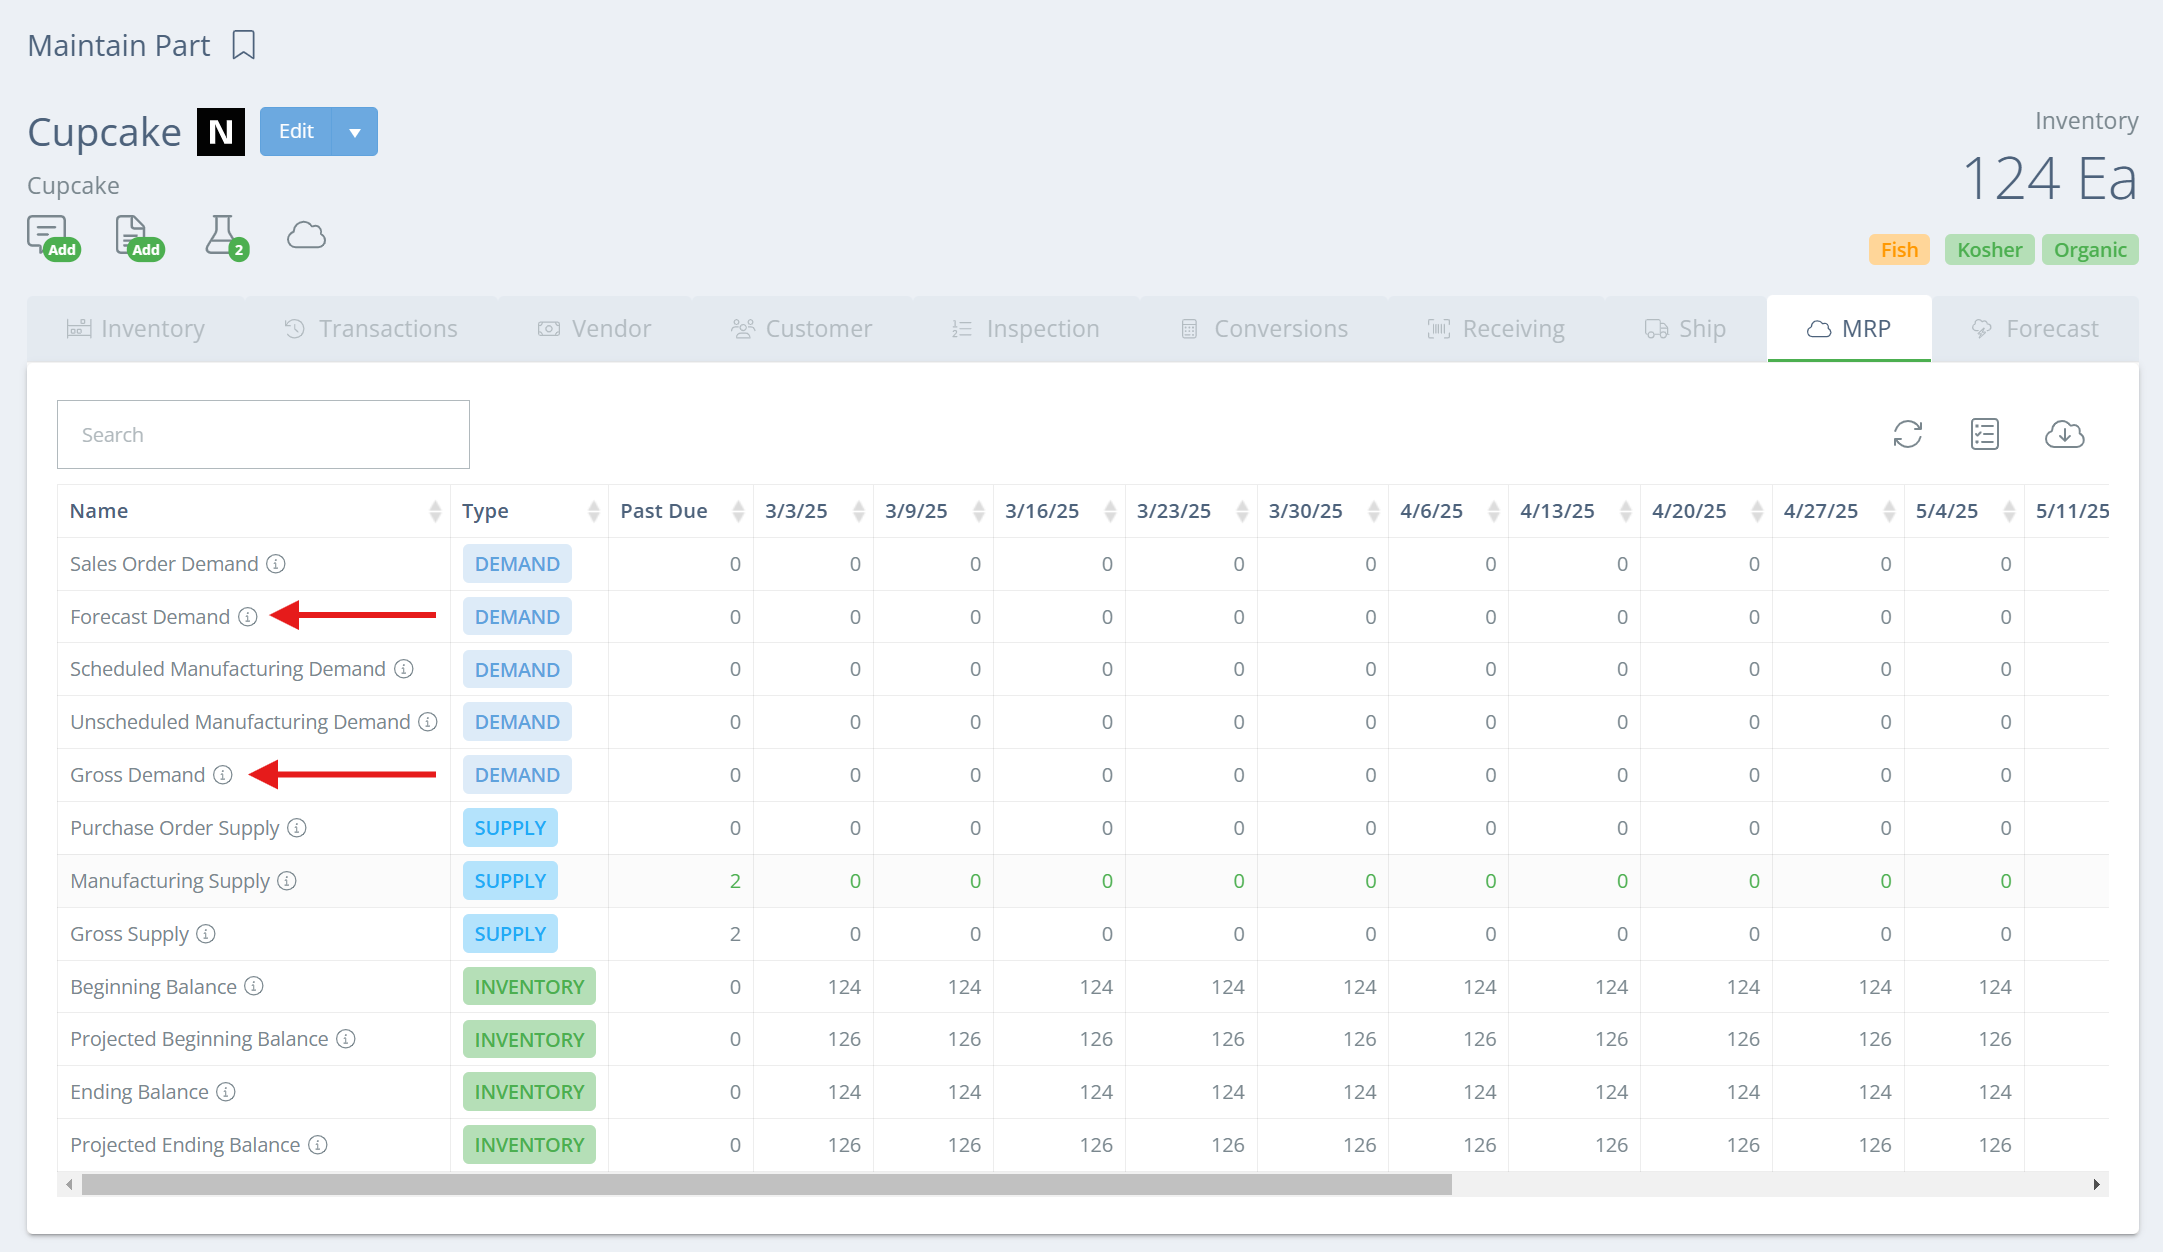
Check the MRP page. On the finished good page your forecast will appear in the "Forecast Demand" row and the "Gross Demand" row.
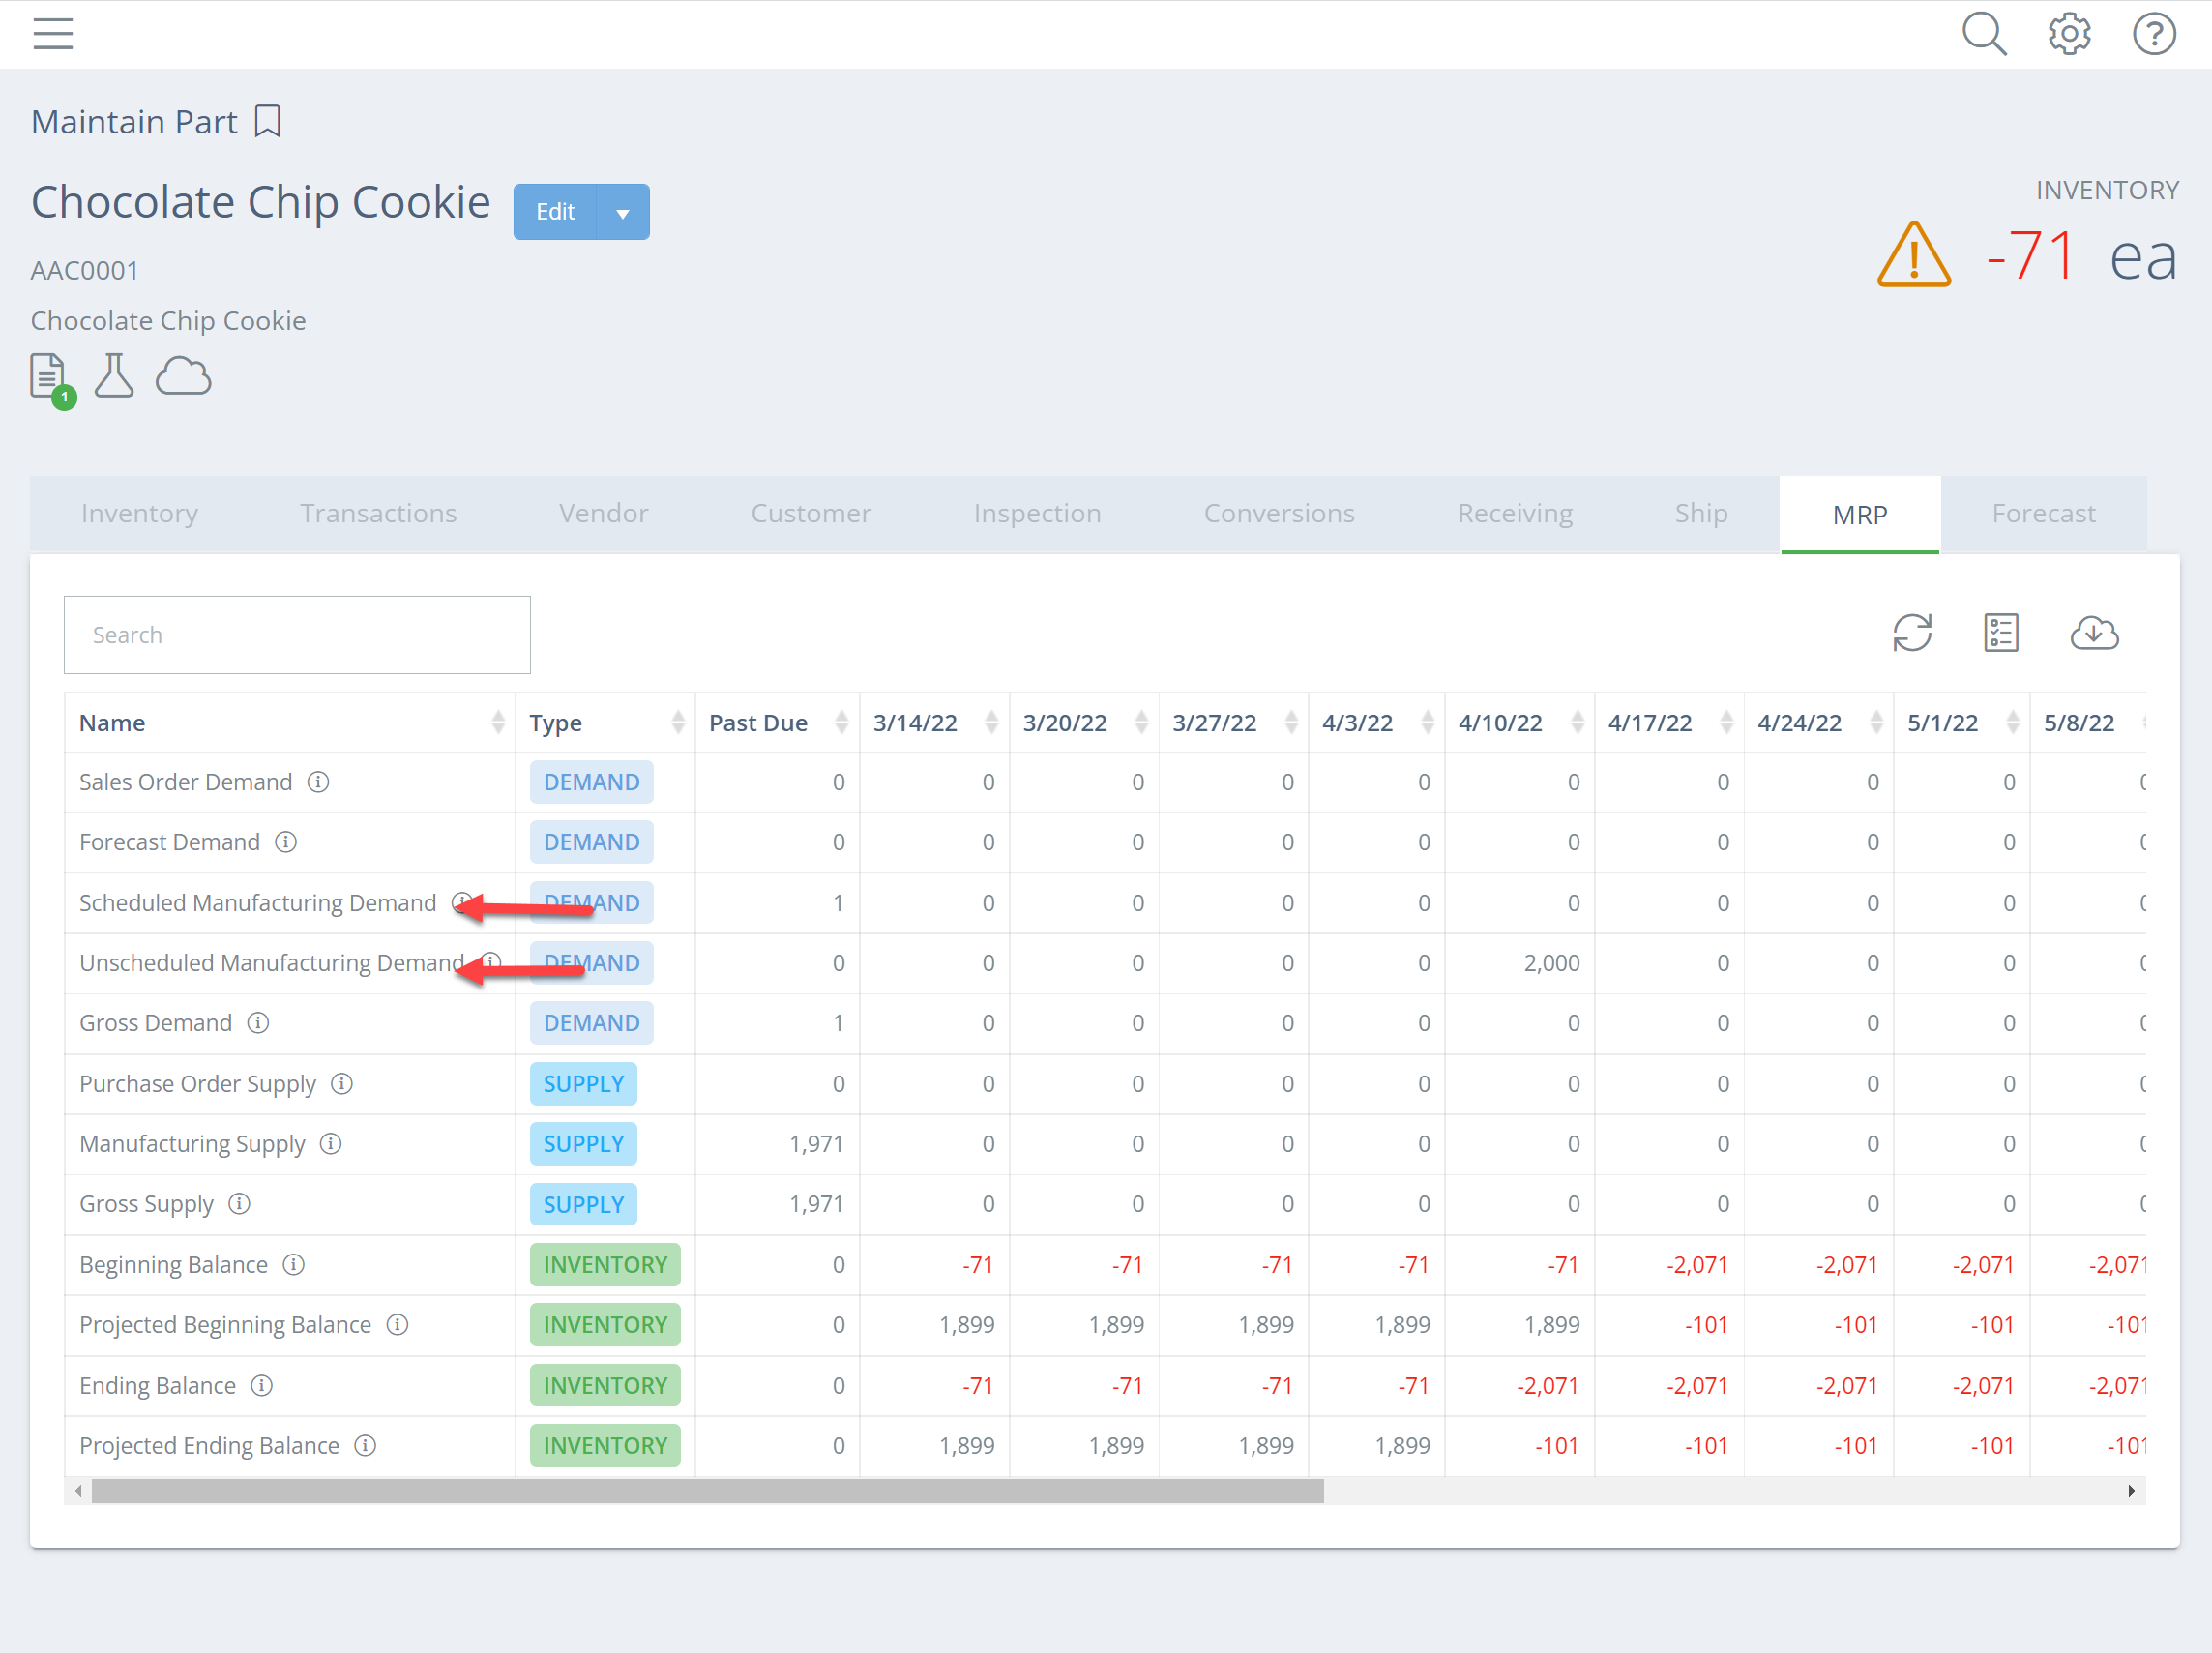
As you check MRP on the parts downstream from your finished good, the demand will appear in the "Scheduled Manufacturing Demand" and "Unscheduled Manufacturing Demand" rows.
Step 4
Check MRP on all downstream parts. Make sure you look at all downstream parts to avoid a part outage. To see all parts used in a finished good, click on the BOM icon (circled in red below).
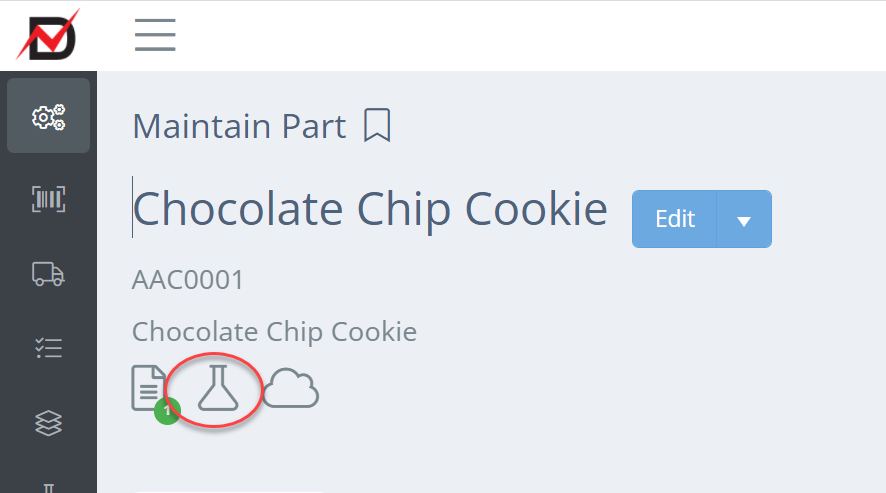
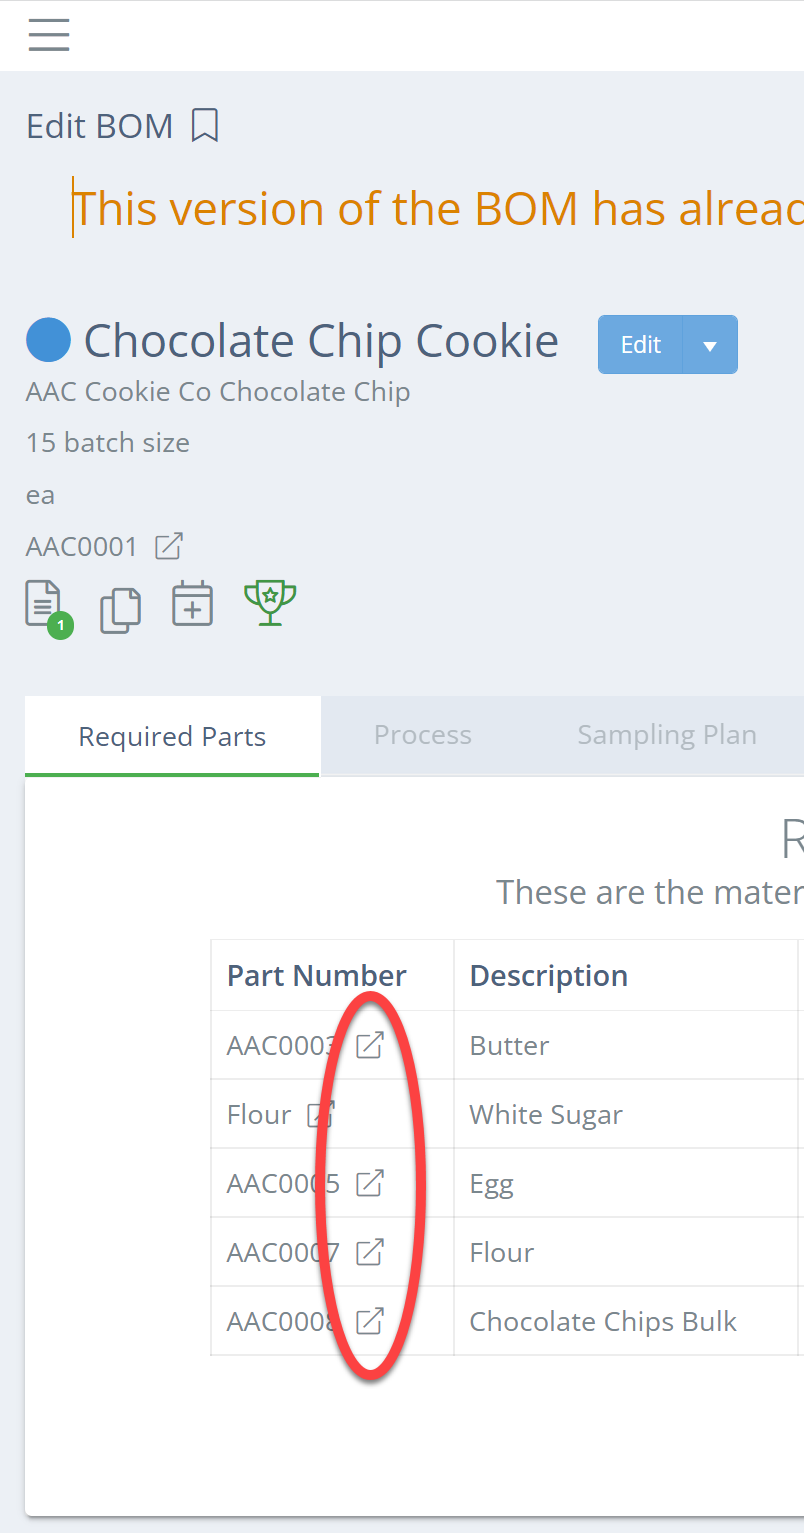
Double click on the BOM and take a look at the "Required Parts". By clicking on the arrow icon next to the part number, as shown circled in red, you will go straight to the part.
Now that you can see how much you need, you can start ordering and scheduling production.
Updated 3 months ago
