
How to Do a Mock Recall
Español: Lee esta página en español.
Français : Consultez cette page en français.
During an inspection you may be asked to show how to initiate a recall if needed. Luckily, with DataNinja you can find the requested information a few ways in just a few clicks.
Find the Identifier
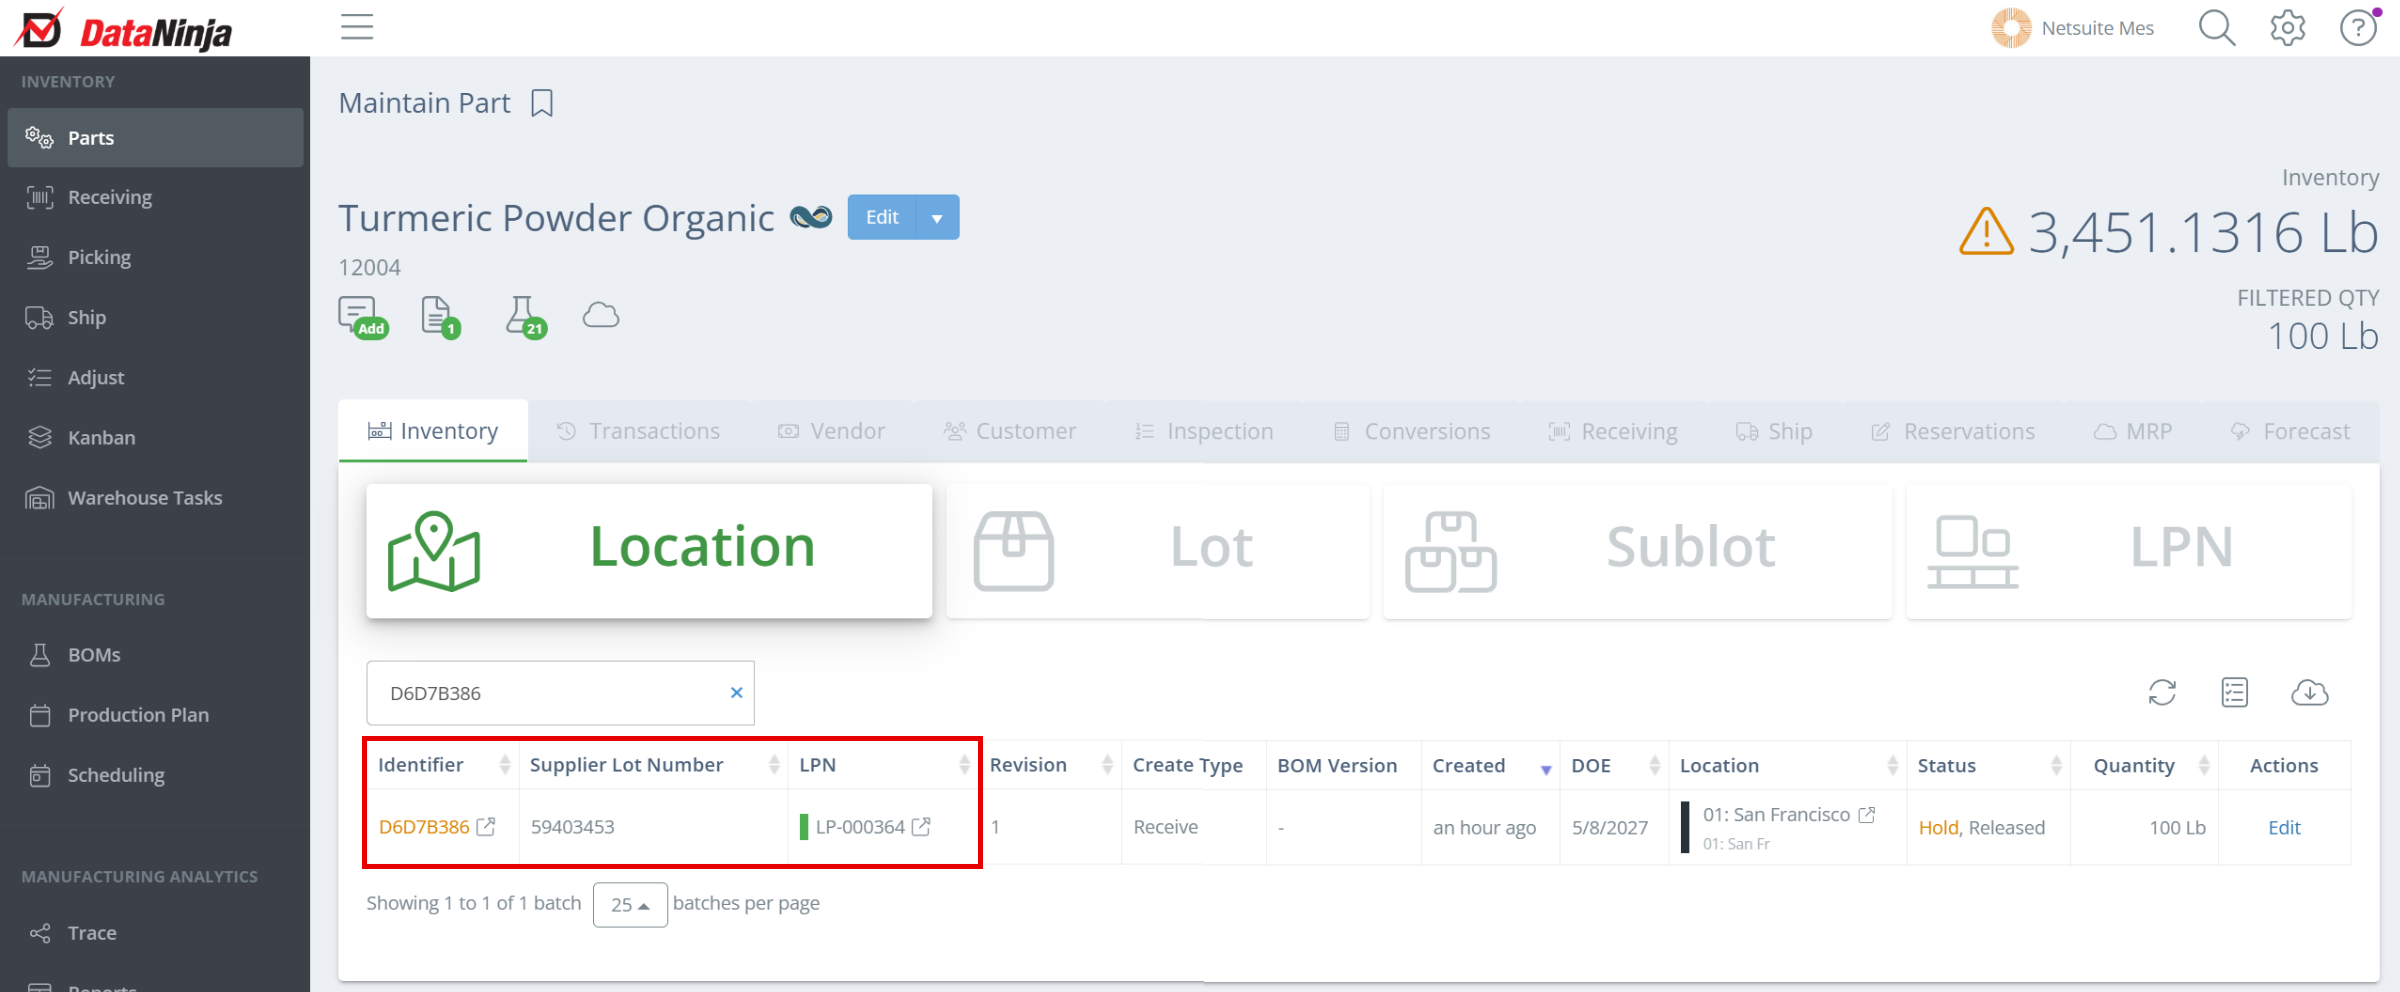
Find a DataNinja searchable identifier for the affected material. As long as you have the DataNinja identifier, a supplier lot number, a barcode/identifier, or license plate number (LPN) you can quickly look up the material in question. Copy the DataNinja identifier (boxed in red below) to your clipboard.
If needed, demonstrate how you can electronically prevent the material from being used by changing the status. Even if you physically quarantine the material in question, changing the status in DataNinja prevents it from mistakenly being used or sold when it is scanned. Here are instructions on how to change the status of a material.
Method 1: Using Reports
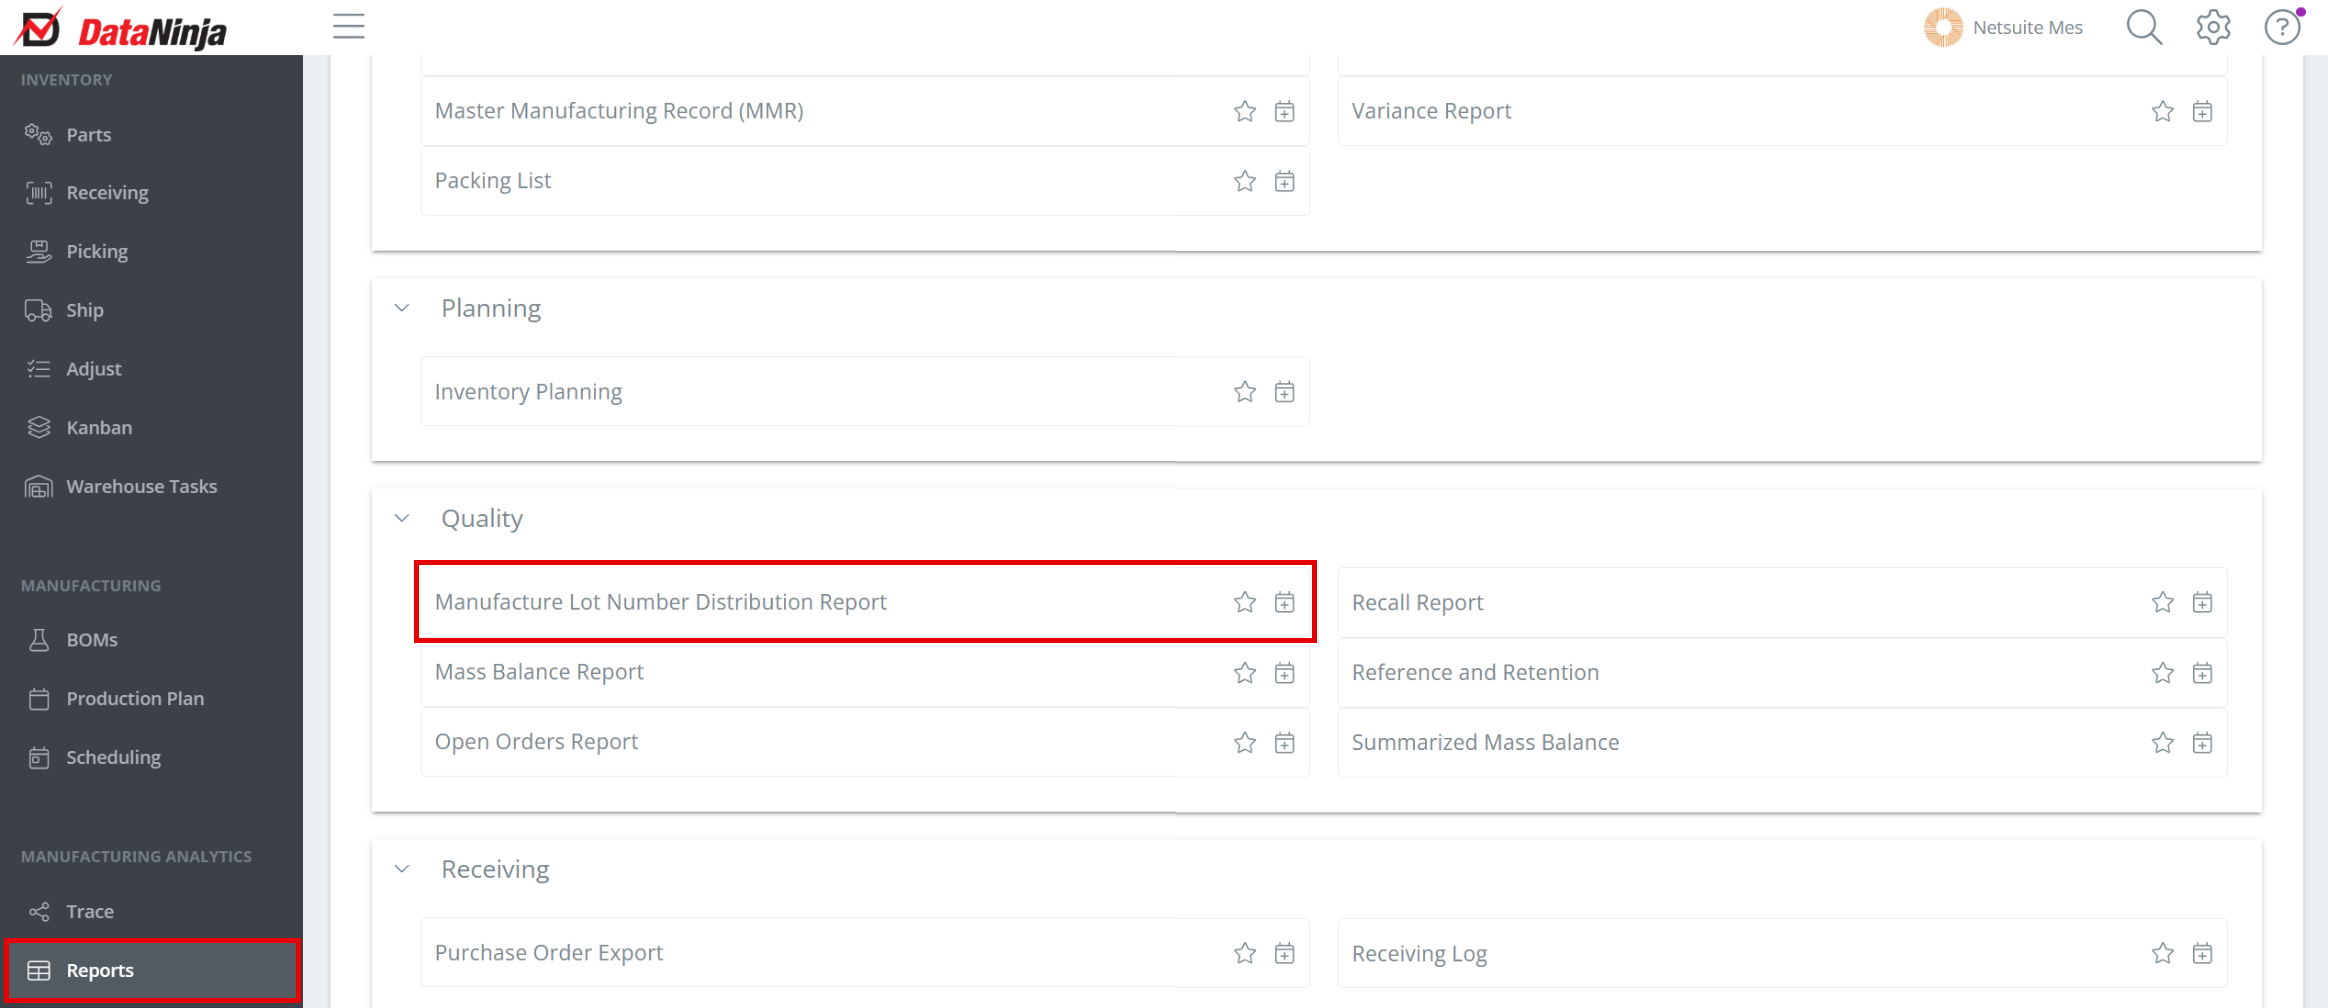
You can find the affected batches by using the built-in reports in DataNinja. Find and click on reports. Scroll down to the Quality reports and click on Manufacture Lot Number Distribution report.
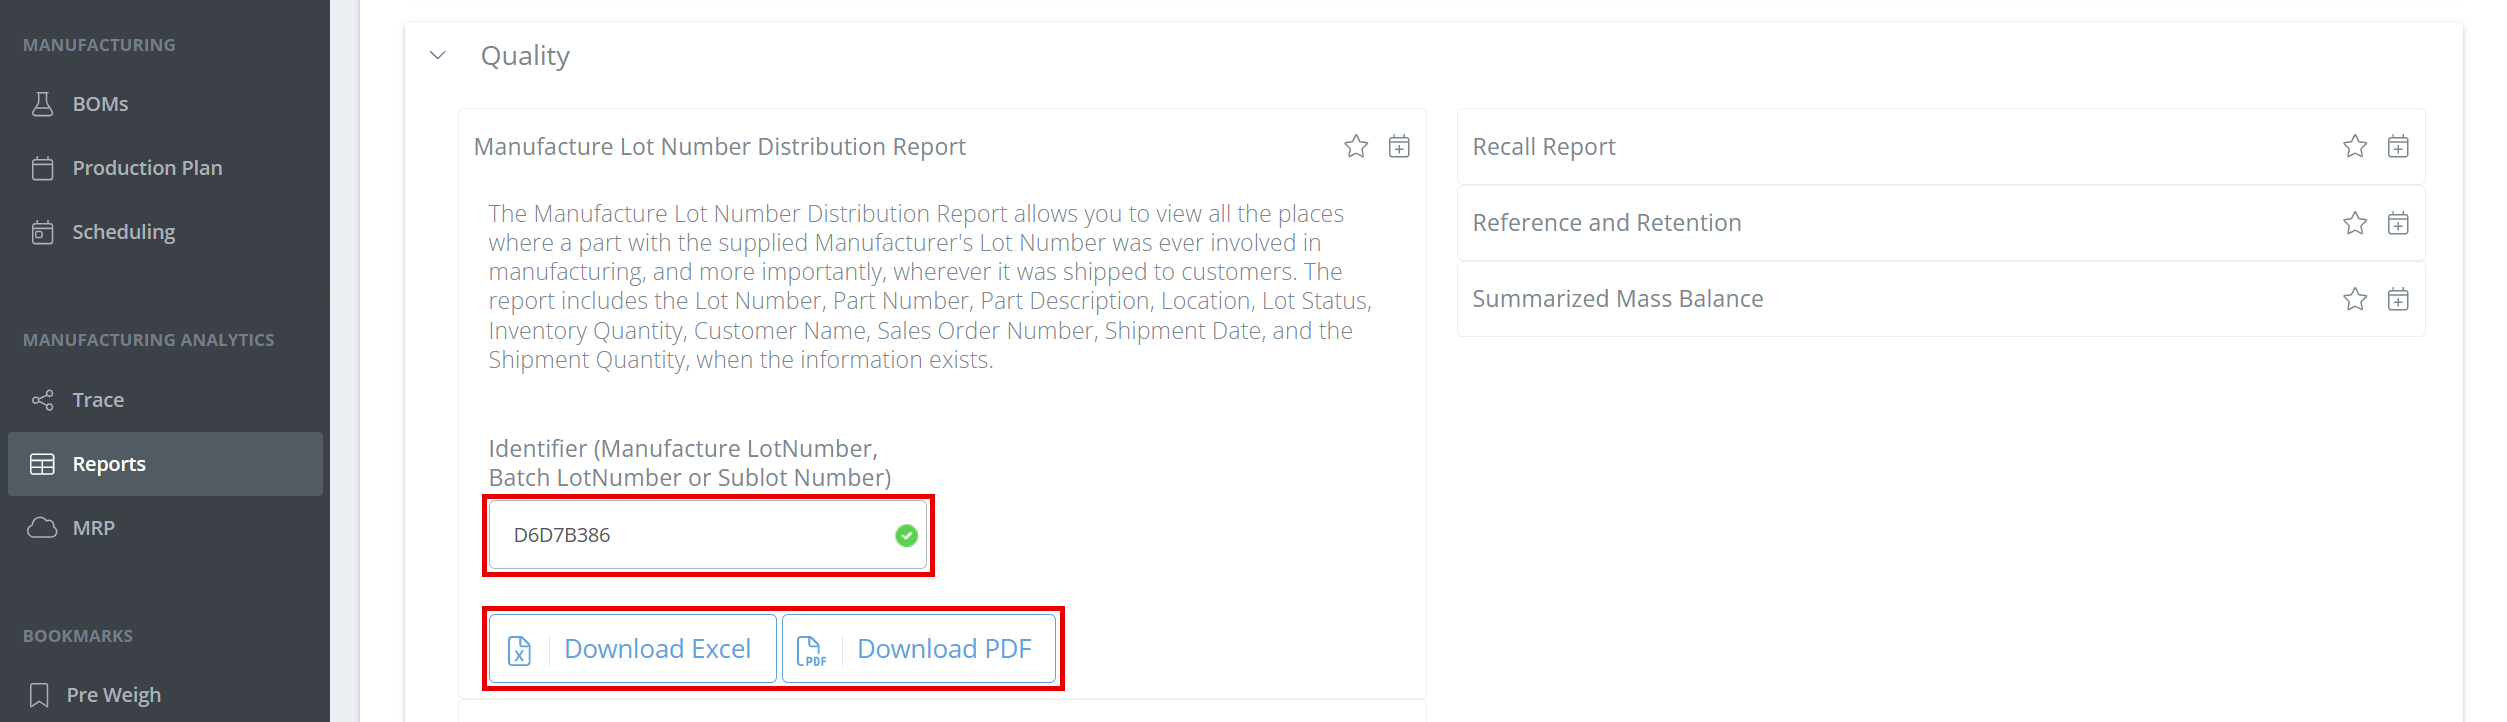
Paste the DataNinja identifier and click on download the Excel worksheet or PDF.
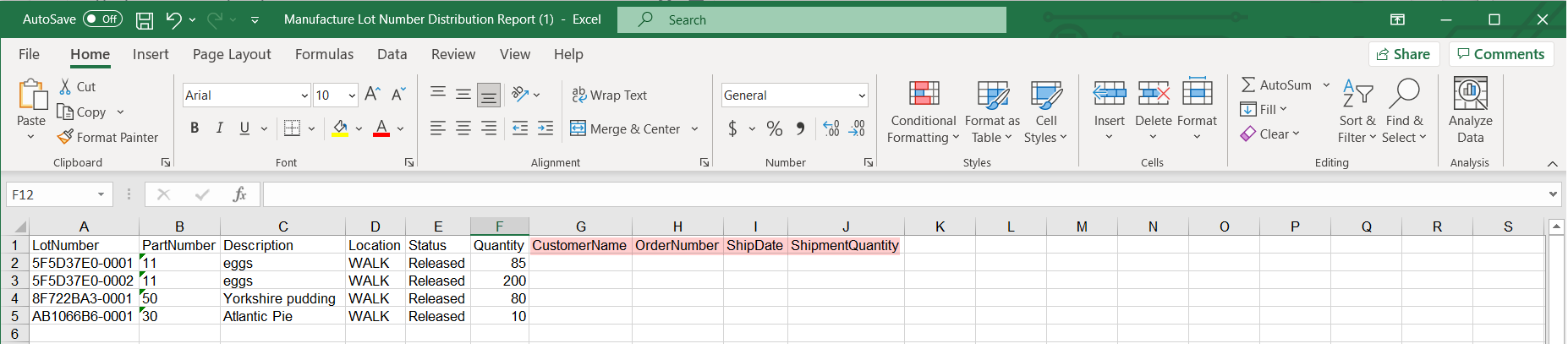
This report allows you to see the affected customers, when the product was shipped, and the quantity they ordered.
Go back to Reports in DataNinja, scroll down to Quality, and use the DataNinja identifier to download the Mass Balance Report. This report shows all the lots where the material in question was used in the “consumed by” column.
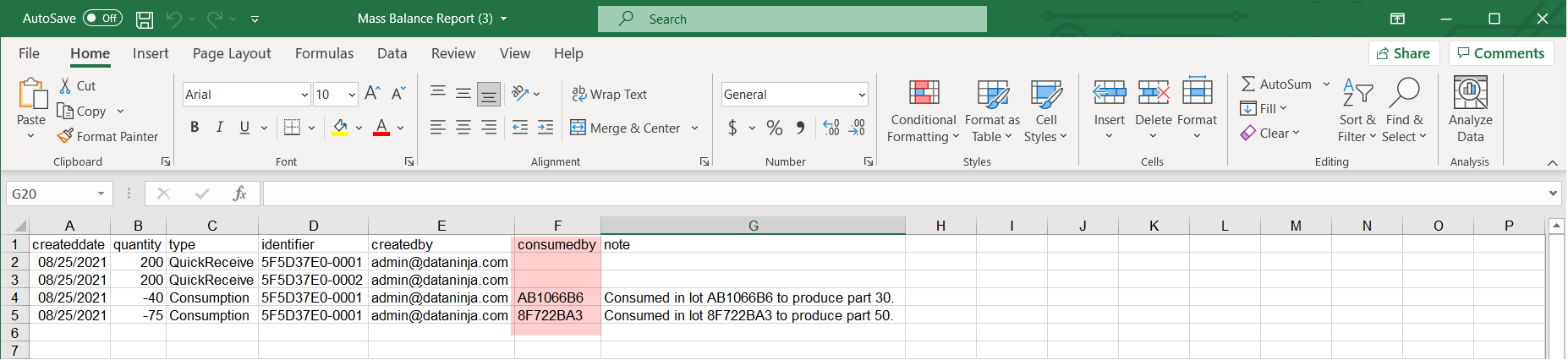
Find the affected batches by using the search function in the upper right corner of DataNinja.
If needed, change the status for all affected batches in DataNinja. Again, changing the status the material in question at all levels (raw material, sub-assembly, and finished goods) in DataNinja prevents them from mistakenly being used or sold.
Method 2: Using Trace
Find the DataNinja identifier for the affected material as shown above. Then click "Trace" under Manufacturing Analytics in the side menu, paste the identifier into the search box, and choose the lot from the results.
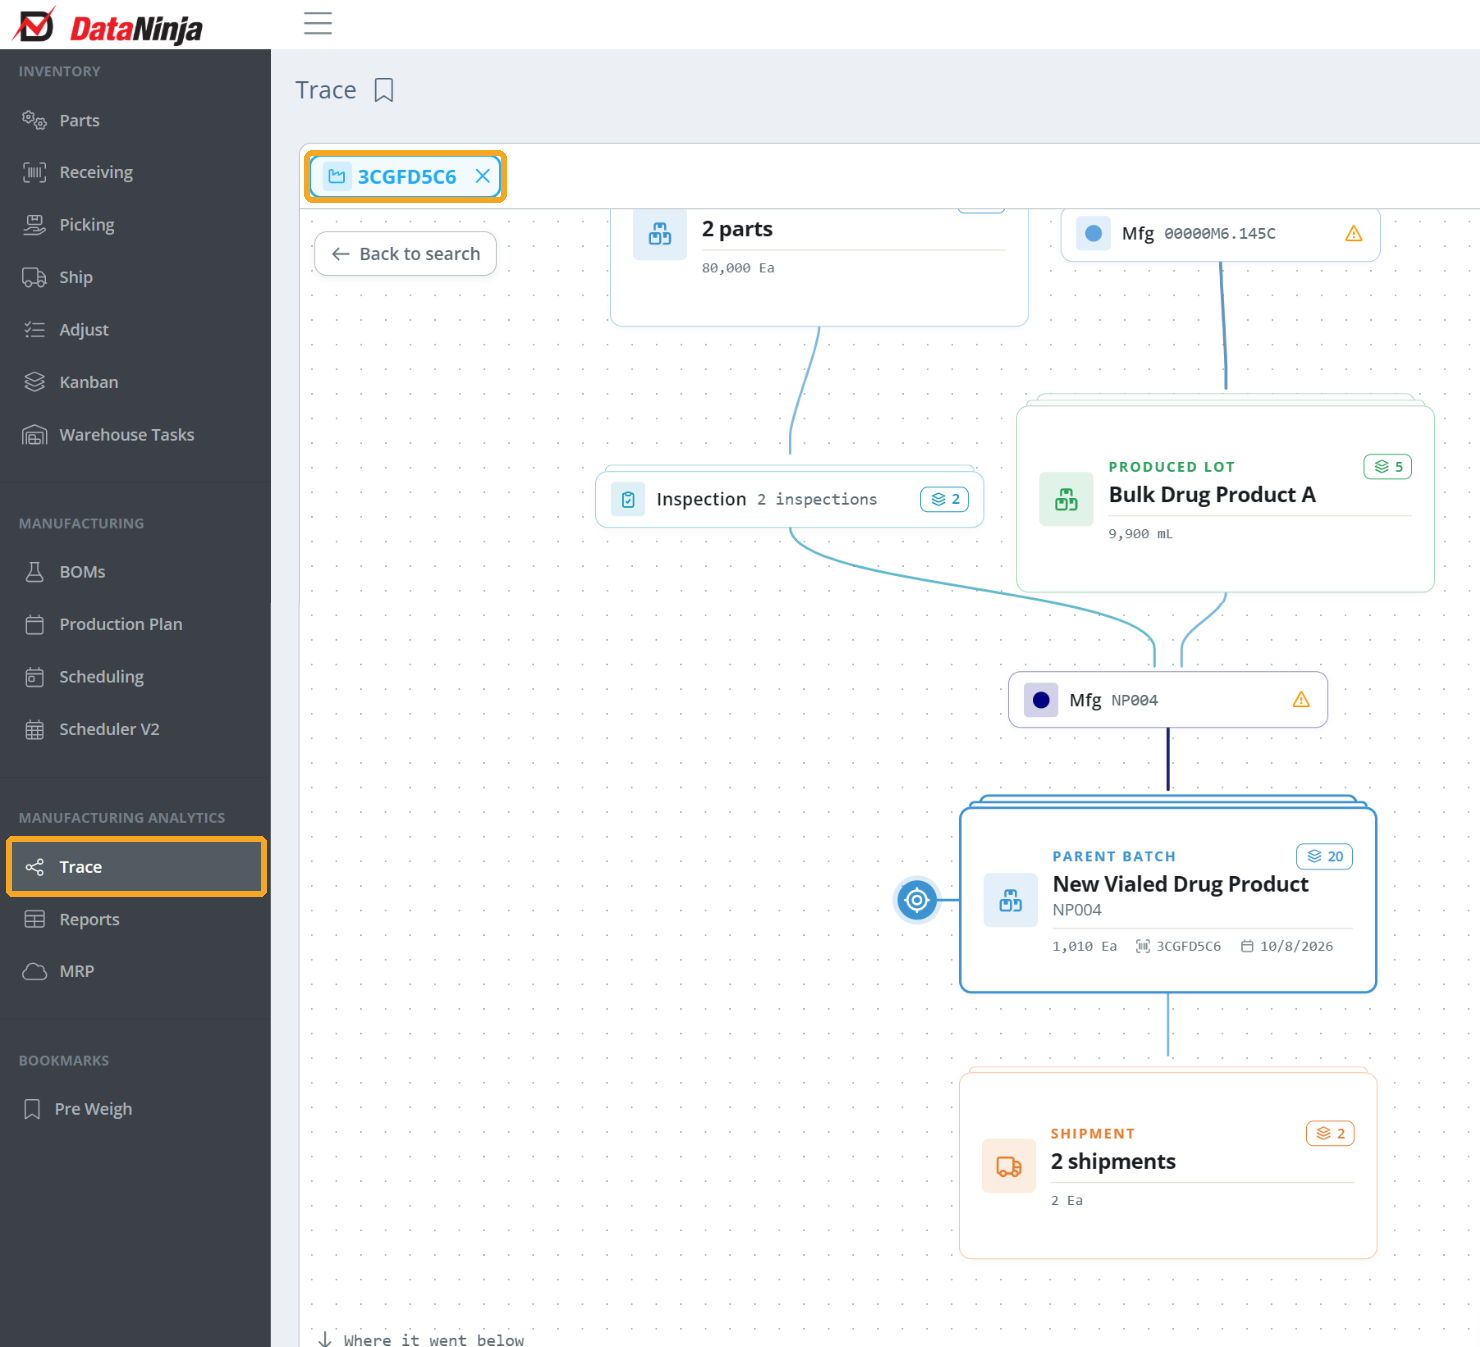
The lot you searched for sits in the middle of the map, marked with blue crosshairs. Everywhere it went is below it: the manufacturing batches that used it, the lots they produced, and the shipments that carried them to customers. The materials that went into it are above. Hover over or click a card to light up its whole lineage, and click a stack to open it. See Lot Traceability for more on reading a trace.
Click a shipment card to see the customer, ship date and quantity. To download the full trace for your recall list, click the cloud button on the map and choose a trace report.
If you need to change the status of an affected batch, click its card, then use "What do you want to do?" at the bottom of the detail panel to open the batch. Repeat this for each affected batch. See Changing the Status of a Part for how to change a status.
Don't See Trace?Trace is part of the Lot Genealogy beta. If your side menu shows "Mfg Record" instead, open it, paste the identifier into the search bar, change "Search Down" to "Search Up", and click the identifiers in the "Searching Up" box to see the affected batches and any shipments that included them. To turn on Lot Genealogy, reach out to our Implementation team or open a chat with our Support team.
Updated 5 days ago