Printing Setup
Getting started with your Hub, Label Printers, and printing labels via DataNinja
Steps for setting up the DataNinja hardware required for barcode label printing:
1. Hub (Power and Internet)
Unpack your DataNinja Hub. Connect to power and internet (via ethernet, preferably) in a network closet next to your router/modem. If you will be using the Hub for scale connectivity, consider cable lengths when deciding where to put your Hub.
2. Printer Connected to Internet
To print labels via DataNinja, your printer needs to be connected to the same network as your Hub. Connect your printer to the network via ethernet cable or use the Wi-fi setup instructions below.
Wi-fi Label Printer Setup Instructions
You will know the printer is connected when the printer's network icon is green.

Not all printers have Wi-fi connection abilitiesEthernet-Only, Wi-fi-Only, and BOTH are all possible printer connectivity variants. An Ethernet-Only printer will be unresponsive to Wi-fi setup attempts.
3. Discover Printers
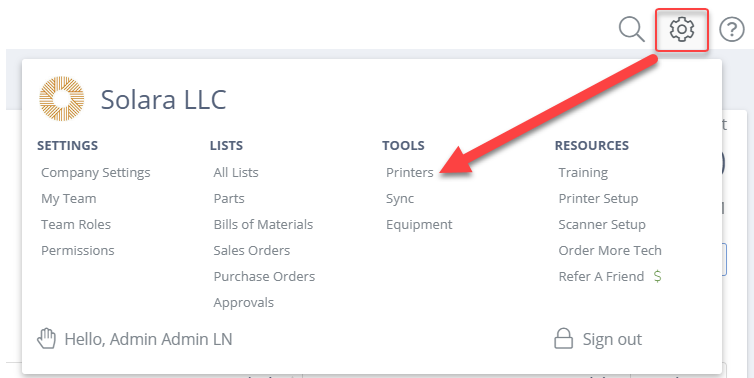
In DataNinja, click on the gear icon, then under "Tools" select "Printers".

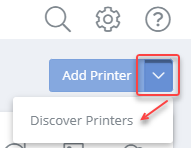
On the Printers page, select the down arrow next to the blue "Add Printer" button at the top right hand corner of the page. Select "Discover Printers". Then click "I Understand".

Once the printer discovery has finished, you should see a line for each printer connected to internet. Each will look like this:

4. DataNinja Printer Configuration + Label Templates
Click "View" on the discovered printer, then click "Edit" to update the printer name and choose the printer location (ex: HQ).
Select Label Templates for each label type. If you would like a new label template, or adjustments made to an existing template, reach out to our team via Chat with the specifications (pictures preferred, when possible) and one of our members will get that created.
DataNinja does not require that a template be selected for each label type, but when running a print job, only printers that have a relevant label template selected will show as an available option. For example, if printing a label at receiving, only printers that have at least 1 receiving label template selected will show as available.
5. Test Print
Perform a Quick Receive by clicking "Receiving" in the left-hand sidebar, then click "Quick Receive" in the top right. Verify the label prints from the selected printer.
Updated 3 months ago
