User Management
Viewing and adding users
Accessing Team Management
To view a the list of your team in DataNinja, click the Gear icon in the top right corner, then click on "My Team" in the Settings column.

Screencap from v4.21.264.185
From here, you can edit user information, titles (optional), roles, languages, etc. In the Name column you will also be able to see each user's username, the one they use to log into DataNinja, under their full name. If a username needs to be changed, please reach out over chat and ask to speak to one of our Support team members.
Grant Access to Other Sites
This feature requires Cognito (SSO) to be enabled, or for your DataNinja instance to use a federated login. If your version begins with 4.21, Cognito is already enabled on your instance.
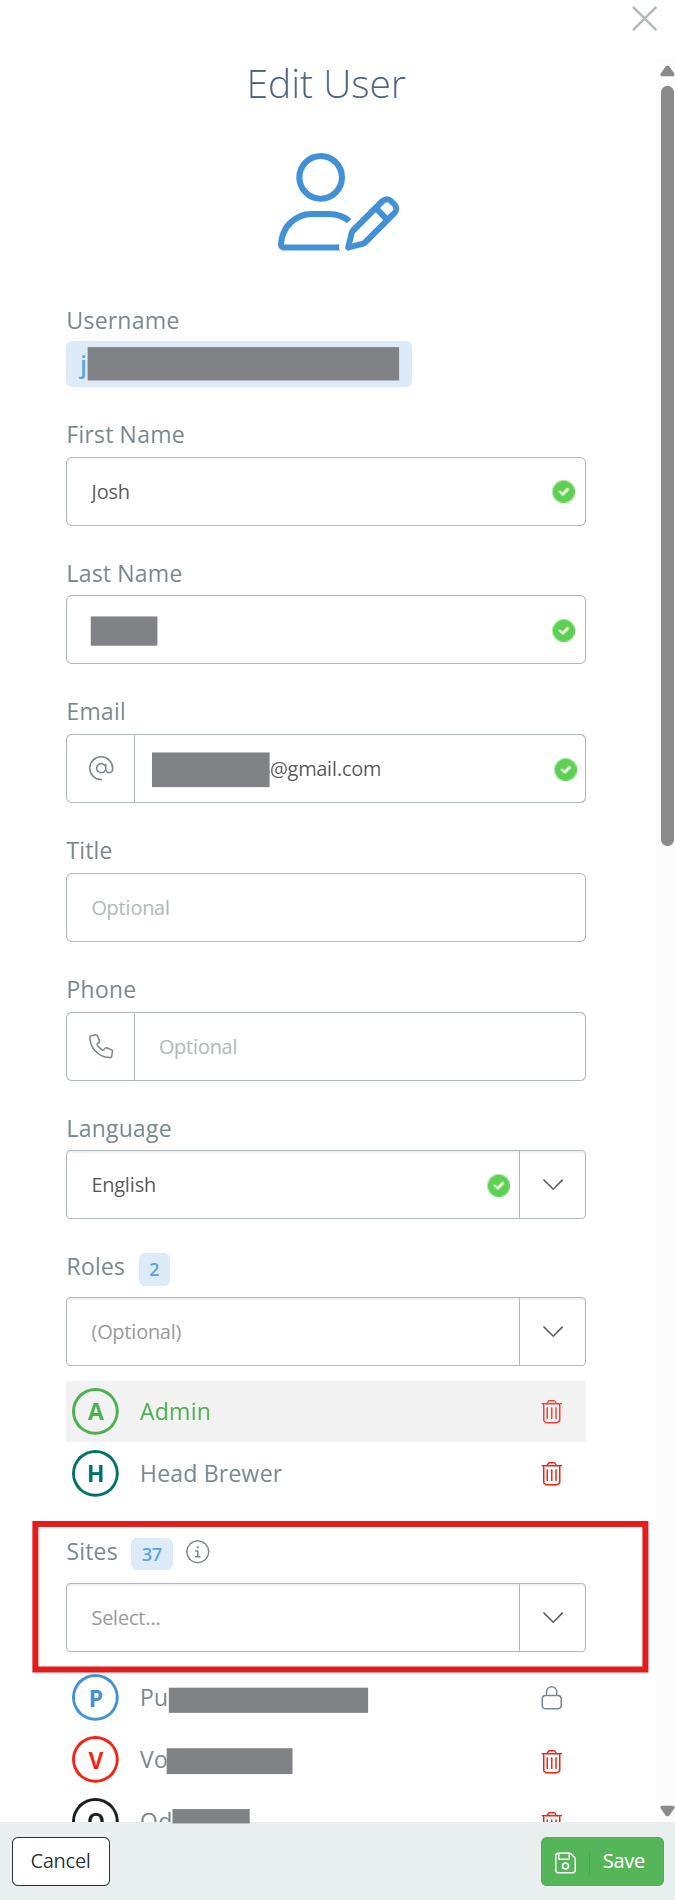
With the implementation of Cognito, only one set of login credentials is required to be able to access multiple DataNinja sites. Users in the Admin role can grant other users access to any DataNinja site that they have access to. To do this, navigate to the Team management page and click 'Edit' in the Actions column for the relevant user to open the Edit User aside.
If your user is in the Admin role, you will see a 'Sites' section where you can add or remove sites from the user's access list. You can only give other users access to sites that you already have access to, so if a site is missing, please reach out to our Support team over chat for that site to be added to your user.
Screencap from v4.21.264.185
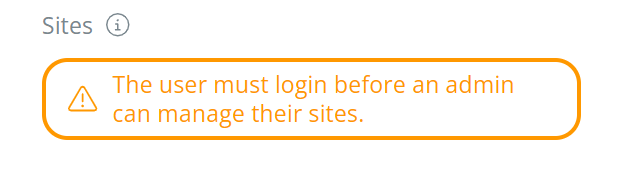
In order for the 'Sites' section to show in the Edit User aside, the user must have logged into the current site at least once. For example, if the admin were logged into site ABC and was editing John's user to give access to site SBOXBD, John would need to have logged into site ABC at least once before. DataNinja will show a warning if the user hasn't logged into the site before.
Screencap from v4.21.264.185
Navigating to Other Sites
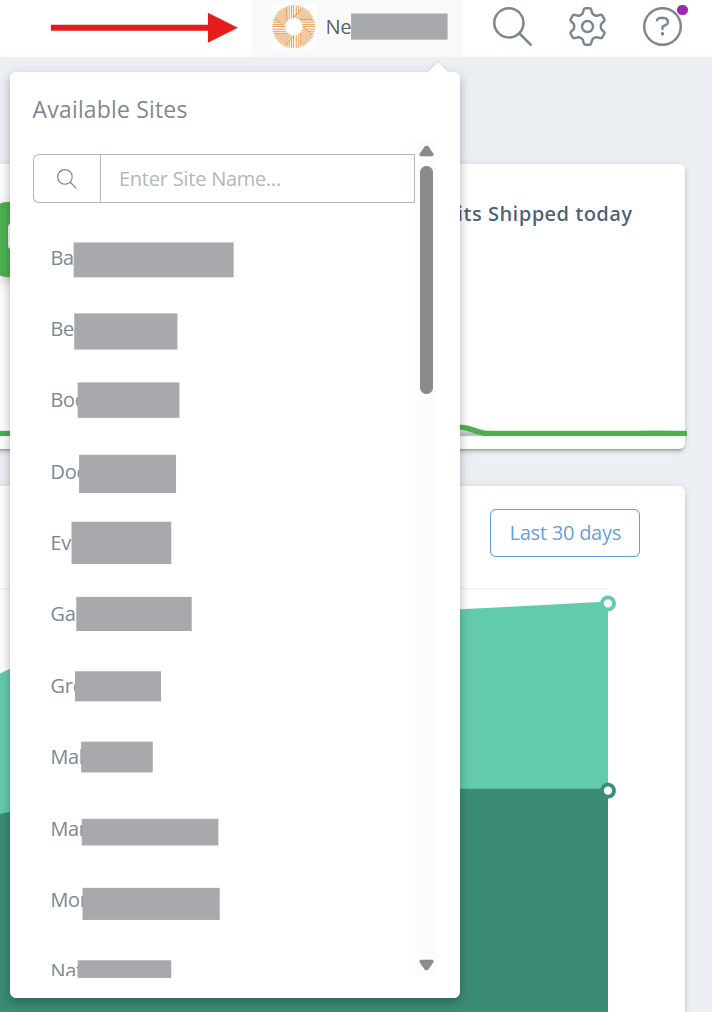
To swap between DataNinja sites, click on your company name in the top right, next to the search icon, and select the desired site from the dropdown list. If a site is missing from your list, reach out to an admin and have them add the site to your access list.
Screencap from v4.21.264.185
Resetting a Password
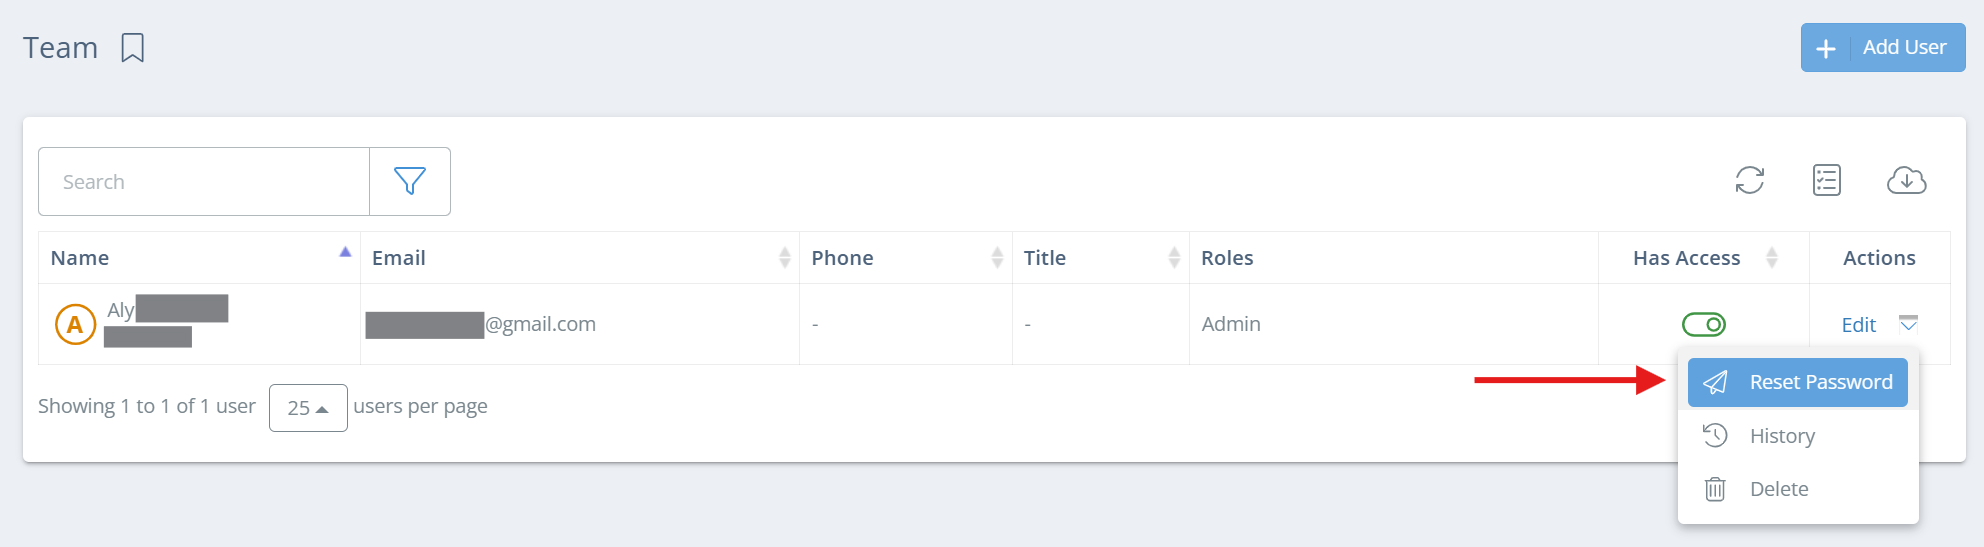
From the Team management page, any user in the Admin role can trigger DataNinja to send a password reset email to a user. To send the email, click the dropdown arrow next to "Edit" in the Actions column and select 'Reset Password'.
Screencap from v4.21.264.185
If your DataNinja instance uses Cognito (SSO) or is on a version beginning with 4.21, then the above method of sending a password reset will only work if the user has already logged in successfully at least once since the Cognito/4.21 update to your environment. If the user does not receive the password reset email, please contact us via chat.
Adding New Users
On the Team management page, click the 'Add User' button in the top right of the screen.

Screencap from v4.21.264.185
Enter a username, the user's first and last name, then an email and any other desired information, then click 'Save and Close' to create the user.
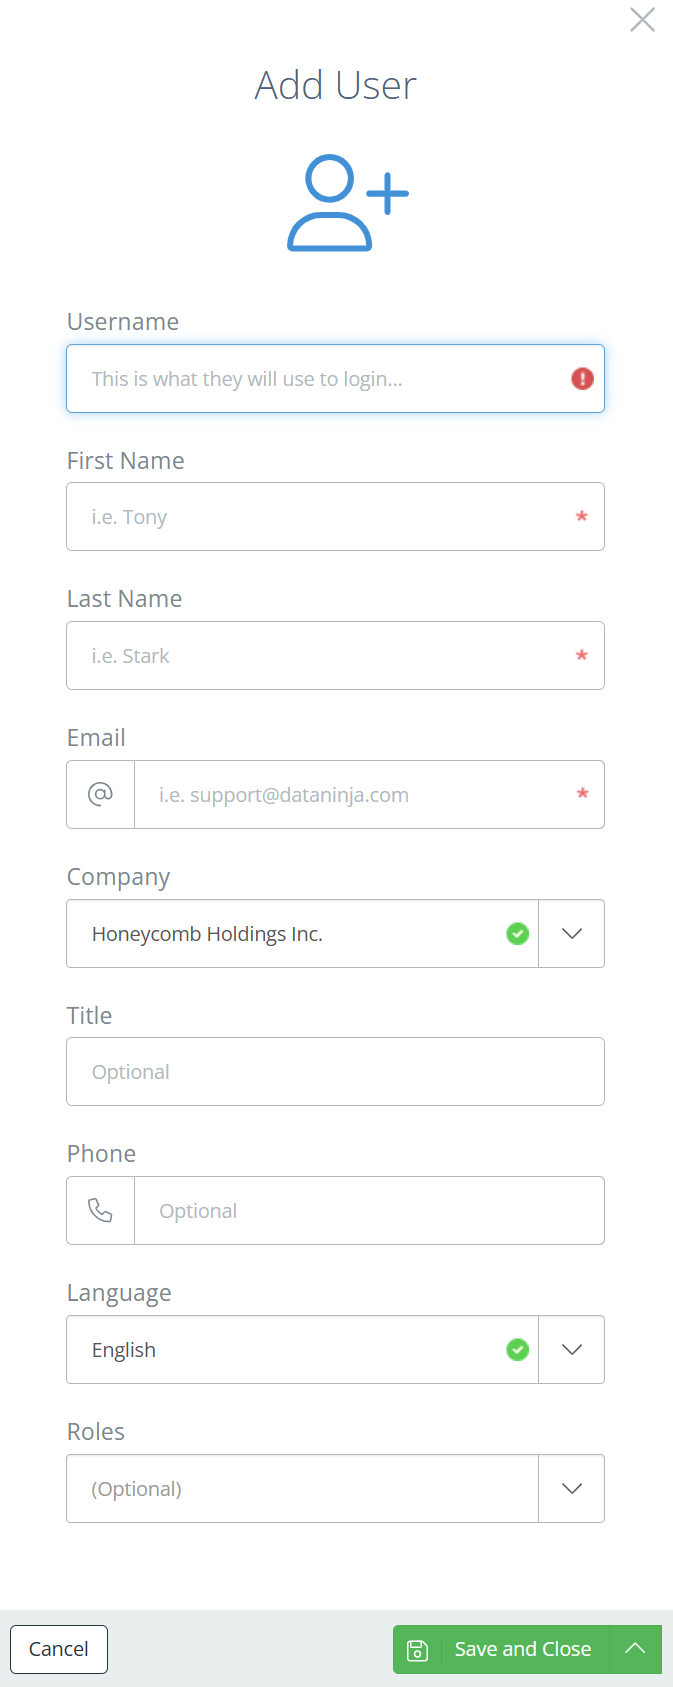
Screencap from v4.21.264.185
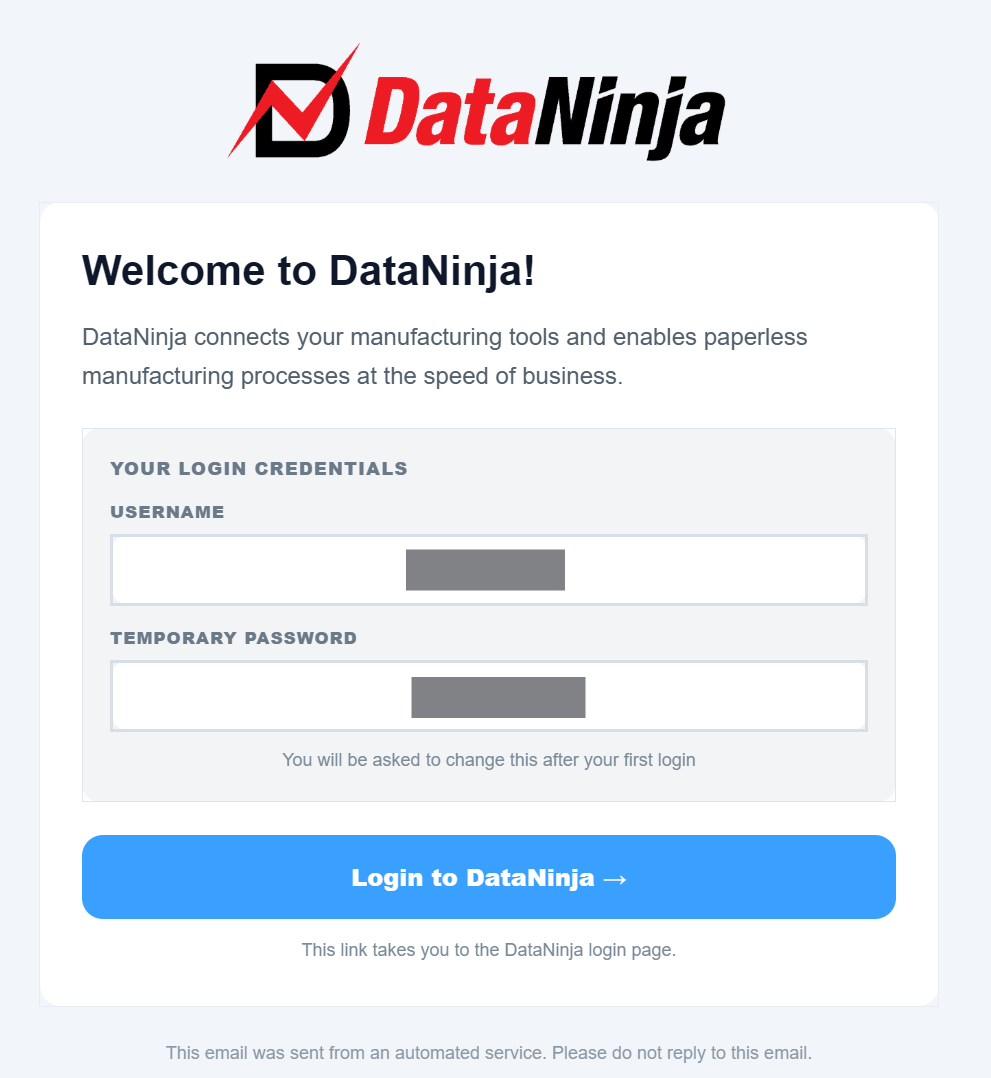
The user will receive an email with their username and a temporary password. They will need to follow the "Login to DataNinja" link in the email to set a permanent password.
If your DataNinja instance is on a version prior to 4.21, the user setup email and process may be slightly different.
Deleting Users
Find the user by scrolling or using the search function on the left side of the screen, then click the dropdown arrow next to "Edit" in the Actions column and click delete.
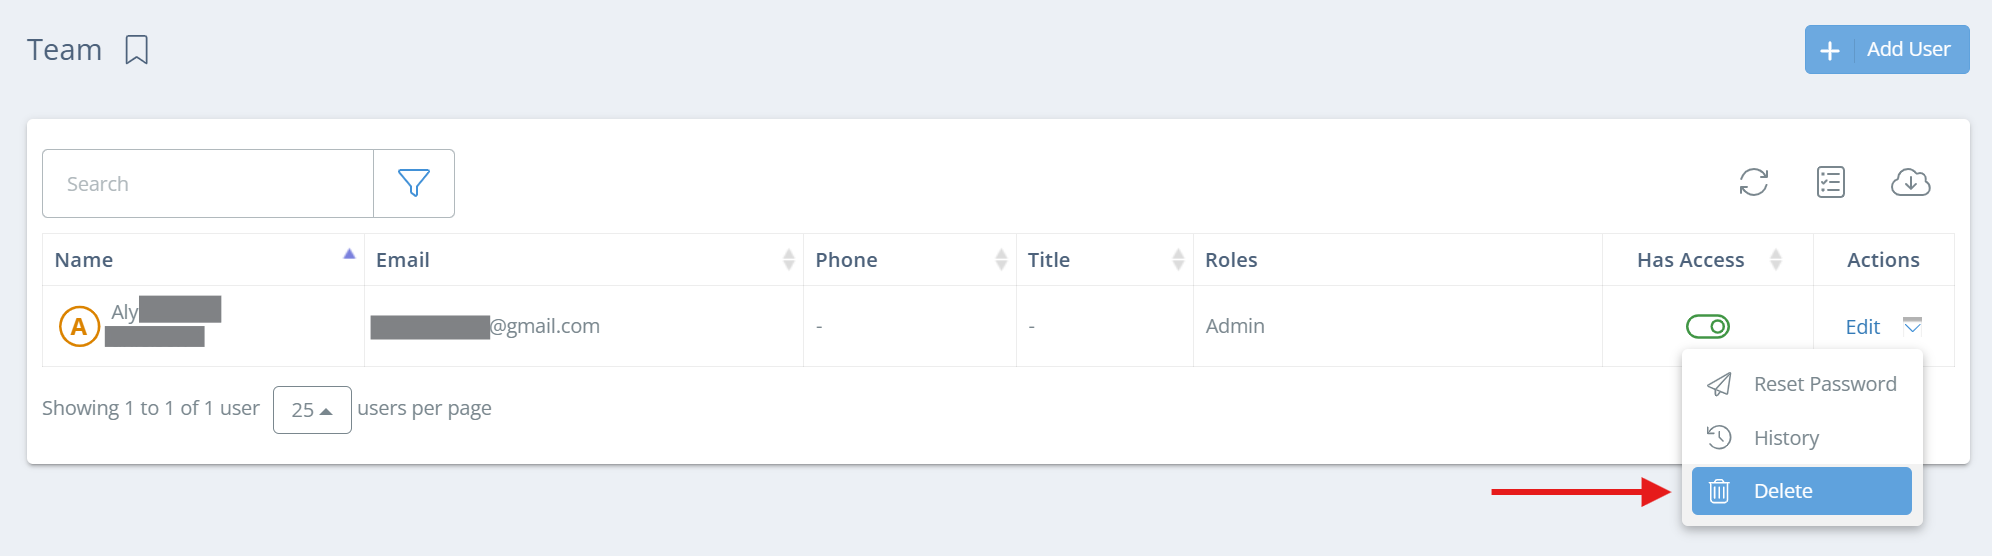
Screencap from v4.21.264.185
However, if you just need to restrict the user's access to DataNinja, consider toggling the 'Has Access' button off instead. This will lock the user's credentials and prevent them from logging in, and their access can be restored by toggling it on again. Assigned roles will be maintained, and you won't need to contact the DataNinja team to restore the user's credentials.
Restoring Users
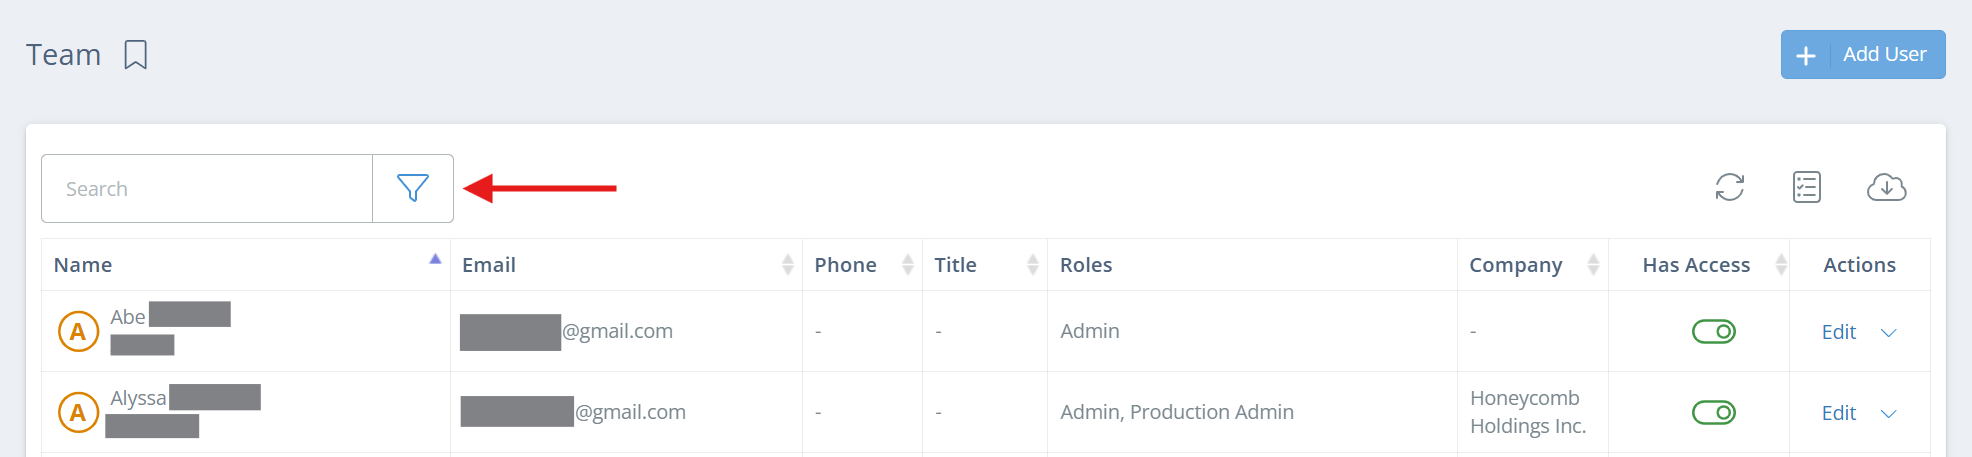
On the Team management page, you can either type in the name, username, or email of the deleted user, or use the filter to browse all deleted users.
To see all deleted users, click the filter icon next to the search bar.
Screencap from v4.21.264.185
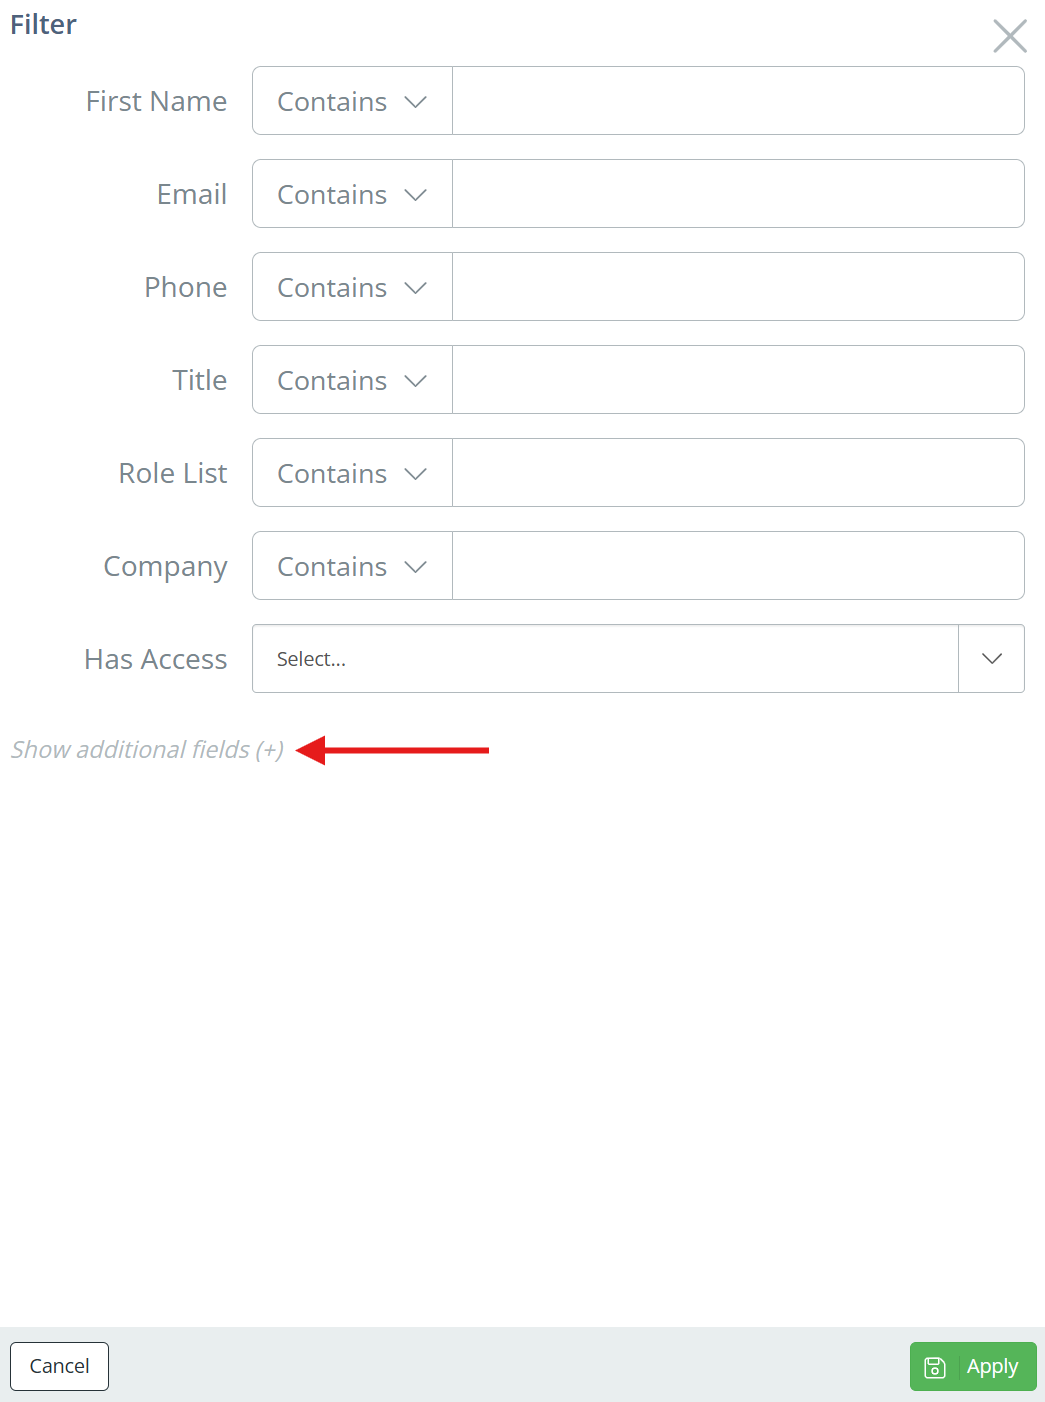
Click 'Show additional fields (+)'.
Screencap from v4.21.264.185
Find "Is Deleted" at the bottom of the options and select either 'Yes' or 'All'. The 'All' option is a great way to see all users that you have created.

Screencap from v4.21.264.185
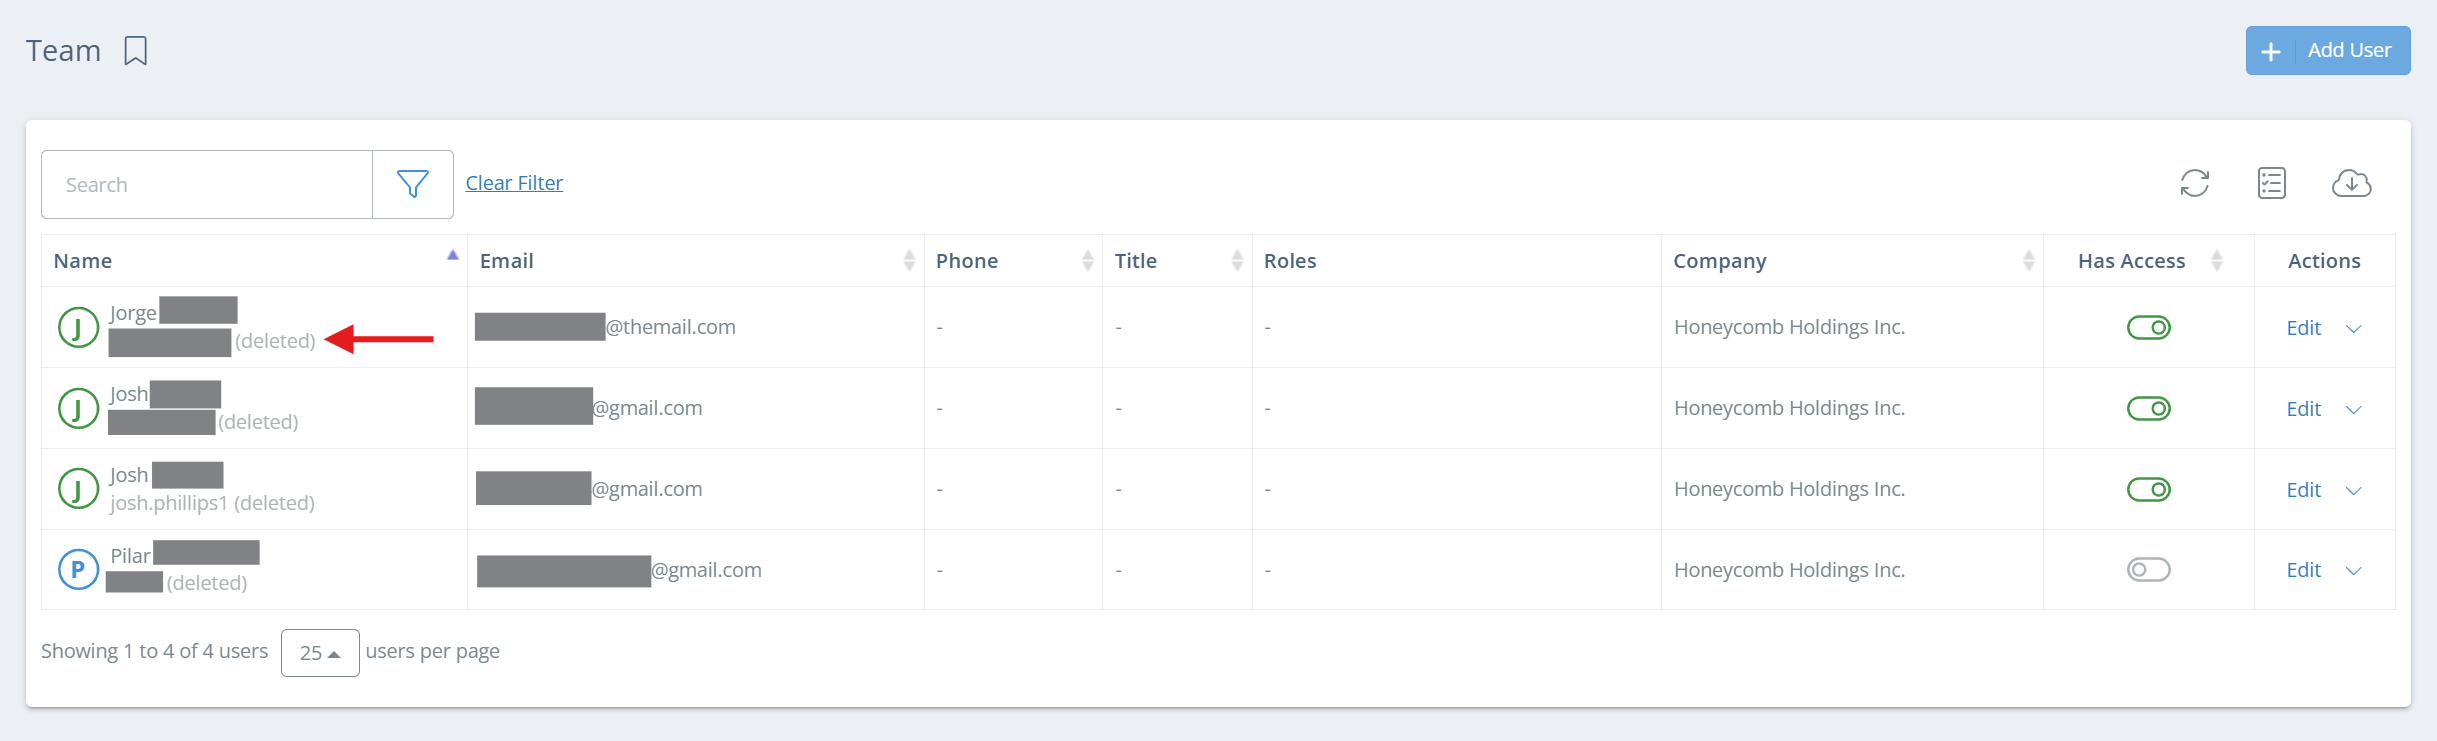
If you selected 'Yes', then after clicking "Apply Filter" you will see only the deleted users.
Screencap from v4.21.264.185
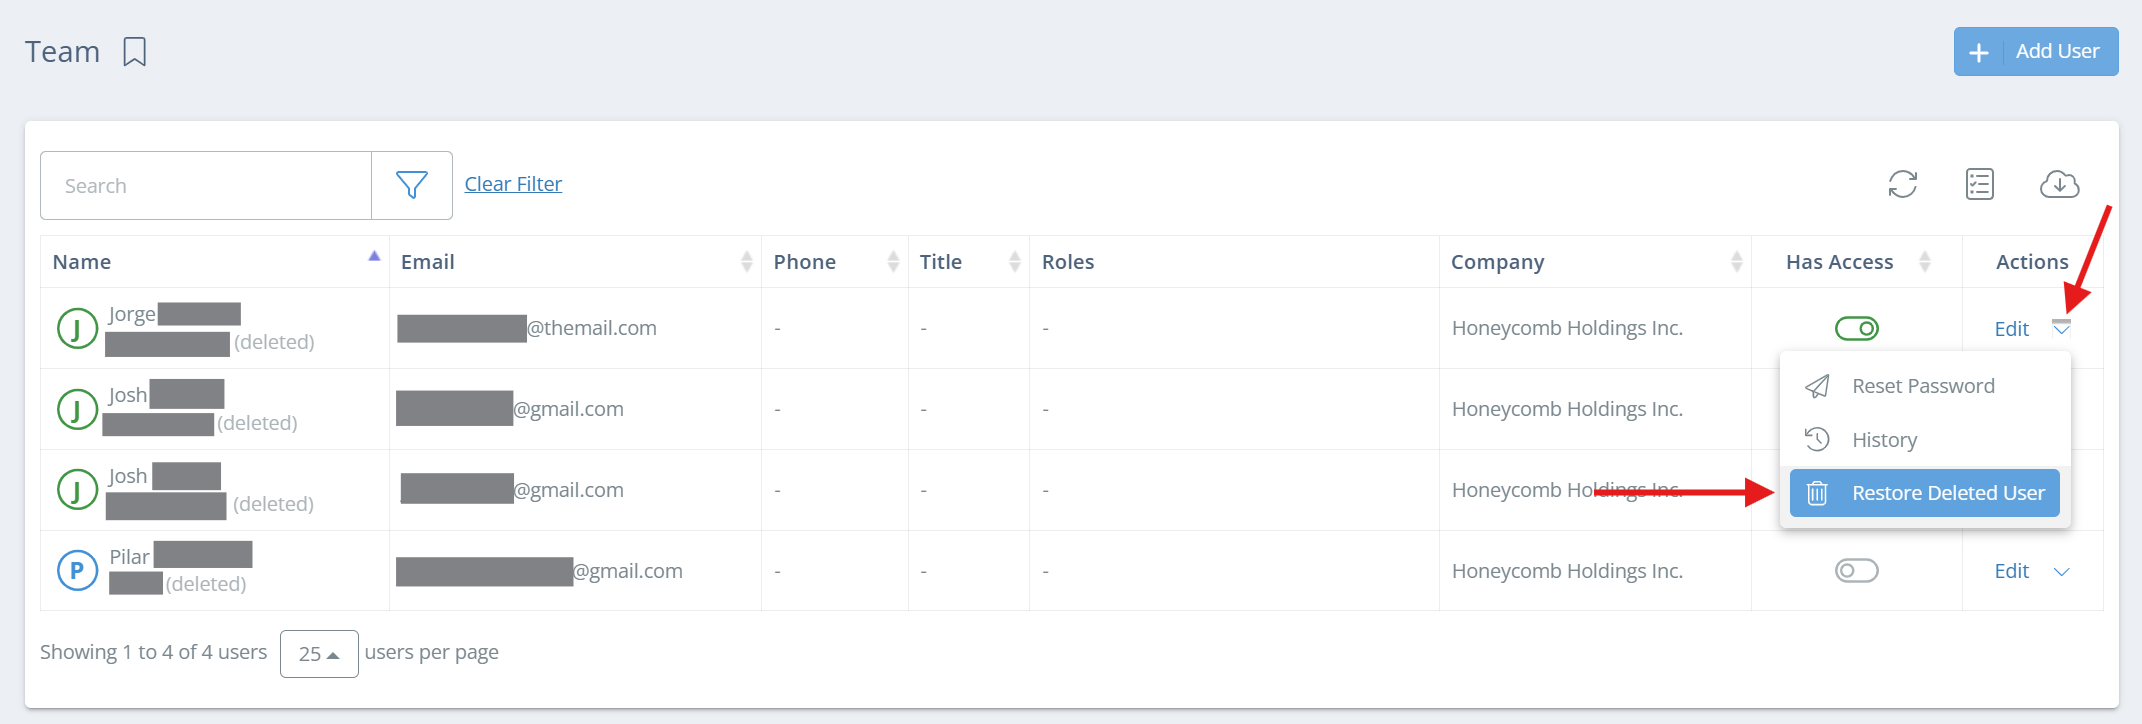
Search for, or scroll to, the relevant user and click the dropdown arrow next to 'Edit' in the Actions column, then click "Restore Deleted User".
Screencap from v4.21.264.185
Roles Do Not RestoreRestoring a user doesn't restore the roles the user had prior to being deleted, so make sure you re-assign any roles that the user needs to have.
Updated 3 months ago