Wi-Fi Printer Setup
Connect a Zebra printer to the internet and to DataNinja
Setup via USB
Download Zebra Setup Utilities
Download this free tool which will allow you to send your Wi-Fi name and password to the printer.
Connect Printer to Computer via USB
Using a USB cable, connect the printer to the computer that has Zebra Setup Utilities installed. The USB will be removed at the end of the setup process.
Select Printer within Zebra Setup Utilities
Select the printer and then click "Configure Printer Connectivity".

Connection Wizard
Choose Wireless, then click Next.

Click Next until you arrive at the Wireless Radio Settings. On the Wireless Radio Settings Window select USA, Canada as the WLAN Country. Then click Next .

Type in your Wi-Fi Network name in the ESSID field. Select WPA-PSK/WPA2-PSK as the security mode. Click Next.

Select String as the PSK Type. Then enter your Wi-Fi password in the PSK name field. Click Finish.

Wait 10-15 seconds for the information to be encrypted and stored in the printer's memory.
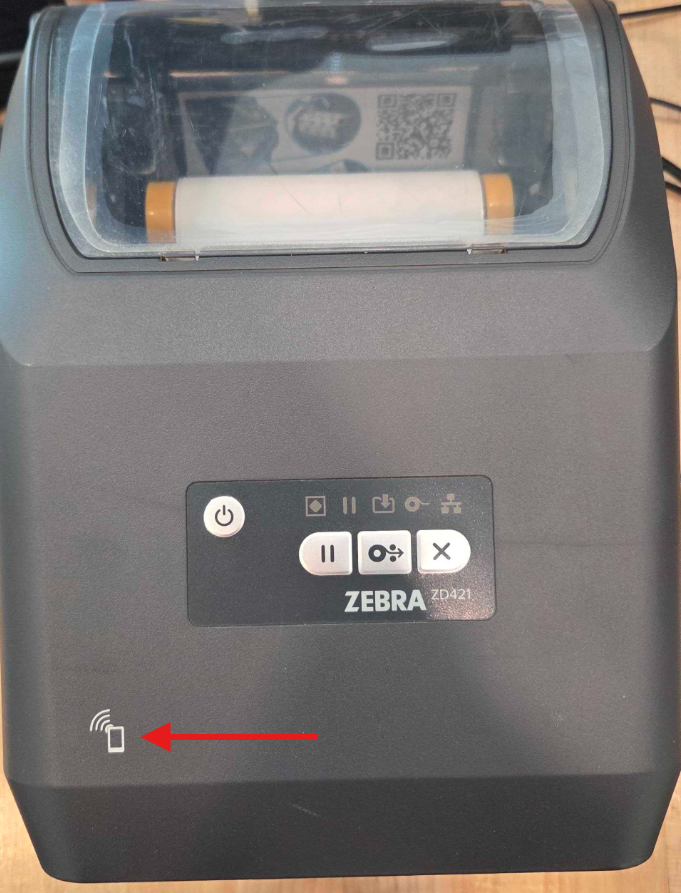
Reboot Printer
Turn the printer off, then back on again. When the network icon lights up green, the printer is connected to Wi-Fi. It could take up to 2 minutes for the light to come on.
Identify the Printers IP Address
Hold down the "X" and "Feed" buttons on the printer at the same time for 2 seconds. The printer will print a label with its configuration settings, including the current network information.

You are looking for something on the label that looks like this:

To enable the printer to print labels from DataNinja, the IP address on the printed label must be within DataNinja. Go to the Printers page in DataNinja and click "Discover Printers" and confirm that the newly connected printer shows in the list, with the correct IP address.
Disconnect USB Cable
The printer should now be successfully connected to Wi-Fi, and the USB cable can be disconnected from the both the computer and the printer.
Set Printer Details
Find the discovered printer with the correct Mac address and double click on it, or click "View" in the Actions column. On the new Maintain Printer page, click "Edit" to view the printer information, then rename the printer, select the DPI and label stock size, and link the printer to the correct hub.
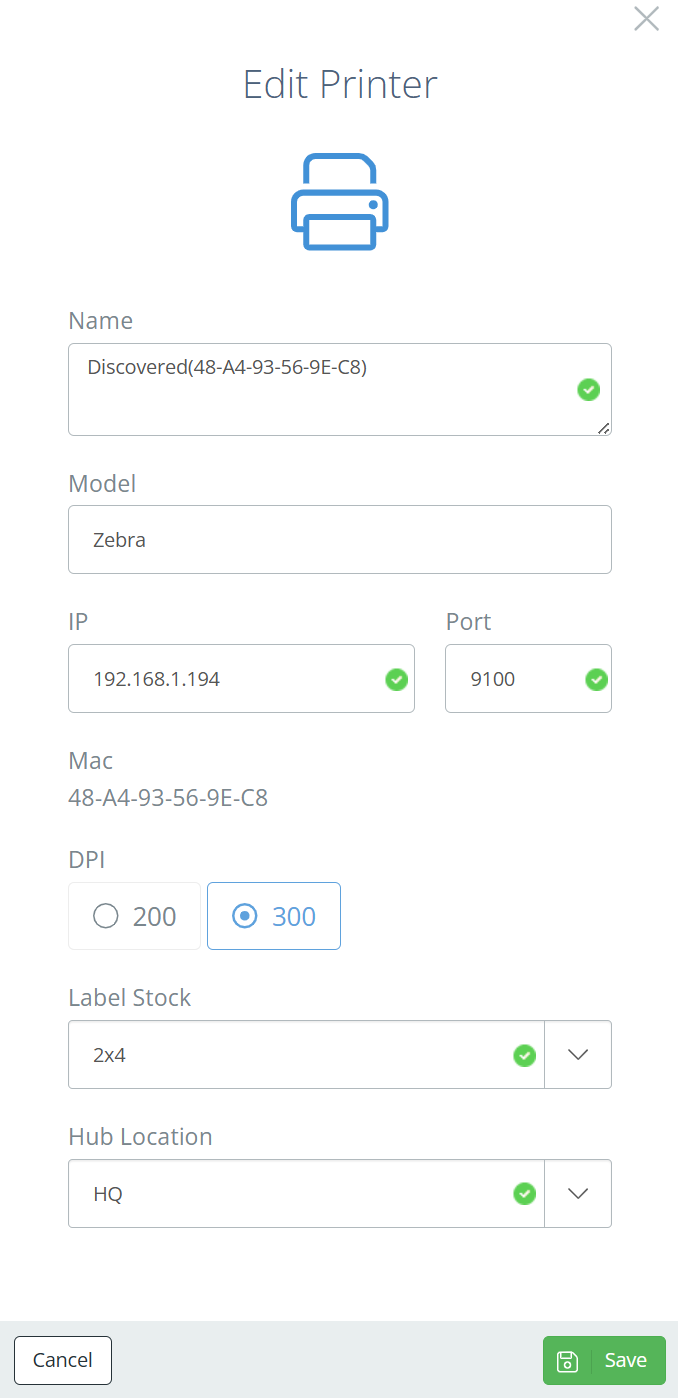
Screencap from v4.21.264.233
Static IP AddressIt's best to give your label printer a static IP address to stabilize printing. If the IP address on the Maintain Printer page doesn't match the actual IP address, the printer will not receive print jobs from DataNinja. Your IT person can help you assign a static IP.
Setup via Mobile Device
To begin setup, download the Zebra Printer Setup mobile app. From the app, you can choose to set up the printer via Bluetooth or by tap.
Tap
To begin printer setup via tap, have the printer plugged into power and set your mobile device, with the Zebra Printer Setup app open, near the tap icon on the Zebra printer.
Follow the prompts within the app to complete the printer setup.
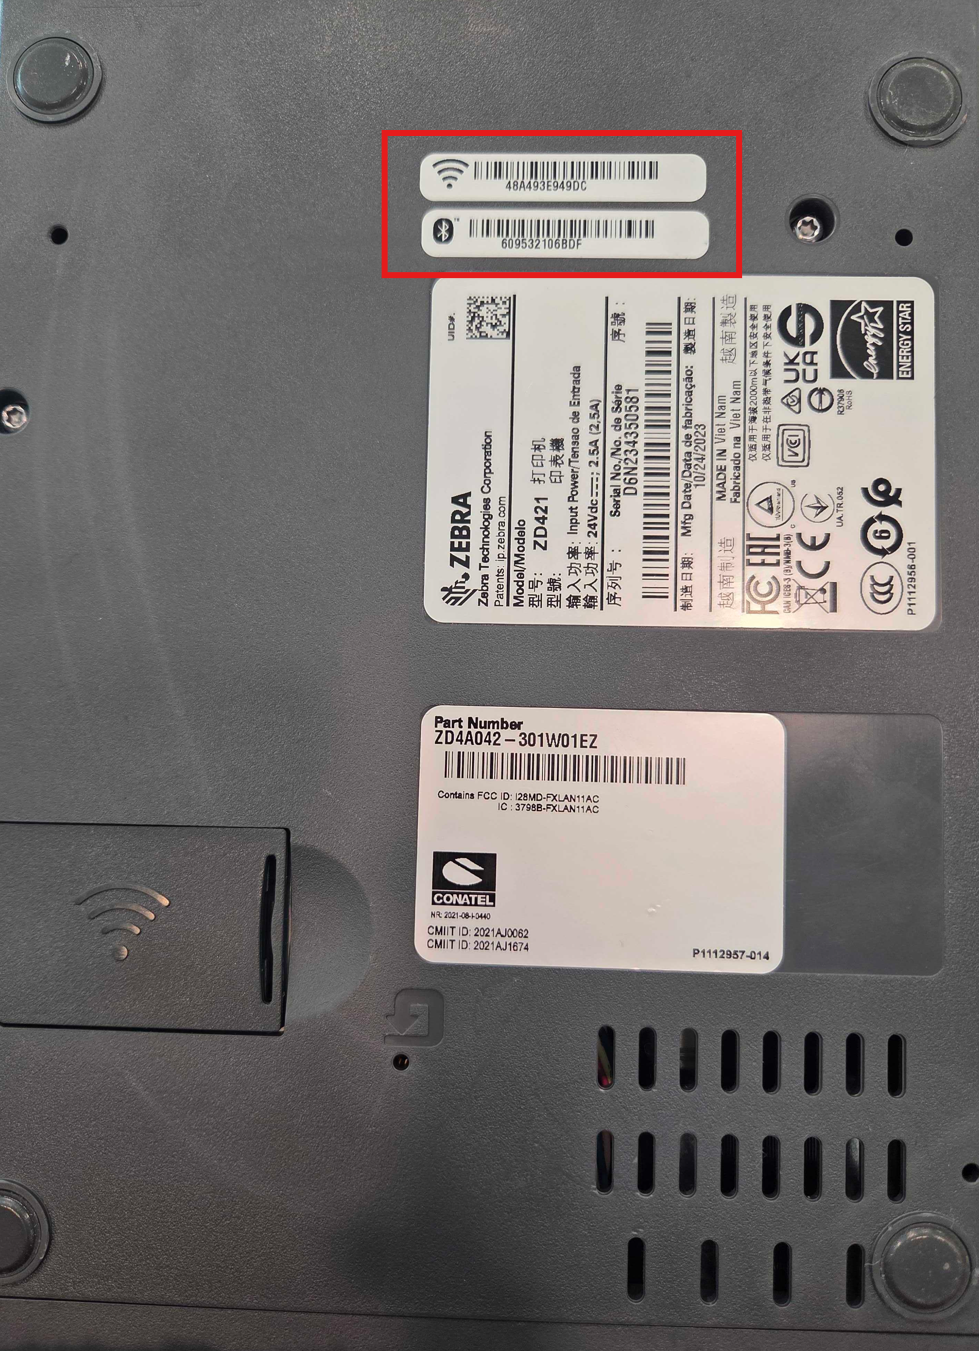
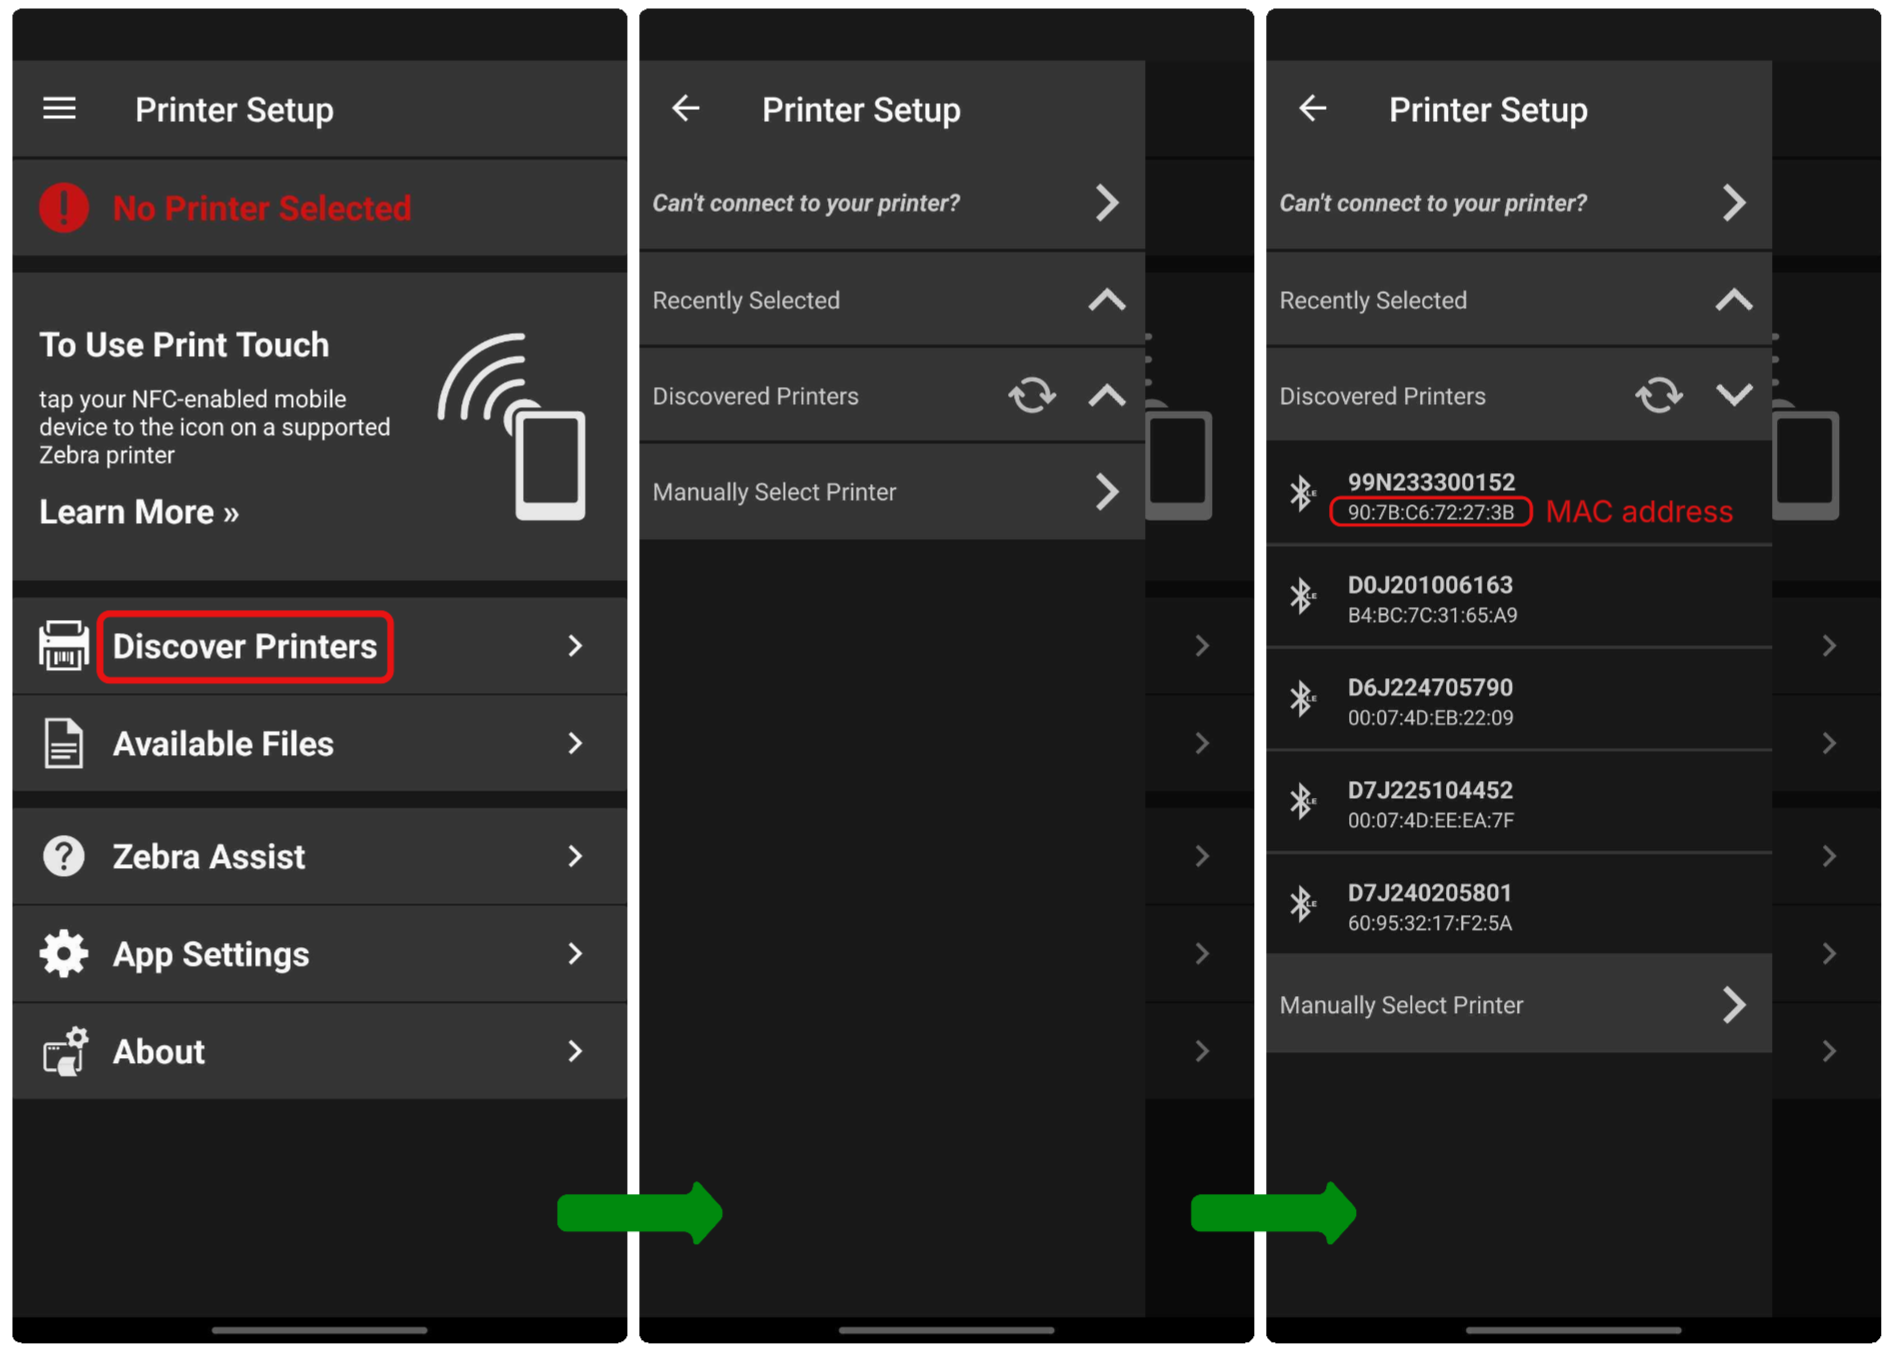
Bluetooth Discovery
In the Zebra Printer Setup app, tap "Discover Printers" and an aside will open with a Discover Printers tab. If the arrows are spinning, the printer discovery process is started, and nearby printers that are connected to power will begin to show. Printers will be listed by Bluetooth address and MAC address, both of which can be found on the printer.
Tap on the printer with the correct MAC address and follow the prompts to complete the network setup process.
Updated 3 months ago