Wave Picking
Selecting inventory that will be consumed in a manufacturing record
What is a wave?
A wave is a pick order- it refers to inventory that will be consumed during production of a specific BOM, and each wave is part specific. So if a BOM has 5 required parts, up to 5 waves can be created by the end of production for that BOM. Picking is not necessarily required to complete a BOM, so you can have less than the number of required parts, but not more.
Picking from a Specific Manufacturing Record
Not all companies have electronic picking enabled. If your company does not have it enabled, but would like to have it, reach out to our Implementation team over chat to get started.
Open the manufacturing record and scroll to the "Picking" section. Expand the section with the arrow on the right if you aren't able to see the list of required parts. On the part that you want to pick, click "Create wave".

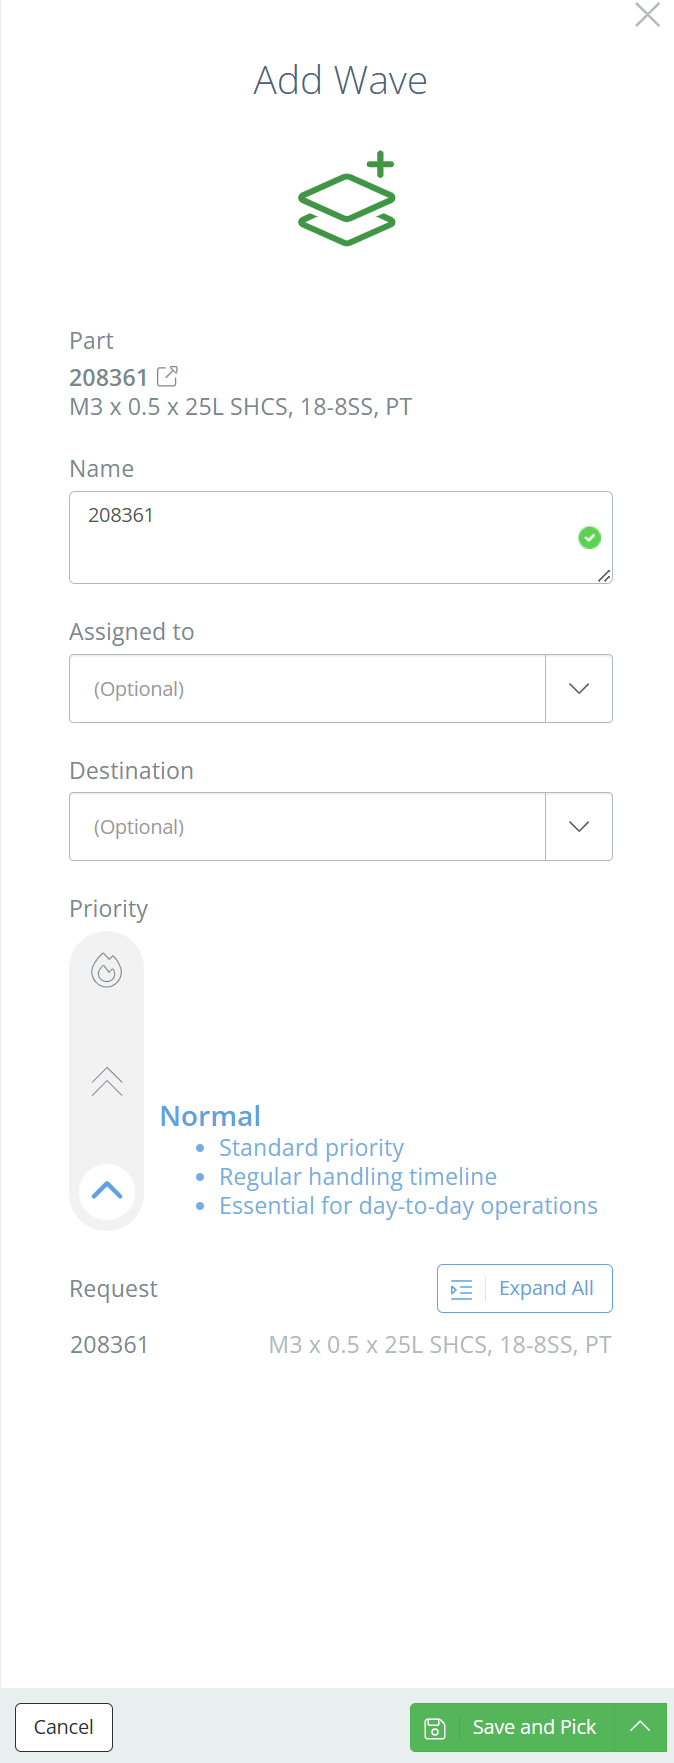
This will open a sidebar on the page where you will select a name for the wave (or leave it as the default, which is the name of the part being picked), and select a priority. Normal priority is the default, with standard handling time, but you can increase it to High or Urgent priority if the wave needs to be handled faster. You also have the option to assign the wave to a specific individual or location. Once all information is filled out, click "Save and Pick".
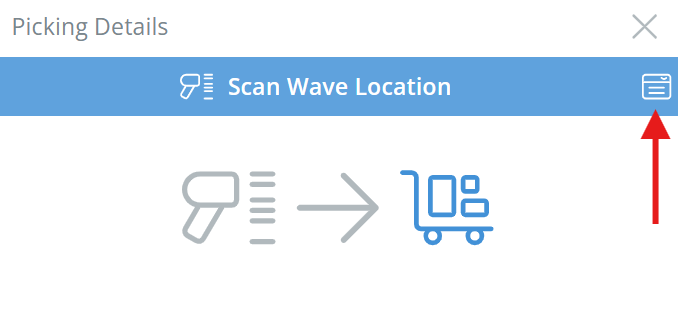
After saving, you will be instructed to scan the wave location, or you can manually select it by clicking on the ID tag icon in the top right.
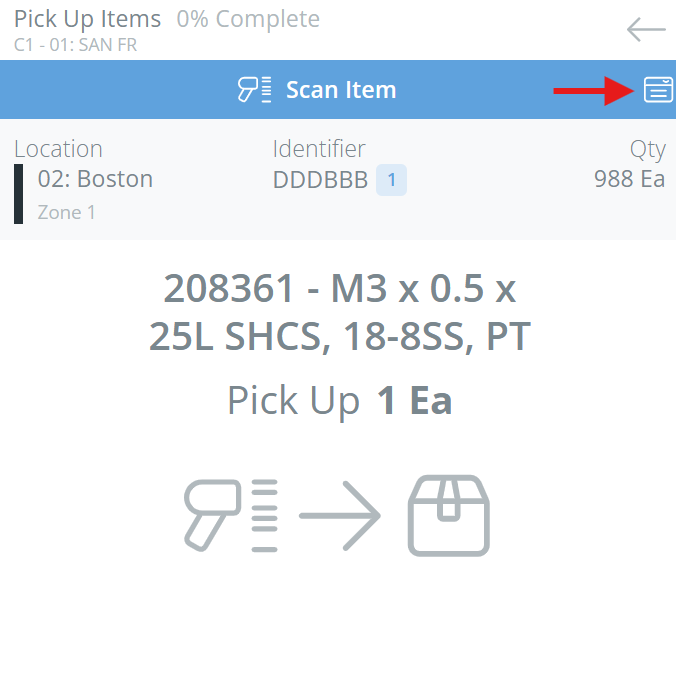
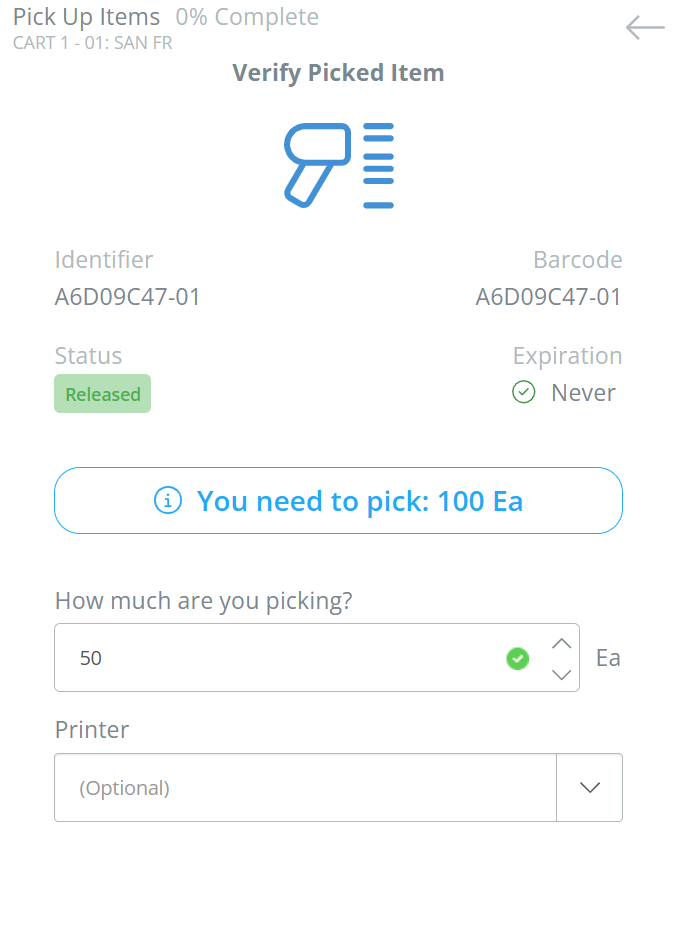
After scanning or selecting the wave location, you will then be instructed to scan the item(s) that will be consumed in this batch. If the item(s) scanned have been reserved on a different batch, you will not be able to scan them to the wave. Otherwise, scan what you need, or manually select the item(s) by clicking on the ID tag icon in the top right, specify the quantity you are picking from this location, then save by clicking "Pick Item".
Over-pickingDepending on your company settings, DataNinja allows you to over-pick on waves. To turn over-picking on/off, click the gear icon in the top right, and go to Company Settings. Then click the Picking settings tab, and edit "Is Over Picking Allowed?" for both Manufacturing and Shipping.
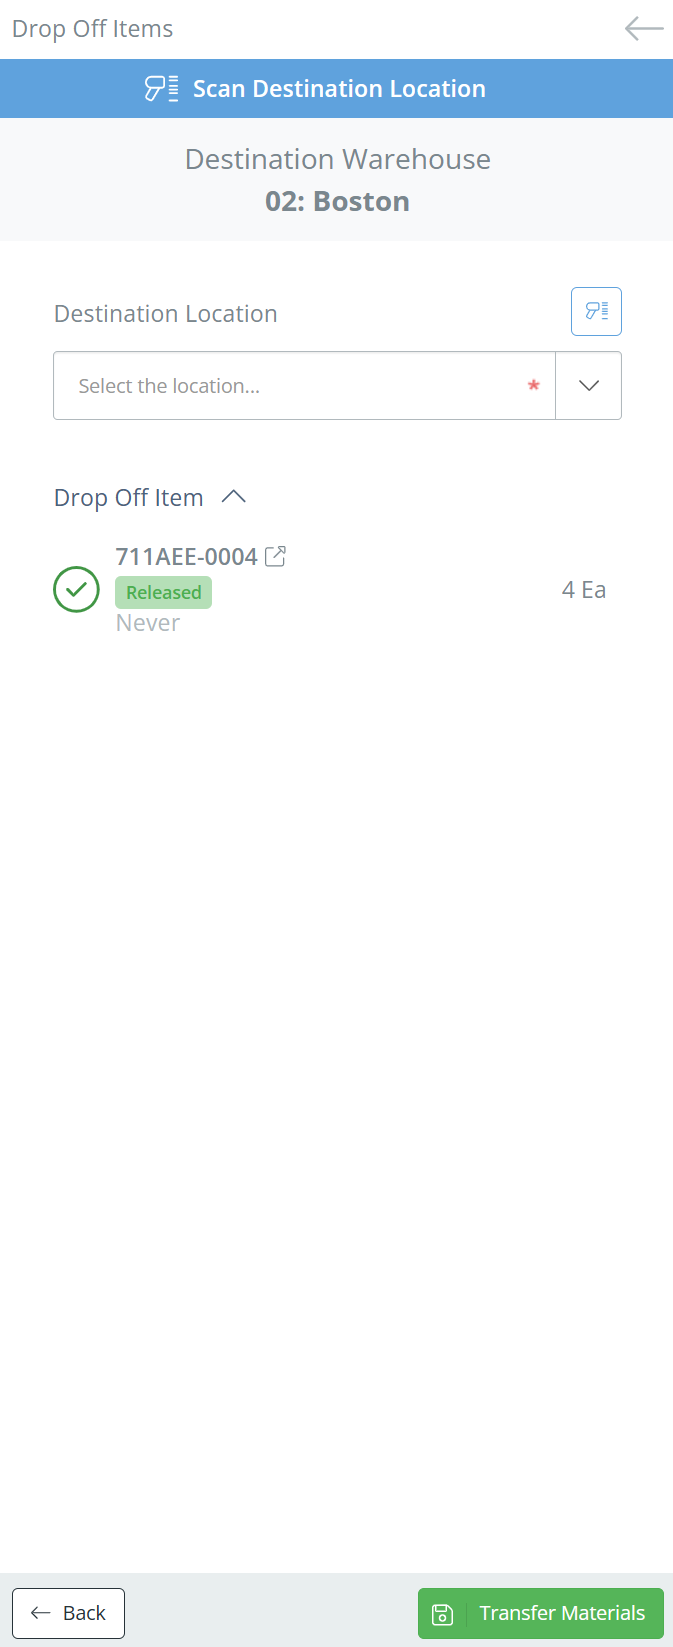
Drop Off
After picking inventory, if you have met or exceeded your needed quantity, you will need to select a location to "drop off" the picked inventory. Click "Drop Off Items", scan or manually enter the location, and click "Transfer Materials" to save.
Picking from Waves Page
Go to the Picking page from the lefthand sidebar, and search for the wave you will be picking. Double-click on the wave, or click "Start Picking" in the Actions column.
This will open a sidebar on the page where you will select a name for the wave (or leave it as the default, which is the name of the part being picked), and select a priority. Normal priority is the default, with standard handling time, but you can increase it to High or Urgent priority if the wave needs to be handled faster. You also have the option to assign the wave to a specific individual or location. Once all information is filled out, click "Save and Pick".
After saving, you will be instructed to scan the wave location, or you can manually select it by clicking on the ID tag icon in the top right.
After scanning or selecting the wave location, you will then be instructed to scan the item(s) that will be consumed in this batch. If the item(s) scanned have been reserved on a different batch, you will not be able to scan them to the wave. Otherwise, scan what you need, or manually select the item(s) by clicking on the ID tag icon in the top right, specify the quantity you are picking from this location, then save by clicking "Pick Item".
Over-pickingDepending on your company settings, DataNinja allows you to over-pick on waves. To turn over-picking on/off, click the gear icon in the top right, and go to Company Settings. Then click the Picking settings tab, and edit "Is Over Picking Allowed?" for both Manufacturing and Shipping.
Drop Off
After picking inventory, if you have met or exceeded your needed quantity, you will need to select a location to "drop off" the picked inventory. Click "Drop Off Items", scan or manually enter the location, and click "Transfer Materials" to save.
Updated 8 months ago