Receiving Inventory
Inbound Inventory Workflows
Auto-Increment Inventory Levels in QuickBooksReceiving in DataNinja increments QOH in QuickBooks so the financial implications of inventory are appropriately recognized.
Receiving Against a Purchase Order (Recommended)
If your financial system is synced with DataNinja, then click on the Receiving tab on the left hand menu, then the Orders tab and select the desired PO.
The "WIP" tab displays all open PO's that have progress greater than 0%, or you can also search and receive inventory based on part type under the "Lines" tab.
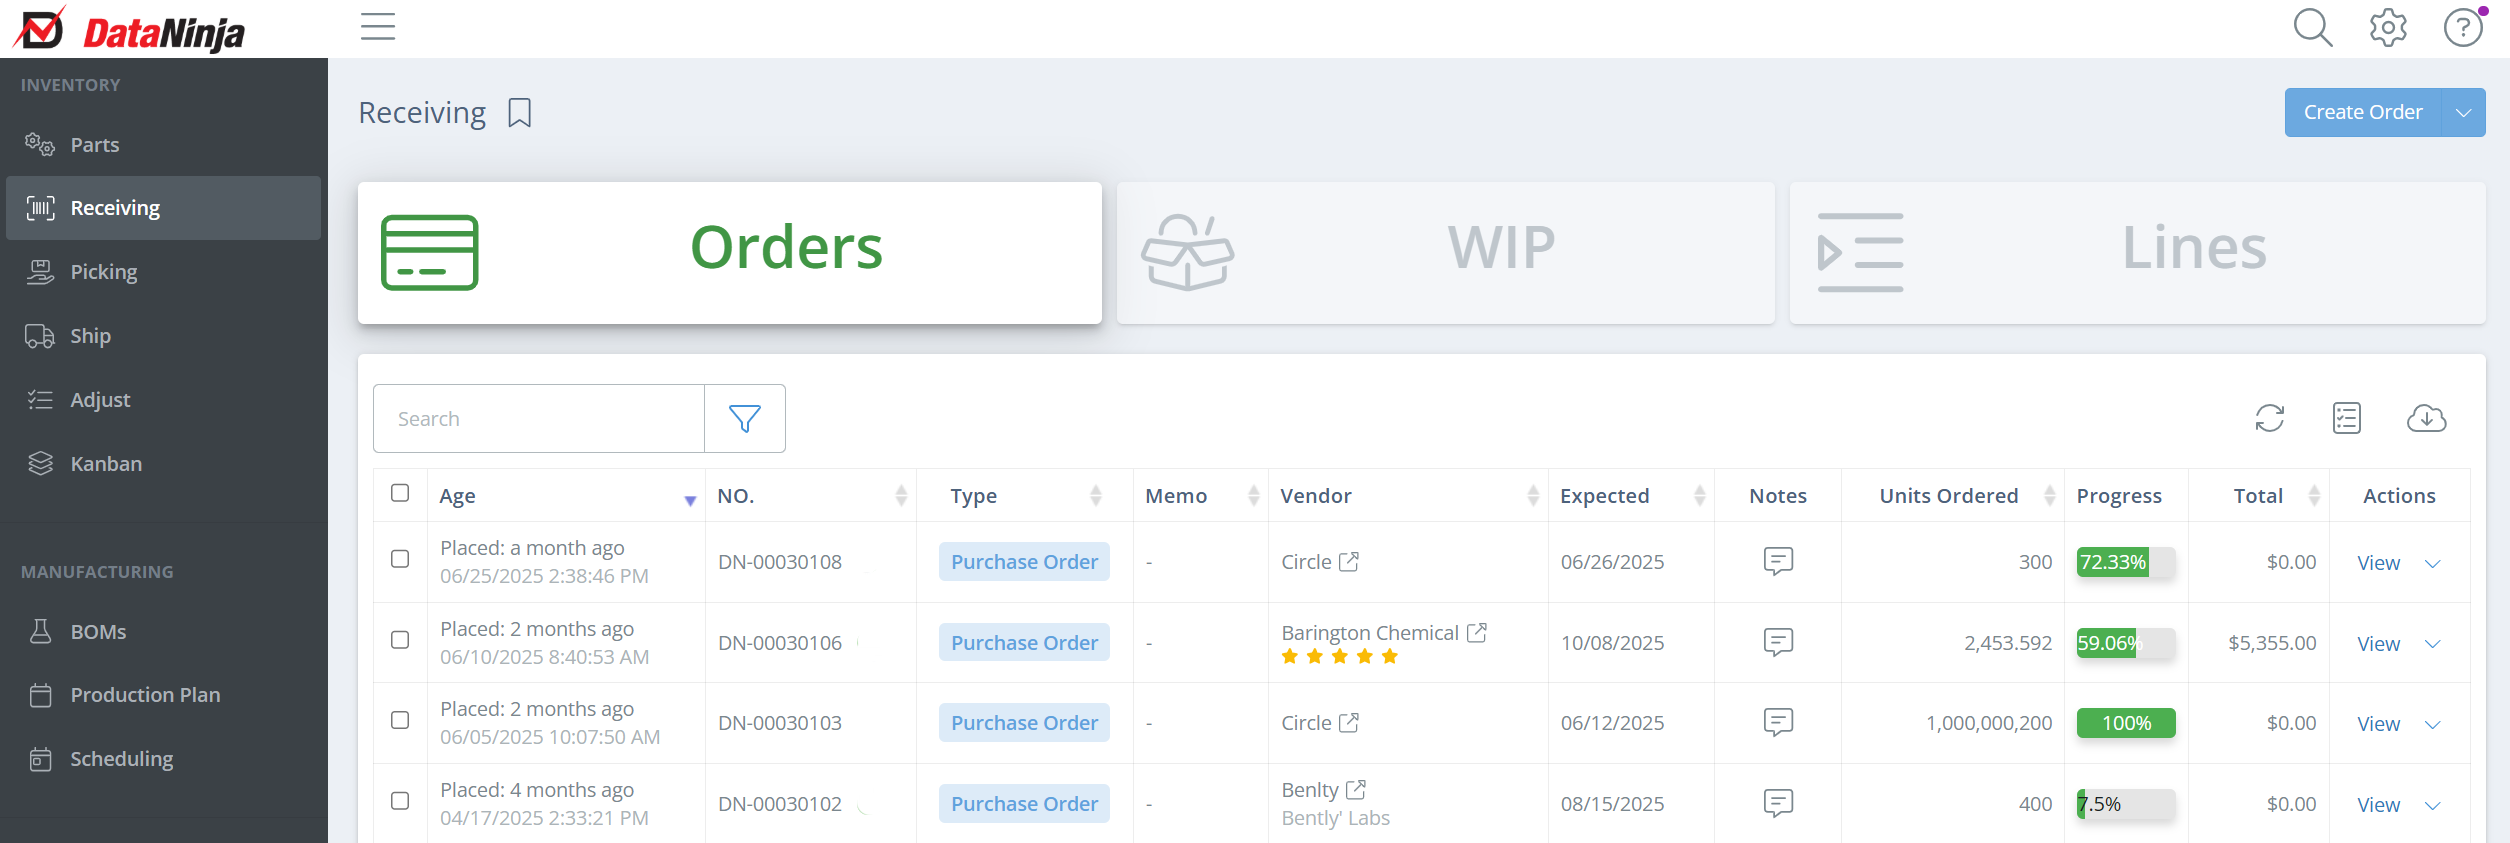
To start receiving on a PO, find and open the relevant PO on the Receiving page, then click "Receive" next to the line you are receiving.

Follow the prompts
You will be prompted to select the receiving unit before entering the quantity of the part received. The default selection is the one that DataNinja has recorded as the "Stocking Unit of Measure".

Enter the amount of product received and the number of labels needed
DataNinja will generate a unique identifier. You can enter the supplier lot number, change expiration date, change location, add notes, and add attachments.

Click "Receive"
The product is now received and included in your current inventory. If there is an inspection associated with that part, you will be prompted to perform that inspection.

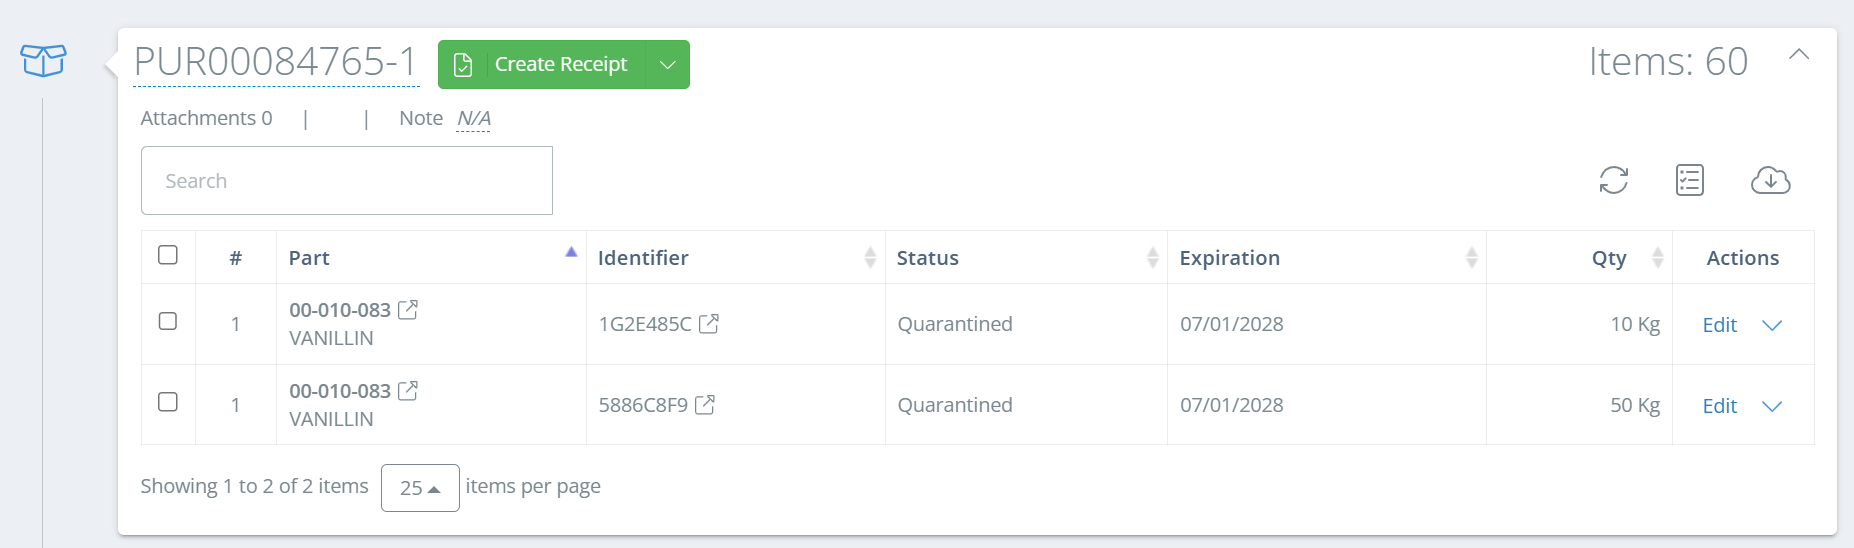
Progressive ReceivingSuppliers often fulfill PO's across multiple shipments. DataNinja can create a bill for received inventory while still keeping a PO open until all lines have been fully received. This way, you know what inventory is still in transit from your supplier- this is "progressive receiving".
To use this feature, follow the steps above until all received inventory on this PO has been received in DataNinja. A Receipt is automatically created when the PO is first received against, and each lot will show on it's own line:
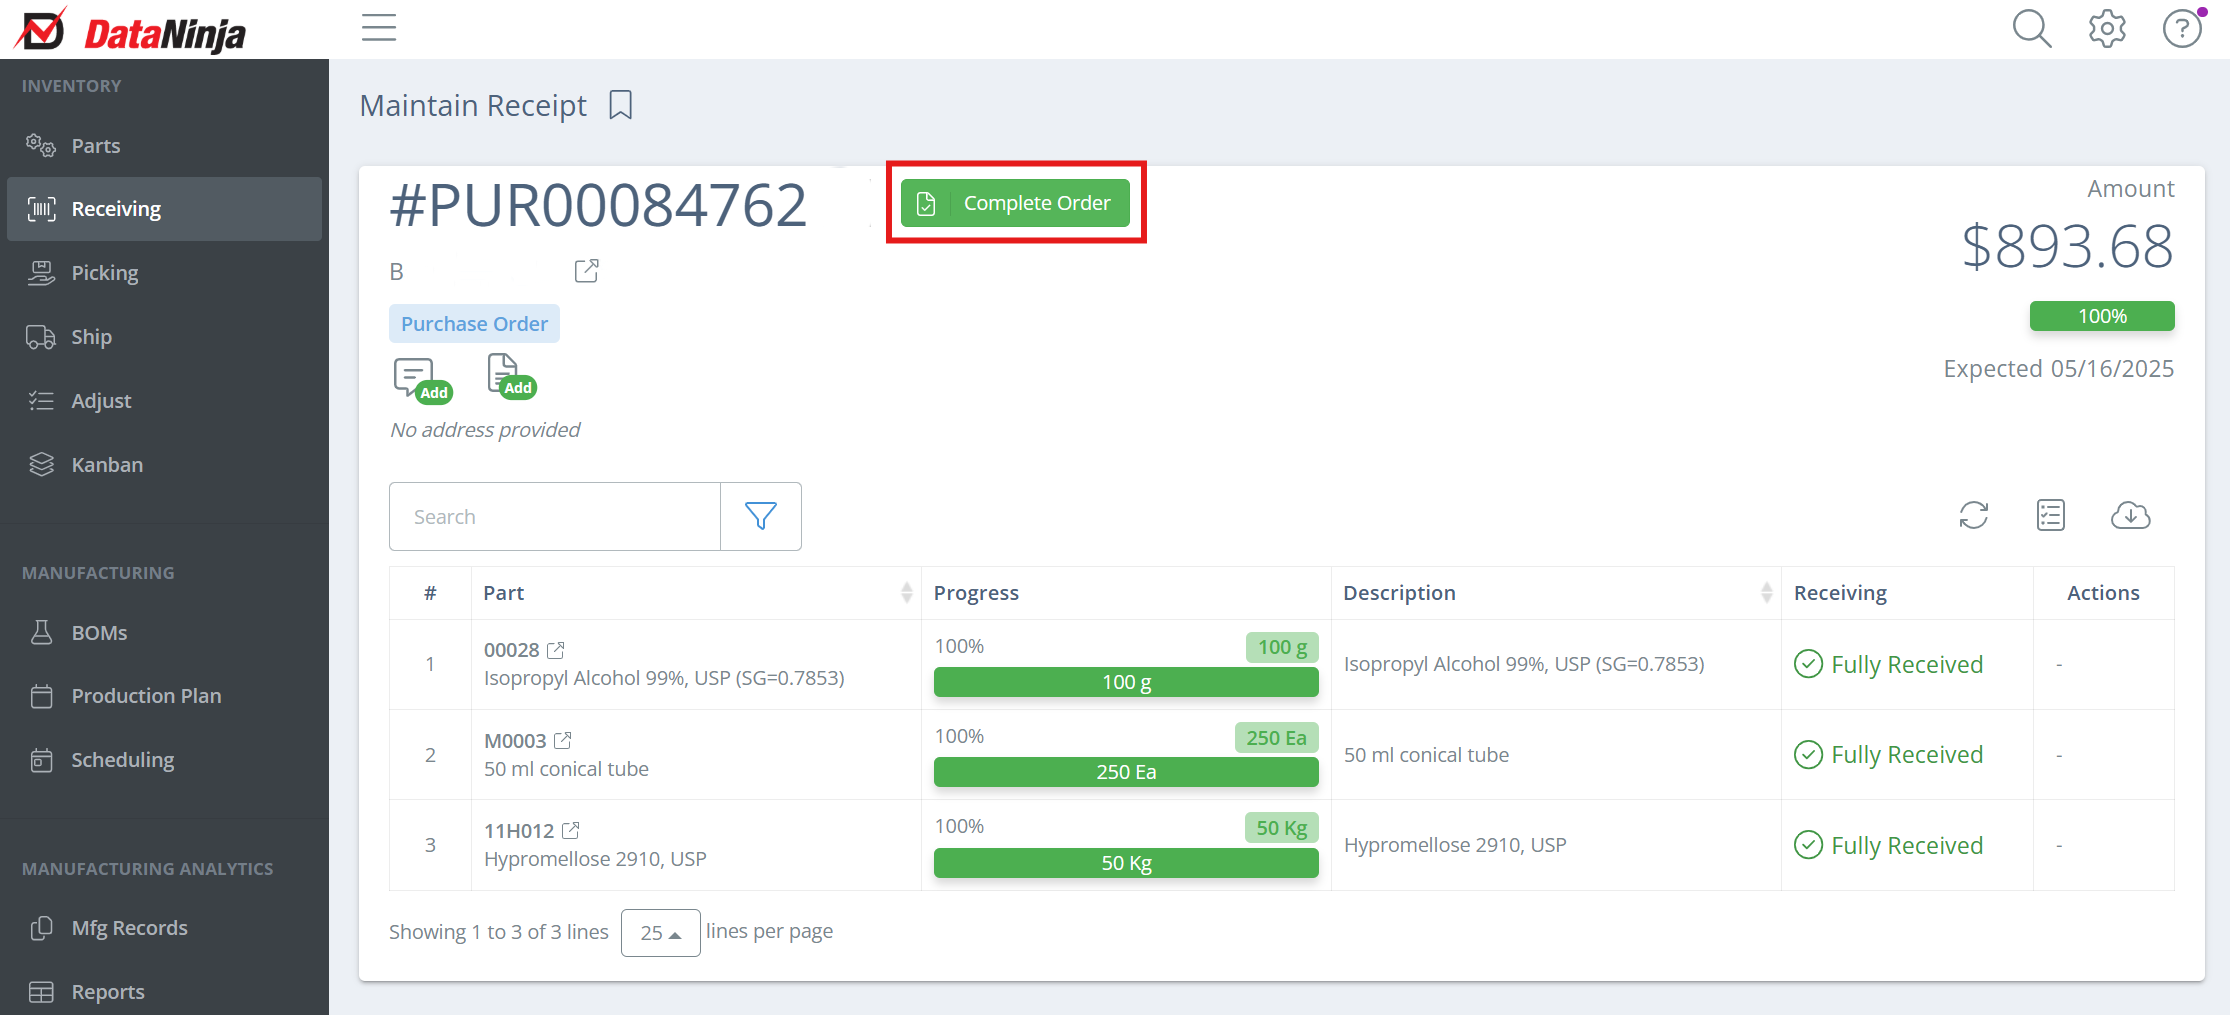
Now that all received inventory is in DataNinja, click "Create Receipt". This will generate a Bill in QuickBooks, and provide a link to the PO in the Bill memo.
Once the PO is received against again, a new Receipt will show in DataNinja (note the "-1" and "-2" after the PO number on the receipts- this indicates the number of receipts that have been created):

Close Order
When all lines on the PO have been fully received, and all receipts have been closed, click "Complete Order" next to the PO number to close the PO in both DataNinja and QuickBooks.
Quick Receiving Inventory (Not Recommended)
If DataNinja isn't tied to your financial system or if you don't have a purchase order for the inventory, you can also quick receive inventory into DataNinja. Quick Receiving can be enabled/disabled in the Company Settings for each DataNinja instance. See Company Settings for more details.
Click "Quick Receive" in the upper right corner of the screen

In the new aside, search and select the part number you are receiving

Follow the prompts
Depending how the part is tracked (by weight or by each) you will be prompted to select the receiving unit before entering the quantity of the part received. The default selection is the one that DataNinja has recorded as the "Stocking Unit of Measure".
Enter the amount of product received and the number of labels needed
DataNinja will generate a unique identifier. You can enter the supplier lot number, change expiration date, change location, add notes, and add attachments.
Click Receive
The product is now received and included in your current inventory. If there is an inspection associated with that part, you will be prompted to perform that inspection.
Updated 9 months ago