Parts
Creating new inventory items (Raw Material, Work in Progress, Finished Goods)
Before you can track, control, and trace inventory, you need to create or enter details about each of the items you keep in inventory. You will need to create or import part information for:
- Raw Materials
- Sub-Assemblies (Inventoried Work-in-Progress)
- Finished Goods
DataNinja also offers the ability to create custom Part Types, see the "Part Types" section below.
Just RememberIf you will regularly need to know the inventory for a material, part, or finished good, then it needs a unique part number in DataNinja.
Adding Parts
Uploading PartsIf you are adding more than 20 parts, it will be faster to use an upload spreadsheet. Use the chat feature on this page and ask for a person, and a member of our Support team will help you get started with the upload.
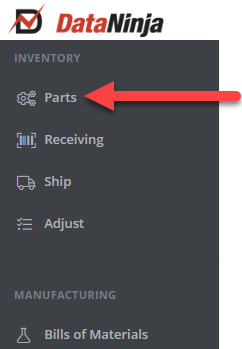
The Parts page is where you will add and configure part-specific settings. Once all inventory has been imported or created in DataNinja, this page will be a central location to monitor real-time inventory levels. Navigate to the Parts page with by clicking on the Parts tab in the left-hand sidebar.
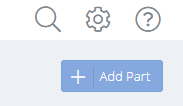
Near the top left of the page, click "Add Part".
An aside should now show on the right side of the screen, with fields for all the various part identifiers, as well as storage conditions/locations, purchasing costs, and tracking specifications.
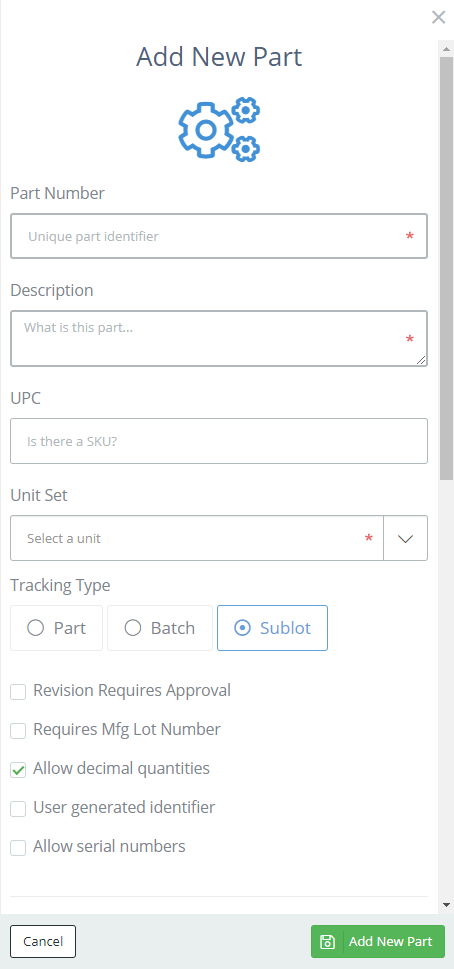
Part Number
This is a unique code that identifies the item in place of a description. We recommend using a simple identifier, such as "WP5G", or "10015", and place specific definitions in the description field instead. Both the part number and the description will be visible on the Parts page after the part has been saved.
Description
Full text, human readable definition/name of the part. This is where you should be specific about the item, like "Vitamin A Beta Carotene 20%" or "Dorsal Resting Hand Orthosis".
UPC (Optional)
Typically only used for capturing the SKU of sellable parts. Can be left blank, and is able to be edited at any time.
Unit Set
If the part is a Raw Material or Sub-Assembly, choose a unit of measure (UOM) set that matches how you most often USE the inventory. If the part is a Finished Good, choose a UOM set that fits based on how you usually SELL the inventory.
Changing the UOM on a saved Part requires DataNinja Support. Use the blue chat bubble on this page to reach the Support team.
Tracking Type
Tracking Type determines how DataNinja tracks the inventory of this item.
Part - Item Quantity (in UOM) and location only. Most commonly used for things like master case boxes.
Batch - Item Quantity, Expiration Date, Quality Control Status, Identifier (Lot Number) by location
Sublot - Item Quantity, Expiration Date, Quality Control Status, Identifier (Lot Number), Location by container
Sublot is usually best!Sublot is the most powerful tracking type. Combined with License Plating, it is typically better than Batch tracking for most processes where traceability is required. When in doubt, go with Sublot.
Check Boxes (Optional)
Most of these checkboxes will likely remain unchecked. By default, only "Allow decimal quantities" is marked.
Revision Requires Approval - Enables revision tracking with e-signature approvals at revision changes. Requires approval before a new part revision can be created.
Requires Supplier Lot Number - Makes the "Supplier Lot Number" field required when Receiving this Part.
Allow Decimal Quantities - Inventory for this part can be transacted in fractional quantities.
User Generated Barcode - Forces manual, custom entry of inventory identifiers. Not recommended.
Allow Serial Numbers - Check this if the part will be transacted serially via API. Not common.
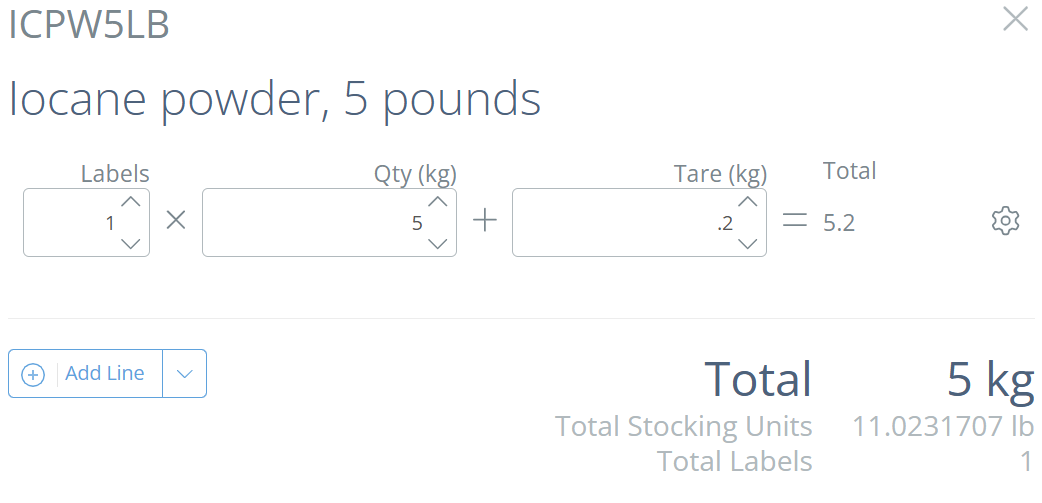
Allow Tare Weight - When receiving this part, the weight of the packaging will be included in the received weight. Allows more detailed inventory tracking by weight.
Potency
If this part is expected to have a particular potency, click "Enable Potency" and enter in the expected strength and the unit of measurement (ex. mg/g).
Part Classifications
Classifications are used to identify any allergens, GMO/Non-GMO, Halal, and/or Kosher statuses. Custom Part Classifications can be created on the Part Classifications page, see Part Classifications for details.
Expiration Type and Expires
Default Expiration Type is "Fixed", which allows you to set a specific expiration date in the Expires field. Changing the Type to "Inherited" removes the Expires field and the part will inherit the expiration date from any consumed parts during manufacturing.
If "Fixed" is selected, enter the number of days after initial inventory receipt or production date before expiration. If the part does not expire, leave as "Never".
You can enter exact dates of expiration when inventory is made (Finished Goods/Sub-Assemblies) or when inventory is received (Raw Materials).
Reorder and Reorder Qty (Optional)
Reorder - When inventory drops below the this level, the part will be flagged as Low Stock (ex. If reorder is set to 50, current inventory is 45, the part is flagged as Low Stock. Will be measured in the same UOM as listed in the Unit Set field.
Reorder Qty - Specifies the quantity to order once the Reorder point has passed and the part is flagged as Low Stock. Will be measured in the same UOM as listed in the Unit Set field.
Purchasing Class (Optional)
Class fields (Purchasing, Sales, Part) are used to "tag" parts into strata for sorting, grouping, and reporting. Leave the Purchasing Class field blank unless you have a need to segregate parts by how they are sourced.
Standard Cost
Standard Cost is how much it costs you to purchase/produce one quantity of the part (measured in the same UOM as listed in the Unit Set field).
Actual costing will activate when purchase orders and production signatures are live. Having a Standard Cost entry is best practice for reporting and go-live phase purposes.
Receiving Location
When new inventory for this part is received (either through a raw material receipt or as the result of a production run) this is the location where the inventory should be stored.
Locations not set up yet? Go with STOCK, then bulk edit.It's common to not have locations configured at the beginning of setup. Type "STOCK" into the field, then assign a name, abbreviation and Zone, then click "Save". You can bulk edit part locations on the parts page after the part is saved, and once you have the correct locations (and relevant conditions) set up, just don't forget! See the "Default Bin Location" page for details on bulk editing parts.
Sales Class (Optional)
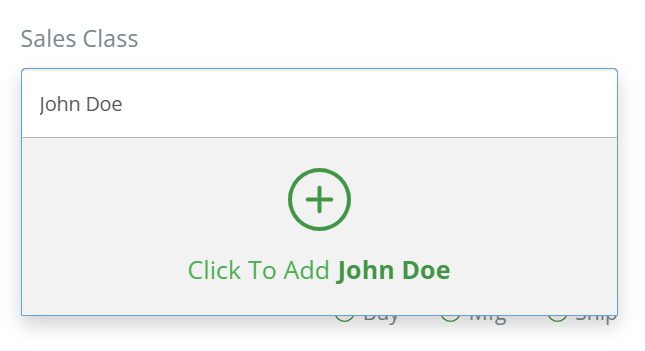
Class fields (Purchasing, Sales, Part) are used to "tag" parts into strata for sorting, grouping, and reporting. Leave the Sales Class field blank unless you have a need to segregate parts by how they are sold. If inventory for this part is customer owned, or tracked for a single customer, use the customer's name as the Sales Class.
Standard Price (Optional)
The most common price your customer pays to buy one quantity of this part from you. Leave blank or enter 0 for any part that will not be sold to customers.
Life Cycle (Optional)
Used to control which transactions (Buy, Mfg, Ship) are allowed on this part. Leave as Distribution unless you want to restrict transaction types.
Part Class
Class fields (Purchasing, Sales, Part) are used to "tag" parts into strata for sorting, grouping, and reporting. Part Class is used to group parts by category i.e. Bottles, Labels, Cold Storage, Dry Goods, Flavors, etc.
Part Type
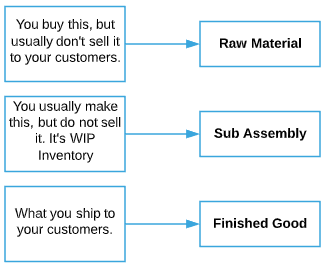
Is this something that you buy? -> Raw Material
Is this something that you make and then use in another step? -> Sub-Assembly
Is this something that you sell? -> Finished Good
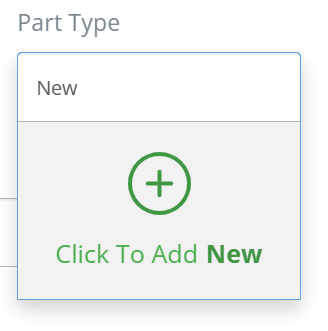
You can also create a custom Part Type by typing the part name into the field and selecting "Click to Add ____" from the dropdown.
Default Status (Optional)
When a new batch of this part is received, this is the status that will be automatically assigned to it. The default option is "Released", but can be changed to "Failed/Scrapped", "Hold", "Pending", "Quarantined", or "Use at Risk". Depending on the selected status, the part inventory may be restricted from use in manufacturing and/or be prevented from being shipped.
Label Class (Optional)
Unless you create your own Label template(s), this field (and the dropdown) will be blank. If you want to create your own custom Label, open a chat with our Support team and set up a meeting to get one created.
Updated 3 months ago
