
Sync Page
Review, troubleshoot, and retry integration sync jobs in DataNinja
Español: Lee esta página en español.
Français : Consultez cette page en français.
The Sync page shows recent integration jobs between DataNinja and the connected external system. Use this page to confirm whether jobs completed, review failed jobs, open the related DataNinja record, and retry a job after the underlying issue has been corrected.
Review Recent Jobs
To open the Sync page, click the gear icon in DataNinja, then go to Tools and select Sync. On the Sync page, each row represents one sync job, or attempt. DataNinja automatically re-tries jobs that fail to sync, so there may be multiple rows for the same sync object.
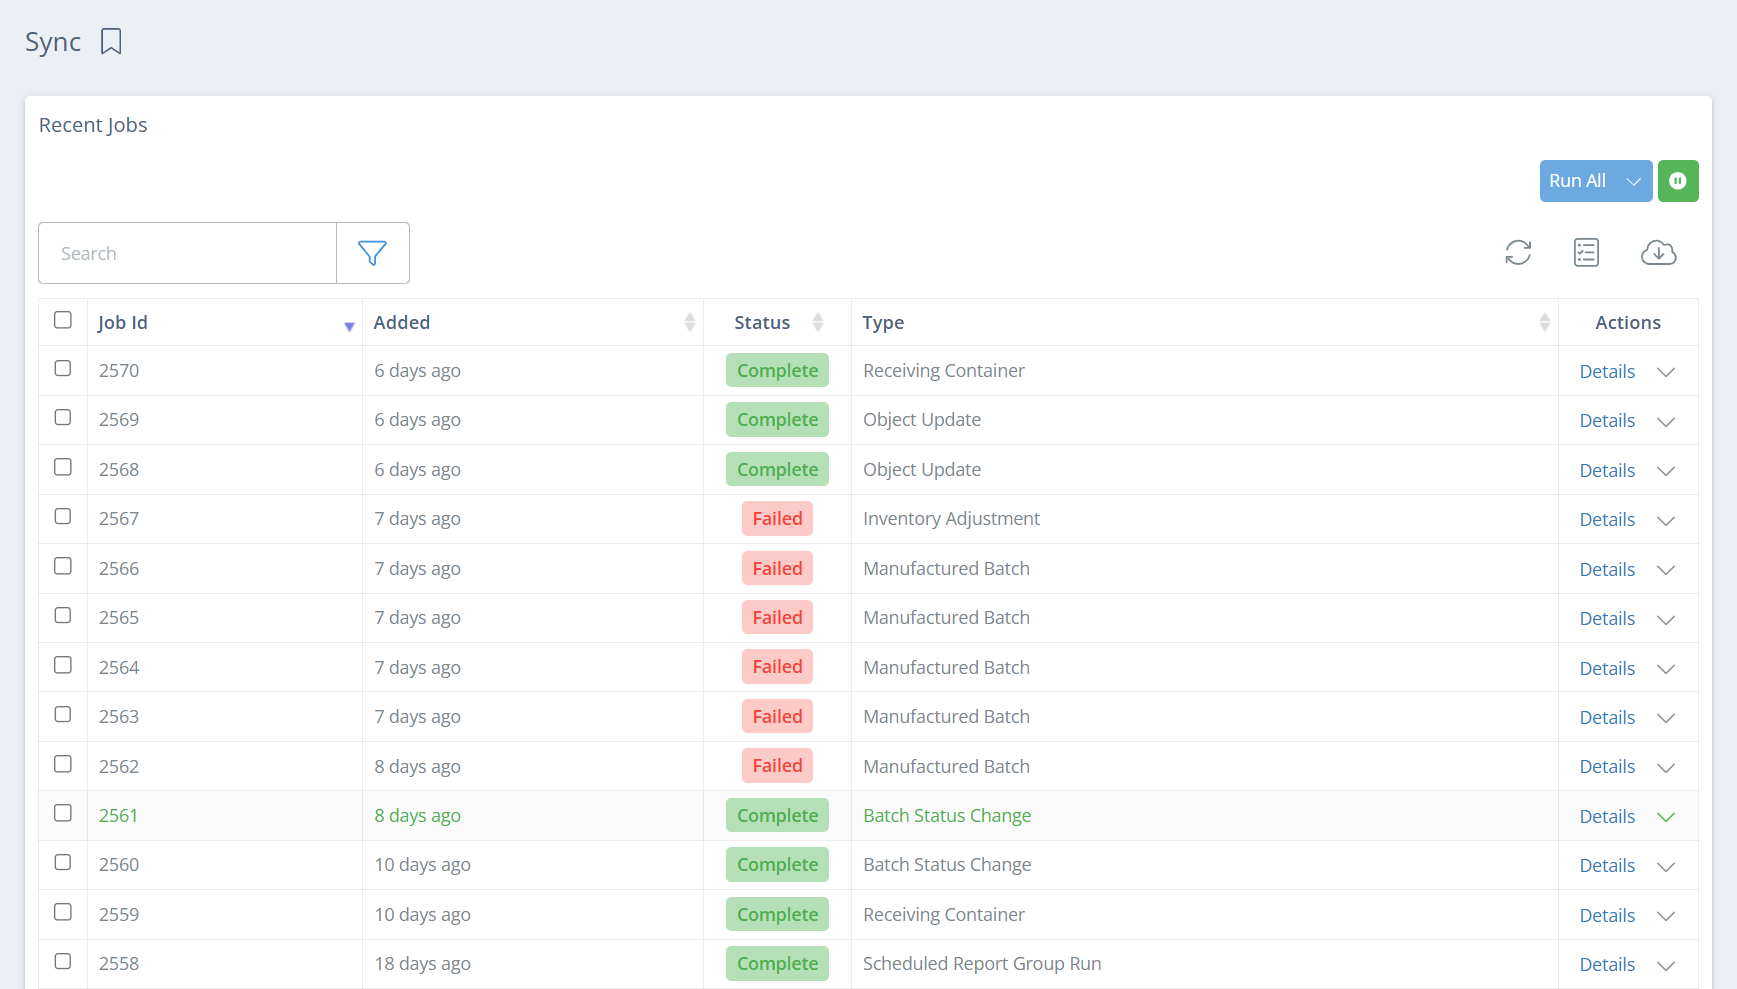
The table by default includes these columns:
| Column | How to Use It |
|---|---|
| Job Id | Unique job number. Use this when searching for a specific sync job or when contacting Support. |
| Added | When the job was added to the sync queue. |
| Status | Current job status, such as Complete, Failed, Fixed, or Re Queued. |
| Type | What the job attempted to sync. The available types depend on the integration and workflow. *See the Types section below |
| Actions | Use details to review the job, or use the row action dropdown for available job actions. |
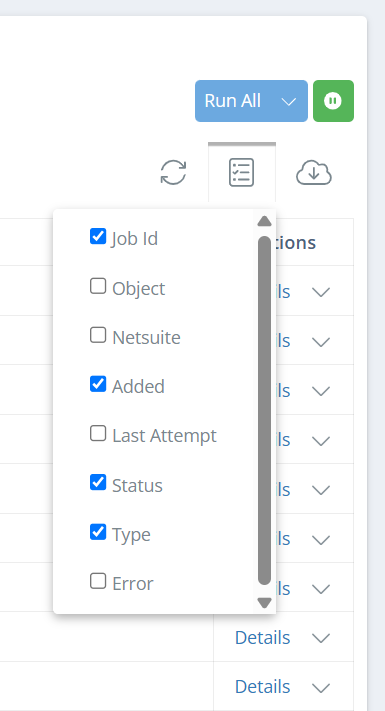
To view more columns, click on the page icon under the 'Run All' button and mark which columns you want to show/hide.
For easier viewing, you can click the Cloud icon to download an Excel sheet with all the current sync data. Downloading is only recommended once you have filtered the data, so the resulting Excel sheet is manageable.
Run AllDo not use Run All unless directed by the DataNinja team. Run All can pull a large amount of data at once, which may cause the site to lag or crash. When you need to sync specific records, click the dropdown next to Run All and use the filtered sync options instead, such as Import Purchase Orders. Be sure to allow 3-5 minutes for those records to sync in before refreshing or retrying.
Filtering Jobs
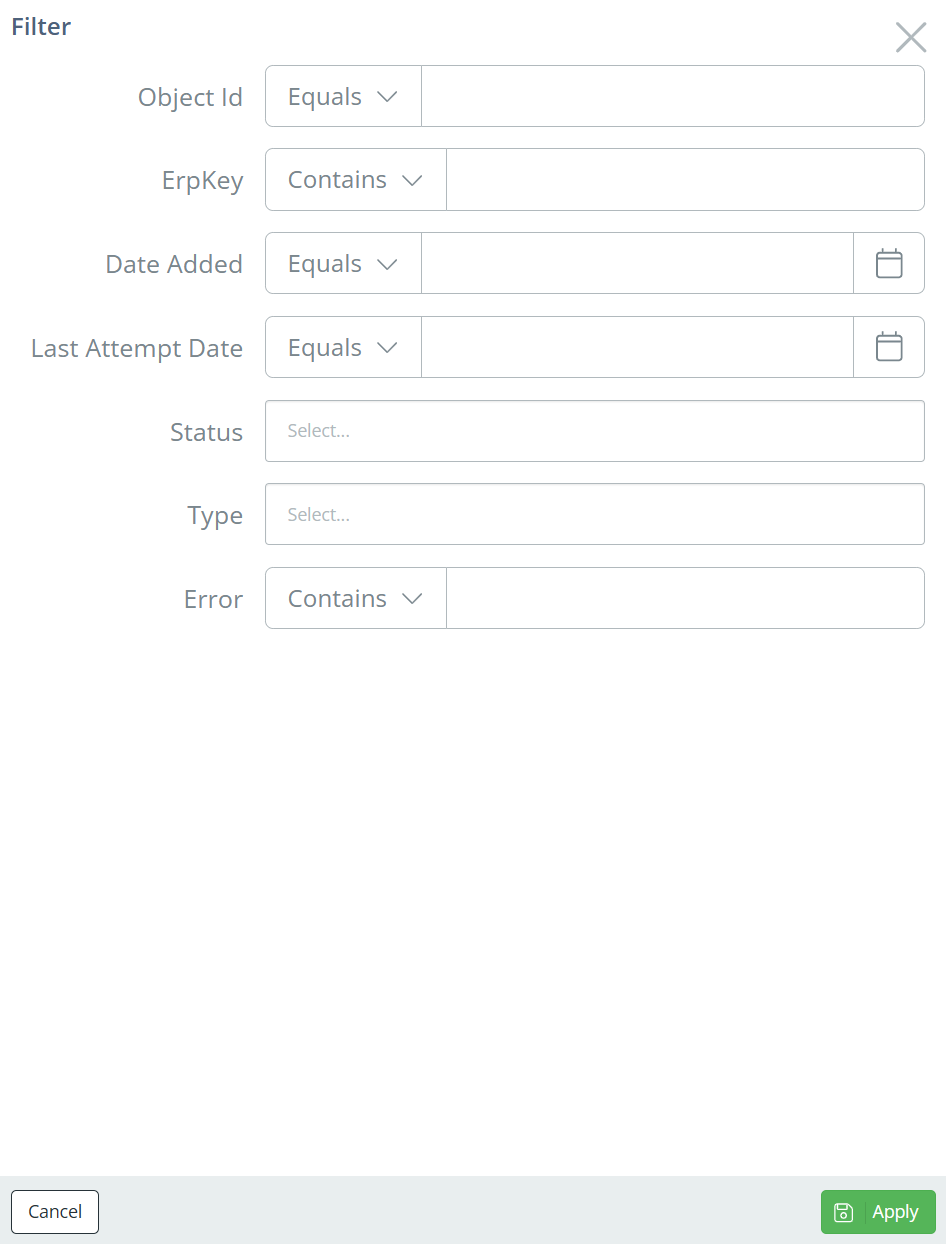
The filter panel may include:
- ObjectId - Filter by objectId. This is the DataNinja internal ID for the object, like BatchId, PartId, PurchaseOrderId, etc.
- Date Added - Filter jobs by the date they were added.
- Status - Filter jobs by status. NetSuite tenants may include Complete, Failed, Fixed, and Re Queued. QuickBooks tenants may only show Complete and Failed.
- Type - Filter by job type.
- NetSuite job types may include Assembly Build, Batch Status Change, Inventory Adjustment, Inventory Transfer, Manufactured Batch, Object Update, Receiving Container, Reservation Upsert, Scrap Manufactured Batch, and Shipment.
- QuickBooks job types may include imports, part updates, purchase order status updates, and inventory adjustments.
- Error - Some tenants include an Error Contains filter for searching inside error text.
Use the Type and Status fields together when there are many failures. For example, filter to Failed and Assembly Build if you need to investigate production-related NetSuite jobs.
To focus on jobs that need review, click the Filter icon next to the Search bar, then select 'Failed' in the Status field and apply. If you don't see the Status field, click on 'Show additional fields' to expand the list of available options.
View the Error Message
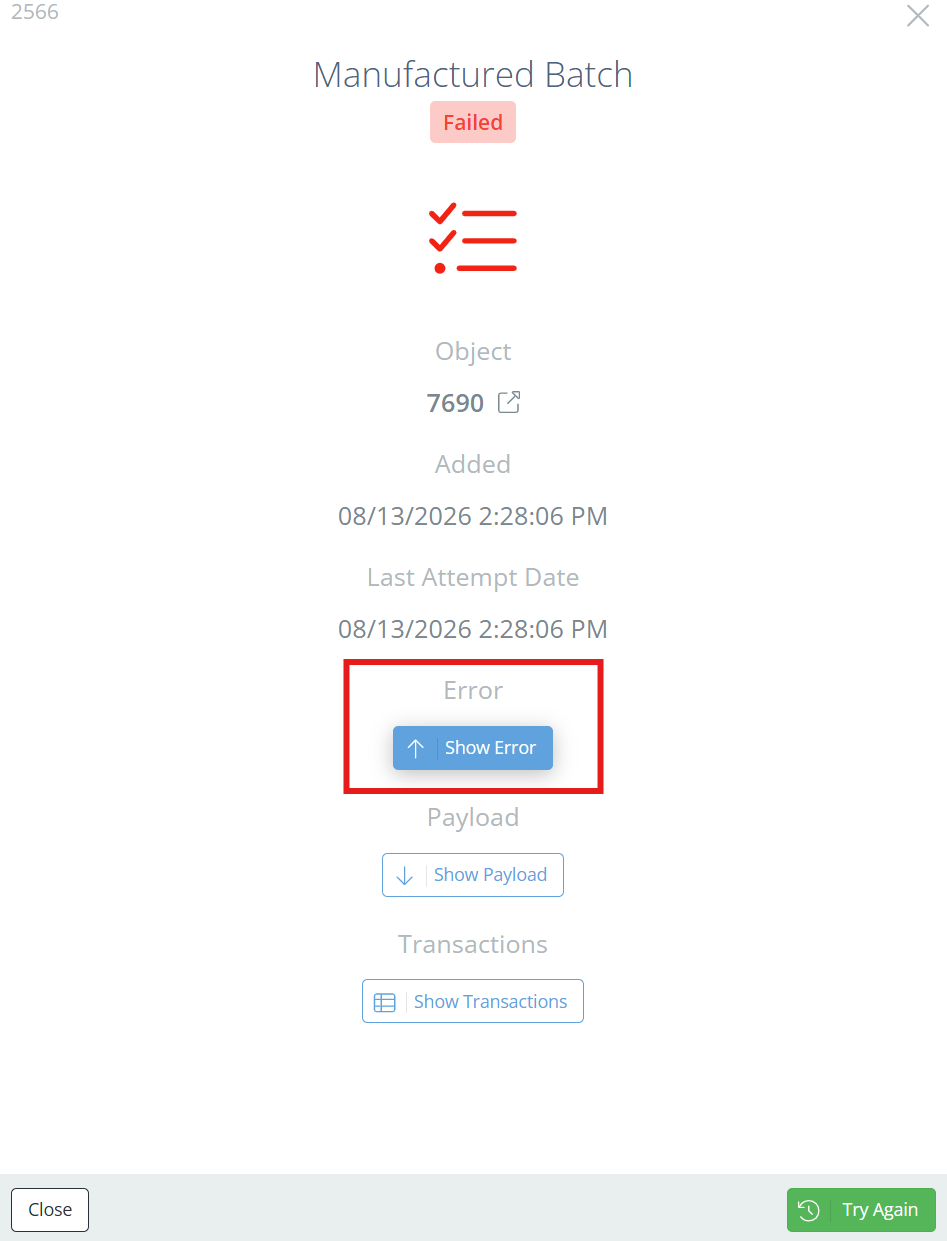
Click 'Details' in the Actions column to open the job detail panel. This aside shows the Job Id, Type, Status, Added timestamp, related record, and available diagnostic sections.
Click the 'Show Error' button in the aside to see what caused the failure. The payload show the exact data that DataNinja is sending to NetSuite/QuickBooks, and is usually only needed when the error message is not enough to identify the issue.
When reading the error, look for:
- The most human-readable message or detail field.
- A missing or invalid field, such as vendor, customer, item, lot number, location, account, unit of measure, tax code, or status.
- The DataNinja or external record type affected by the job.
- A status code or validation message from the external system.
- A message that says the record is locked, closed, posted, inactive, already exists, or cannot be updated.
Do not stop at the first technical-looking text. Integration errors often include a short message, a more useful detail, and then a stack trace or API response. Start with the message and detail.
This is an example of a failure found in a NetSuite tenant.
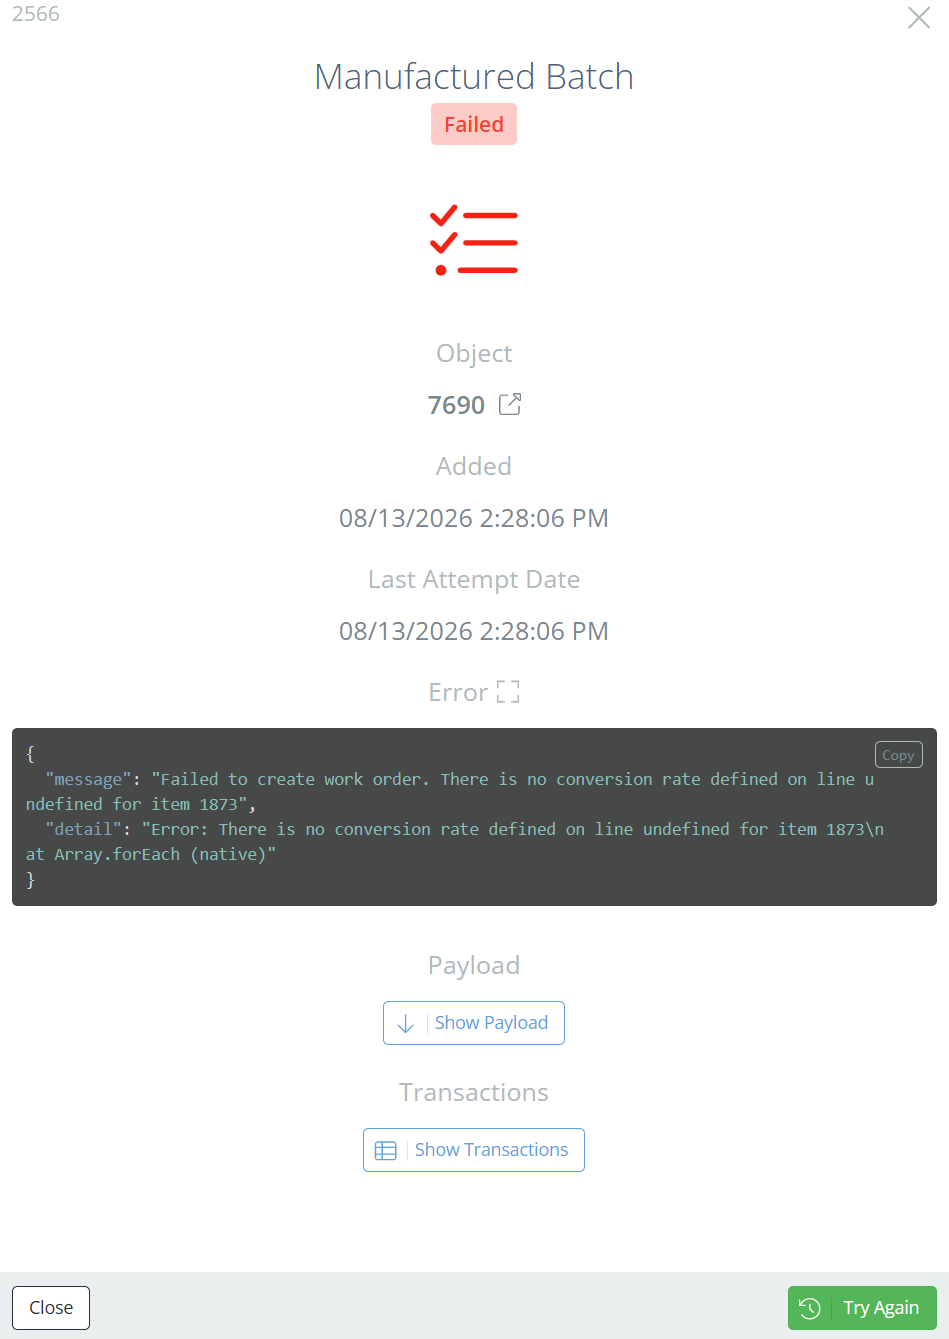
For NetSuite tenants, a Manufactured Batch in DataNinja equals a Work Order in NetSuite. So we can gather that a new manufactured batch was scheduled in DataNinja, but wasn't able to be created and linked in NetSuite. The next part of the Message tells us why: there's a conversion missing, likely in NetSuite since the job originated in DataNinja, for part 1873. To resolve this error, you would need to go to NetSuite and compare the list of conversions for part 1873 to what DataNinja has. Fix any discrepancies, then click 'Try Again' on the job and see if the status changes to 'Fixed'. Keep track of the ObjectId to make it easy to find the job again after the refresh.
Open the Failing Record
If DataNinja can identify the related record, the detail panel shows the record type and a linked record number. Click that record number to open the failing DataNinja record.
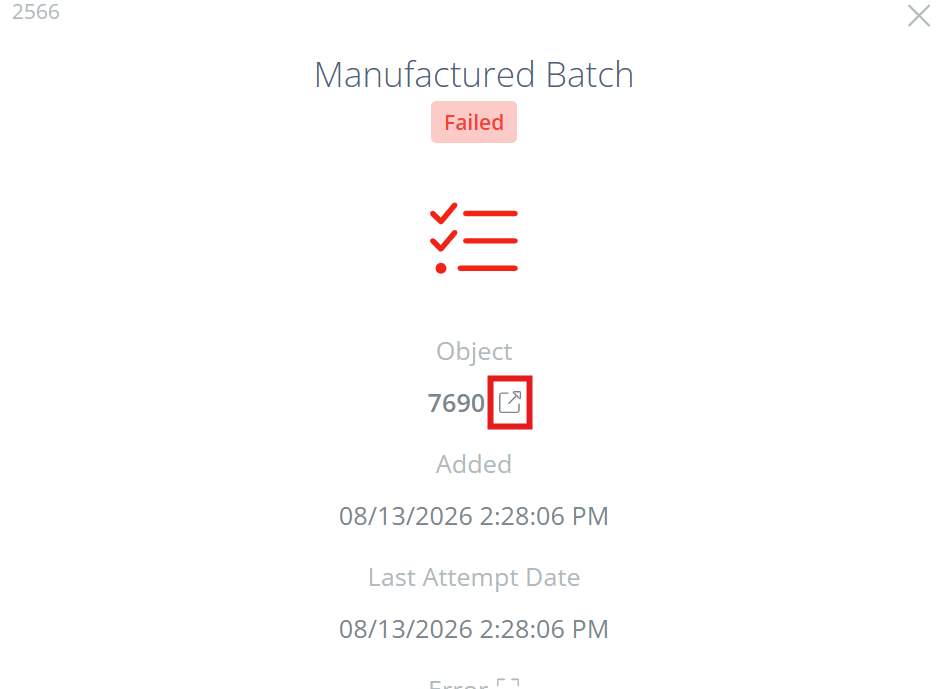
After opening the related record, review the fields mentioned in the error message. If the error points to a missing or invalid value in DataNinja, correct the record and save it before retrying the sync job. If the error points to the external system, correct the record or setup issue there before retrying.
Watch for Cascading Failures
Sync failures can cascade. If received inventory or produced inventory fails to sync, later jobs that depend on that inventory may also fail because the external system does not yet know the inventory exists.
Common downstream failures include:
- Inventory transfers
- Shipments
- Batch status changes
- Inventory adjustments
- Consumption in manufacturing
When several jobs fail around the same item, lot, batch, receipt, or production record, troubleshoot the earliest upstream failure first. Do not start by retrying every downstream job. Fix and retry the receipt or production job that creates the inventory, confirm it completes, and dependent jobs should automatically retry once the sync is successful.
Try the Job Again
Only retry a job after the underlying issue has been corrected.
You can retry from either place:
-
Open details for the failed job, then click Try Again
-
Open the row action dropdown and click Try Again
-
Anywhere the NetSuite/QuickBooks logo would usually show, but is replaced by an arrow
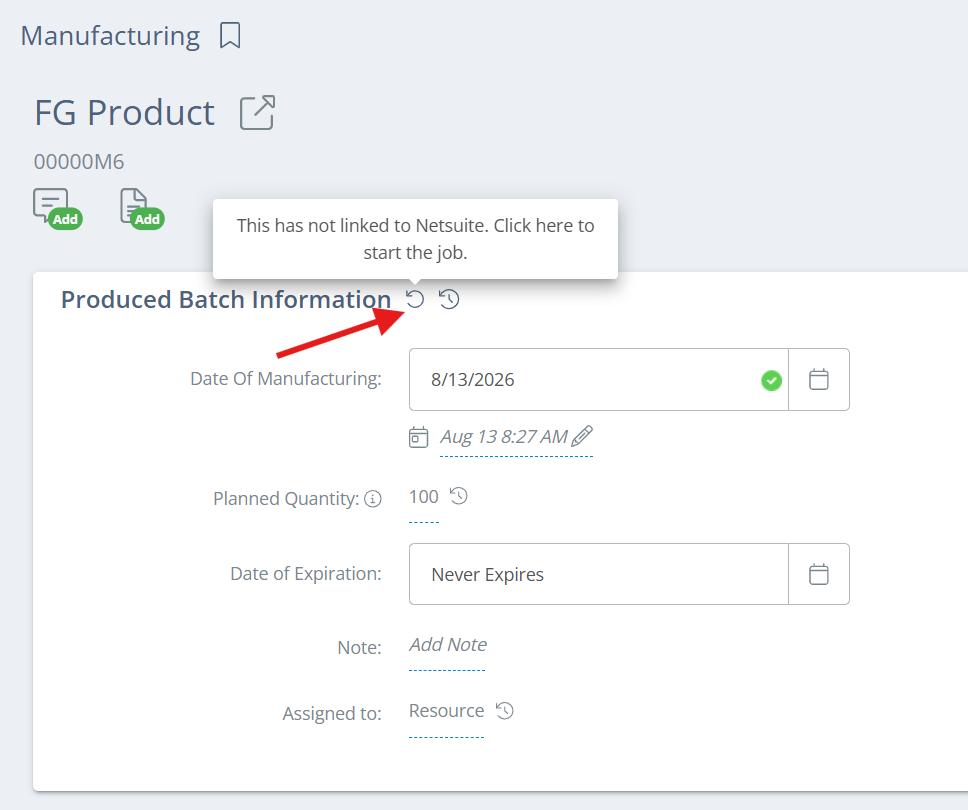
After retrying, wait a few minutes, click Refresh, and review the job status again. If the job fails again, open the latest details and read the new error. Sometimes fixing one issue allows the job to move forward far enough to reveal a different issue. If the job is successful on the attempt, the status will change to 'Fixed'.
Mark as FixedThe row action dropdown may also show Mark as fixed. Use Mark as fixed only when the issue has already been resolved outside the retry workflow and the failed job no longer needs to be retried. Marking a job as fixed does not prove that the transaction successfully synced.
Search for a Specific Failure
Use the Search field above the table when you know what you are looking for. Search can find visible table text, including Job Id, Status, Type, and any error text that is visible in the table.
Useful searches include:
- Job Id, if Support gave you one or you copied it from the job details.
- A job type, such as Batch Status Change, Manufactured Batch, Shipment, Import Purchase Orders, or Create Inventory Adjustment.
- A related record number, if it appears in the visible job data or detail panel.
- A phrase from the error message, if errors are visible in the table.
For a more targeted search, combine Search with filters. For example, filter Status to Failed first, then search by job type, record number, or error phrase. If the tenant has an Error Contains filter, use it when you specifically need to search inside error text.
Troubleshooting Recommendations
| Recommendation | Why It Helps |
|---|---|
| Start with Failed status | Complete jobs rarely need review, and large tenants may have thousands of jobs. |
| Use Type to group related failures | Multiple Manufactured Batch or Batch Status Change failures may point to one upstream production or receipt issue. |
| Read details before retrying | The table may not show the full error, payload, related record, or last attempt date. |
| Fix upstream inventory creation first | Transfers, shipments, adjustments, and status changes can fail when the receipt or production job that created the inventory failed first. |
| Retry one corrected job before retrying many | A single retry confirms whether the correction worked before more jobs are re-queued. |
| Refresh after retrying | The table does not always update instantly after a job is re-queued or completed. |
| Use Mark as fixed carefully | It is best used for jobs resolved outside the normal retry path, not as a replacement for confirming a successful sync. |
| Include the Job Id and error when contacting Support | The Job Id, related record, Type, and error message give Support the fastest path to the failing job. Screenshots are also helpful. |
Updated 16 days ago