Edit Existing Labels
Basic changes to existing DataNinja labels can be done in the UI, though more complex changes and fields will need to be handled by the DataNinja team, as they may require some back-end adjustments.
Basic changes to existing DataNinja labels can be done in the UI, though more complex changes and fields will need to be handled by the DataNinja team, as they may require some back-end adjustments.
Edit a Label Template
When editing a label template, the template will be updated across all printers, not just the one the printer you are editing the template in. The template will not automatically be selected on all printers, only updated.
To edit a label template, go to the Printers page and select the printer with the relevant template. Now, from the Maintain Printer page click the dropdown arrow next to the name of the label template, then select 'Edit'.
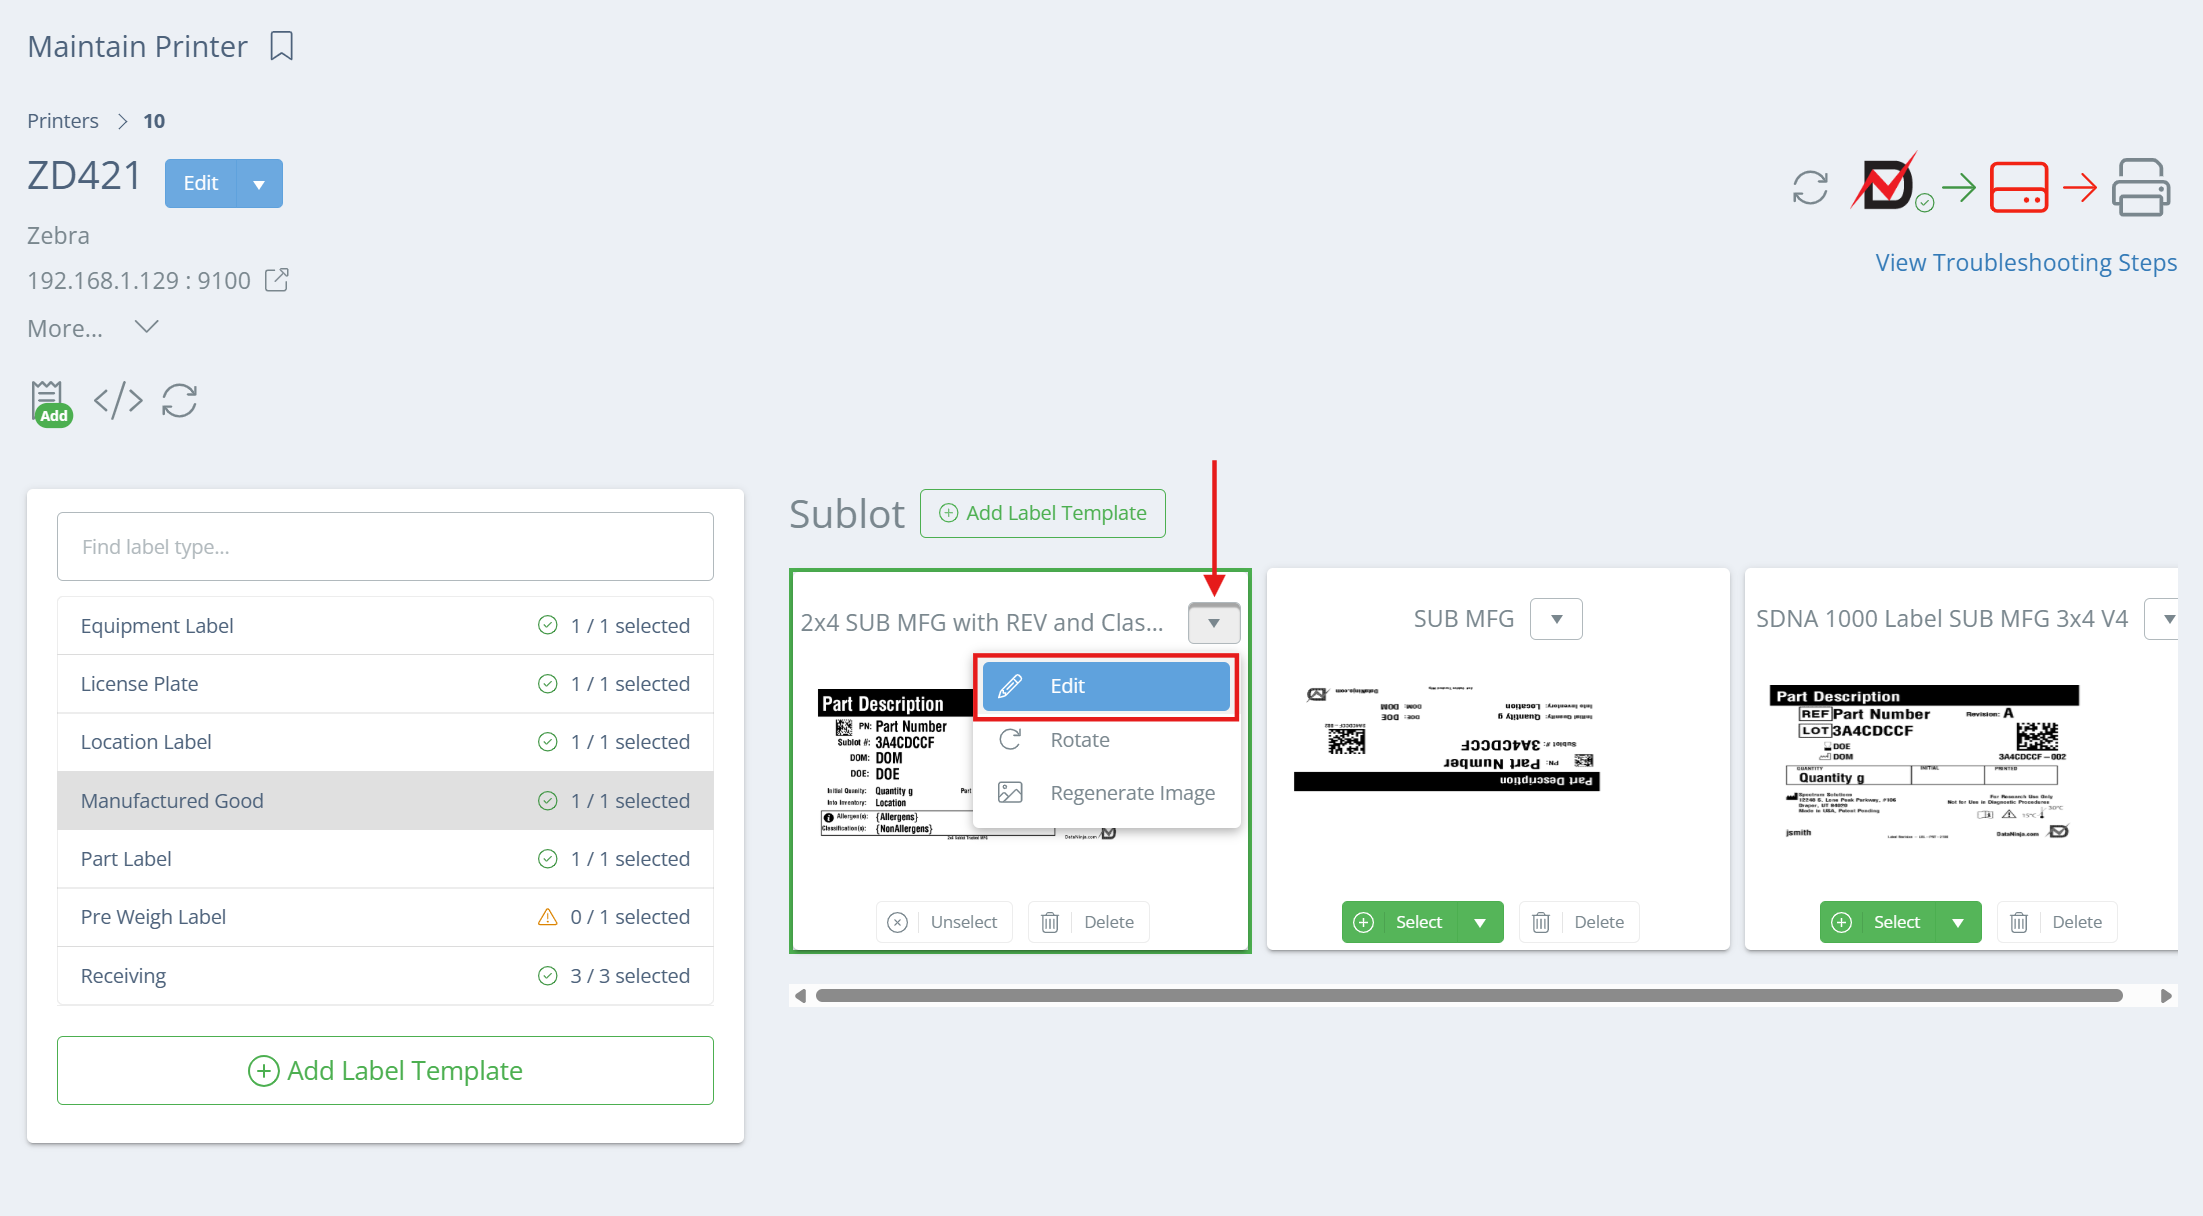
Screencap from v4.21.264.294
A new aside will open that covers the full DataNinja page; to return to the Maintain Printer page, just click the X in the top right. The new page will show the ZPL code for the selected label template, a preview of the label, and then some settings on the left side.
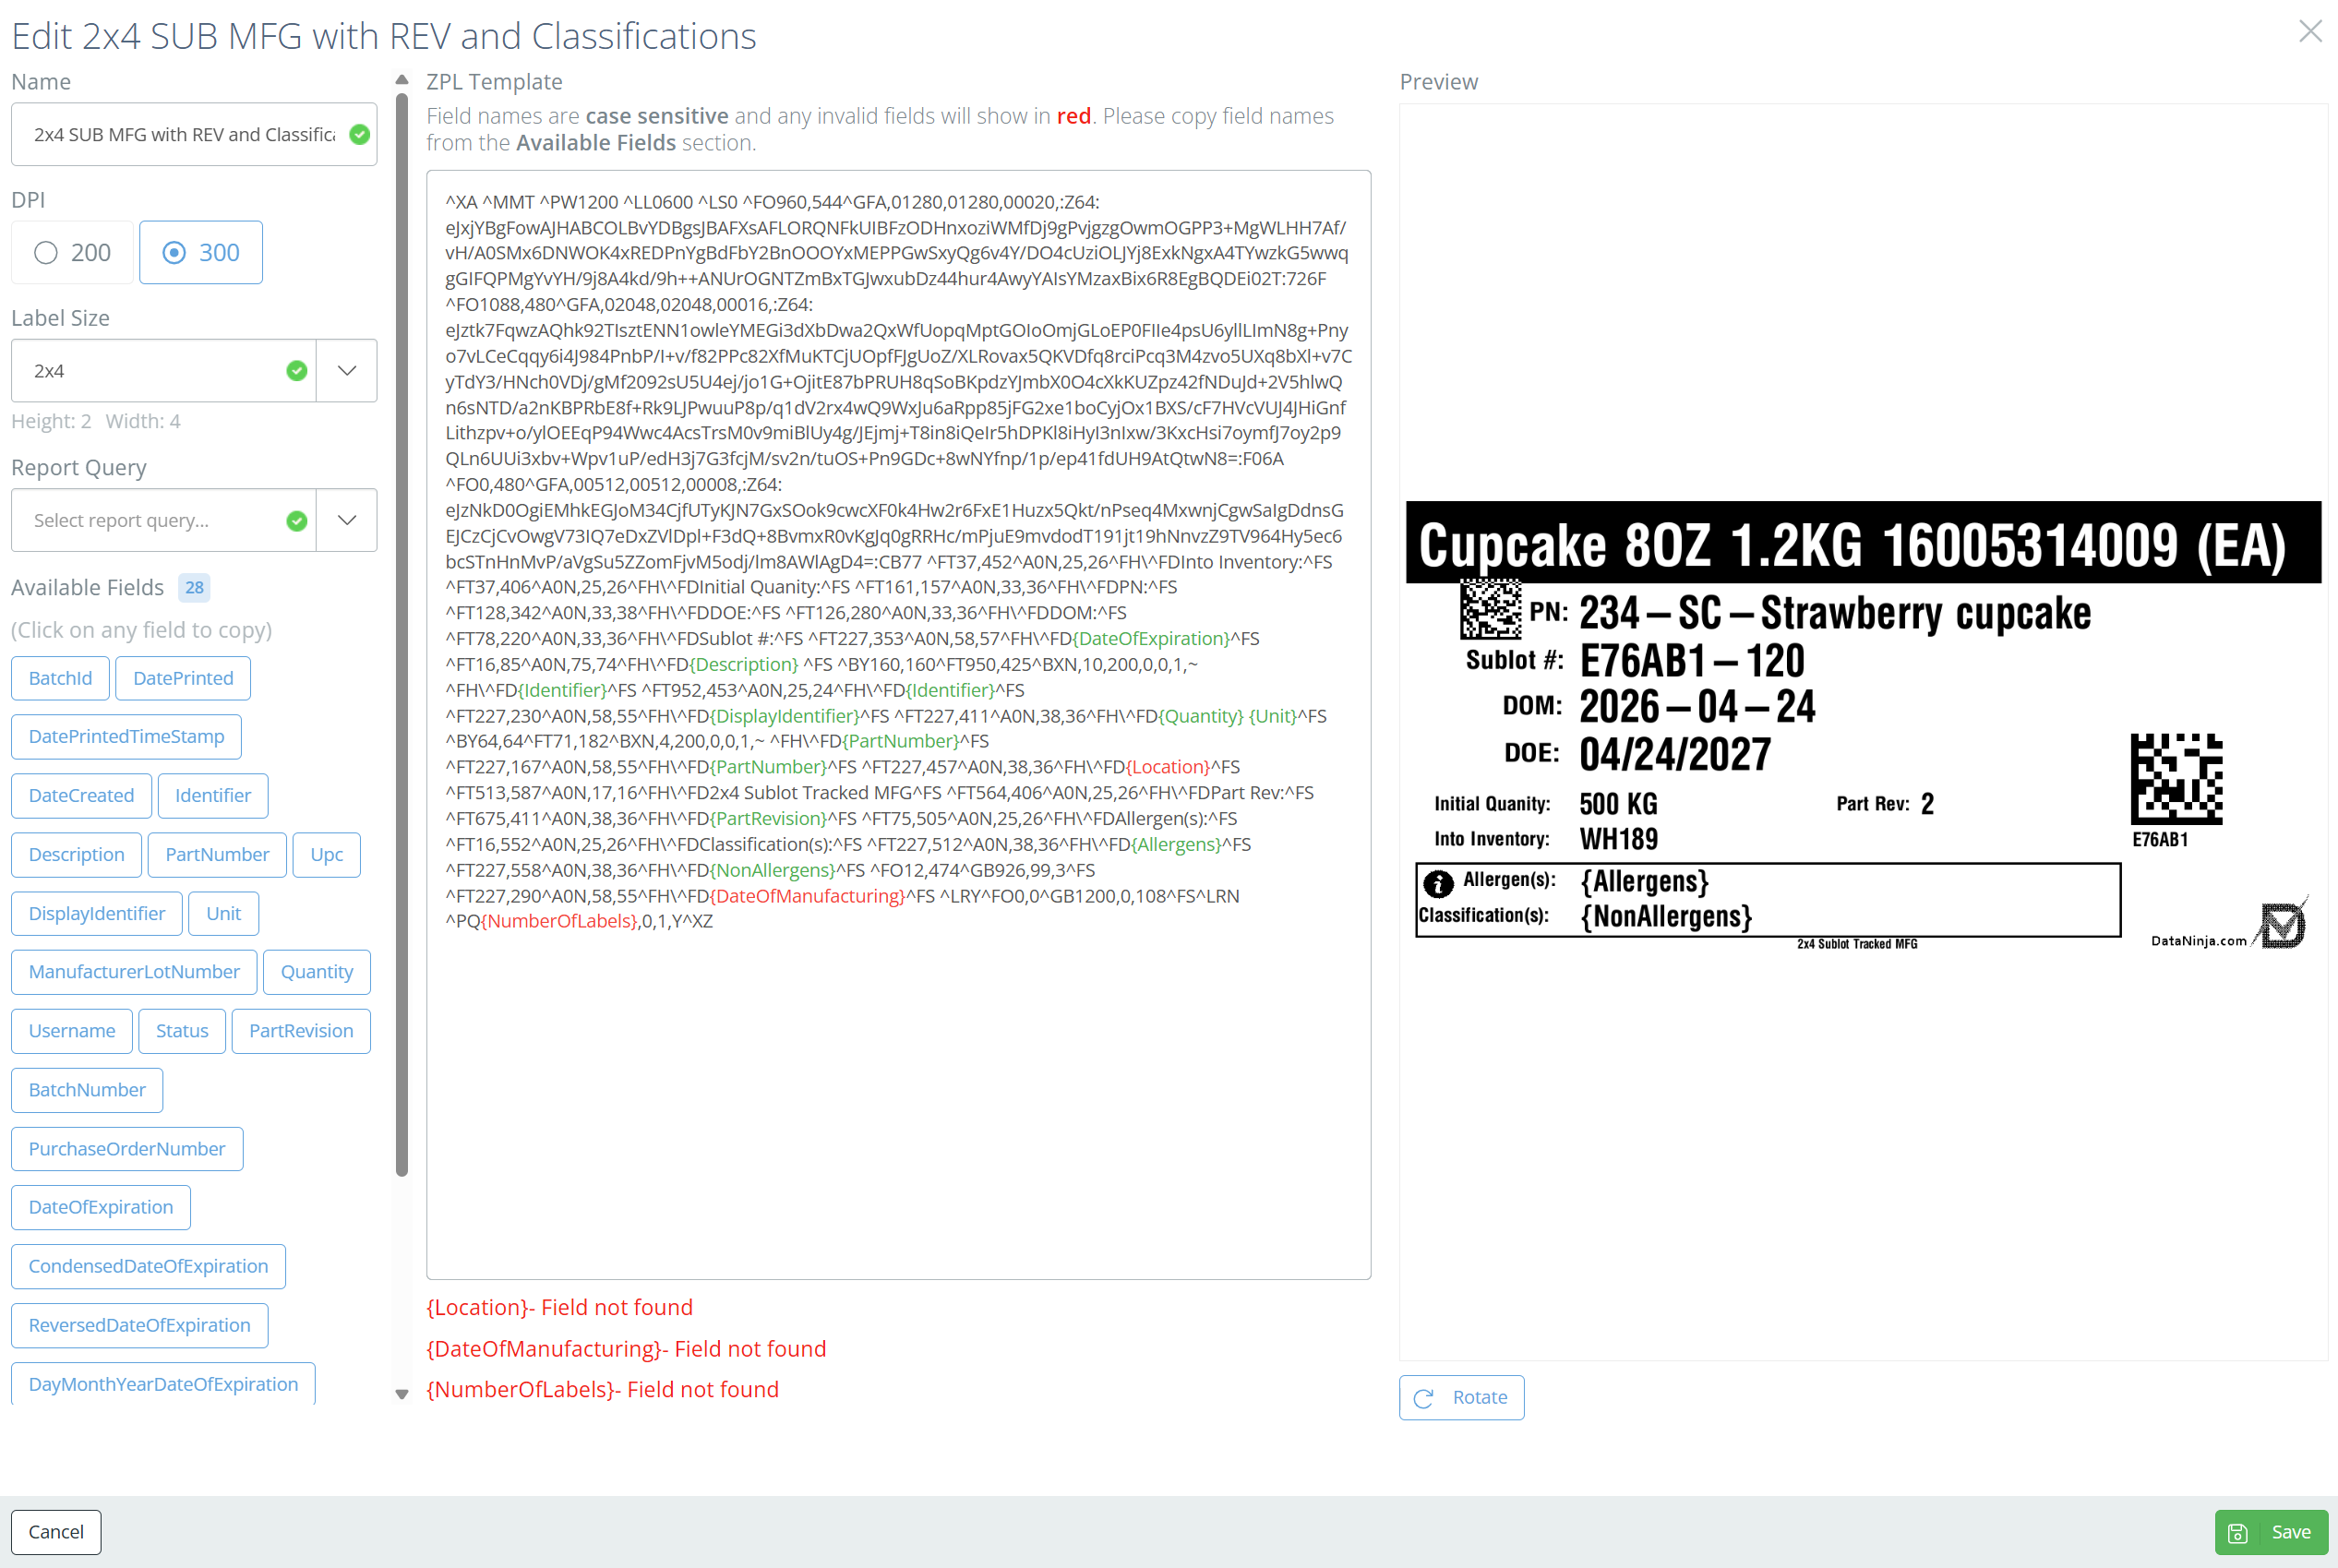
Screencap from v4.21.264.294
Settings
DPI
Make sure that the DPI is set correctly- look for the '^PWxxx' and '^LLxxx' lines in the ZPL- these control the Print Width and Label Length, respectively. If they are both easily divisible by 300, then the template is for a 300 DPI- otherwise, it's a 200 DPI label.
Label Size
Adjust the label size if needed. If you do change the label size, be aware that that field spacing on the label will be off until you adjust the ZPL accordingly. Double check that the Height and Width showing under the field match your label stock.
Report Query
Unless this is a 'custom' label (i.e. the DataNinja team had to create a custom query so non-standard fields would fill on the label), the Report Query space should be blank. Most labels will not be 'custom', even if they visually differ from the default templates.
Available Fields
These are fields that are immediately available for use on the label. Take the field name and put it between curly brackets (like {'{'}PartNumber{'}'}) and DataNinja will replace it with the appropriate live data when the label is printed. Not all possible fields are listed here, just some of the most common ones. The field names are similar to the ones found on the API page, but when used on a label the fields will use Pascal Case instead of Camel Case. Reach out to the DataNinja team via chat if you need any fields added to your label(s) that aren't listed under Available Fields.
Update the ZPL
Unless you're very familiar with ZPL, you'll want to select all of the label's ZPL and copy it, then open Labelary and paste it in. Labelary will give you a preview of the label, similar to DataNinja, but it has an additional feature that will tell you what each line of ZPL code controls, based on where your cursor is at in the code. It may also be helpful to have your favorite AI system reformat the ZPL for readability.
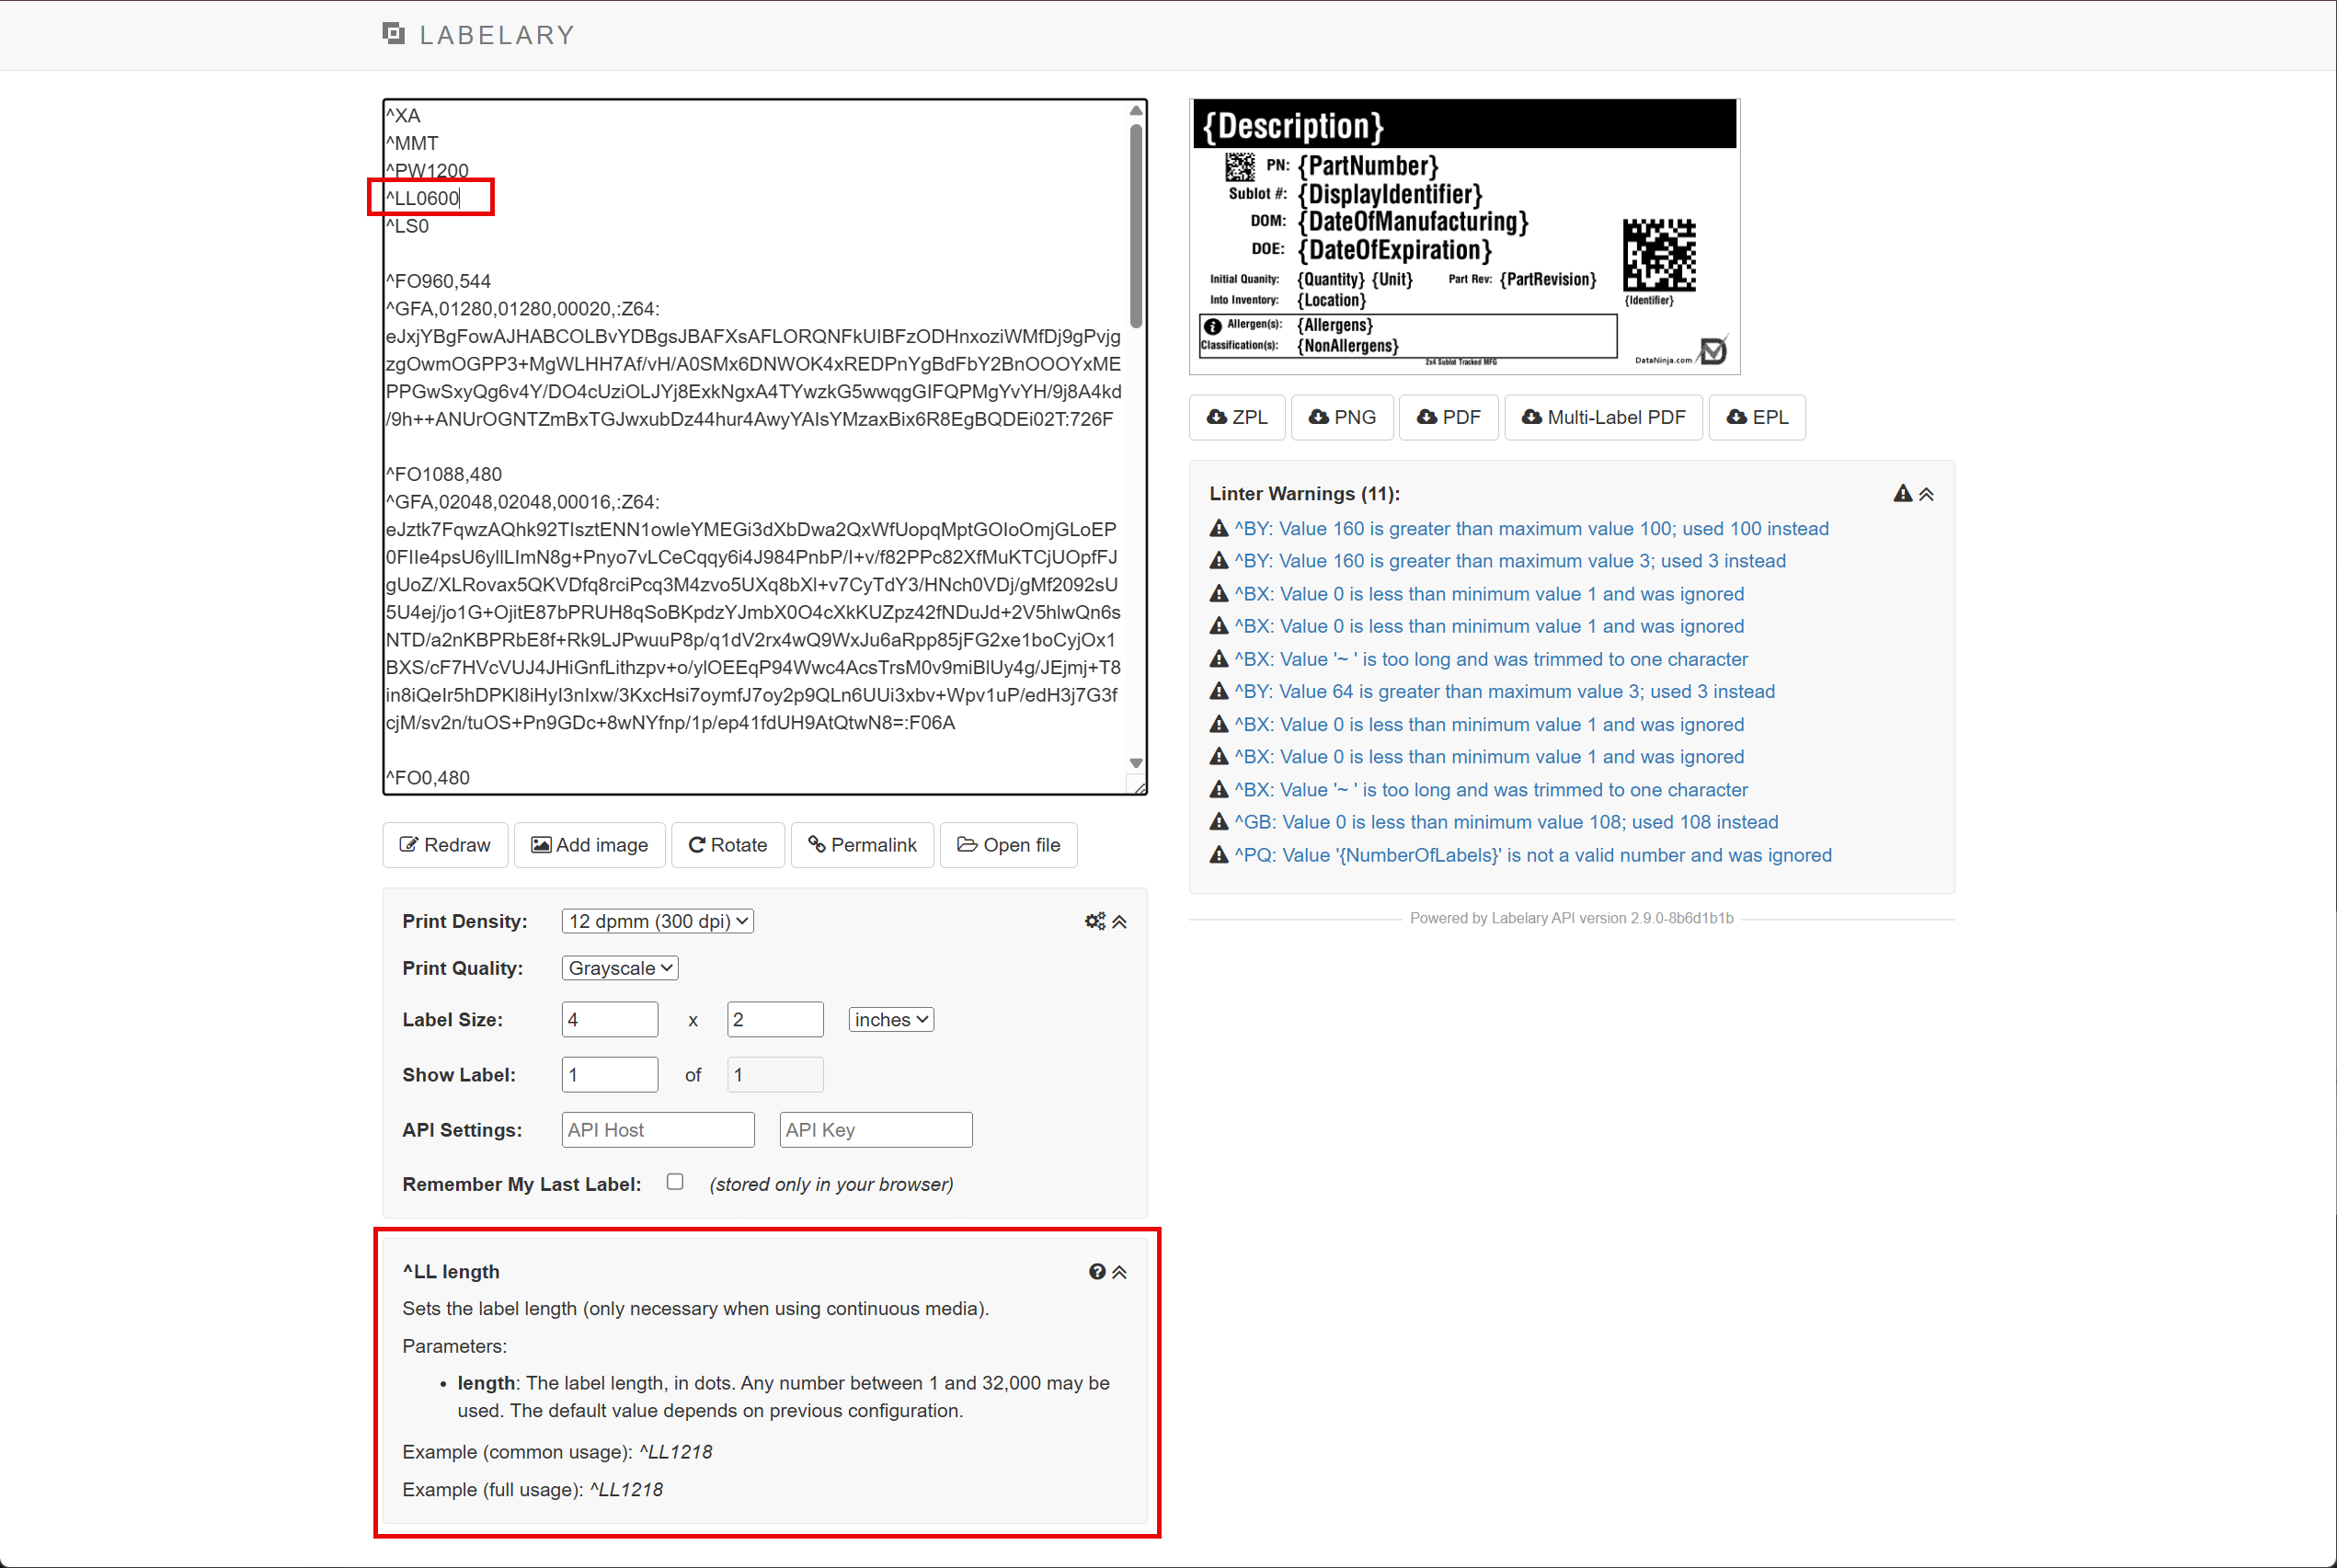
Make the necessary updates to the ZPL and verify that the visual layout of the label by clicking 'Redraw' to make Labelary reload the preview image based on the new code. Warnings in Labelary do not always indicate a broken label, but they should be reviewed. The most important check is whether the template renders in the correct size and whether the visual structure matches the intended design.
Once everything looks good, copy the ZPL from Labelary and paste it back into the ZPL Template field in DataNinja. If all the other label settings are correct, click 'Save'.
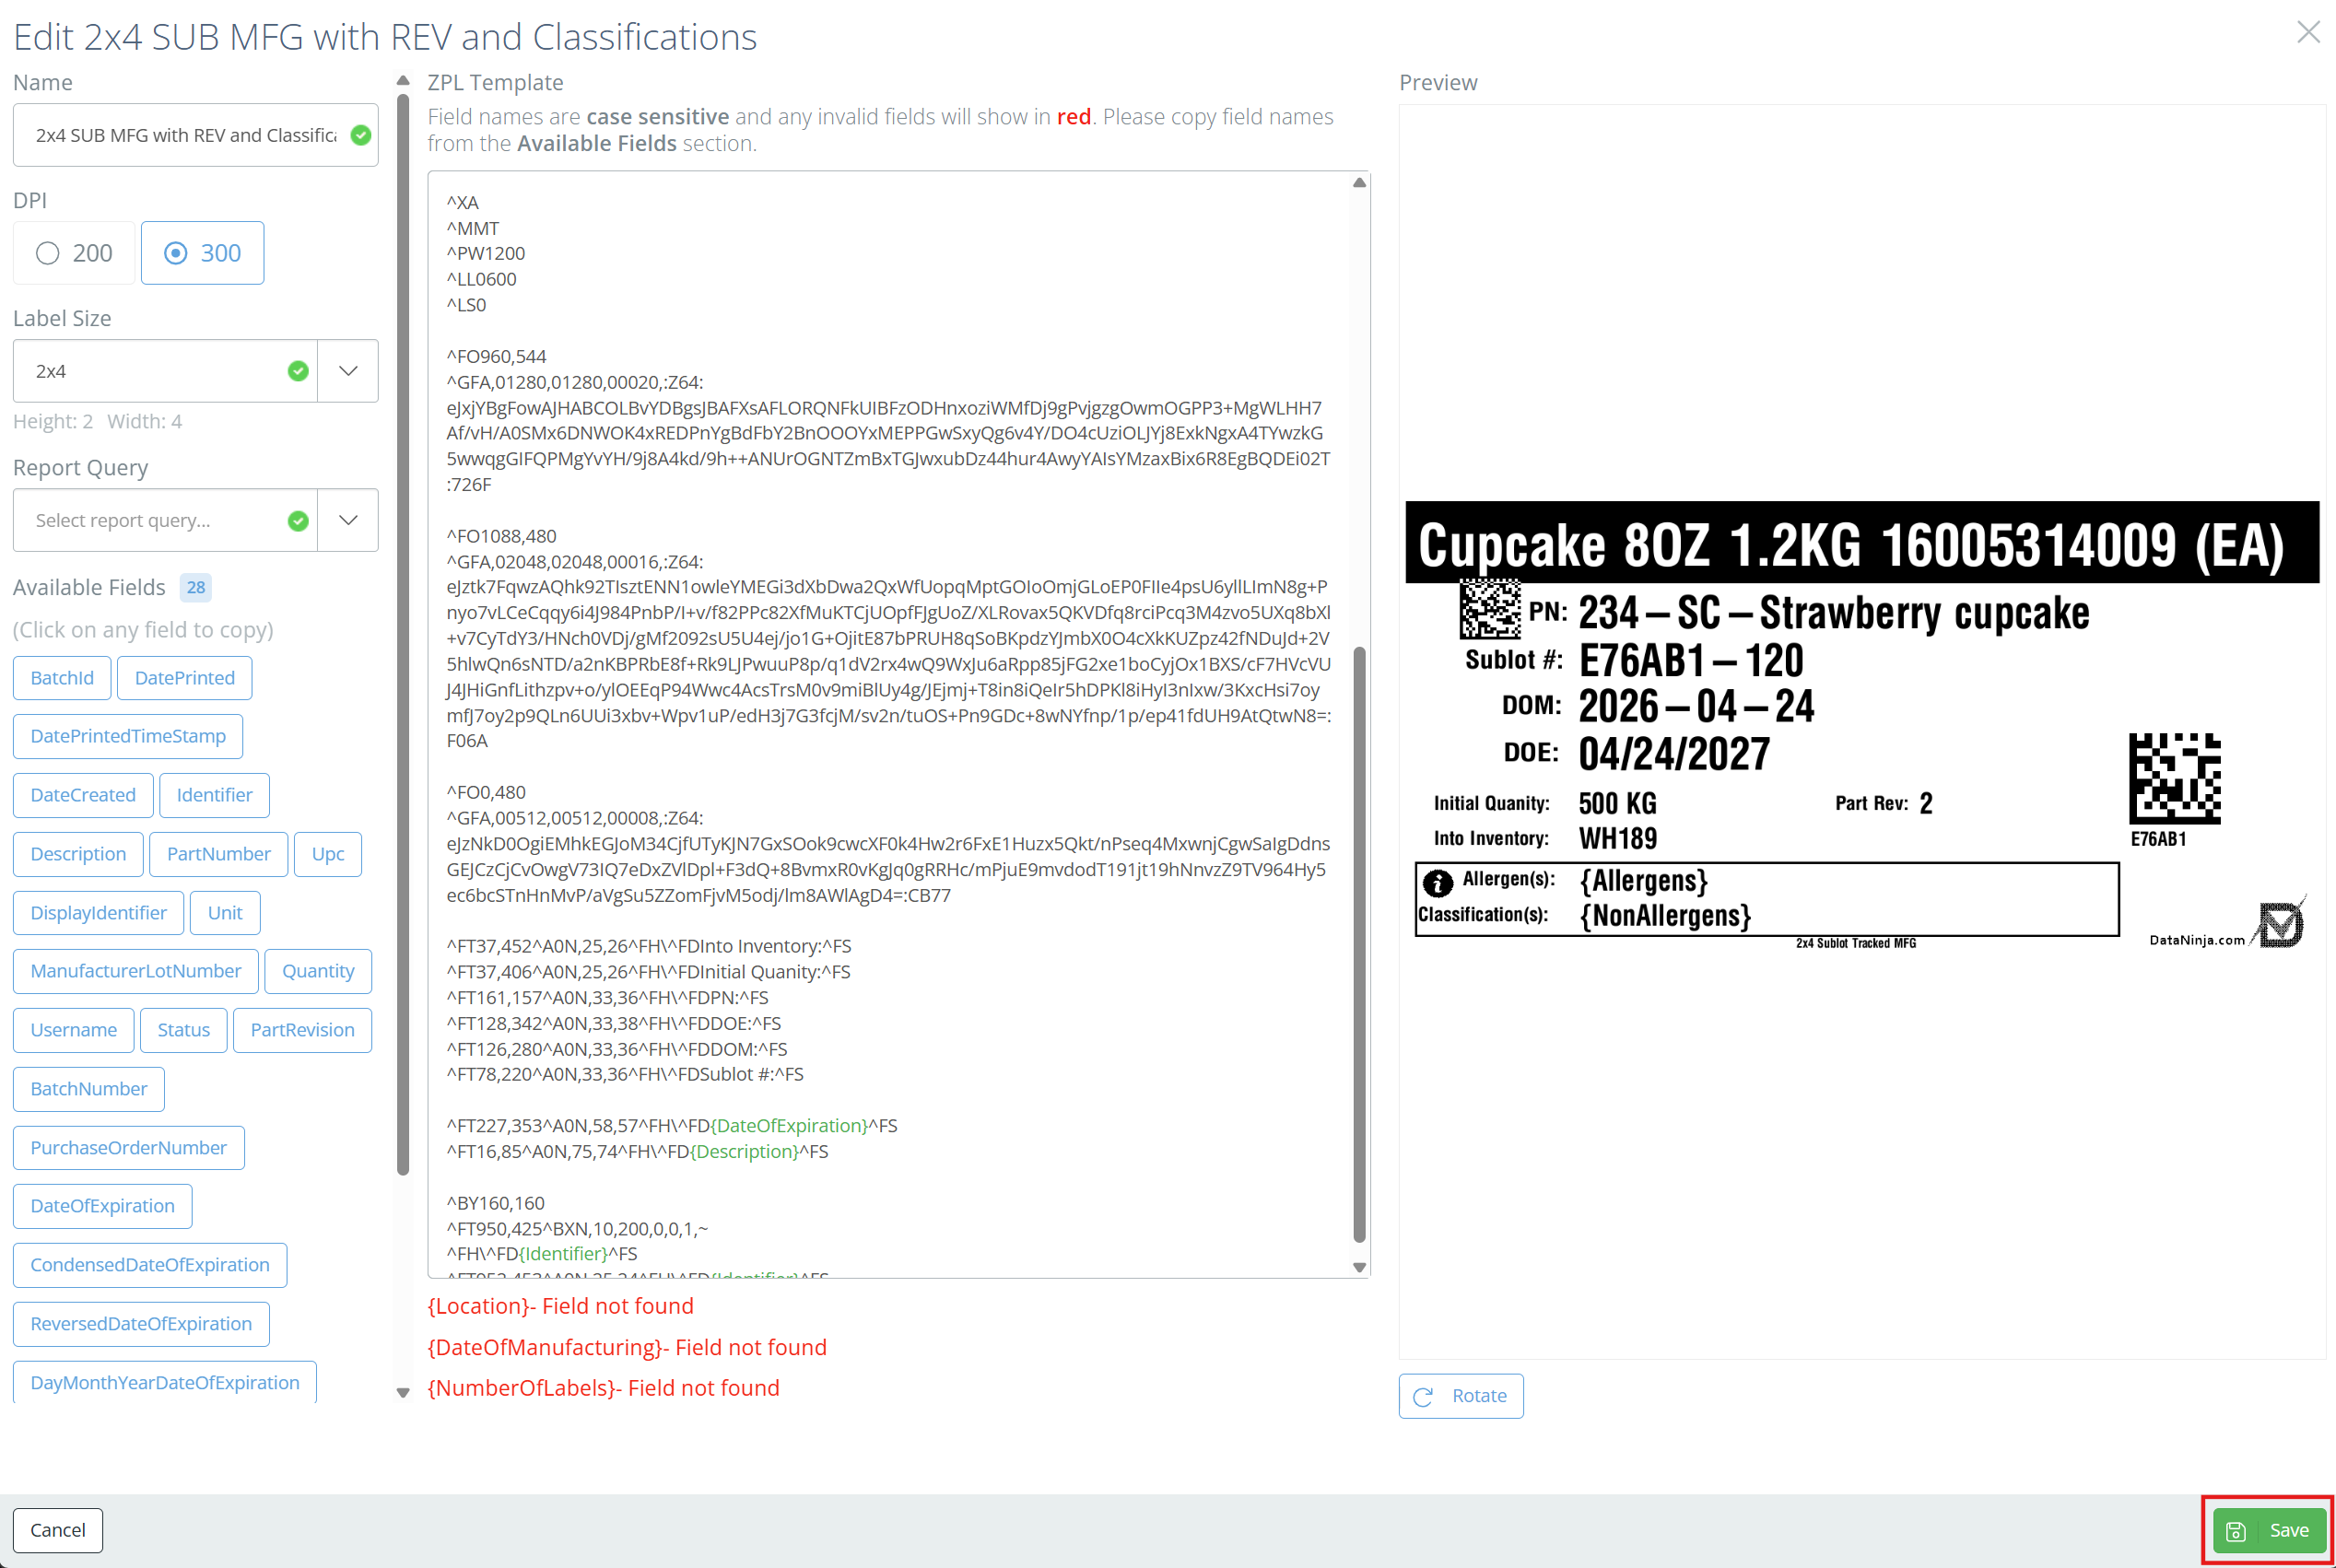
Screencap from v4.21.264.294
Some fields, like {'{'}NumberOfLabels{'}'} may show as invalid if they don't appear in the Available Fields list. This won't prohibit the label from printing, but some fields on the printed label may show in curly brackets if the field was truly invalid and the relevant data was unable to be pulled. If you have any questions or issues, reach out to the DataNinja team via chat.
{'{'}NumberOfLabels{'}'}The {'{'}NumberOfLabels{'}'} field allows DataNinja to actively control how many labels get printed, so don't remove it from the label. If the field is not on the ^PQ line, then only 1 label will print out at a time, regardless of whether you use Print Multiple or enter a greater quantity in DataNinja. If the ^PQ line reads ^PQ1,0,1,Y, update it to be ^PQ{'{'}NumberOfLabels{'}'},0,1,Y instead.
Updated 3 months ago