Reason Code Actions
Set Rules for Different Types of Inventory Transactions
Certain inventory transaction types, called Reason Code Actions, can now be connected to specific financial accounts using Reason Codes so they don't hit inventory shrink. There are 7 Actions:
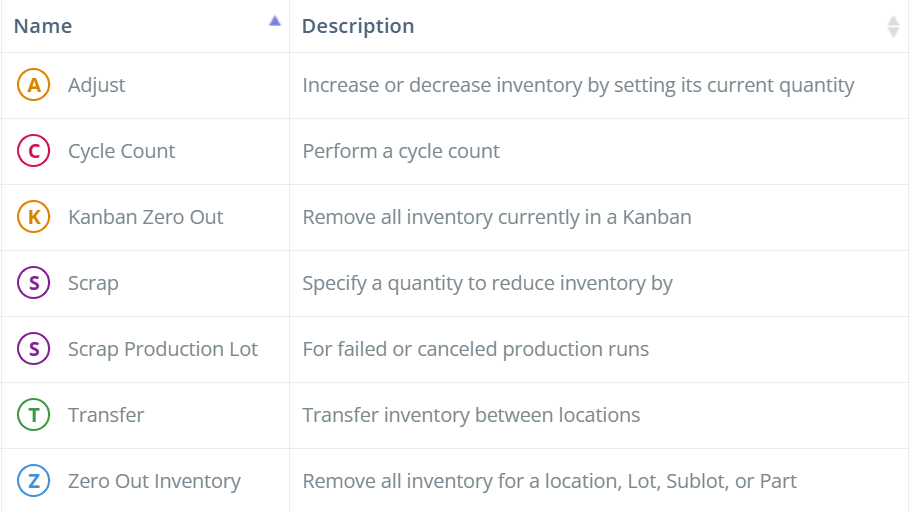
Screencap from v4.21.264.116
Setting Up Reason Code Actions
Reason CodesReason Code Actions are easier to set up after Reason Codes have been created, so before continuing, make sure that your site has Reason Codes set up; see our Reason Codes page for more information.
On the Reason Code Actions page, click 'Edit' in the Actions column to open the aside. Here, you can control if a note is required to be entered when this Reason Code Action is used, as well as which Reason Codes can be selected during the transaction. Click 'Add' to add additional Codes, or click the dropdown arrow next to a Code and select 'Delete' to remove it from the list. The default Reason Code for the Action will be marked with a green star icon; click on the star icon to toggle the default on/off.
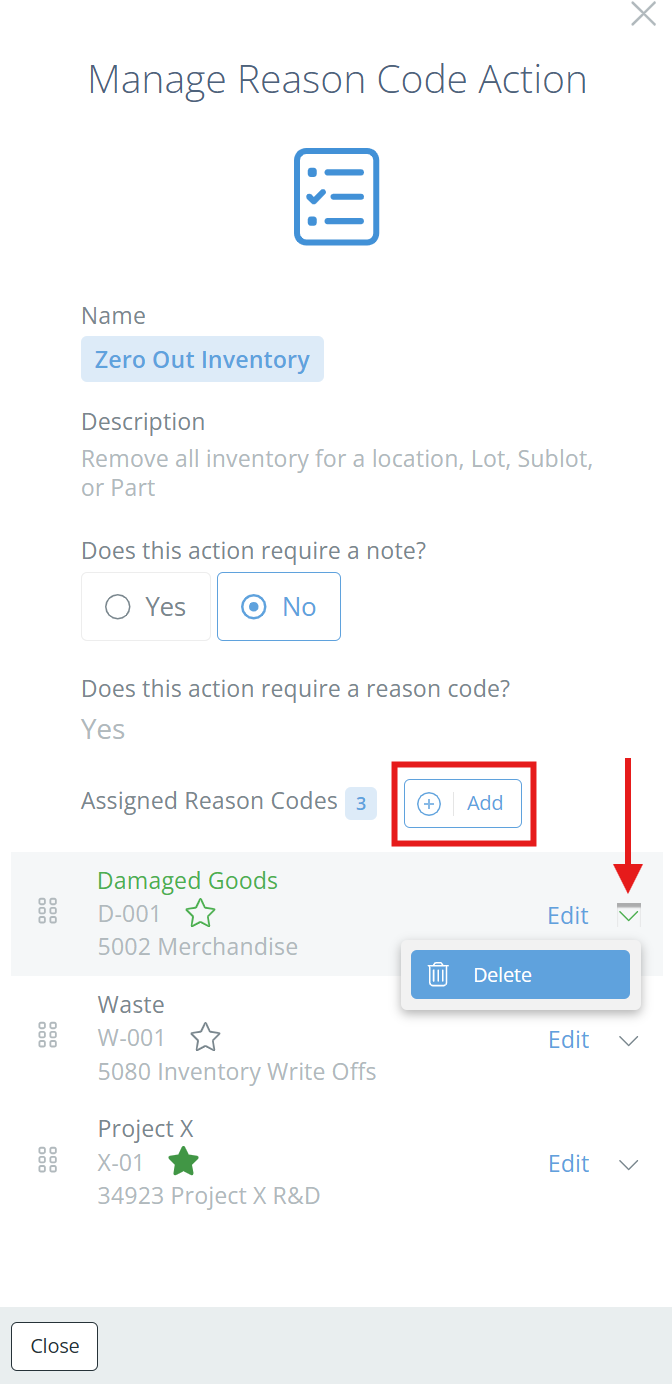
Screencap from v4.21.264.116
Additionally, if you click 'Edit' next to a Reason Code, you can link the Code to a financial account. The account selected will determine which financial account is hit when transactions marked with this Reason Code are completed. This can help spread the load from inventory shrink and make tracking financial transactions easier. If no account is selected, the transaction will hit the default account- either inventory shrink or an account in the Company Settings, depending on the transaction type.
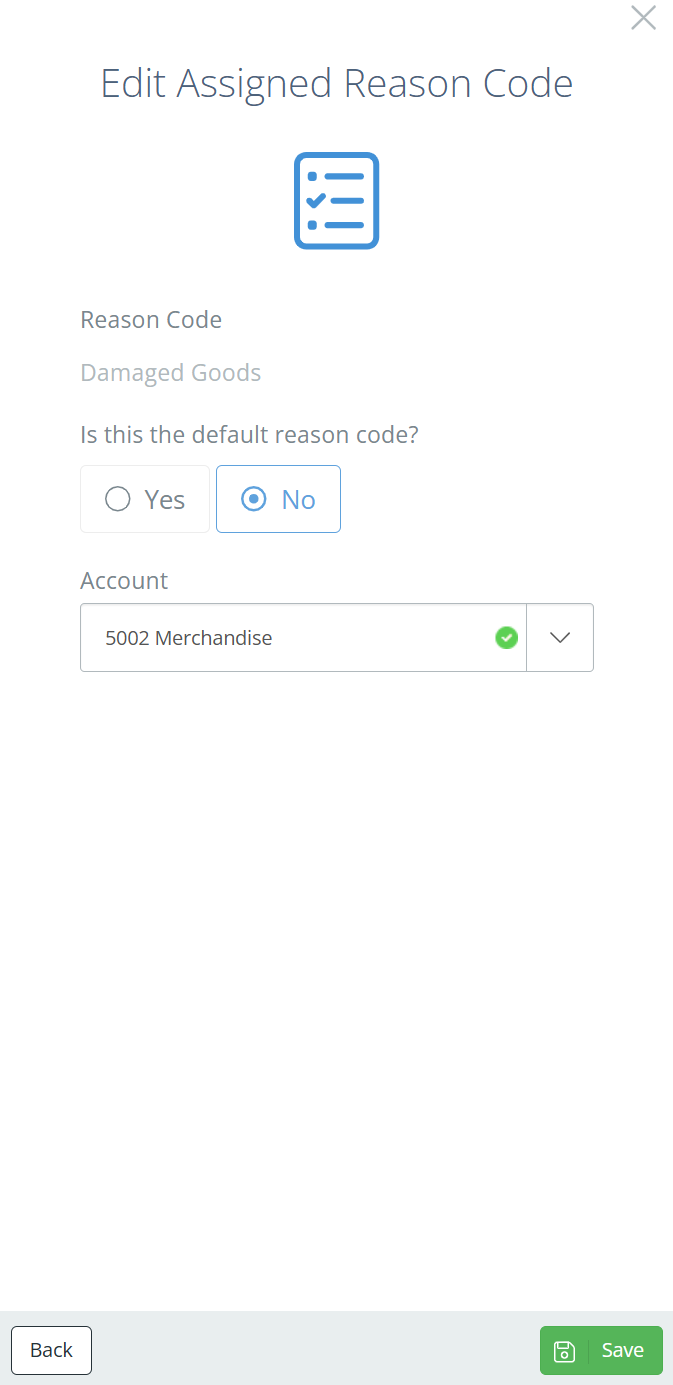
Screencap from v4.21.264.116
QuickBooks Connection RequiredIf you do not have QuickBooks connected to your DataNinja instance, you will not be able to select an account for Reason Codes. Recommended practice is to have Reason Codes and Reason Code Actions set up before your go-live date so the team can be familiar with the process, then link the financial account(s) as soon as QuickBooks has been connected.
Updated 5 months ago