Label templates in DataNinja are assigned at the printer level and control which labels are available to print during workflows such as receiving and manufacturing. Each printer can have its own label template selections, which makes it possible to tailor label printing to the specific use of that printer.
Label templates in DataNinja are assigned at the printer level and control which labels are available to print during workflows such as receiving and manufacturing. Each printer can have its own label template selections, which makes it possible to tailor label printing to the specific use of that printer.
Default templates are available as soon as the site is created, but all templates can be edited upon request. You can make basic changes to label templates in DataNinja if you are familiar with ZPL, and you can use Labelary to learn how each ZPL line affects the label design. See the Edit Existing Labels and Design New Labels pages for more details.
Selecting Label Templates
👍
Selecting a label template on one printer does not automatically select it on any other printer; each printer must be configured individually. However, adding a new label template makes it available for selection across all printers, and deleting a label template removes it from all printers on the site. This means template selection is printer-specific, while template creation and deletion are site-wide changes.
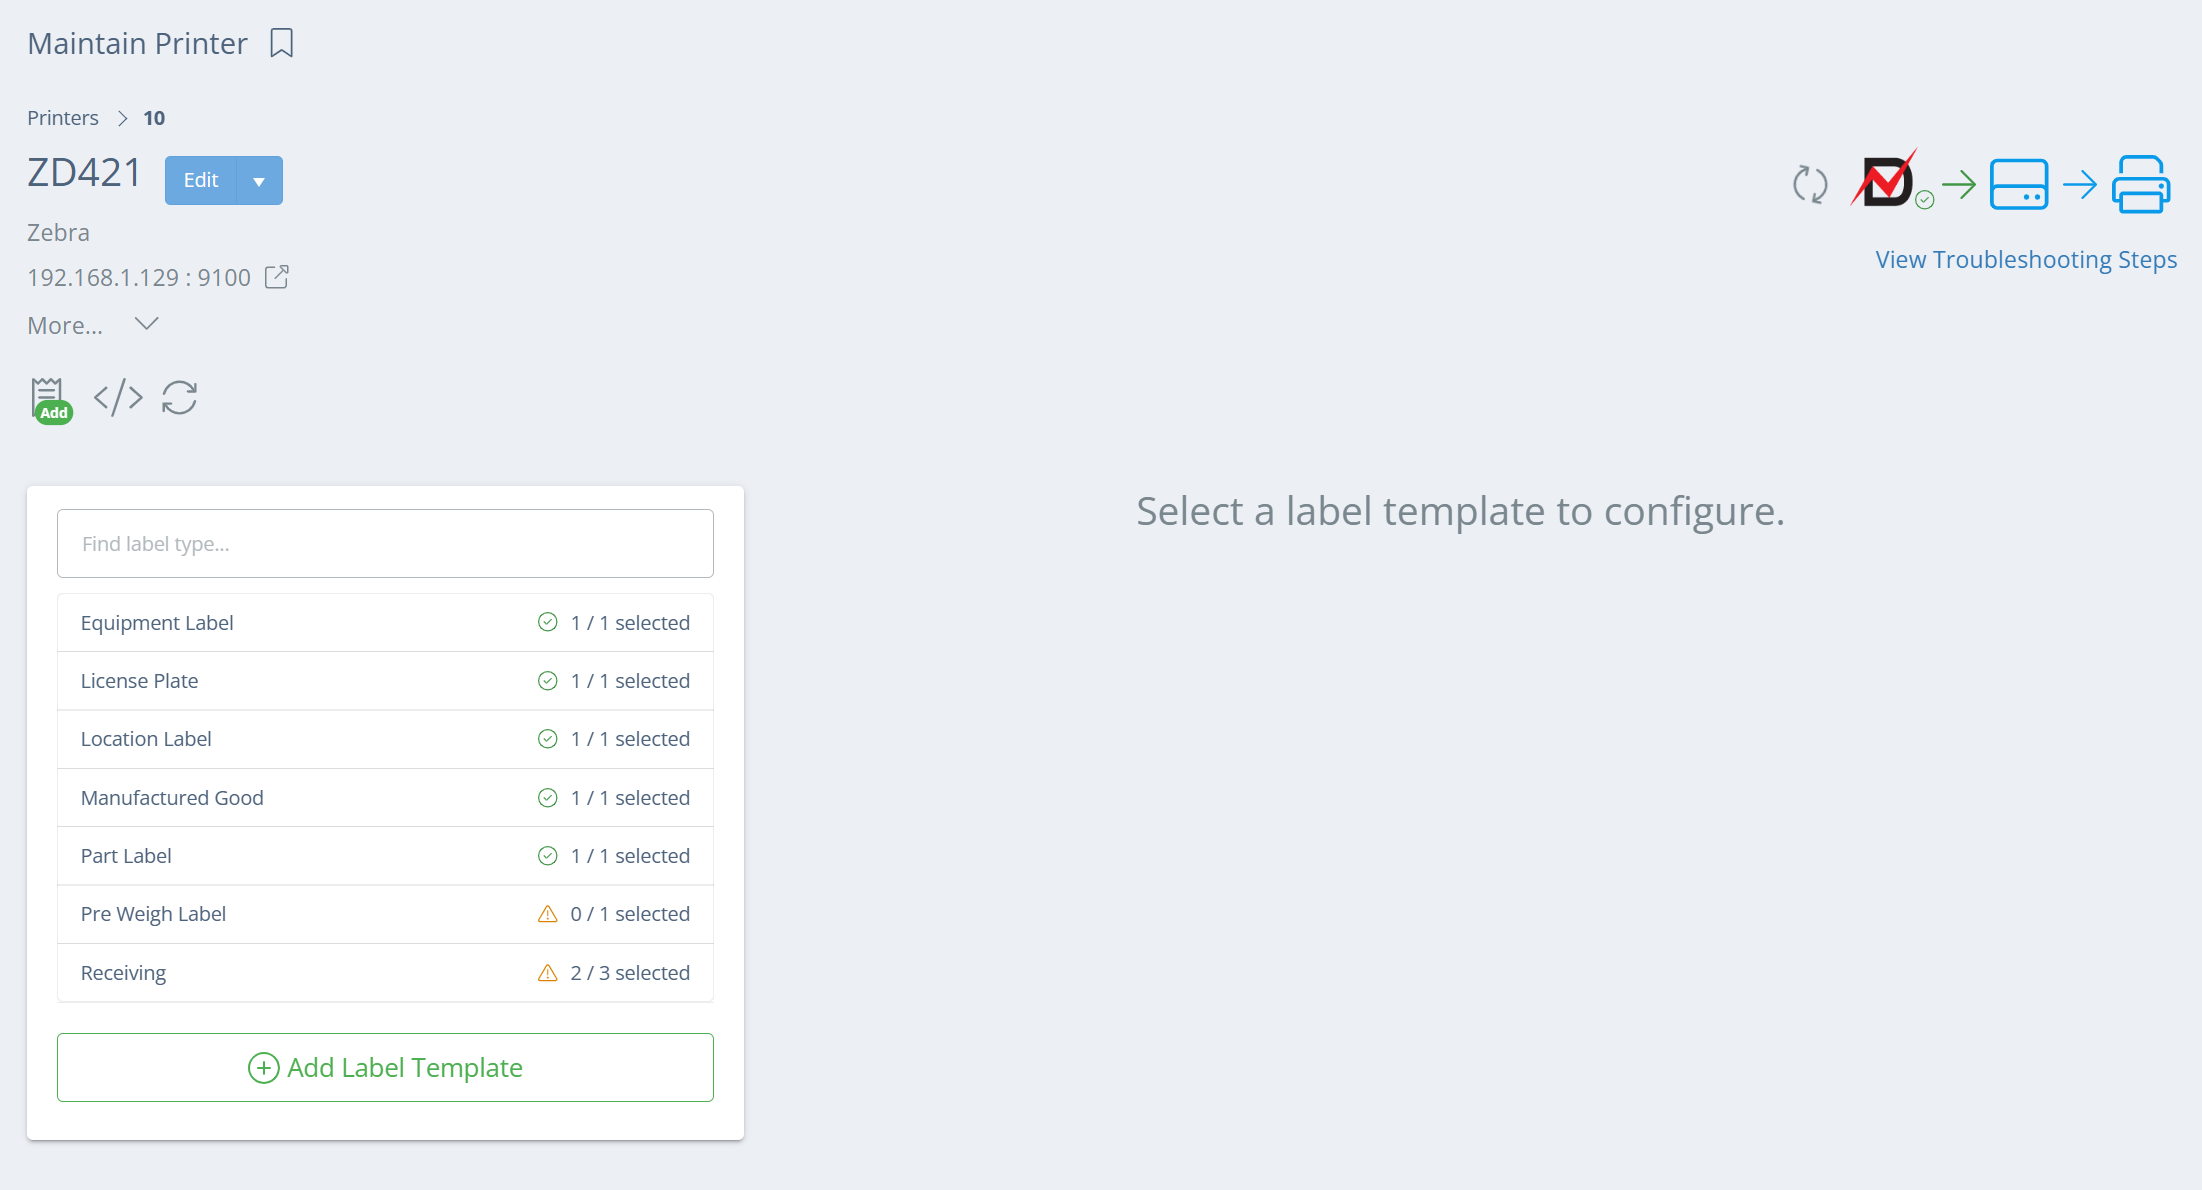
Click on the gear icon and go to the Printers page, then double-click on the printer you want to configure. This will open the Maintain Printer page, where you can view and manage the label templates assigned to that printer.
Screencap from v4.21.264.294
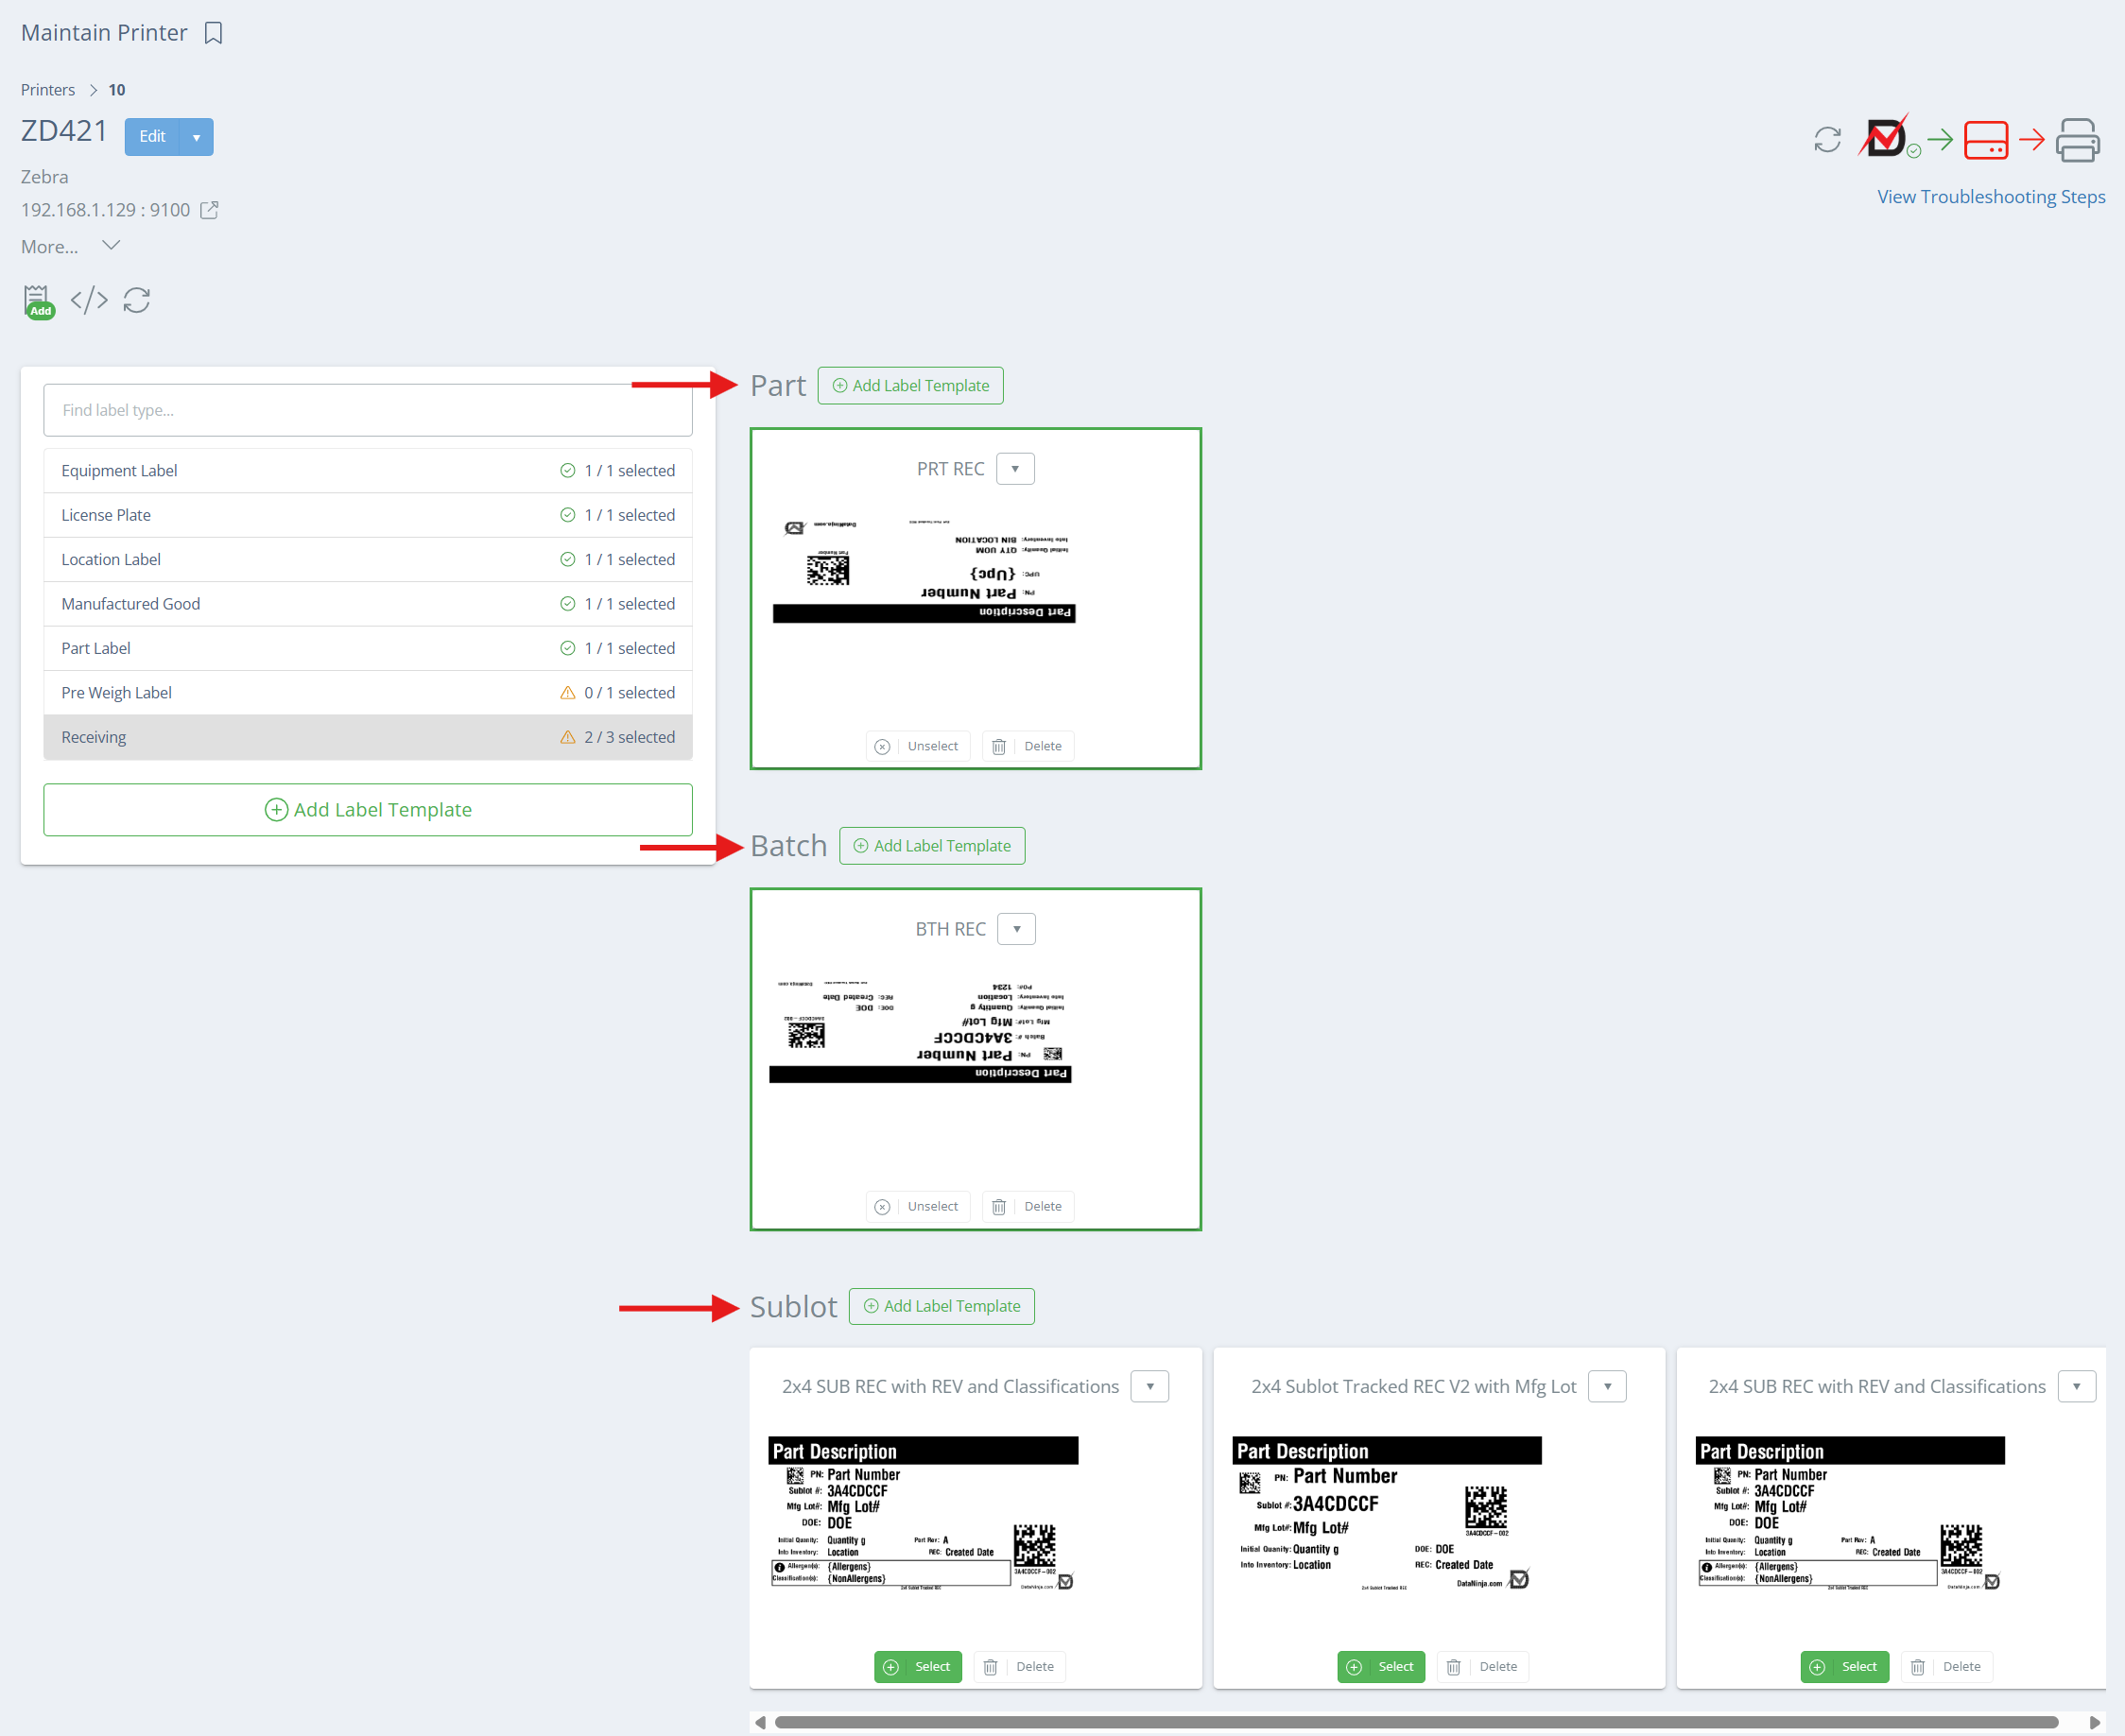
On the Maintain Printer page, DataNinja displays a list of label template types, like License Plate and Manufactured Good. If you click on a Manufactured Good or Receiving, up to 3 tracking types can show: Part, Batch, and Sublot. These subtype options are tied to the tracking method set on the part, so the corresponding tracking-type template will print (sublot tracked part -> sublot label, batch tracked part -> batch label, etc.). This allows you to differentiate for different label templates to be used automatically based on how the item is tracked in DataNinja.
Screencap from v4.21.264.294
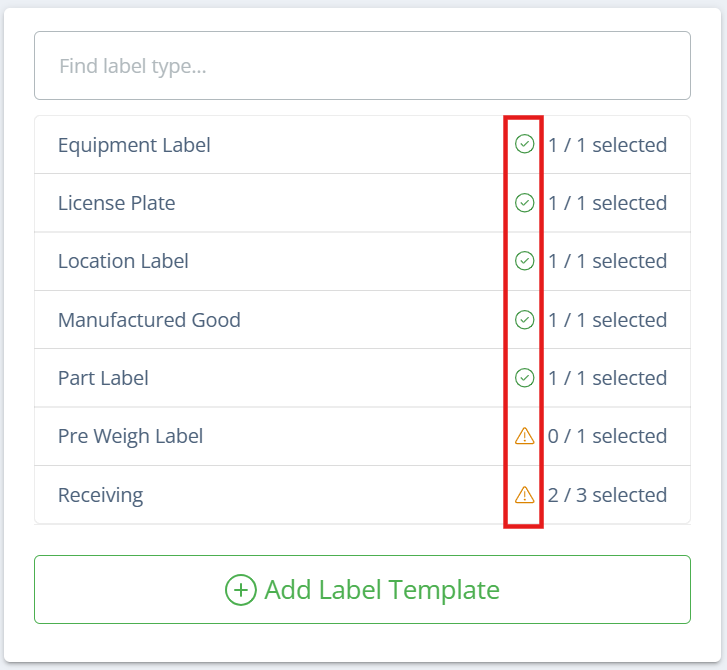
If there is a green check mark next to the label type, that means that all possible labels for that type have been selected. A yellow triangle means that there is at least 1 template selection missing.
Screencap from v4.21.264.294
Selecting Multiple Templates
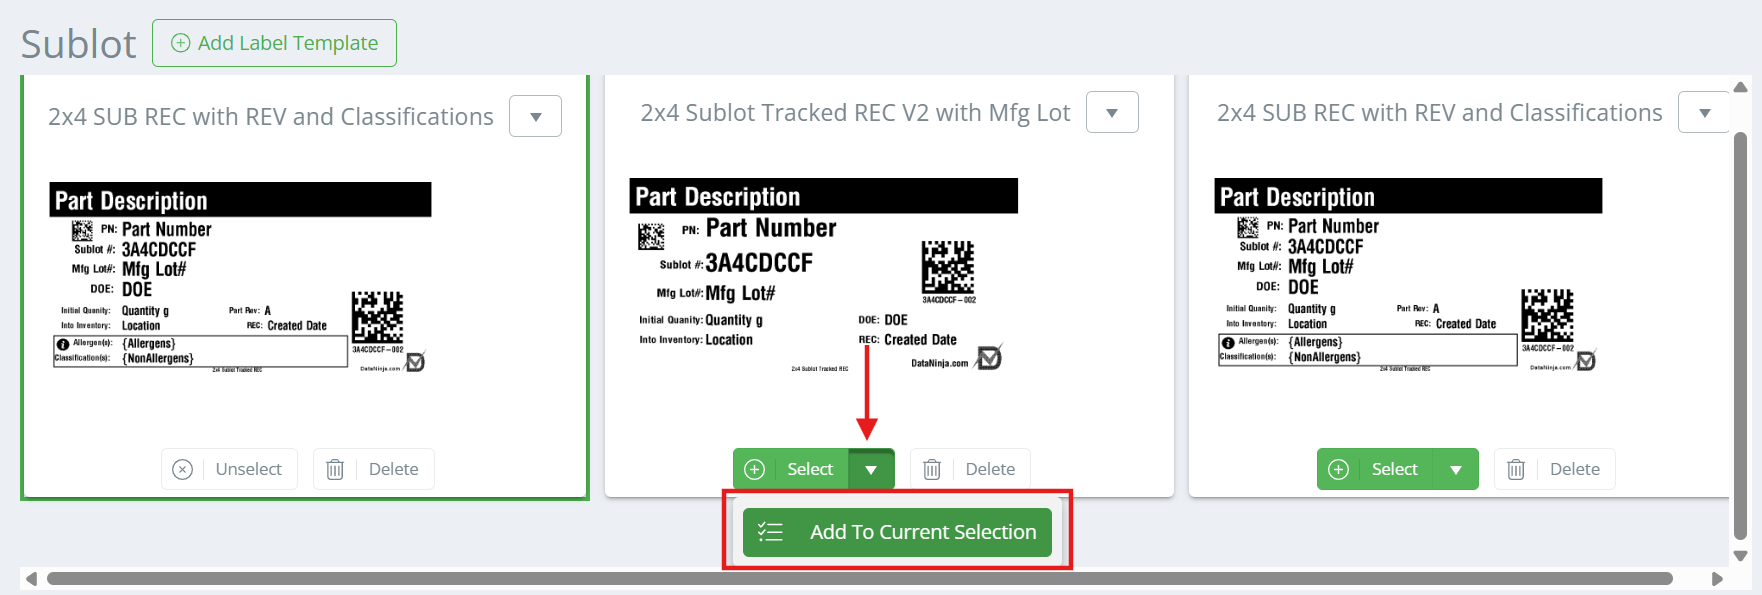
For each label tracking type, you can choose one or more templates, per printer. To select multiple templates, click 'Select' on one template, then use the dropdown arrow and click 'Add to Current Selection' on the next template(s).
Screencap from v4.21.264.294
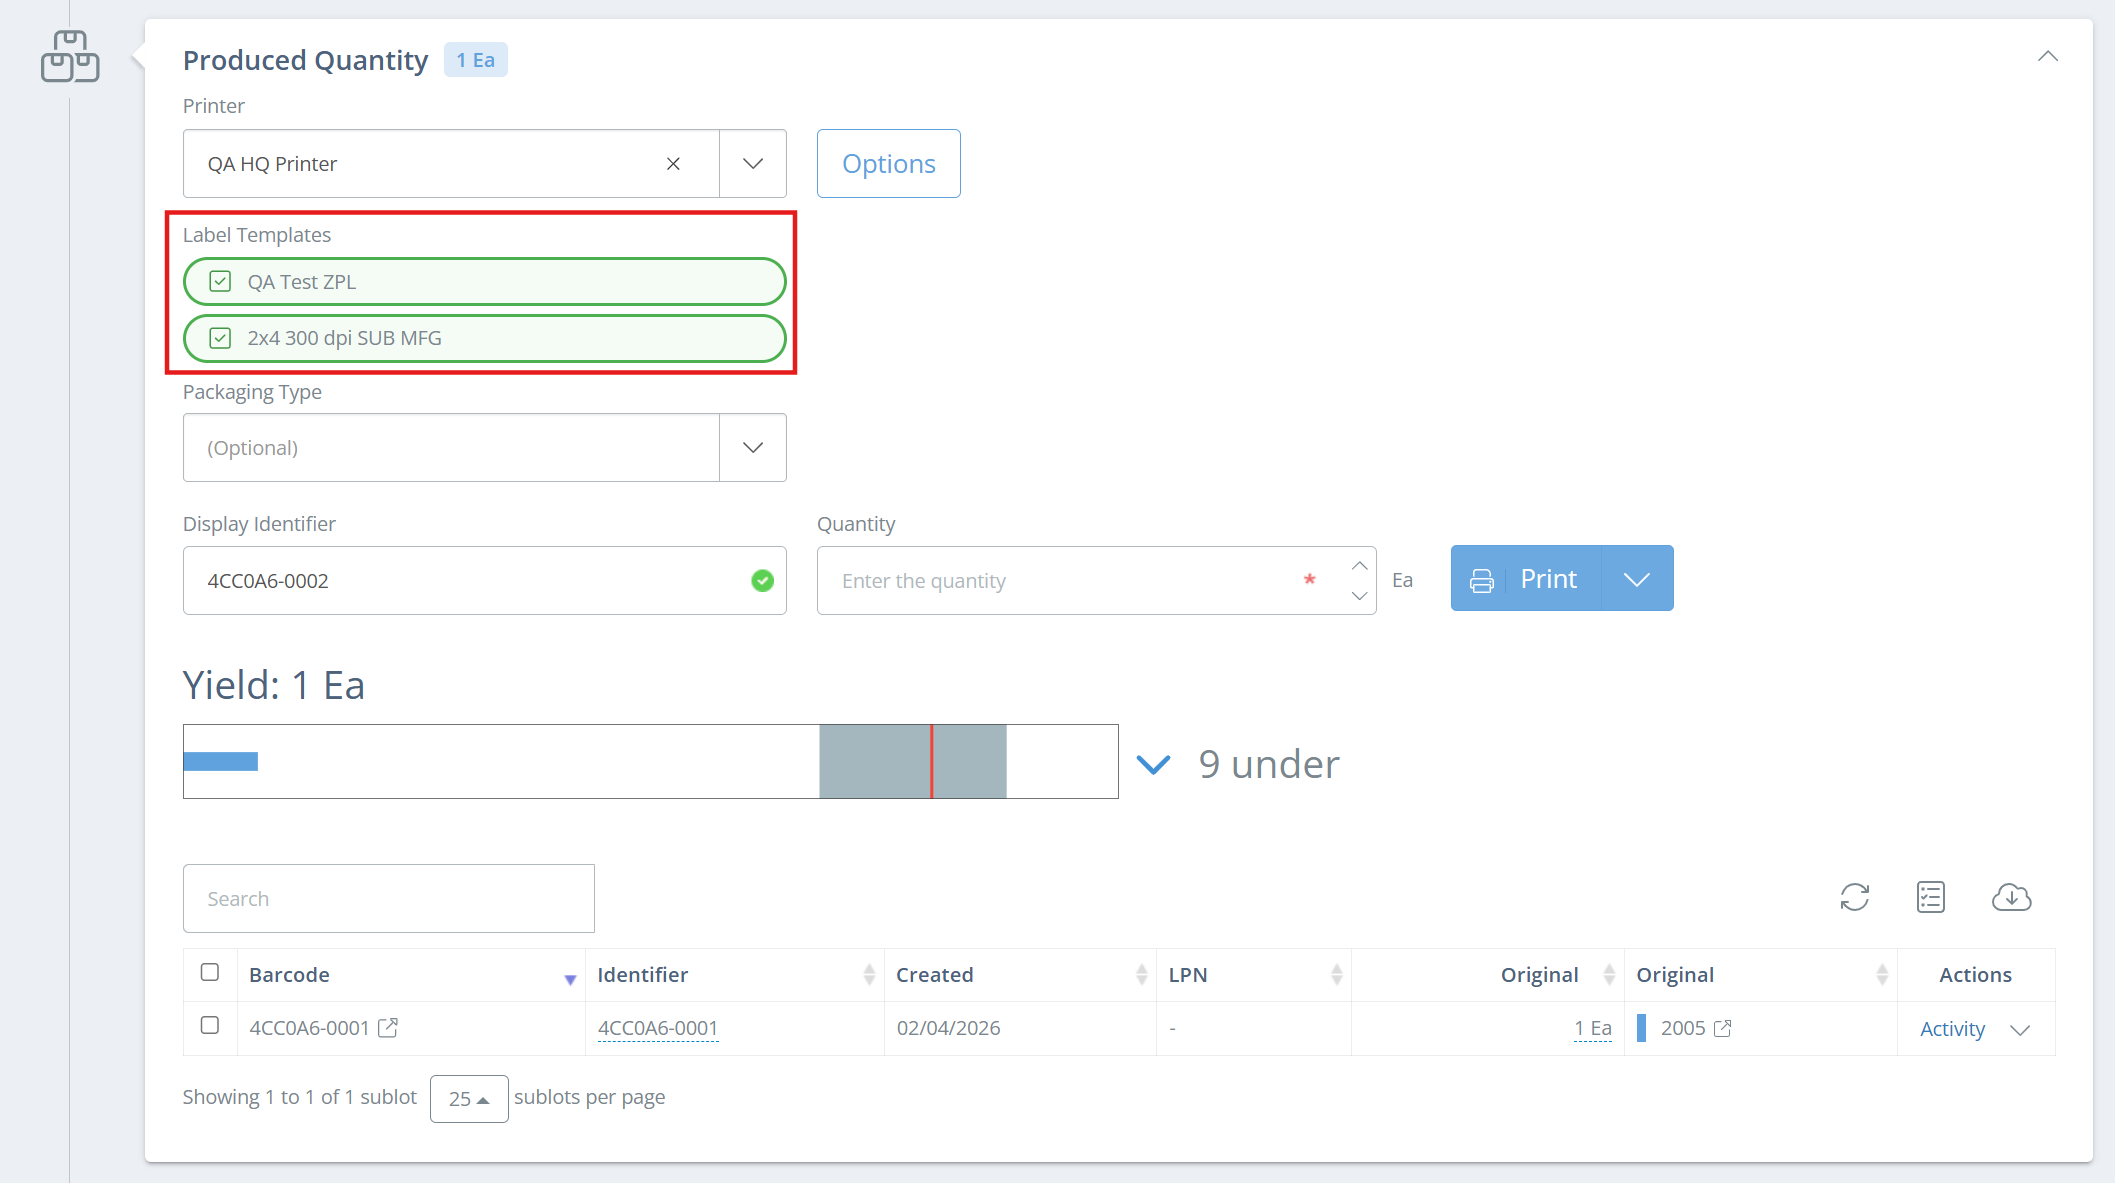
When multiple templates are selected for the same subtype, they will appear as a checklist during workflows such as manufacturing or receiving. This allows you to decide whether to print one label template or multiple label templates at the same time, just click the checkbox to add/remove one of the templates before printing.
Screencap from v4.21.264.294
❗️
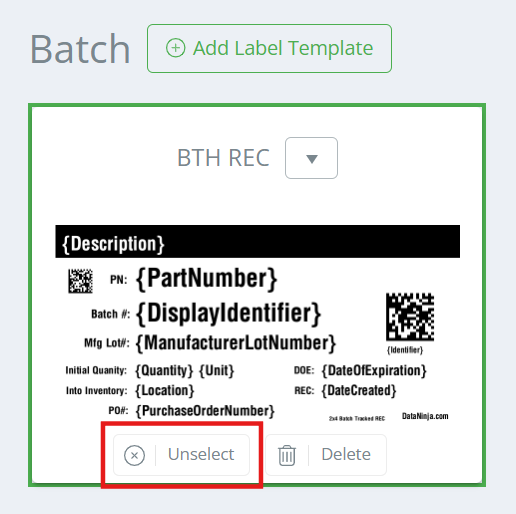
Unselecting vs Deleting Templates
If a template should no longer be used on a specific printer, click 'Unselect'. This removes the template from being printed on the printer, but it can be re-selected again if needed. Deleting a template will remove the label template from your entire DataNinja site, and must be restored manually by the DataNinja team. Since deleting affects all printers, it should only be used when the template is no longer needed anywhere in the system.