Advanced Scheduling
Optimize output by coordinating work hours, equipment, facility areas and manufacturing process steps
Not All Sites Have Scheduling Enabled
If your DataNinja site does not have scheduling enabled, but you would like to utilize this tool, please reach out to our Implementation team via chat.

Setup Checklist:
Each of the following must be set up to manage operations with Scheduling:
1. Work Centers
Work centers are locations where specific tasks or activities are performed as part of the production process. It's recommended that you set up one work center for each building's work area. For example, the following work centers may be present in "Building 1": PreWeigh, Blending, Packaging.
2. Work Schedules
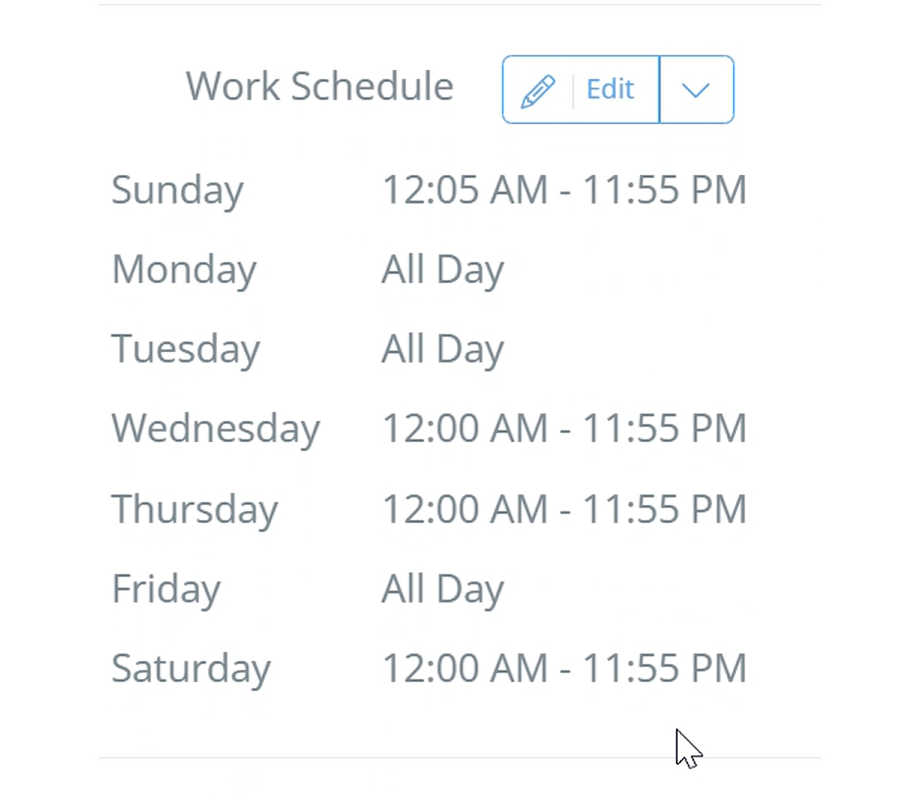
Prevent scheduling conflicts by blocking out when equipment or team members can operate. For example, PreWeigh might arrive at 6am and leave by 2pm, packaging and blending might run from 9am to 5pm. Add a work schedule for each unique equipment or team operating hours.
3.Equipment
Organized by type. "Equipment" is defined as the uniquely identified tools used in production.
4.Process Step Settings
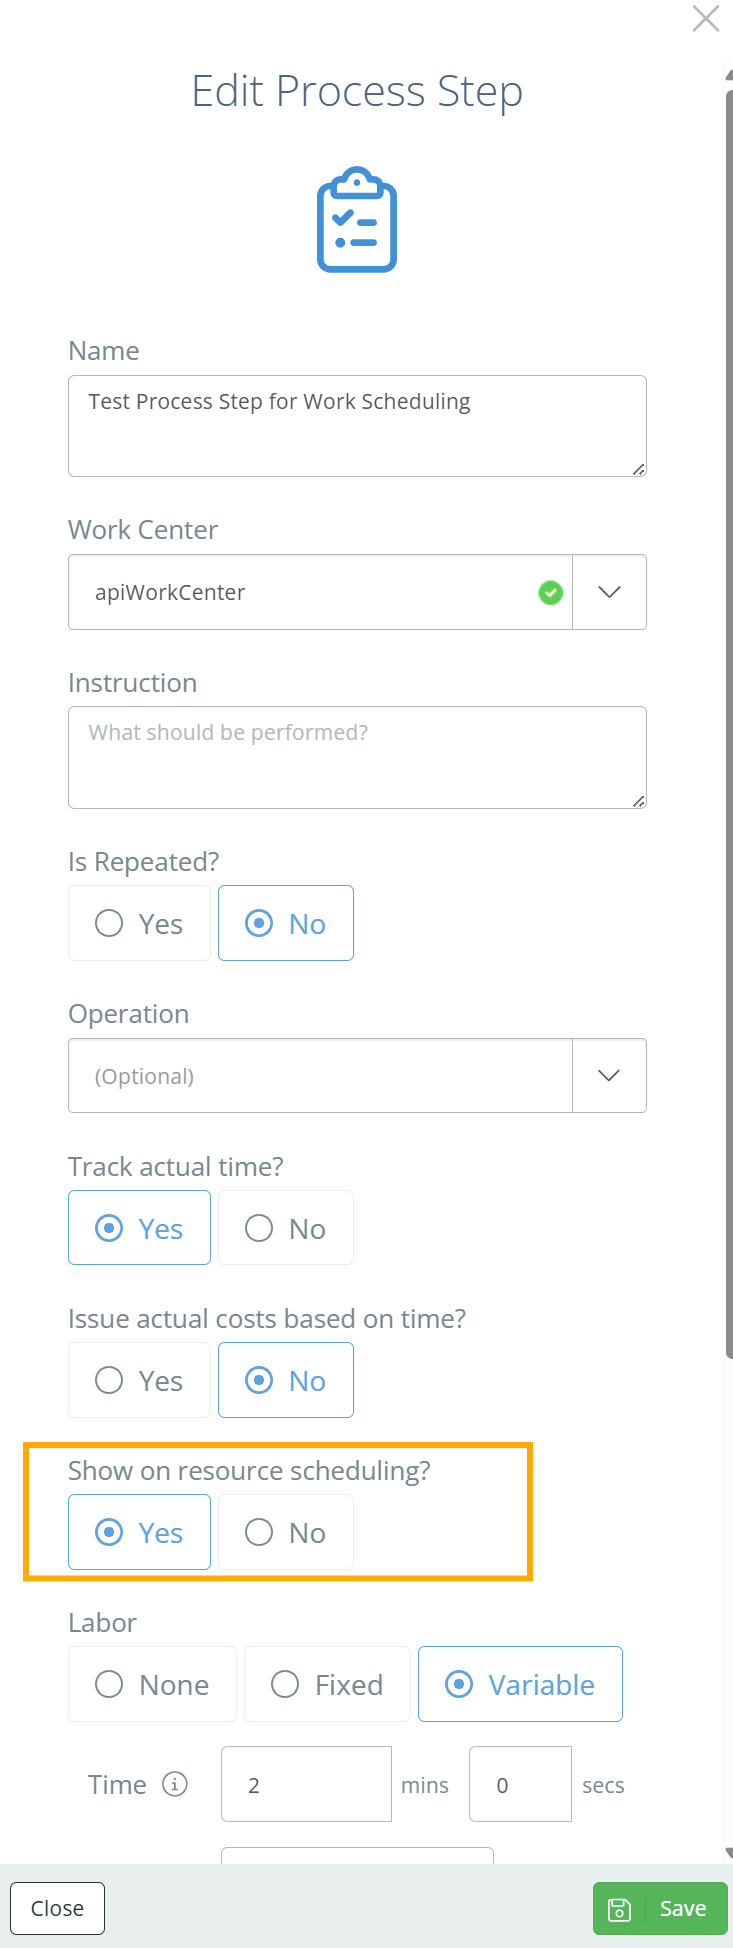
Your BOM process step settings control which manufacturing execution steps will appear with scheduling constraints. To activate scheduling for a particular BOM Process Step:
- Click Edit
- Add Labor minutes ( Variable or Fixed)
- Select "Yes" for "Show on Resource Scheduling"
5.Resources (Assigned To) Field
Sometimes overlapping resources are NOT bad. (your PreWeigh team might be able to on more than one batch) Use resources to divvy up tasks by parallel capabilities when more than one manufacturing record is planned at the same time within the same work center.
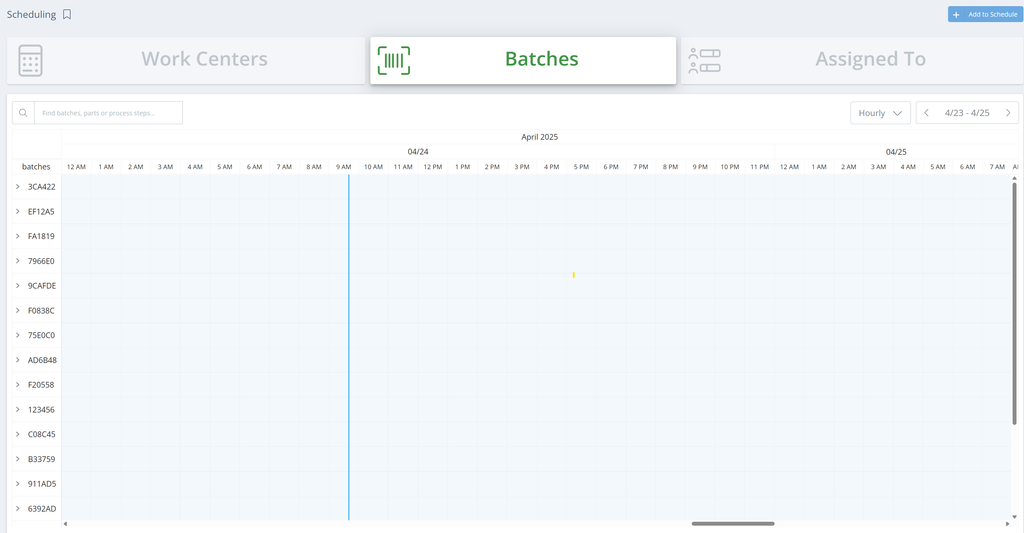
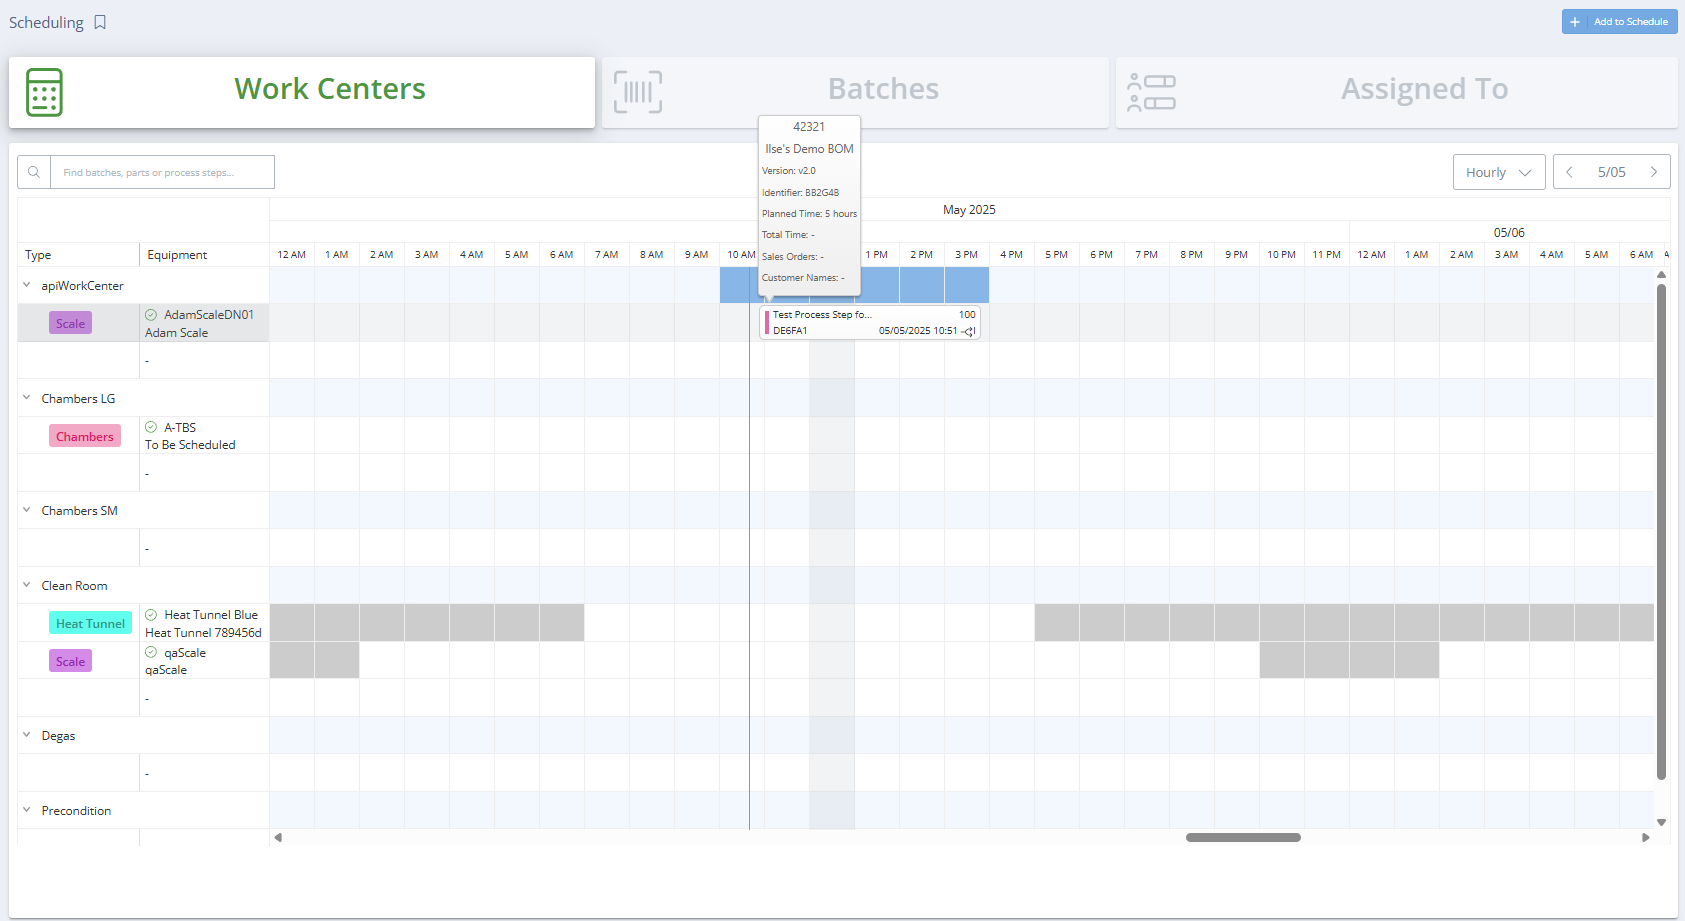
Make it Happen! Drag, Drop, and Slide for the Best Schedule

Tip: Watch out for RED!
Your scheduling chart automatically highlights when there are conflicting resources. Color density also indicates shift times where the schedule has the least room for unexpected delays.
Alternate Scheduling Views
Batches Tab is useful for monitoring scheduling constraints BY job.
The "Assigned To" scheduling tab is useful for monitoring scheduling constraints by Production Room, Operating line, or even Production Management Personnel.

Setting Up Work Centers and Equipment
So you want to set up scheduling but you don’t know where to start? No problem. Let’s take it to the basics.
Because scheduling works around work centers and equipment, we first need to make sure that we have those two elements set up properly.
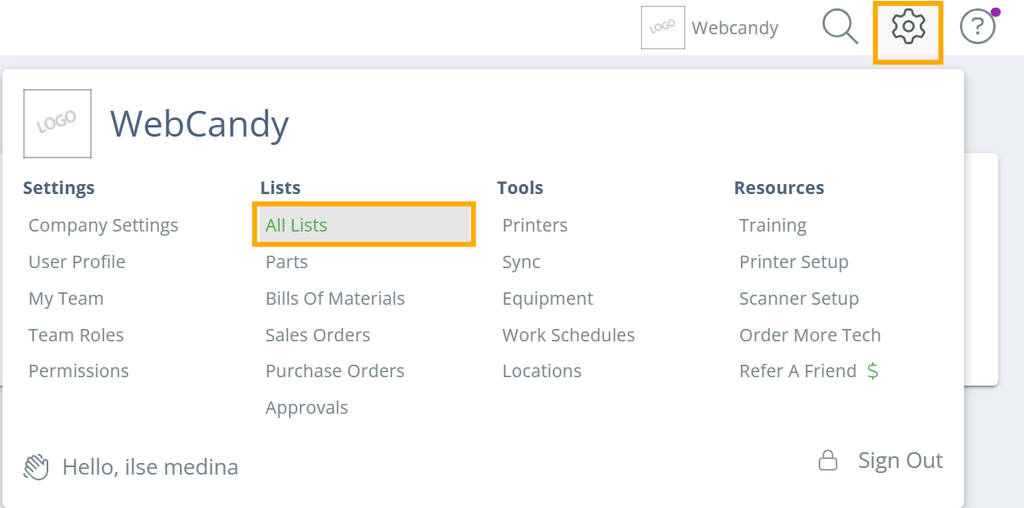
Starting with Work Centers, in your DataNinja Instance, you’ll want to select the configuration icon and then select ‘All Lists’, this will take you to the main page of all pages hidden within the site. In your search bar, go ahead and type in: Work Center. Or, scroll all the way to the bottom, it’s in alphabetical order anyway.
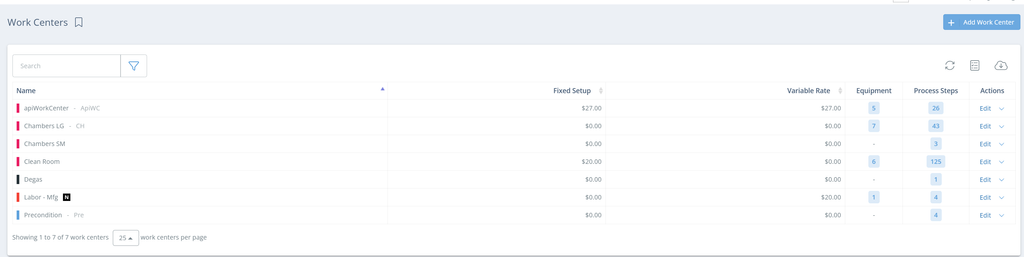
Once in the page, here is where you’ll set up and configure the needed Work Centers.
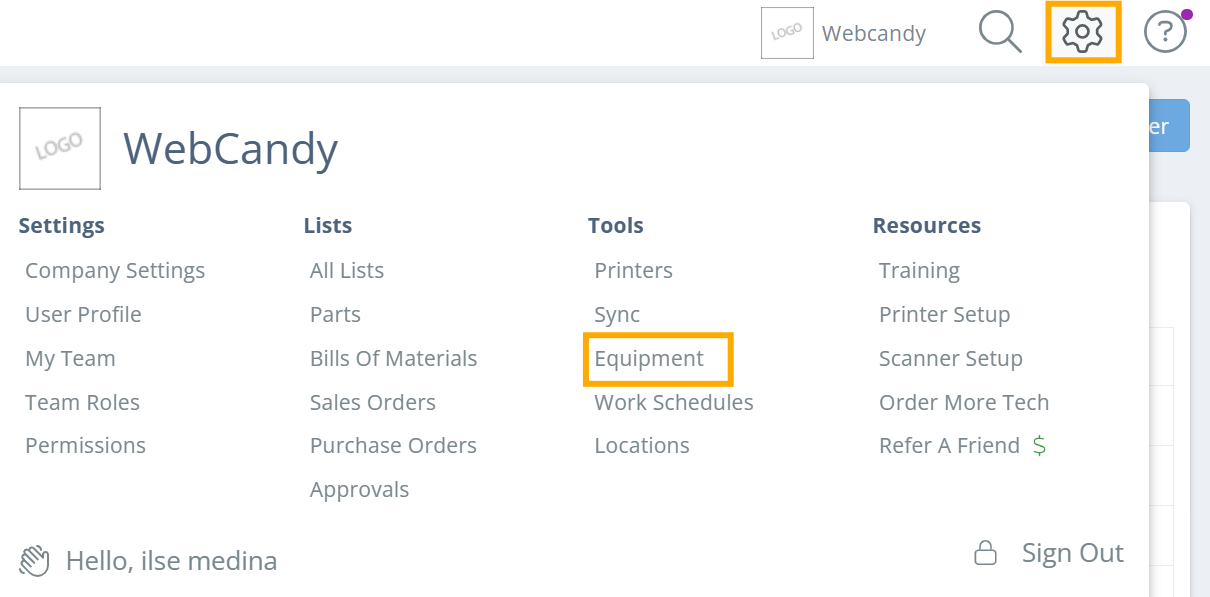
After work centers, comes the set up equipment. Go back to the configuration icon and select ‘Equipment’ under ‘Tools’
The Setup of Equipment should be simple, however, there is one important item that cannot be forgotten! When setting up your equipment, you MUST make sure that under the ‘Maintain Equipment’ settings, ‘Show in Schedule’ is checked! If it is not, you will not see this in the Scheduling page.
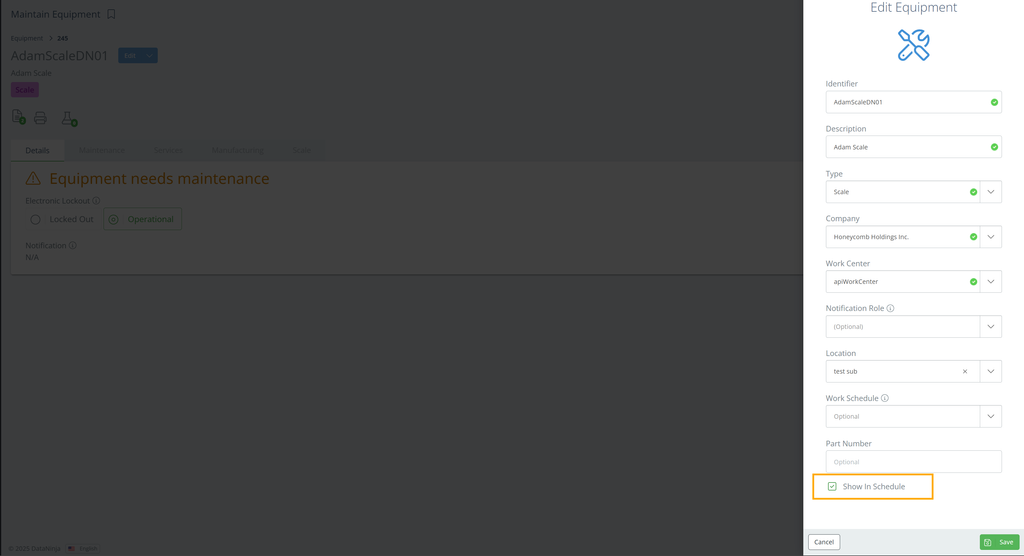
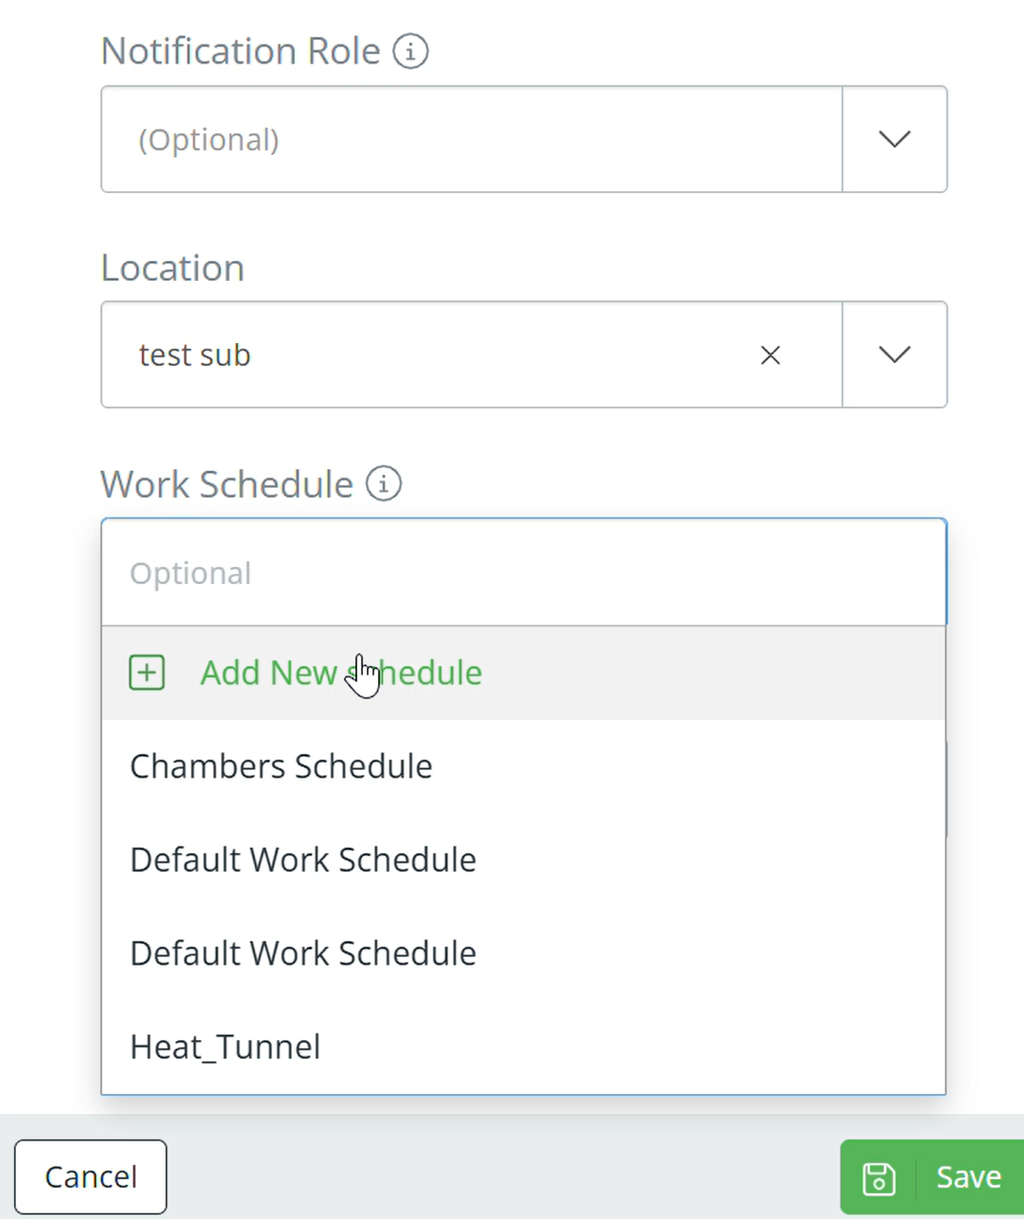
Before moving back to the scheduling tab to verify, let’s look at where we can add a schedule to the equipment. These instances can be ideal to identify known downtimes of equipment for servicing or cleaning. In that same window, where you see ‘Work Schedule’, click on the drop down menu.
Now! You can head back to the scheduling tab and under ‘Work Centers’, you’ll find the item! Woot, woot! One step closer to success. Now, let’s talk about the BOM set up, shall we?
Setting Up BOM for Scheduling Needs
In order to tie the need for an equipment and it’s availability, we’ll need to include the required equipment into the Bill of Material! This will help create a streamlined connection between when equipment can be used and, based on quantities expected out of that scheduled BOM, what that timeline could look like.
Our first step to get this established is to go to our designated BOM, and edit it to include the necessary equipment.
One important thing to note is when selecting your work center, you MUST select the same one as your established equipment in order for it to populate as an option.
While the name of the specific equipment does not show, remember that this is because this enables the team working on the record to select WHAT equipment they’re utilizing. We’ll see in a little bit, how this look as a finished BOM.
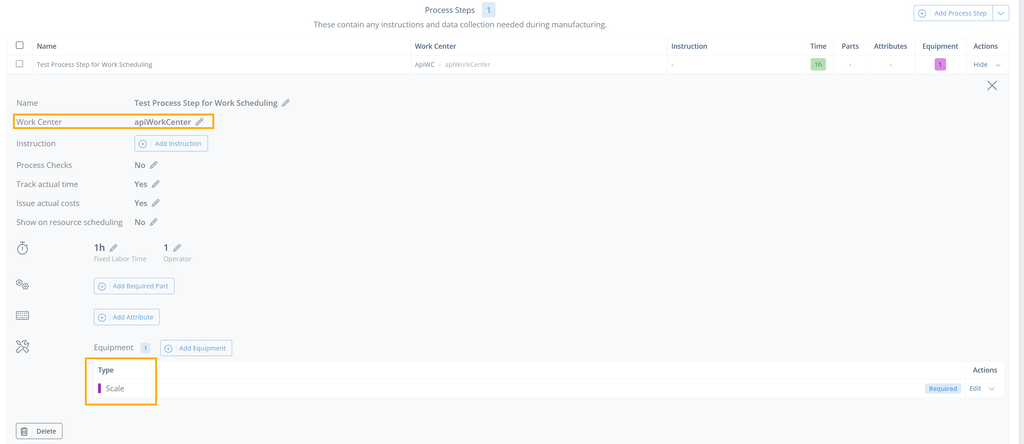
_Important to note: _You need to make sure that the ‘Show On Resource Scheduling’ is checked yes!
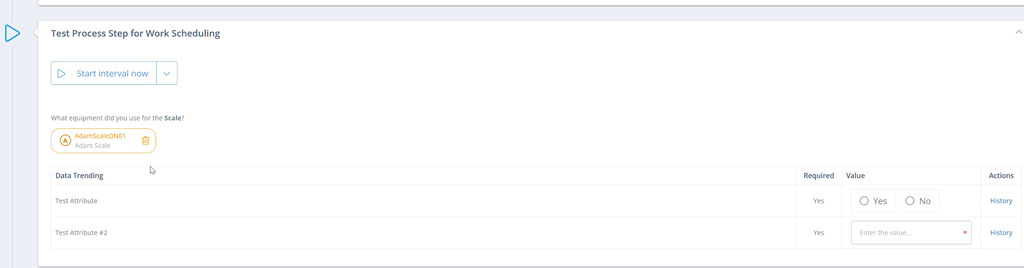
Once the BOM is released and scheduled, you will be able to select your appropriate equipment!
But to see where the real magic lies, you’ll want to go back to the Scheduling tab to see how it all comes together!
For any further questions on Advanced Scheduling, reach out to your DataNinja representative for a live demo!
Updated 4 months ago