Shipping Inspections
Outbound inventory inspections
Shipping inspections are an excellent way to record shipment conditions and requirements. DataNinja allows for granular, and general, outbound inspections- similar to incoming inspections. If you have inspections that you want to be completed on every outbound shipment, the shipping inspection should be completed at the Company level; if the inspection is customer-specific, the inspection should be set up at the Customer level.
By Company
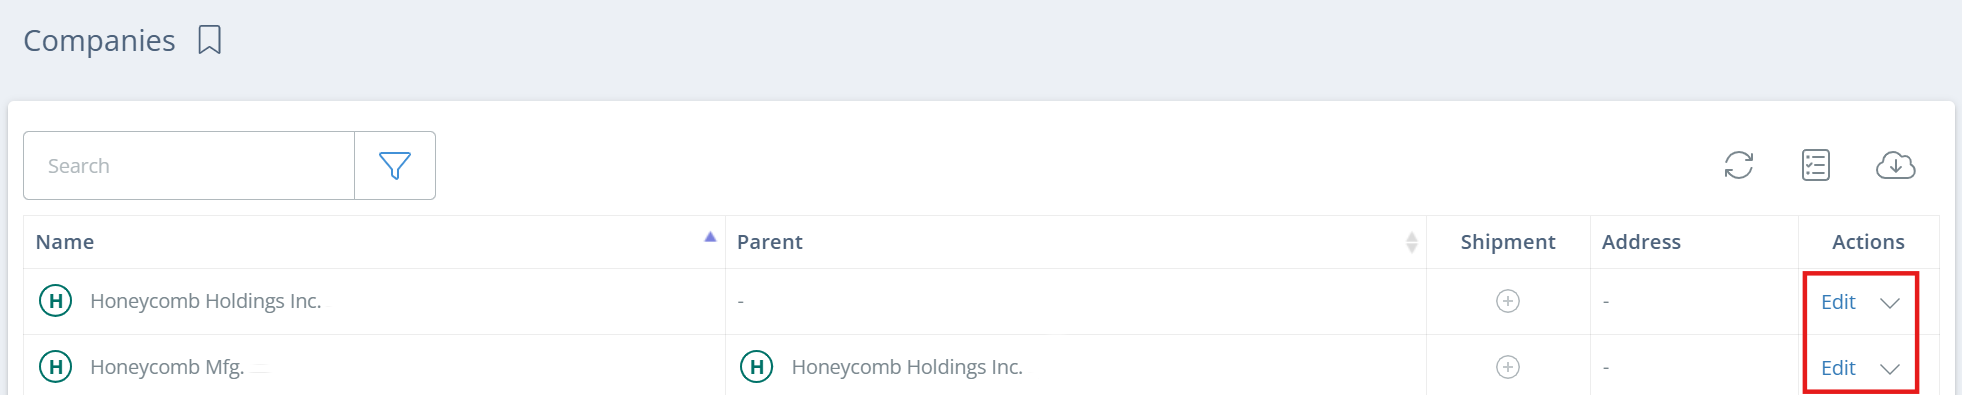
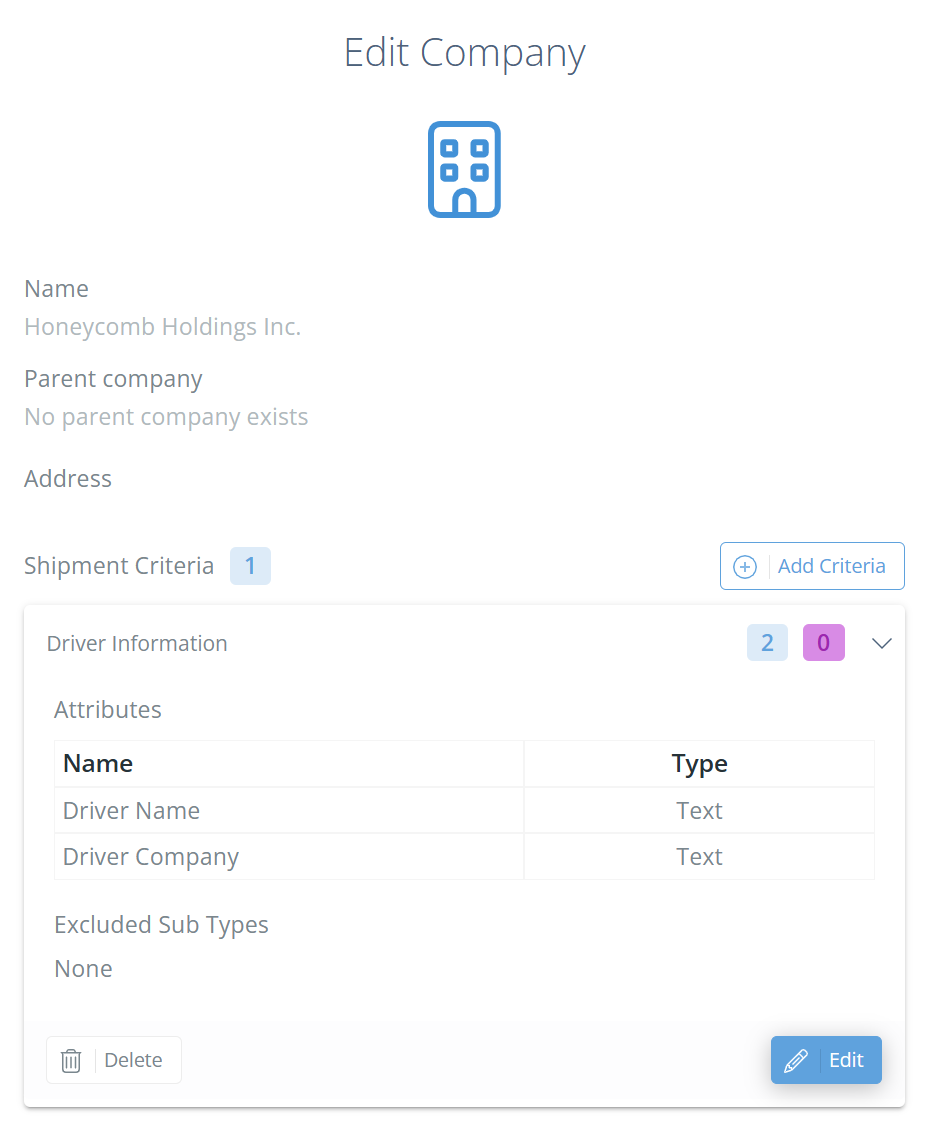
Company shipping inspections are applied to all shipments, unless an exclusion is marked (see "Exclusions" section below). To create a Company shipping inspection, click on the gear icon in the top right, then go to "All Lists" and click on "Companies". On the Companies page, find the company you want the inspection to apply to, then click on the "+" in the Shipment column, or click "Edit" and "Add Shipment Criteria".
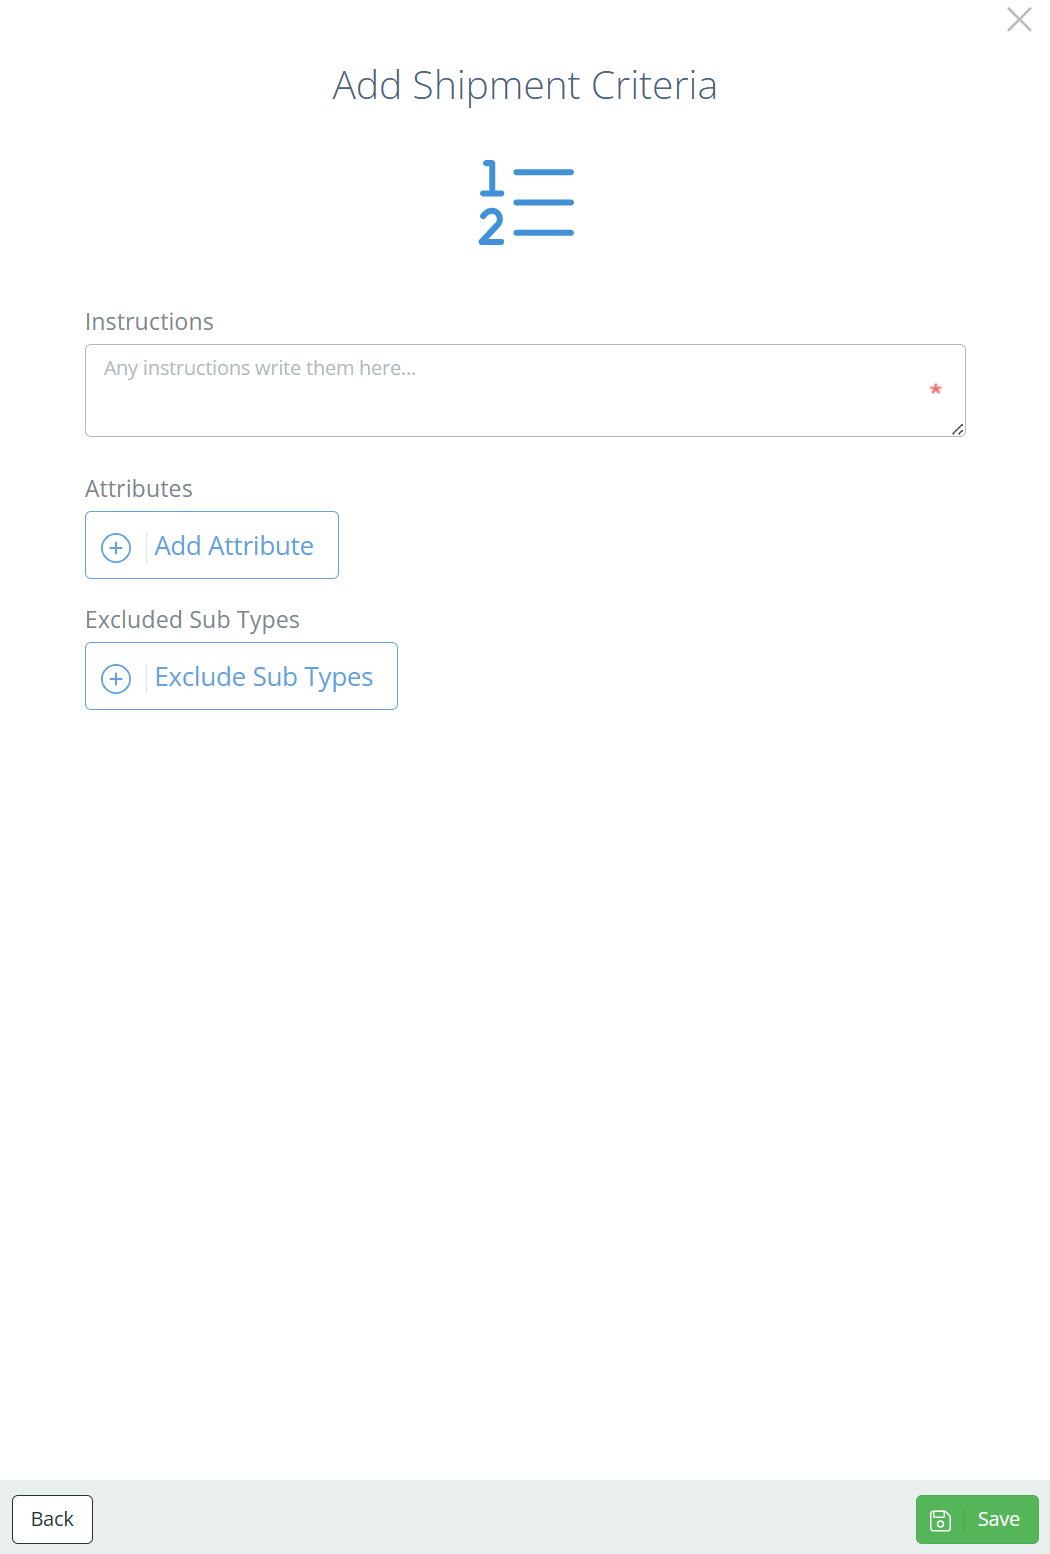
A new sidebar will open and ask for the Shipment Criteria information. Enter the instructions (this will be the name of the criteria), add attributes, and mark any exclusions. Once finished, hit "Save".
Adding Criteria Attributes
Attributes are specific actions/recorded actions needed to complete each inspection criteria. Select the best fit for the information you want to record, and mark if the attribute is required, as well as if verification is needed. Any number of attributes can be added to a criteria, and any number of criteria can be added to an inspection.
Attribute Types
| Attribute Type | Monitors | Alerts If |
|---|---|---|
| Check Box | Completion | Not Checked Off OR Incorrect Choice |
| Date Field | Date Entry | Blank OR Not Correct Format |
| File | Upload Success | No File/Image Uploaded |
| Number Field | Number Entry | Blank OR Outside Threshold |
| Select Box | Checked Entries | No Boxes Marked OR Incorrect Choice(s) |
| Text Field | Text Entry | Blank |
| Weight | Weight From Connected Scale | Blank OR Outside Threshold |
Second Person Verification (New!)
For each attribute on a Process Step, you can now require a second person to verify that the attribute was completed correctly. Just select "Yes" under "Requires Verification?" when setting up or editing the attribute. Be aware that this means that a second user with a different DataNinja login must hit "Confirm" on the attribute in order to complete it.

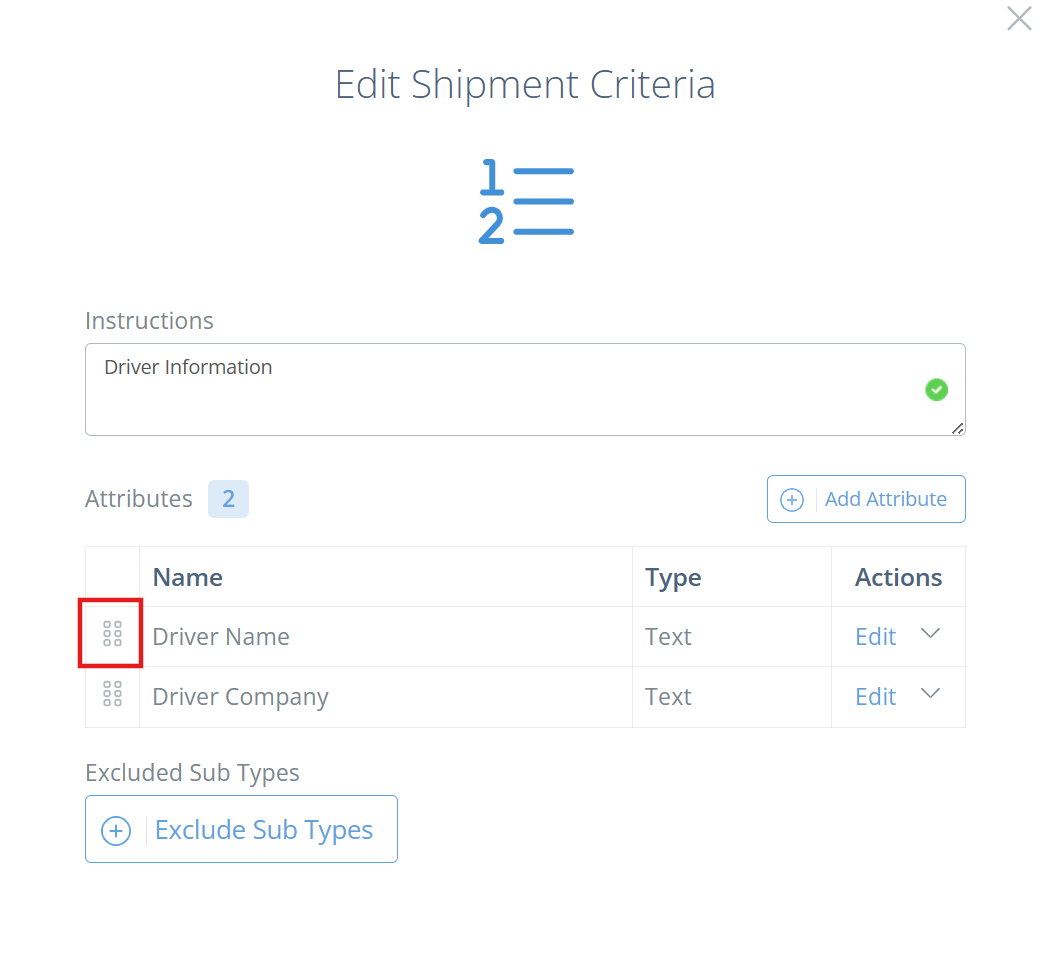
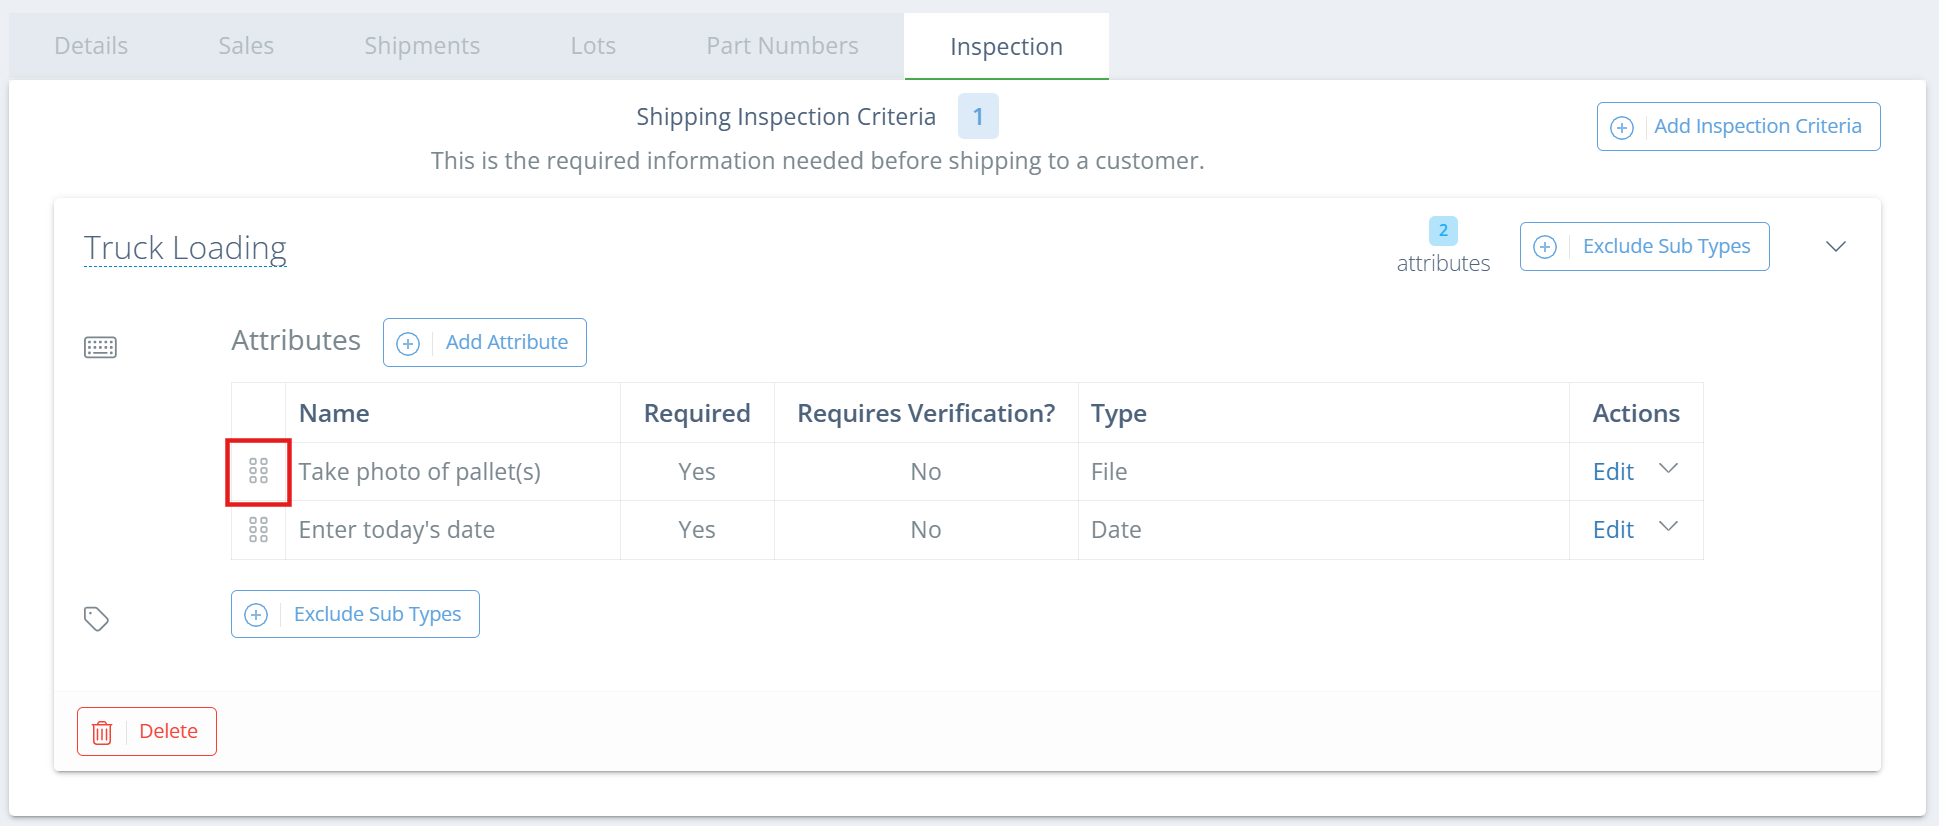
Changing Attribute Order
You will see 6 dots to the left of the attribute name- you can click and drag on these dots to change the order of attributes.
Exclusions
There may be cases in which you don't need to complete a particular shipping inspection criteria- DataNinja now allows you to exclude the criteria as a requirement under specific circumstances. Be aware that this does not remove the inspection as a whole (unless you mark all criteria to exclude a sub type), only the specific criteria.
Sub Types
Sub Types are only relevant if your company uses NetSuite. See our NetSuite Shipping Inspections page for details.
Deleting Inspection Criteria
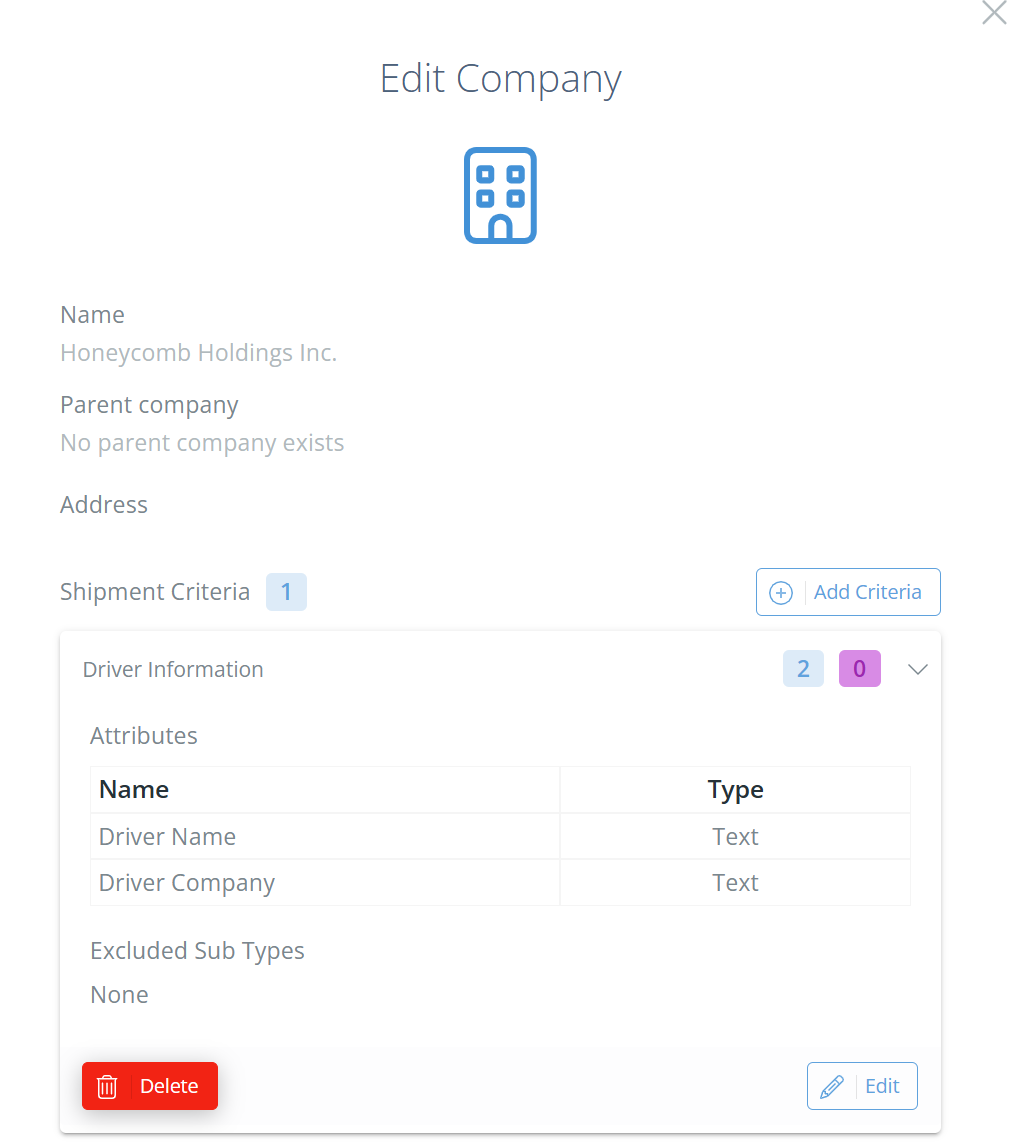
To delete inspection criteria, click "Edit" on the company with the criteria, then expand the criteria by clicking on the criteria, and click "Delete" in the bottom left. The criteria will then be removed from the company.
Deleting Attributes
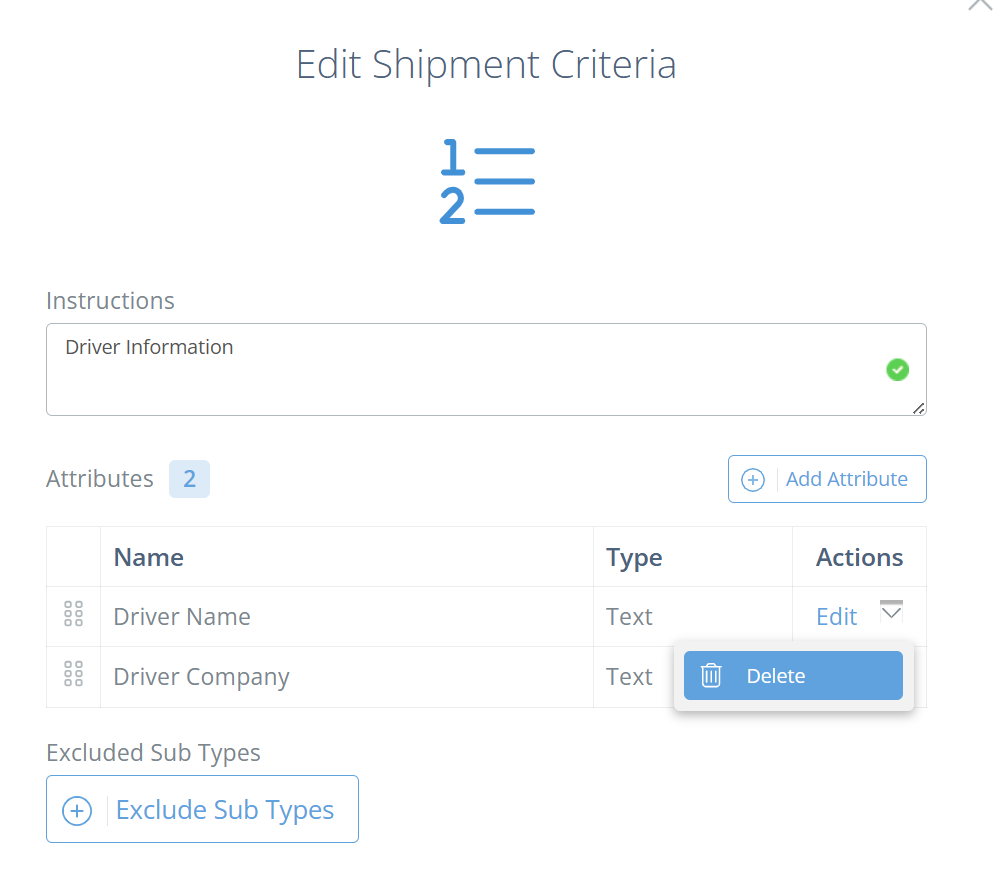
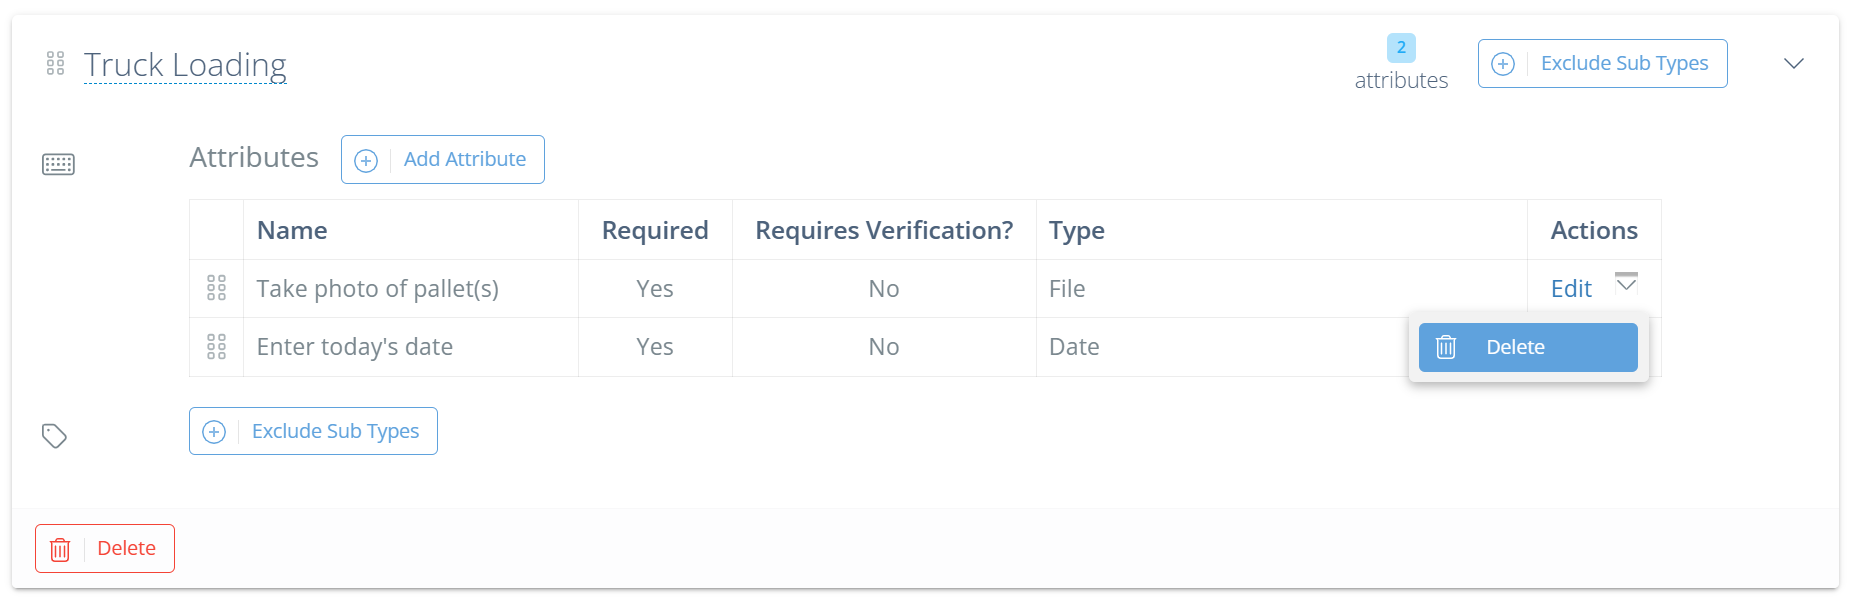
To delete an attribute from a criteria, click "Edit" on the company with the criteria, then expand the criteria by clicking on the criteria, and click "Edit" in the bottom right.
Once you are editing the criteria, click the dropdown arrow in the Actions column and hit "Delete" to remove the attribute from the criteria.
By Customer
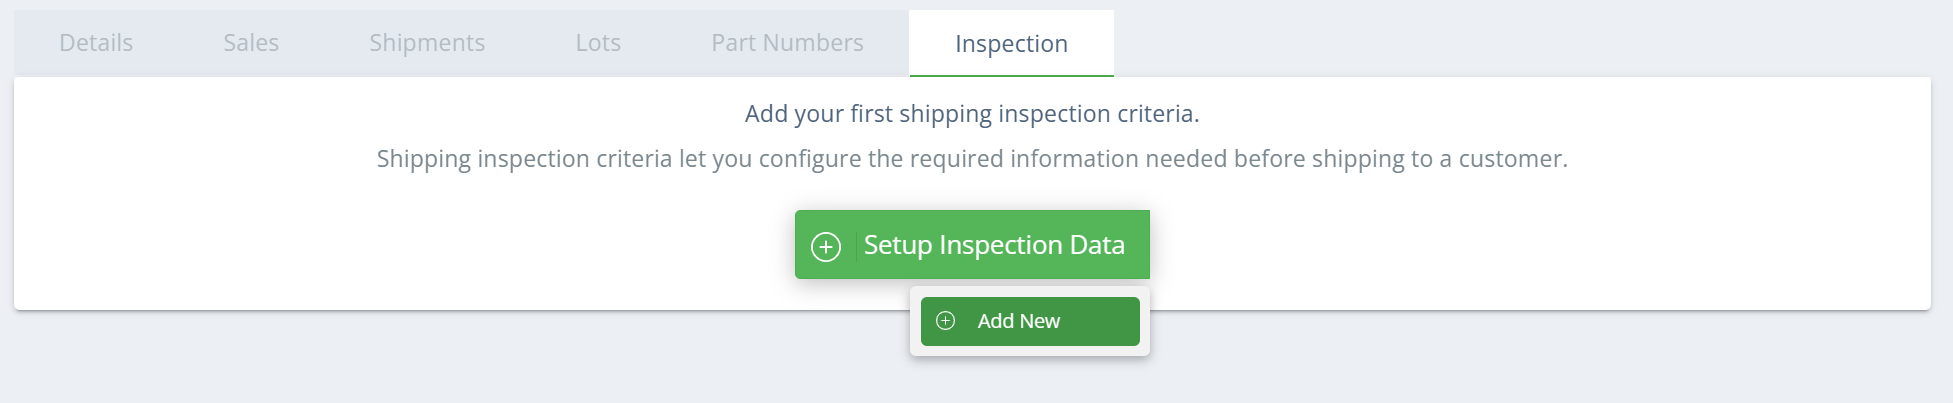
Customer shipping inspections are only applied to shipments for a specific customer, unless an exclusion is marked (see "Exclusions" section below). To create a Customer shipping inspection, click on the gear icon in the top right, then go to "All Lists" and click on "Customers". On the Customers page, find the company you want the inspection to apply to, then go to the Inspection tab. If you haven't set up any inspections on the customer, click "Setup Inspection Data" and "Add New".
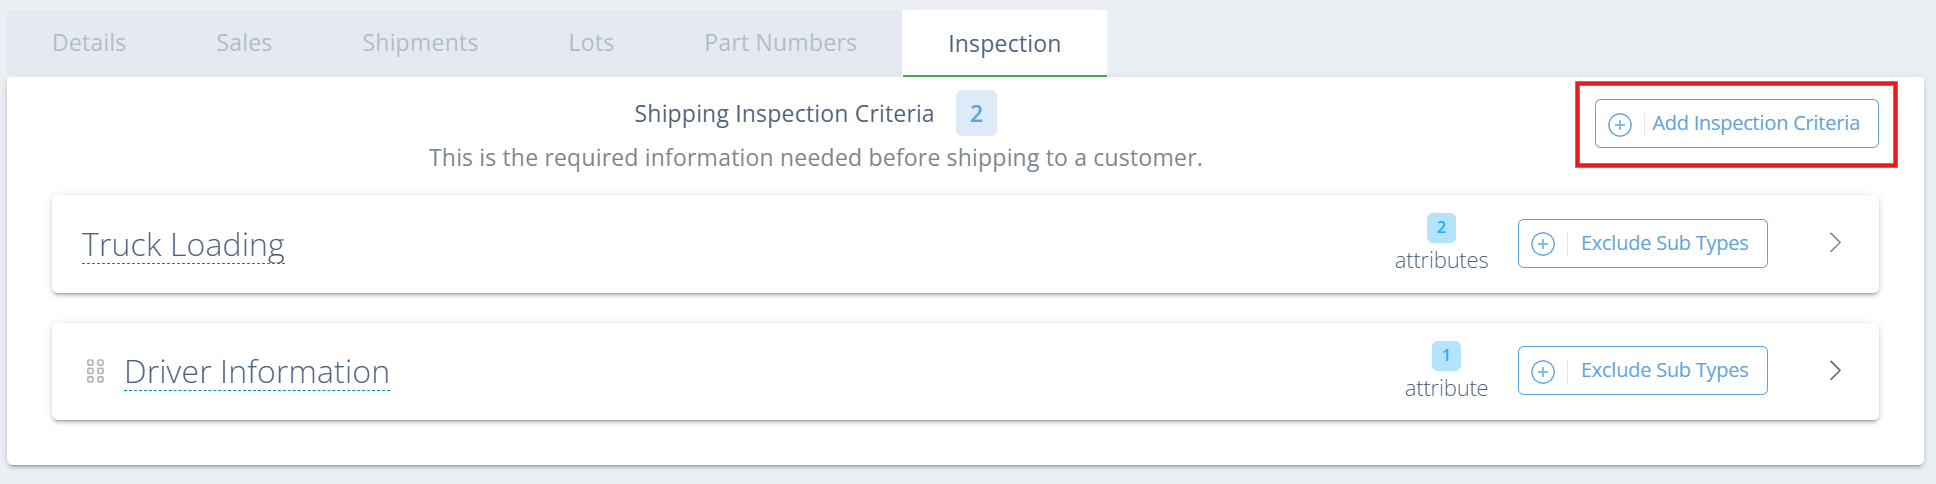
If inspection criteria have already been added to the Customer, click the "Add Inspection Criteria" button to add new criteria.
A new sidebar will open and ask for the Shipment Criteria information. Enter the instructions (this will be the name of the criteria), and hit "Save". The sidebar will close and you will see the criteria in the Inspection tab, with the "Add Attribute" button available. You can find another "Add Attribute" button by clicking the arrow on the far right and expanding the inspection criteria.

Adding Criteria Attributes
Attributes are specific actions/recorded actions needed to complete each inspection criteria. Select the best fit for the information you want to record, and mark if the attribute is required, as well as if verification is needed. Any number of attributes can be added to a criteria, and any number of criteria can be added to an inspection.
Attribute Types
| Attribute Type | Monitors | Alerts If |
|---|---|---|
| Check Box | Completion | Not Checked Off OR Incorrect Choice |
| Date Field | Date Entry | Blank OR Not Correct Format |
| File | Upload Success | No File/Image Uploaded |
| Number Field | Number Entry | Blank OR Outside Threshold |
| Select Box | Checked Entries | No Boxes Marked OR Incorrect Choice(s) |
| Text Field | Text Entry | Blank |
| Weight | Weight From Connected Scale | Blank OR Outside Threshold |
Second Person Verification (New!)
For each attribute on a Process Step, you can now require a second person to verify that the attribute was completed correctly. Just select "Yes" under "Requires Verification?" when setting up or editing the attribute. Be aware that this means that a second user with a different DataNinja login must hit "Confirm" on the attribute in order to complete it.

Changing Attribute Order
You will see 6 dots to the left of the attribute name- you can click and drag on these dots to change the order of attributes.
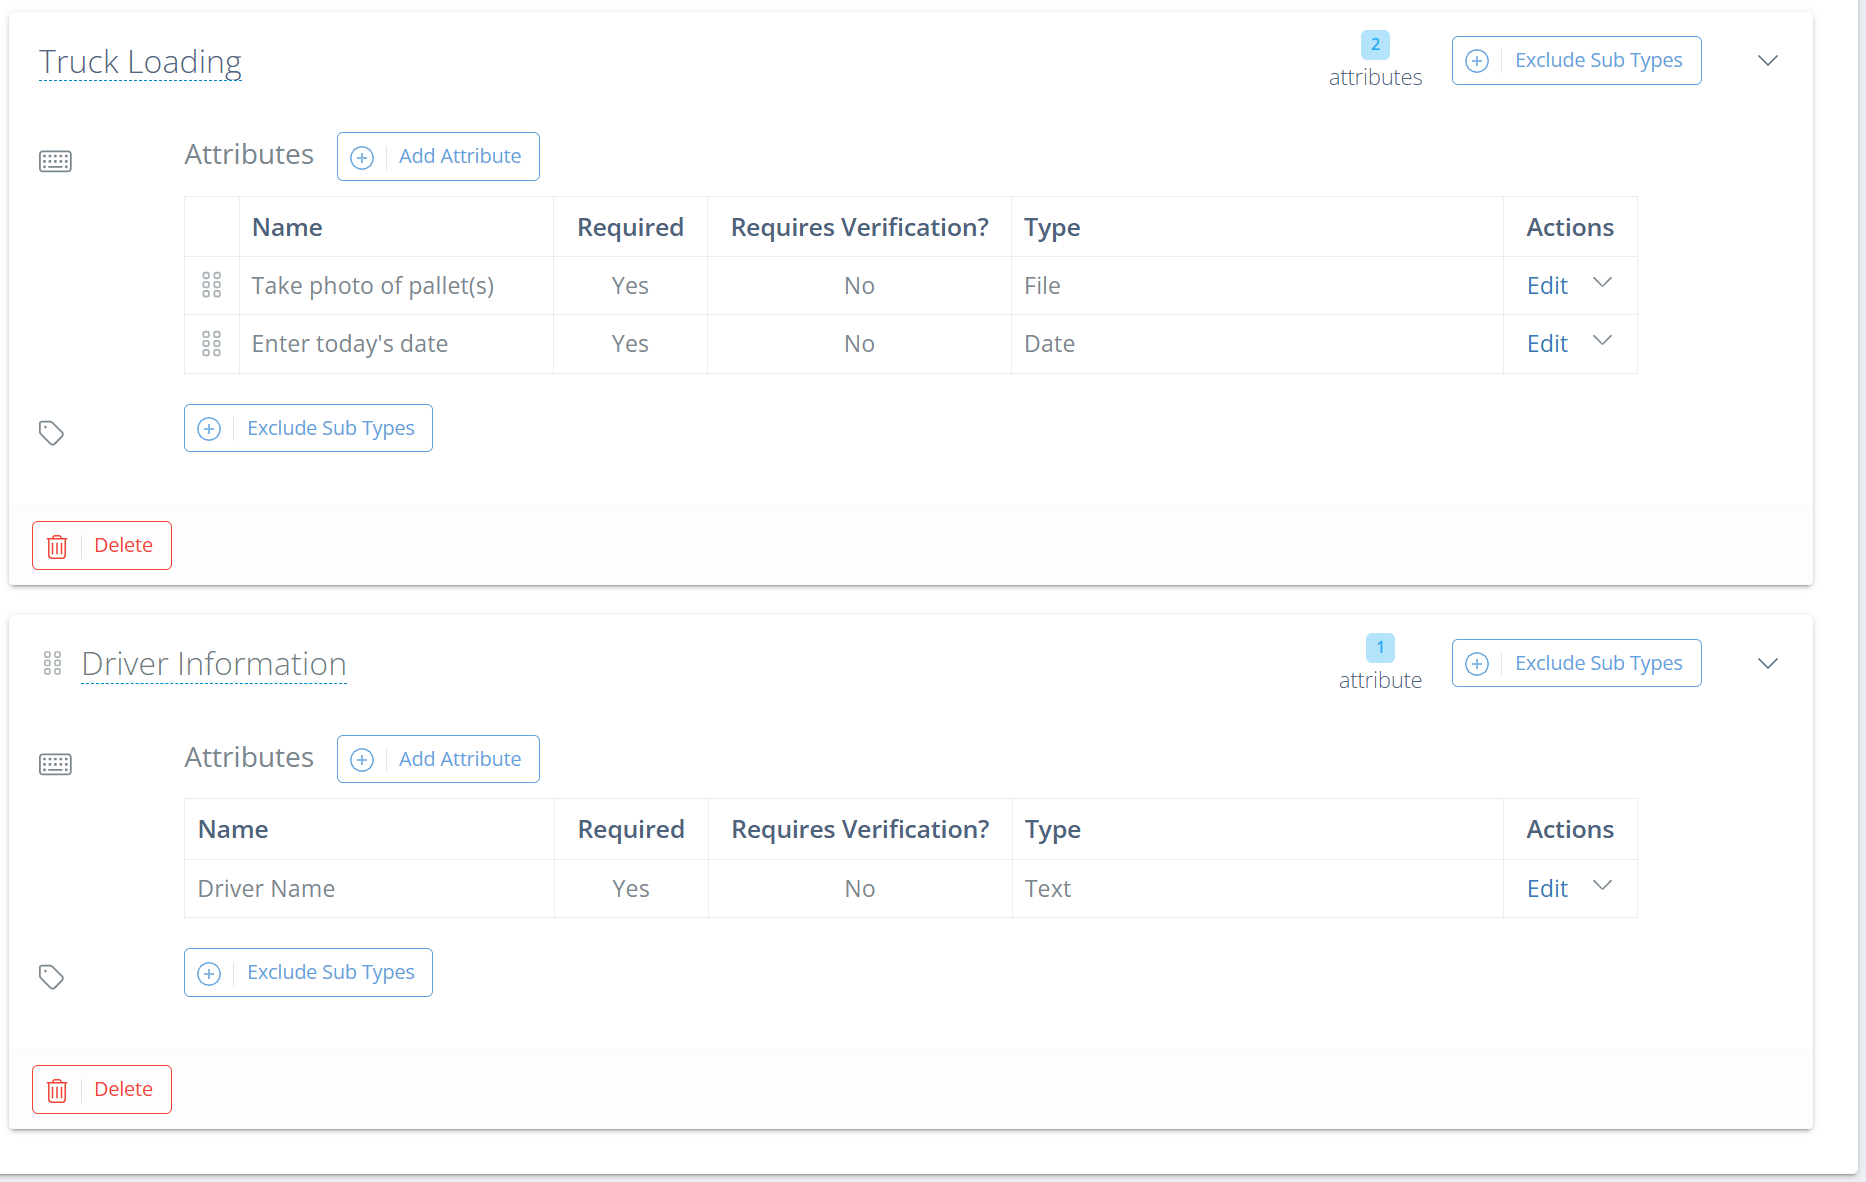
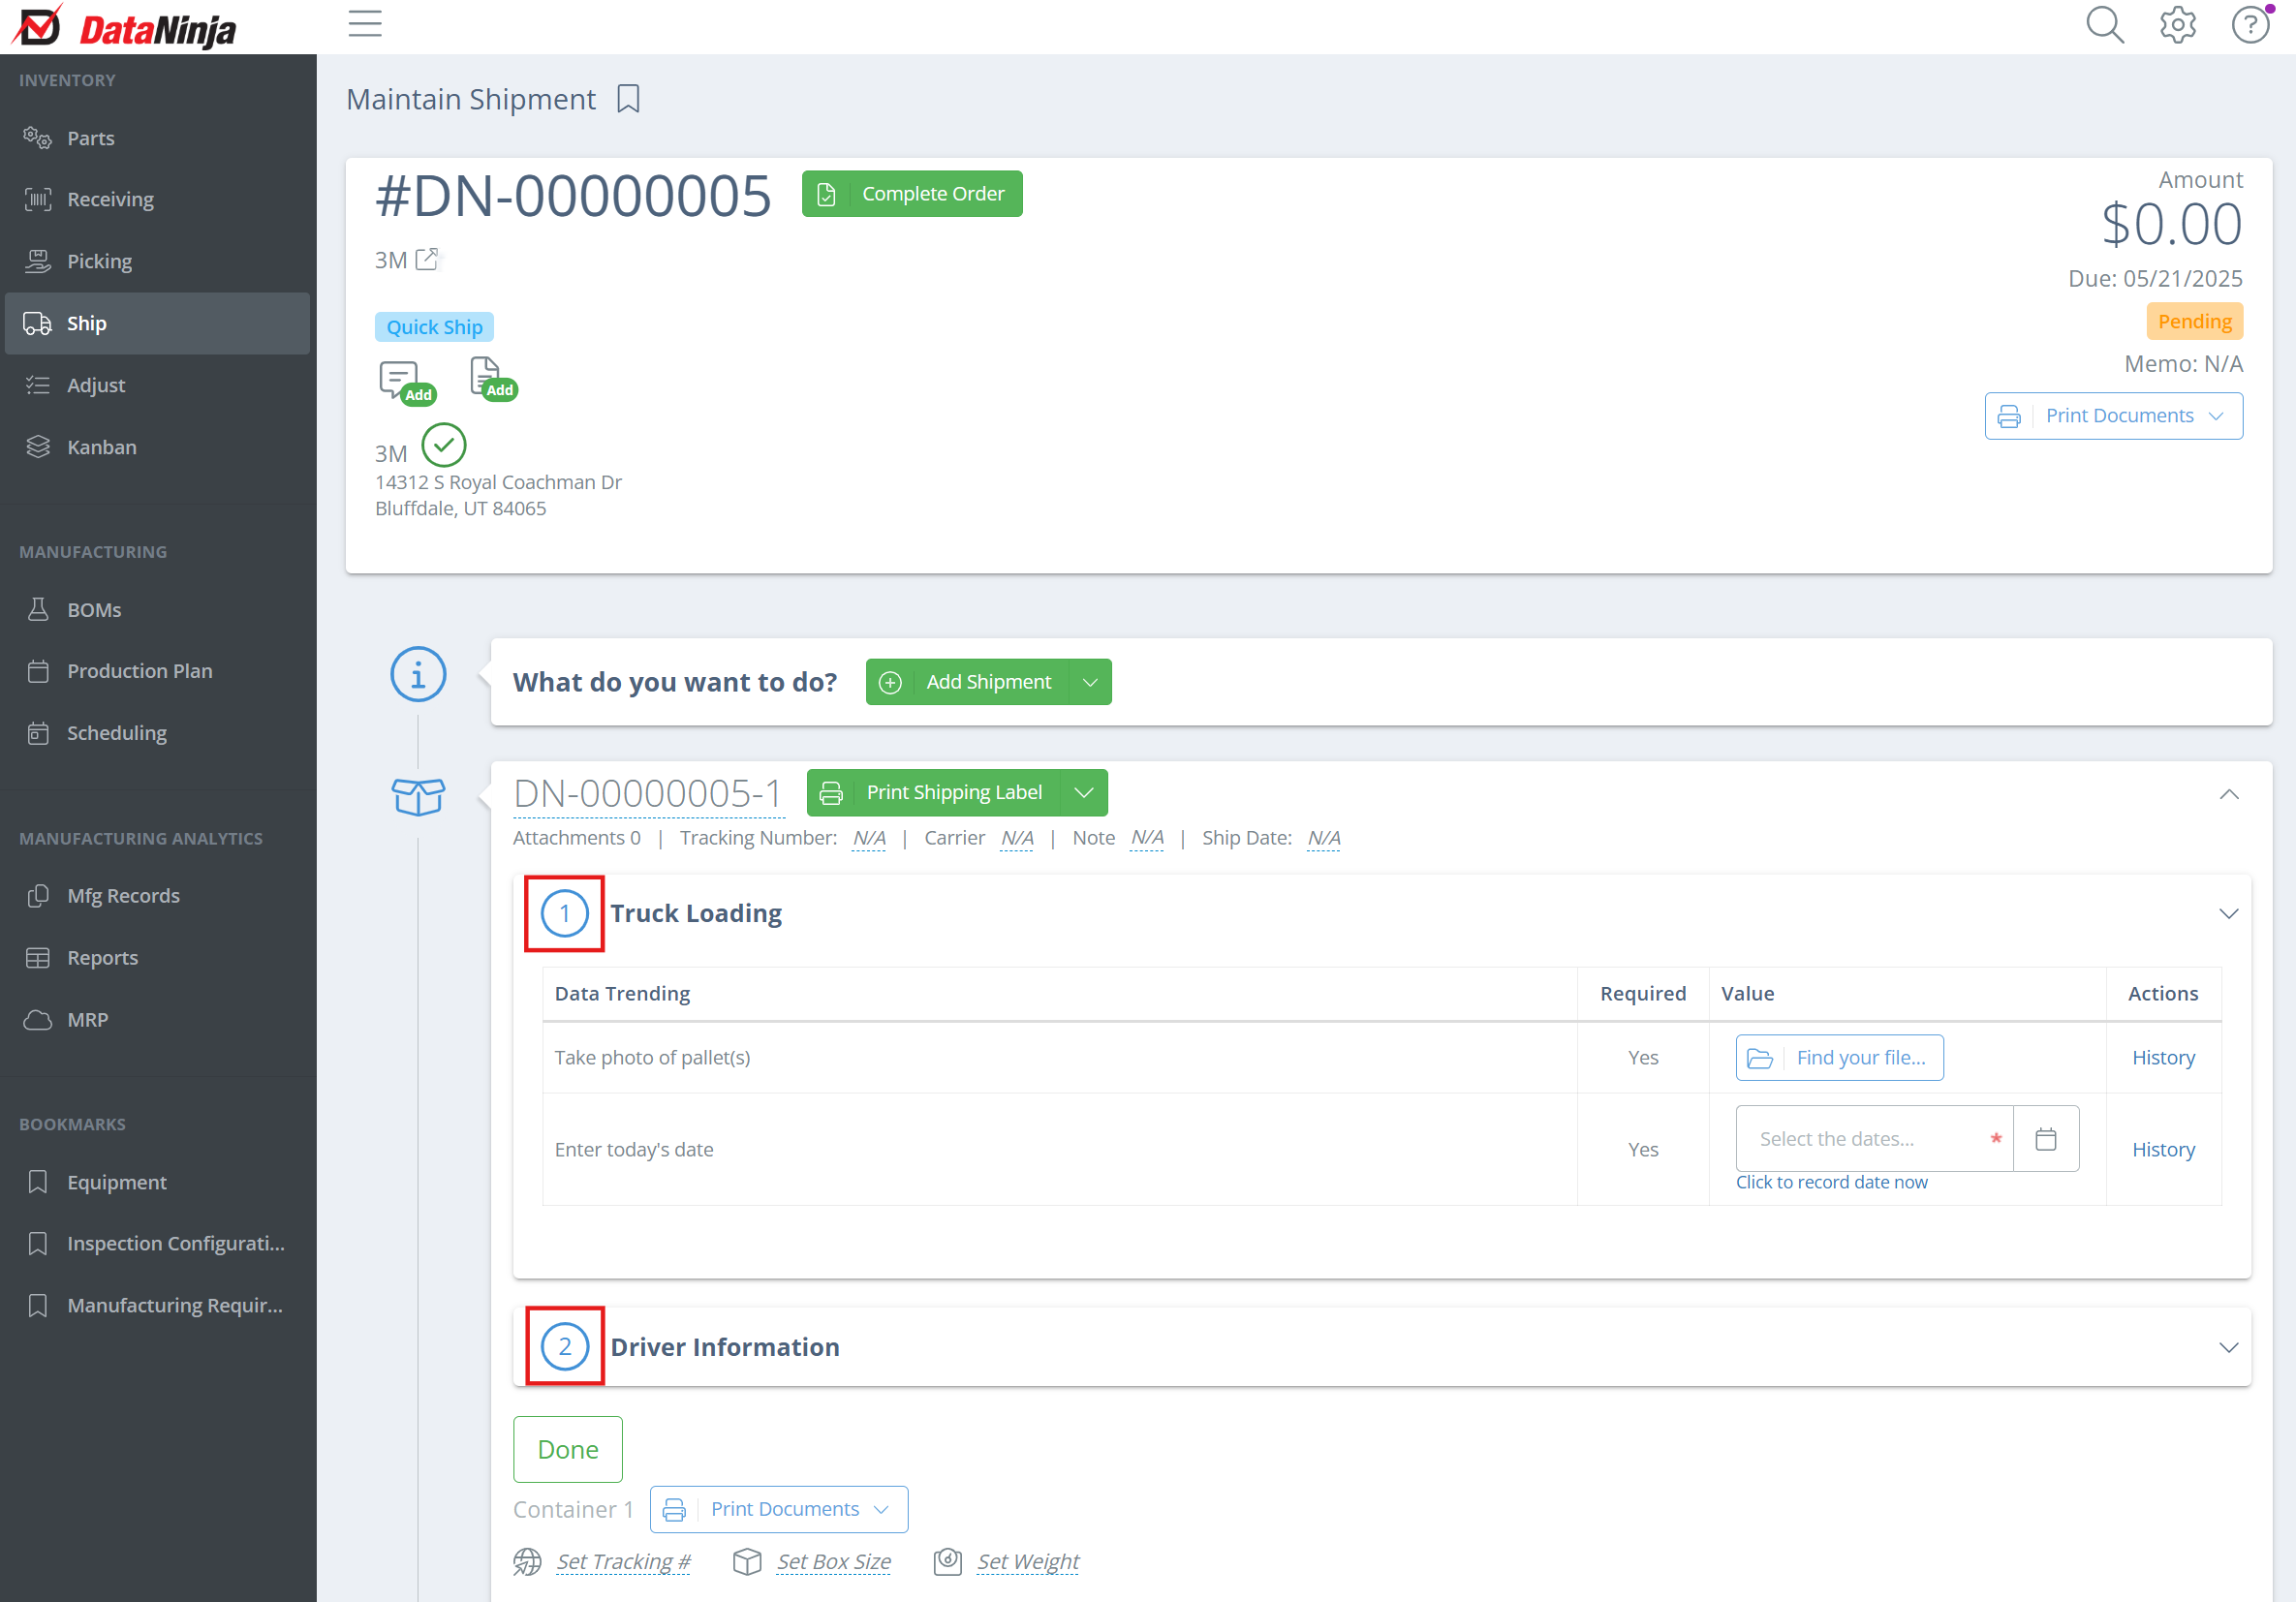
If you have multiple criteria on a shipping inspection, you can click and drag attributes between criteria, so long as there is one or more attributes on each of the criteria.
For example, in the image below, you wouldn't be able to move the "Driver Name" attribute to the "Truck Loading" criteria because "Driver Information" only has 1 attribute, but you could move "Enter today's date" to "Driver Information".
Exclusions
There may be cases in which you don't need to complete a particular shipping inspection criteria- DataNinja now allows you to exclude the criteria as a requirement under specific circumstances. Be aware that this does not remove the inspection as a whole (unless you mark all criteria to exclude a sub type), only the specific criteria.
Sub Types
Sub Types are only relevant if your company uses NetSuite. See our NetSuite Shipping Inspections page for details.
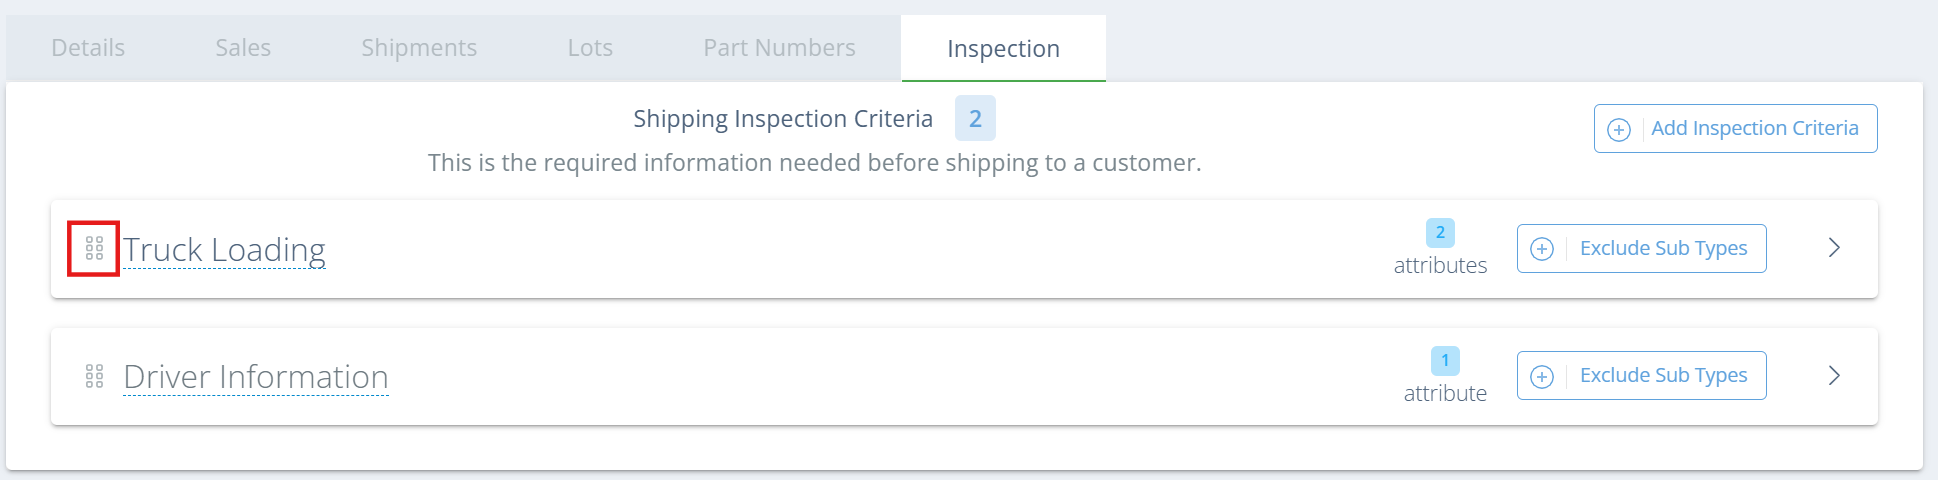
Changing Inspection Criteria Order
You will see 6 dots to the left of the criteria name- you can click and drag on these dots to change the order of the inspection criteria.
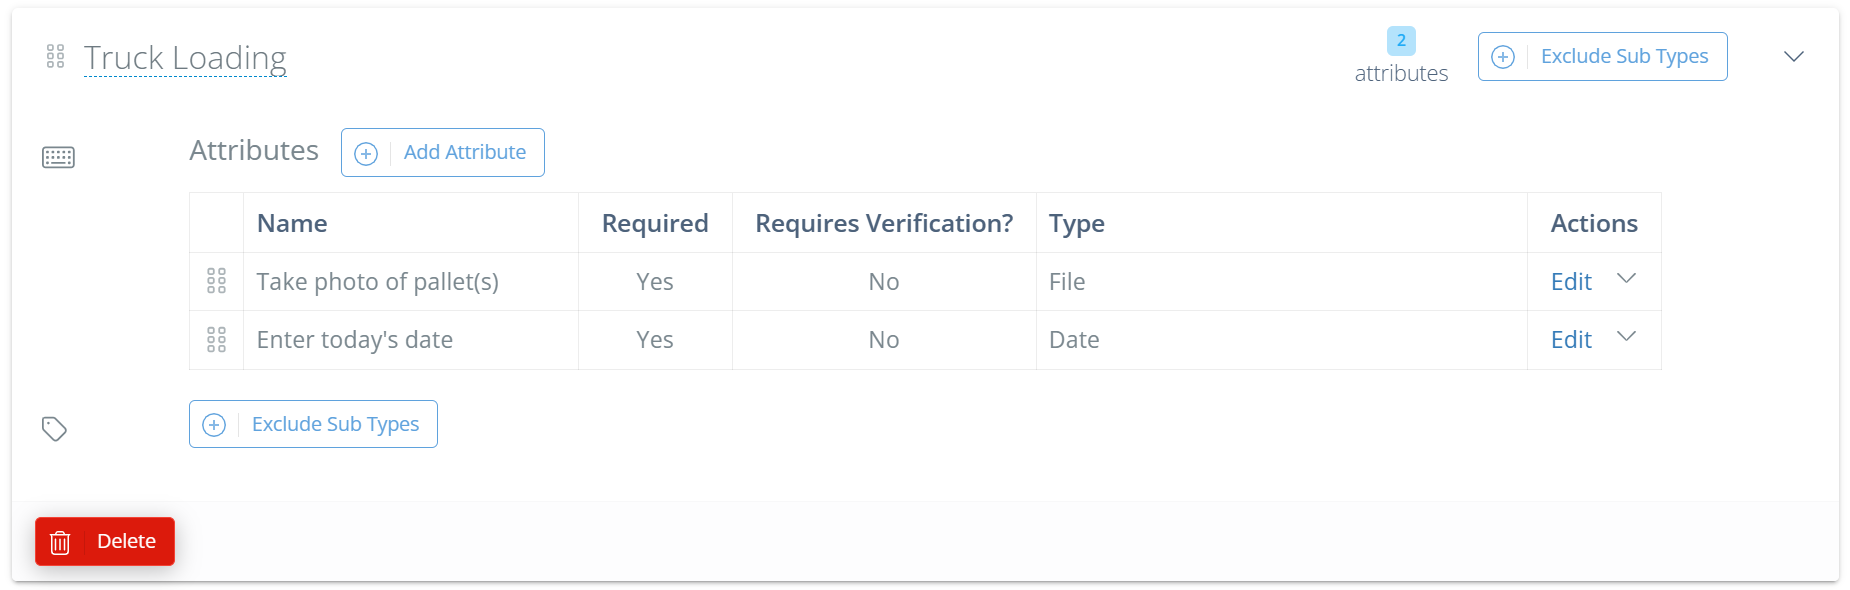
Delete Inspection Criteria
To delete an inspection criteria, click on the criteria (not the name) to expand it, then click "Delete" in the bottom left.
Delete Attribute
To delete an inspection criteria, click on the criteria (not the name) to expand it, then click the dropdown arrow in the Actions column and hit "Delete".
Completing the Shipping Inspection
Once the shipping inspection is set up (at either the Company or Customer level), it will show on future shipments. Shipments that were in DataNinja before the inspection was set up will not have the inspection, but if a new shipment is opened on an older order, that new shipment will have the inspection.
To complete the shipping inspection, go to the Ship tab, open the relevant order, and look at the shipment section. The inspection will be found in the shipment section, with the inspection criteria numerically marked.
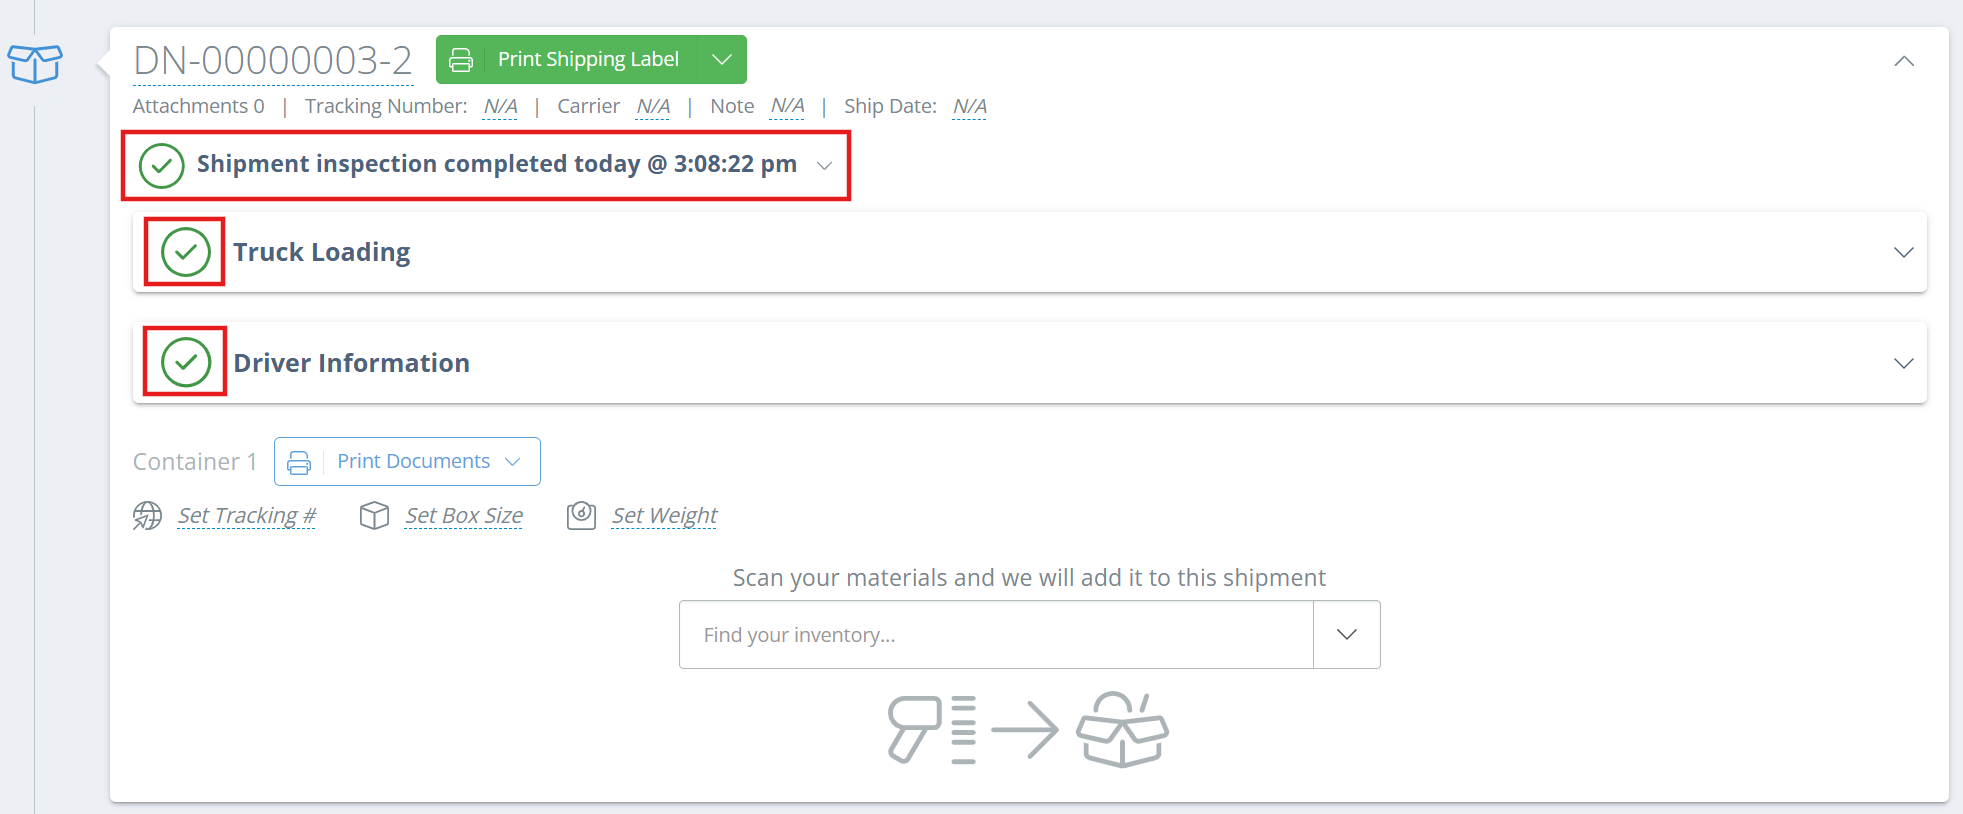
Once all inspection criteria have been completed, click "Done", and if all criteria have been successfully completed, a checkmark will show next to each criteria and the completion timestamp recorded.
Updated about 19 hours ago