Shipping Inventory
Outbound Inventory Workflows
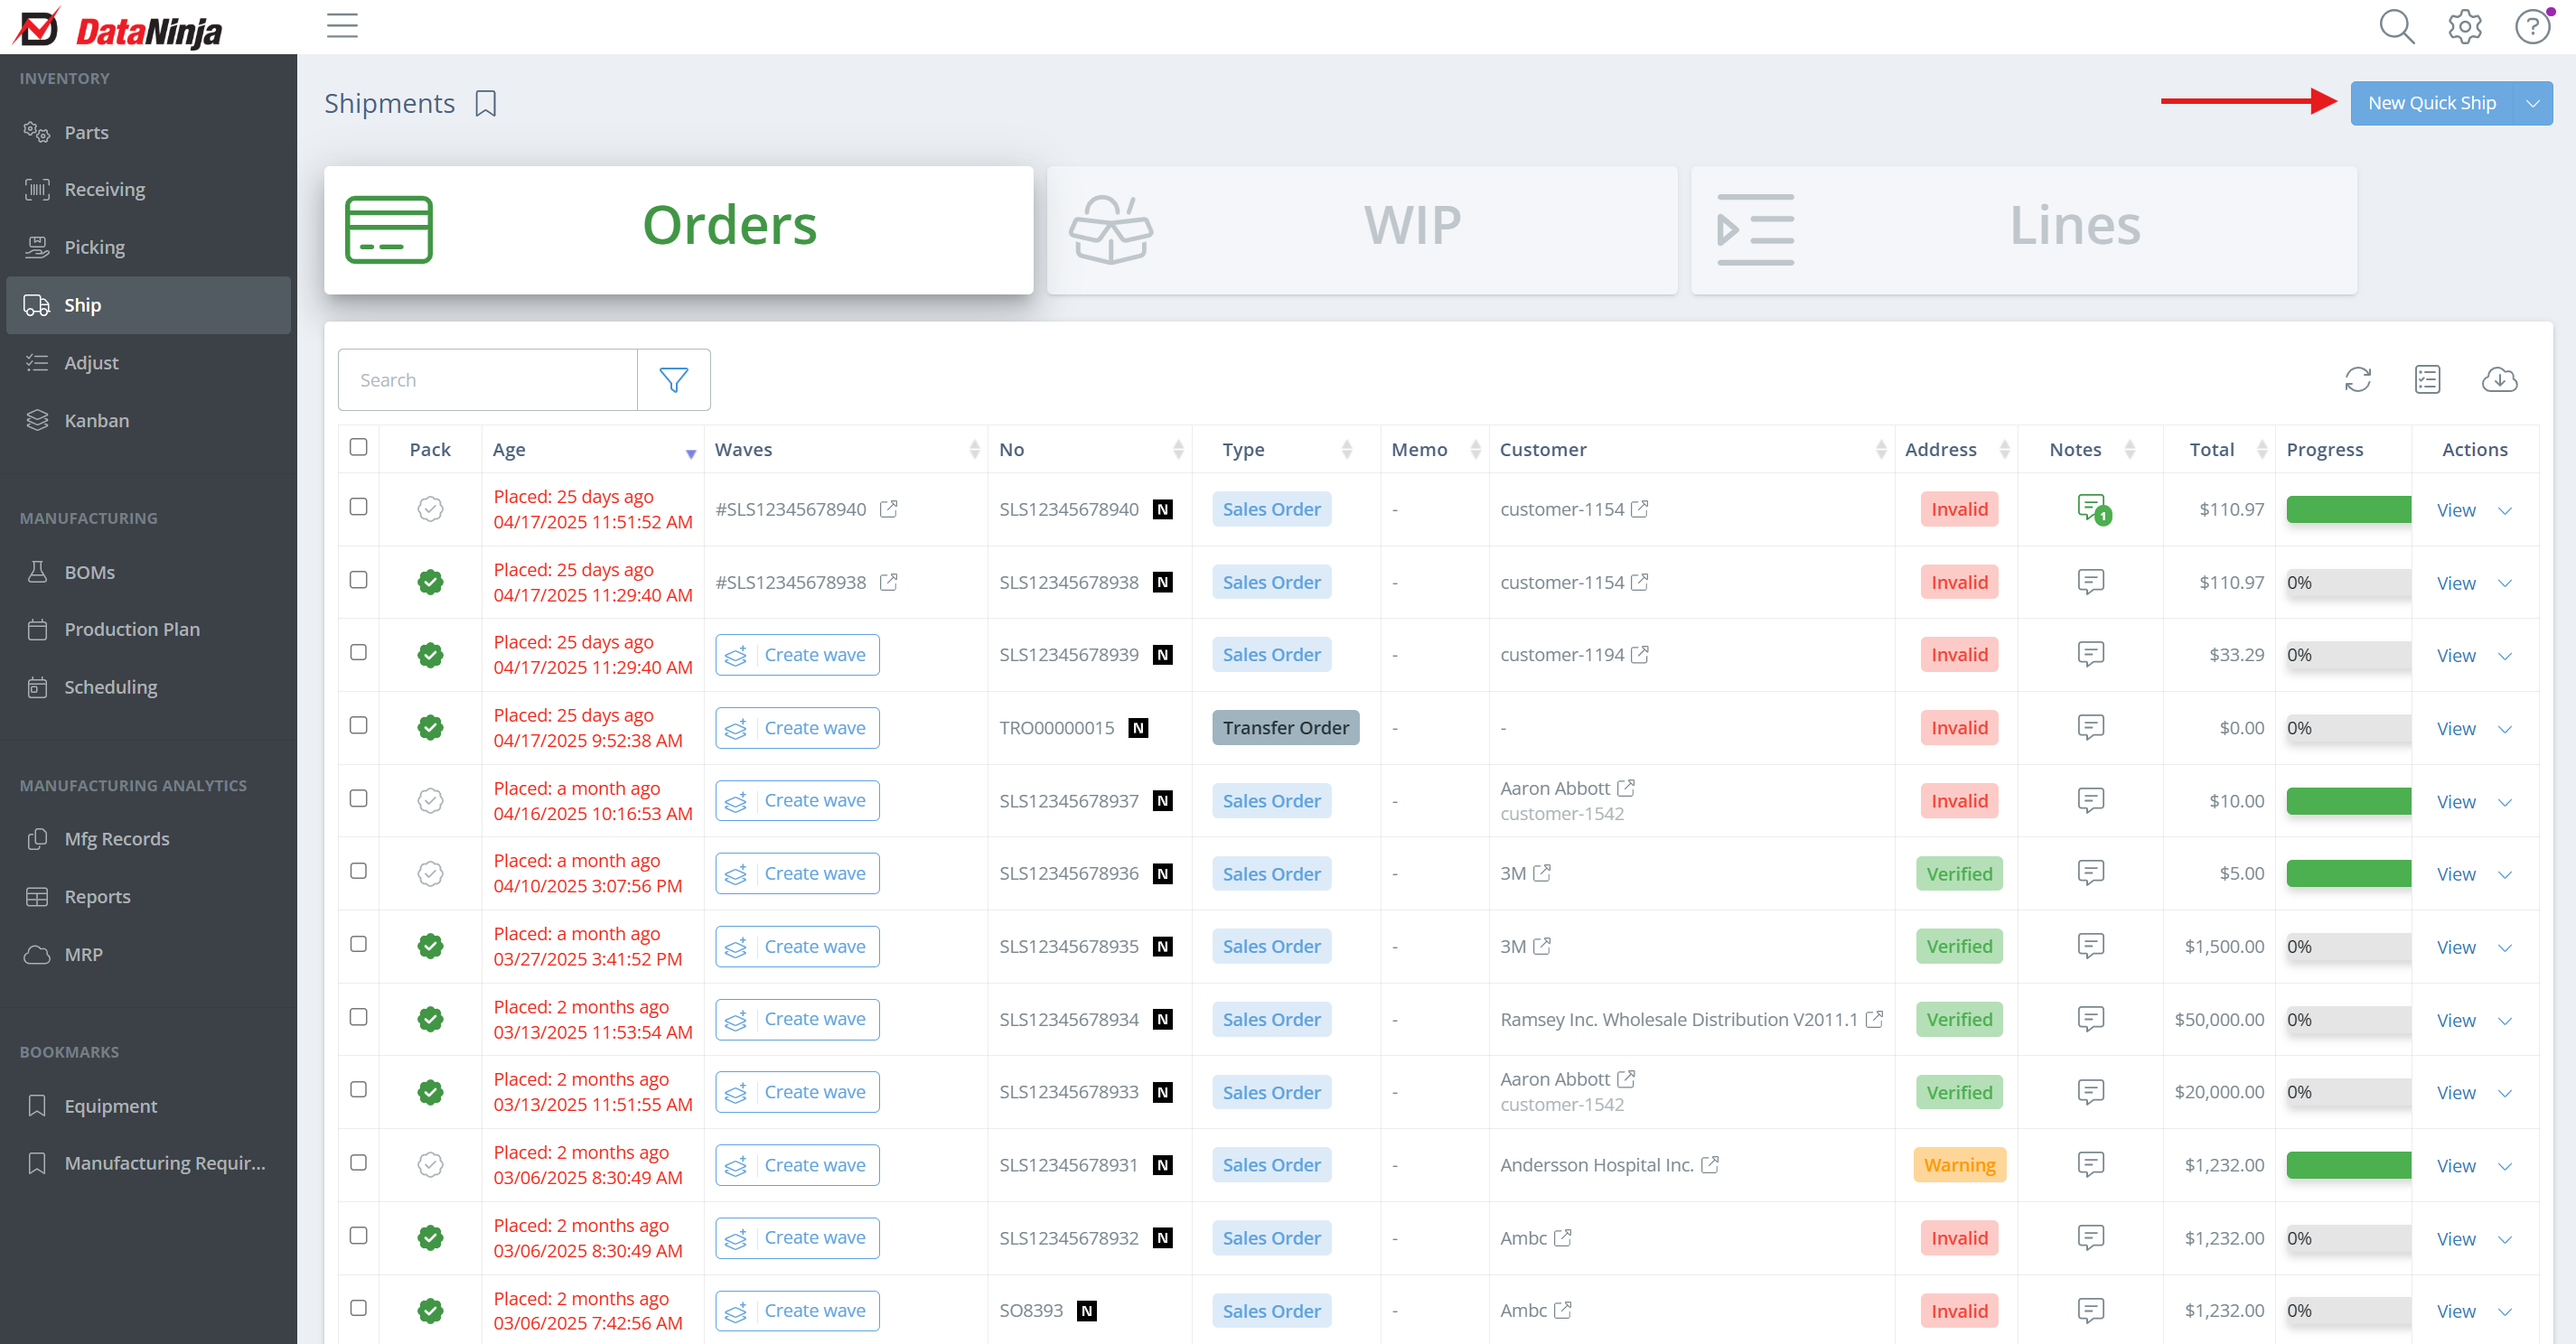
DataNinja offers 2 ways to ship inventory- Quick Ship and Progressive Shipping. We recommend that you primarily utilize progressive shipping unless your financial system is not tied into DataNinja, or a Sales Order does not exist in your financial system for the shipment. All shipping will be completed from the Shipments page, which is accessed by clicking on "Ship" in the left-hand sidebar. On the Shipments page, Sales Orders that have been partially completed (have at least 1 completed shipment) are found under the "WIP" tab, and if you want to ship inventory based on part, go to the "Lines" tab. Sales Orders that do not have any completed shipments will be found under the "Orders" tab.
Quick Ship
If DataNinja isn't tied to your financial system or you don't have a Sales Order for the inventory, create a "Quick Ship" to ship inventory to customers.
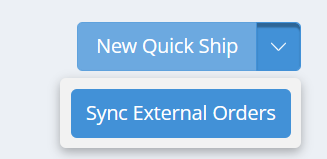
Click "New Quick Ship" in the upper right corner of the screen.
In the newly opened sidebar, select the ship date, customer, and address to ship against. Then hit "Create Order".

You will be taken to the shipment page, where you can add inventory to the shipment, print the shipping label, and complete the order.

Progressive Shipping (Recommended)
Progressive Shipping, sometimes called progressive invoicing, is the ability to partially fulfill customer orders and invoice for the portion of the order that is complete (shipped).
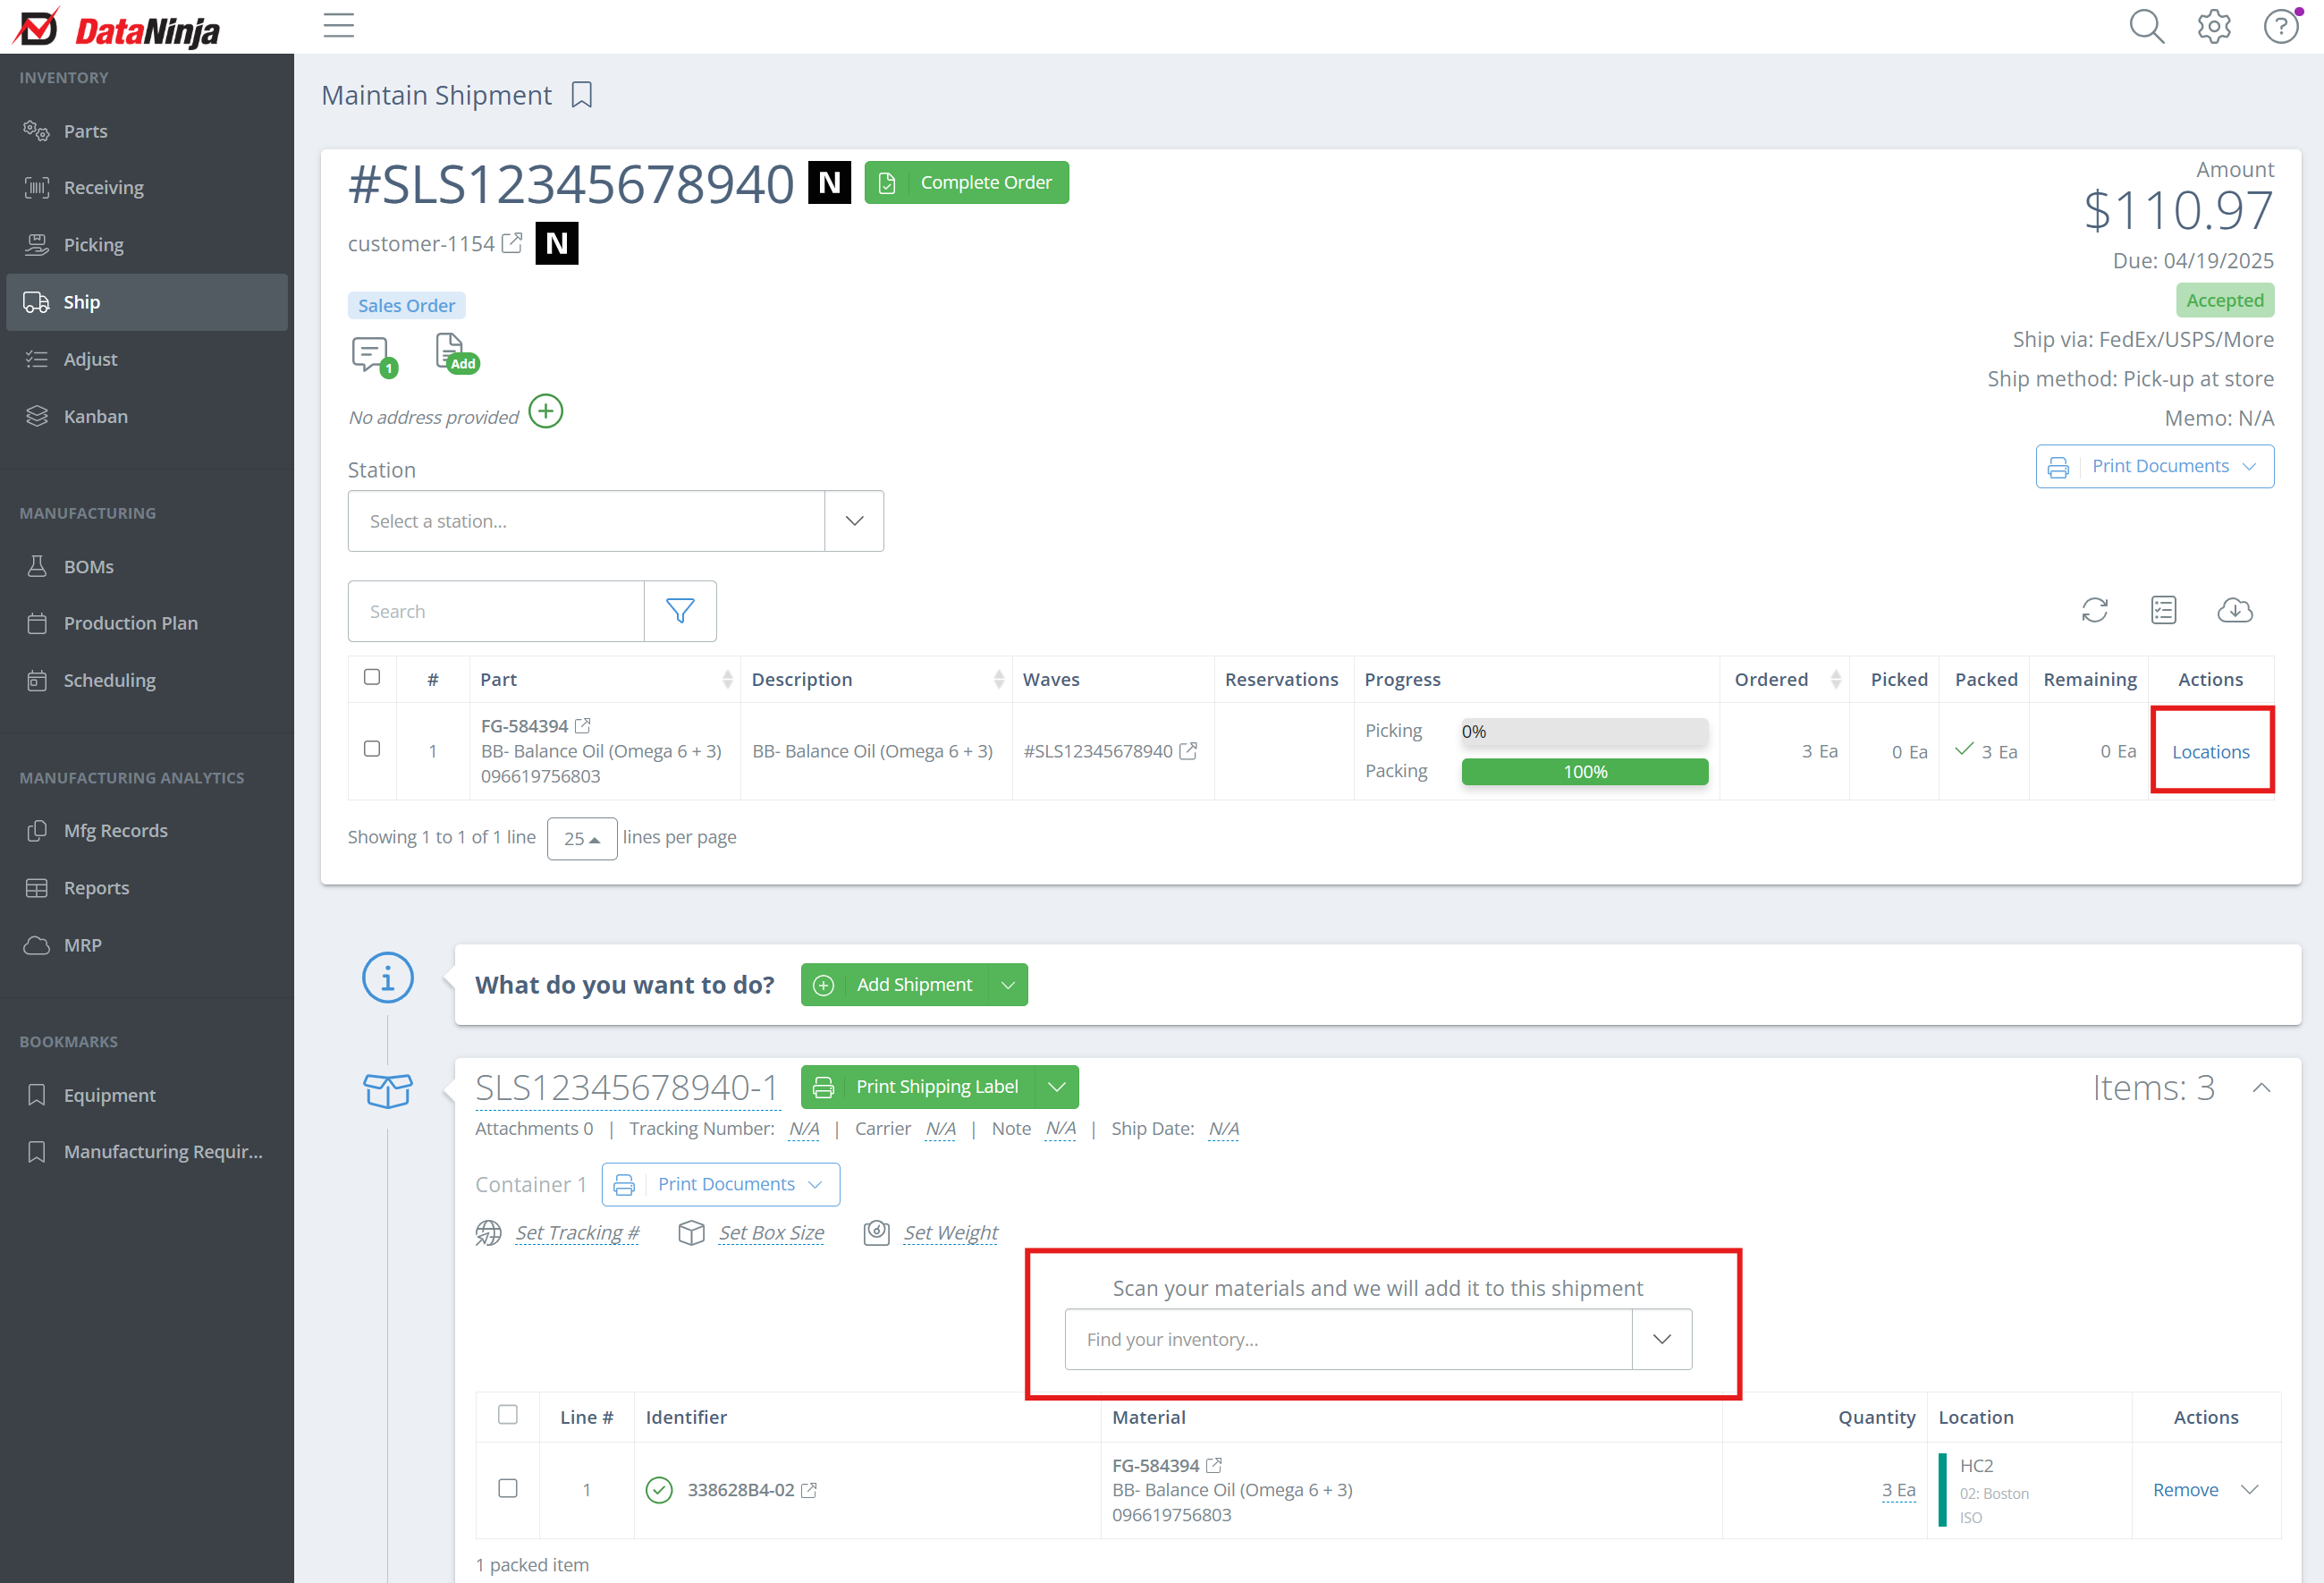
To fulfill a customer order via multiple shipments, find and open the relevant Sales Order on the Shipments page. Then you can scan inventory directly into the shipment, or click "Locations" in the Actions column to add inventory to the shipment. You can manually adjust the inventory on the shipment if needed, by clicking directly on the Quantity field.
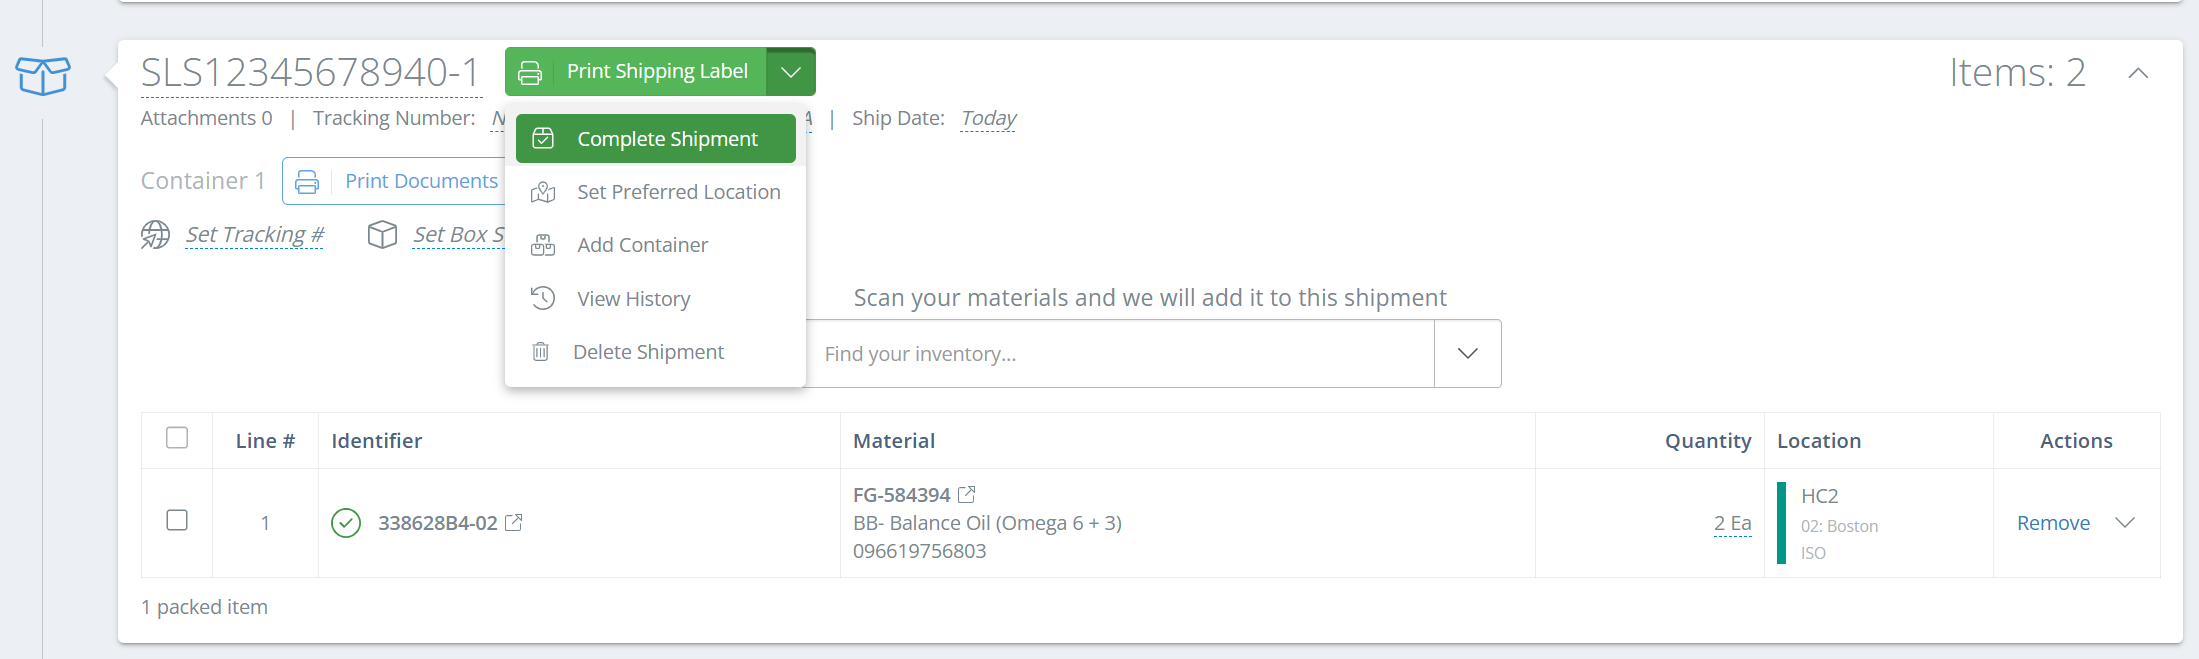
Once the shipment is ready to ship, print the shipping label, then click the drop down arrow and select "Complete Shipment". Once the shipment is marked complete, the invoice for the shipment will generate in QuickBooks. Note that the invoice will only include items from the completed shipment.
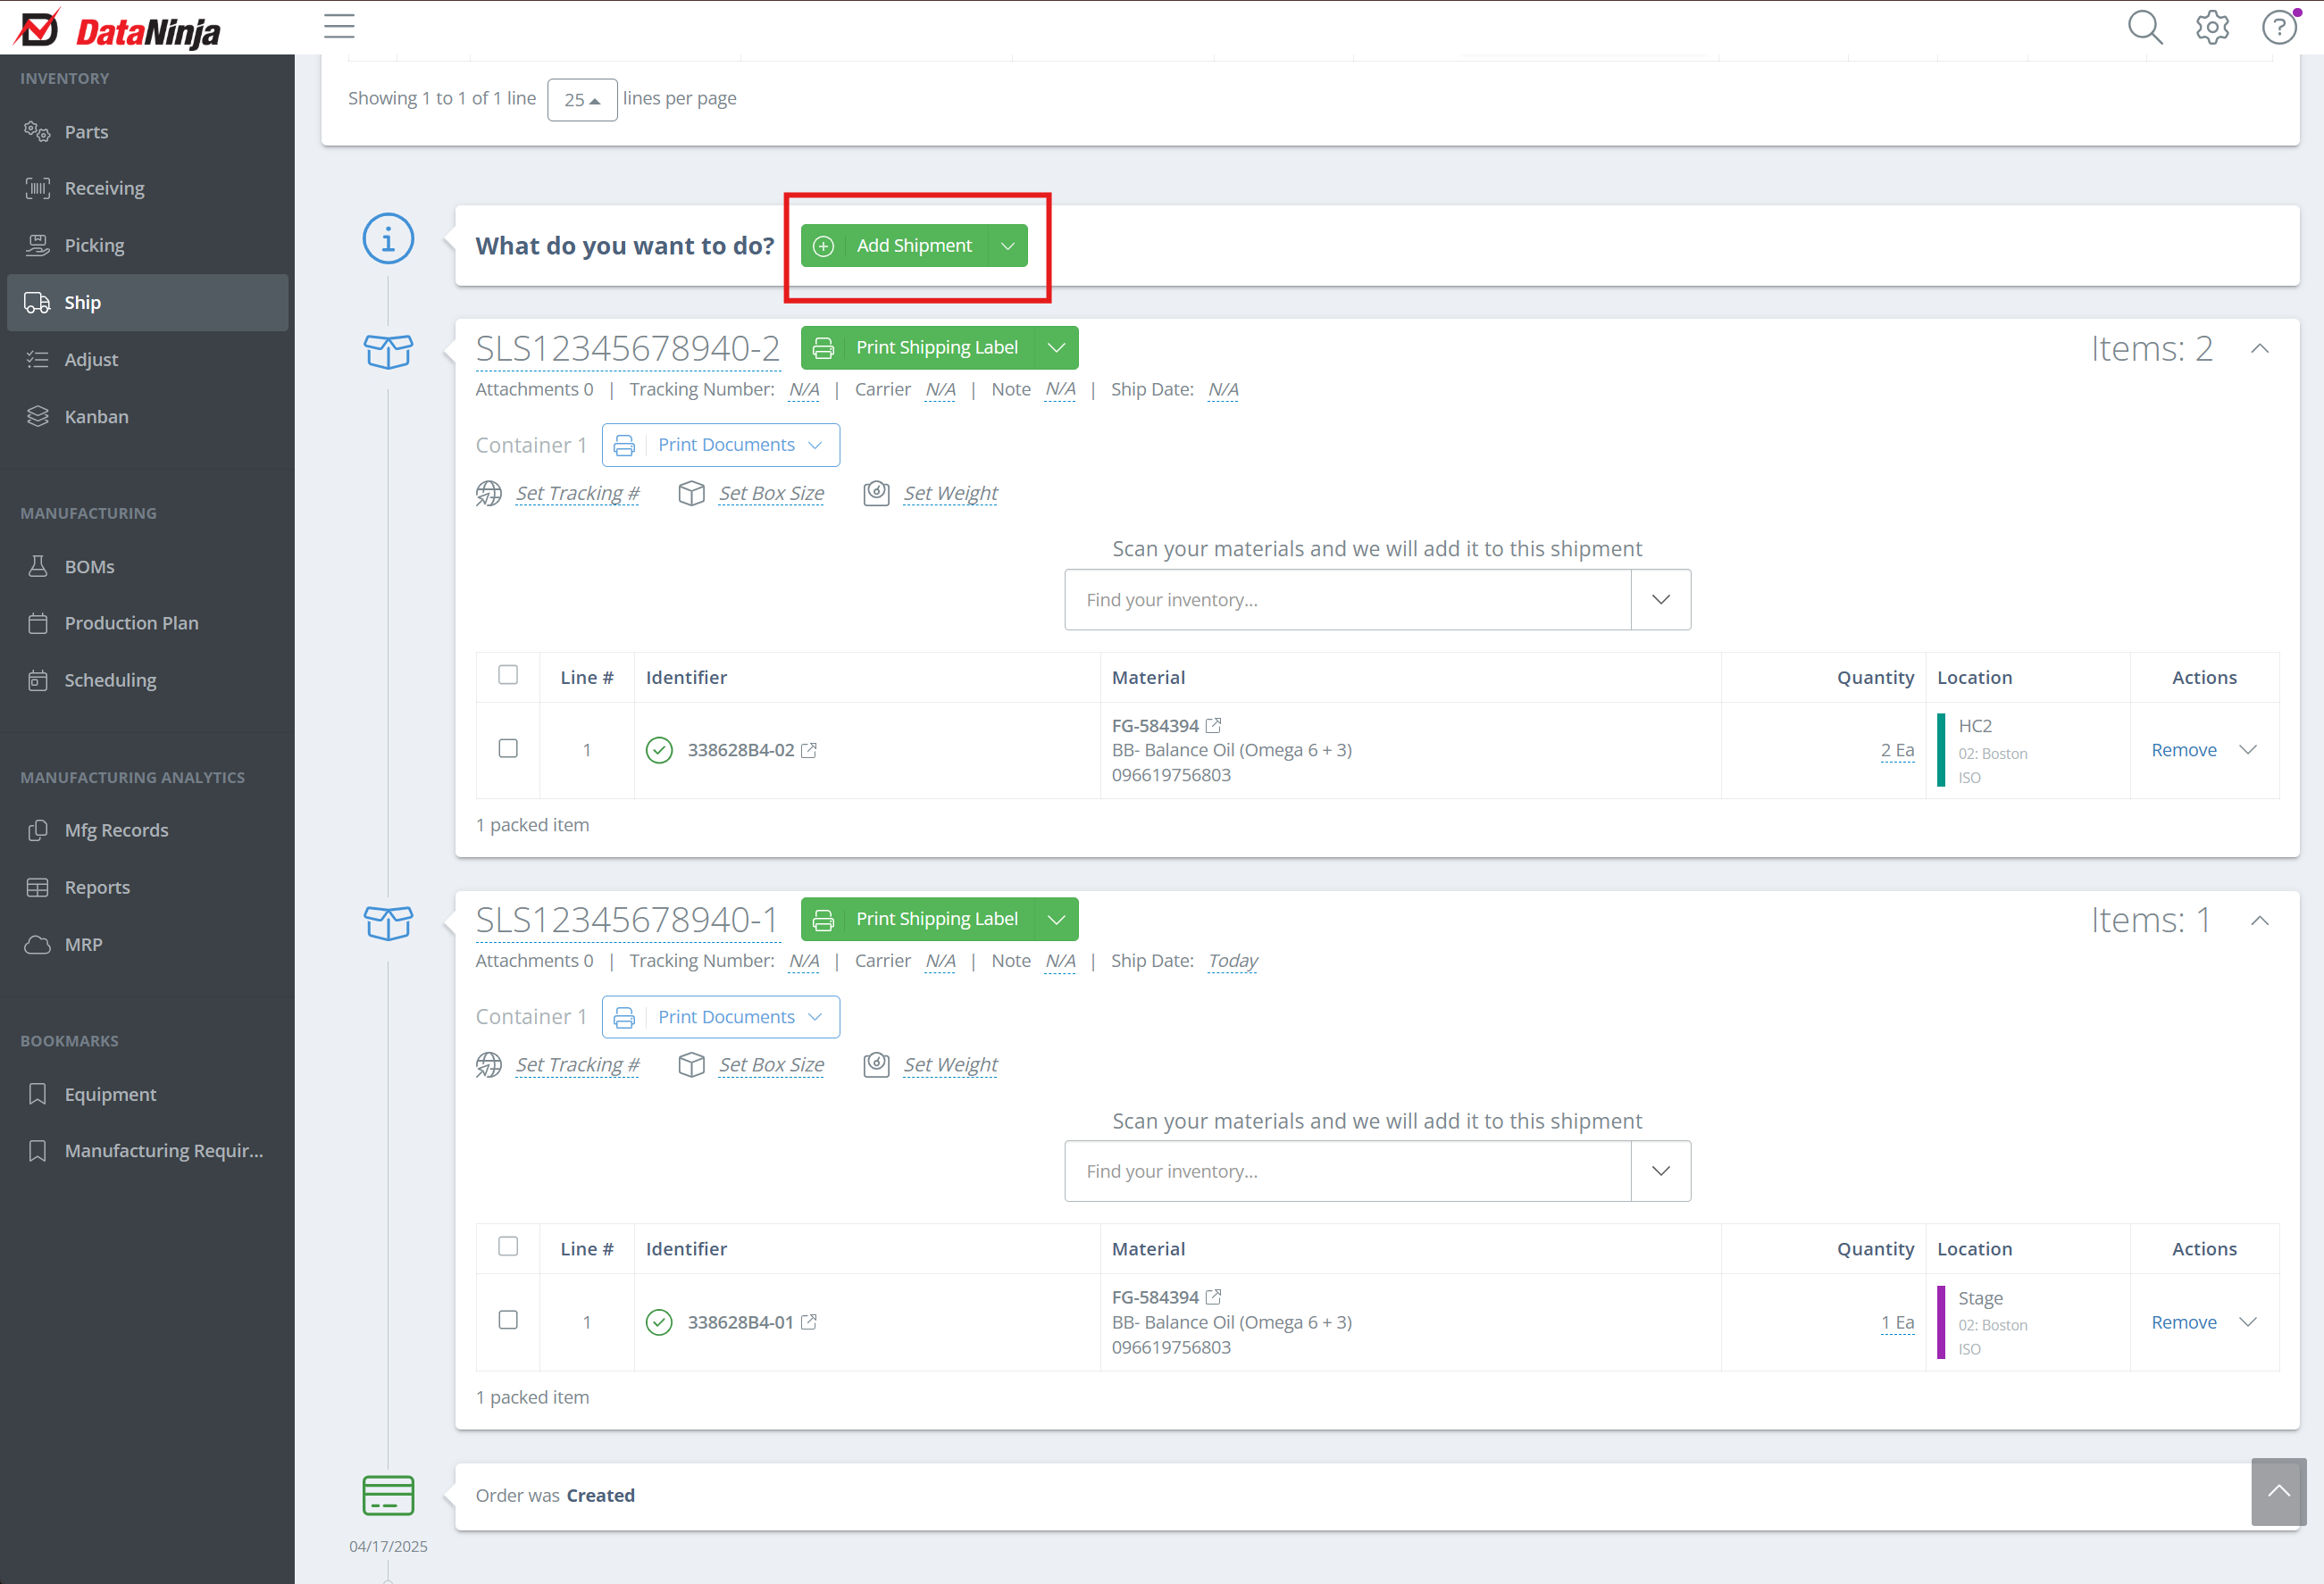
To add an additional shipment, click "Add Shipment", then follow the same steps as above. DataNinja will allow any number of shipments on a Sales Order, and will create an individual invoice for each shipment once it is completed.
When the Sales Order is complete, click "Complete Order" next to the Sales Order number in DataNinja. Depending on your settings, this will create an invoice in QuickBooks (from estimate) or complete the order and update the memo field (sales receipt or customer invoice).
DataNinja will attach your custom Packing List to the transaction in QuickBooks.
Sync External Orders
Not seeing the Sales Order you need? Click the "Sync External Orders" button by clicking the dropdown arrow next to "New Quick Ship". Wait a few minutes for the sync to complete, then refresh the page.
Updated 1 day ago