Shipping Inspections
Record and sign outbound shipment checks at the company or customer level
Español: Lee esta página en español.
Français : Consultez cette page en français.
This page applies to DataNinja tenants integrated with NetSuite or QuickBooks Online, and to tenants with no finance system integration. The workflow in DataNinja is the same across integrations; where a financial system changes behavior, the integration-specific note calls it out.
Items that are synced with an integration will show the relevant integration's logo. Screenshots on this page may show the NetSuite logo, but tenants integrated with QuickBooks Online will see that logo instead. Tenants with no financial integration won't see any logo.
Shipping inspections record the conditions and checks for an outbound shipment, much like Incoming Inspection does for received inventory. Set up an inspection at the Company level when it should be completed on every outbound shipment, or at the Customer level when it only applies to one customer. Once an inspection is set up, it has to be completed and signed before the shipment can be completed.
Set Up a Company Shipping Inspection
Company shipping inspections apply to all shipments, unless a criteria excludes the order's sub type (see Exclude Order Sub Types).
To create one, click on the gear icon in the top right, go to "All Lists", then click on "Companies". Find the company the inspection should apply to, then click on the "+" in the Shipment column, or click "Edit" and then "Add Shipment Criteria".

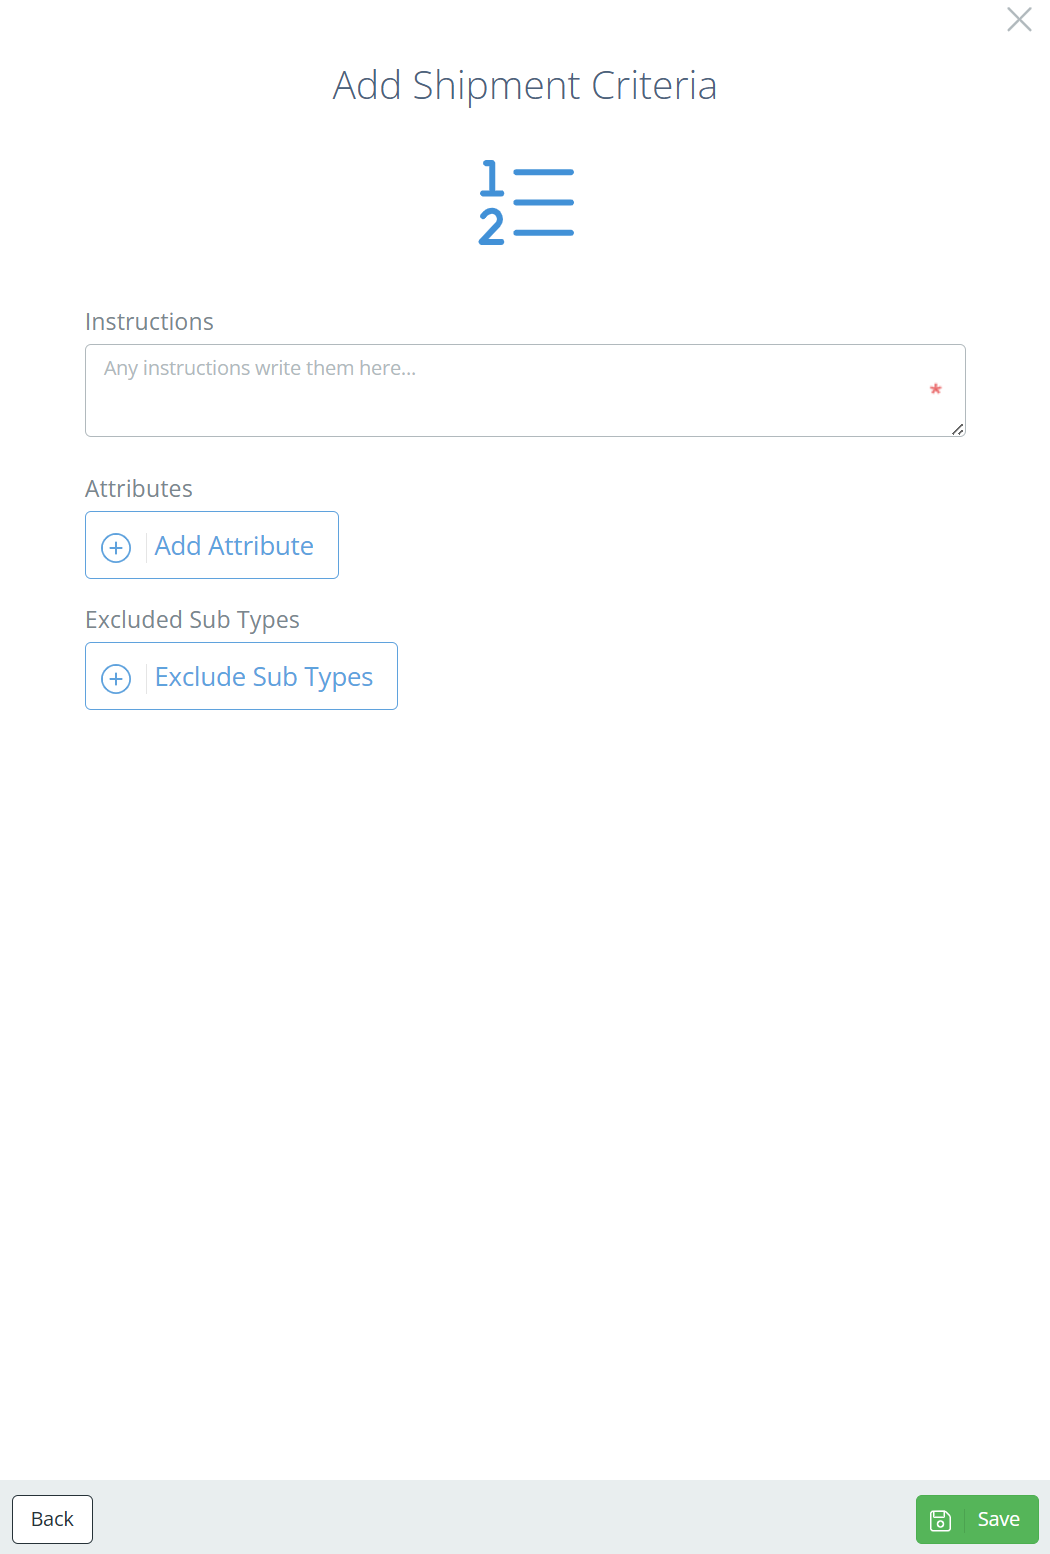
A sidebar opens and asks for the Shipment Criteria information. Enter the instructions (this becomes the name of the criteria), add attributes, and mark any exclusions. When you're finished, click "Save".
Set Up a Customer Shipping Inspection
Customer shipping inspections only apply to shipments for that customer, unless a criteria excludes the order's sub type.
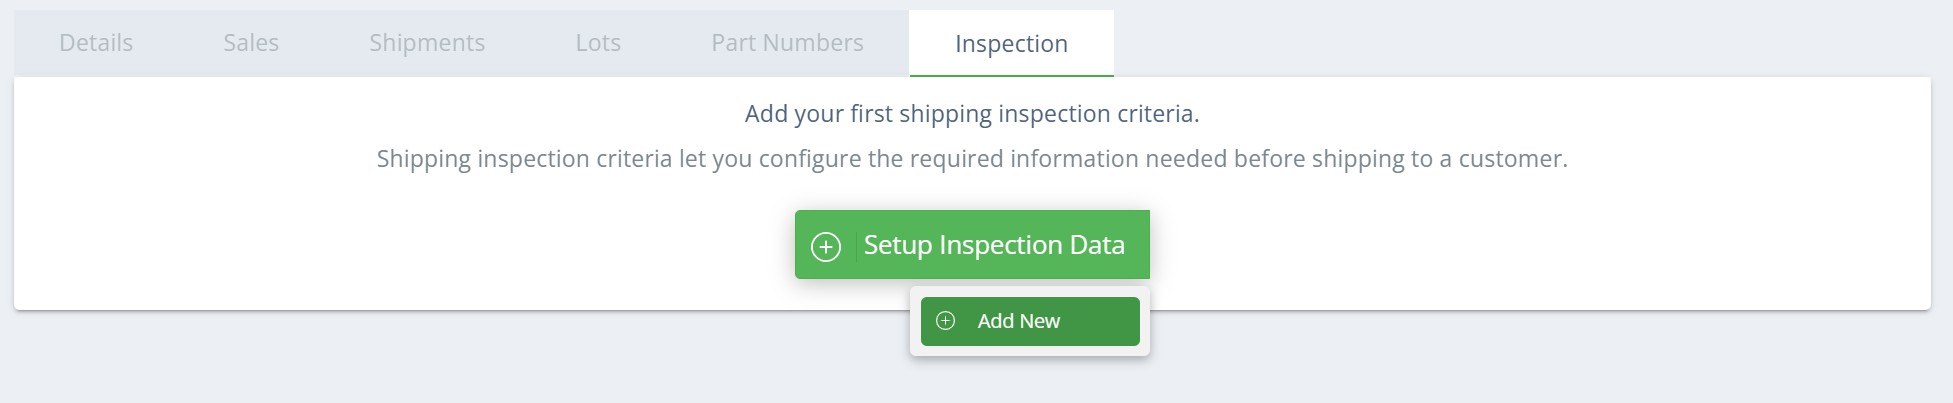
To create one, click on the gear icon in the top right, go to "All Lists", then click on "Customers". Find the customer the inspection should apply to, then open the "Inspection" tab. If the customer doesn't have any inspection criteria yet, click "Setup Inspection Data" and then "Add New".
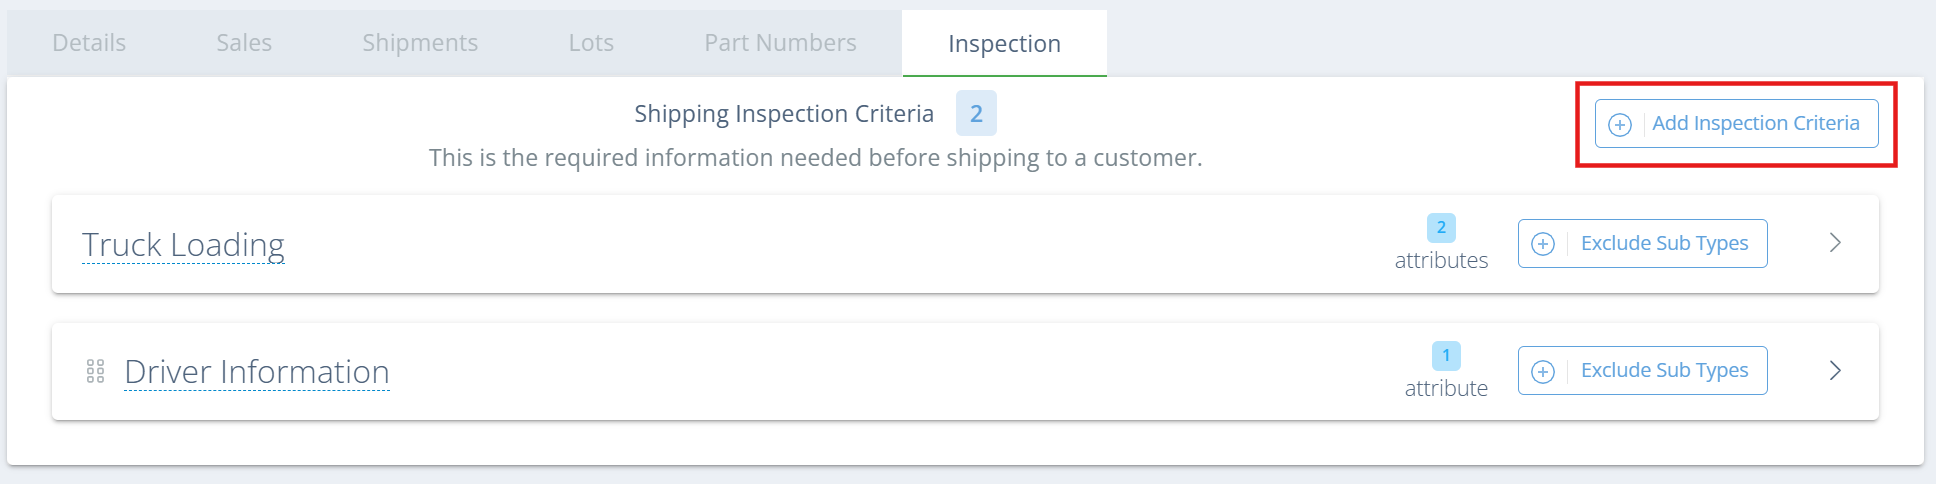
If the customer already has inspection criteria, click "Add Inspection Criteria" to add more.
A sidebar opens and asks for the Shipment Criteria information. Enter the instructions (this becomes the name of the criteria) and click "Save". The criteria then shows in the Inspection tab with an "Add Attribute" button. You'll also find an "Add Attribute" button when you expand the criteria with the arrow on the far right.

Add Criteria Attributes
Attributes are the values someone records to complete a criteria, such as a photo of the pallet or the driver's name. Company and customer criteria use the same attributes. Choose the type that best fits what you want to record, then mark whether the attribute is required and whether it needs verification. A criteria can have any number of attributes, and an inspection can have any number of criteria.
| Attribute Type | Records | Alerts If |
|---|---|---|
| Check Box | Completion | Not checked OR incorrect choice |
| Date Field | A date | Blank OR not in the correct format |
| File | An uploaded file or image | No file or image uploaded |
| Number Field | A number | Blank OR outside the threshold |
| Select Box | One or more checked entries | No boxes marked OR incorrect choice(s) |
| Text Field | Text | Blank |
| Weight | A weight from a connected scale | Blank OR outside the threshold |
Second Person VerificationYou can require a second person to verify that an attribute was completed correctly. Select "Yes" under "Requires Verification?" when you set up or edit the attribute. A second user with a different DataNinja login then has to click "Confirm" on the attribute before it's complete.

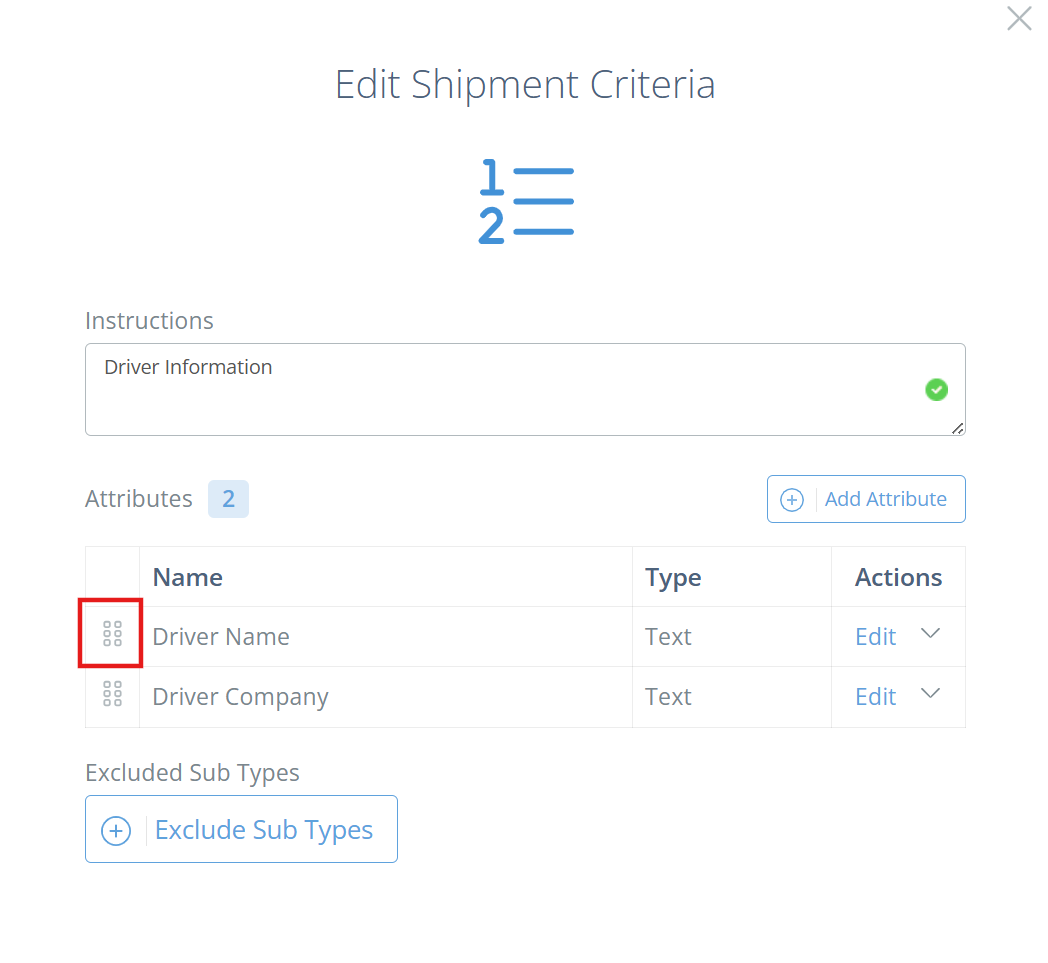
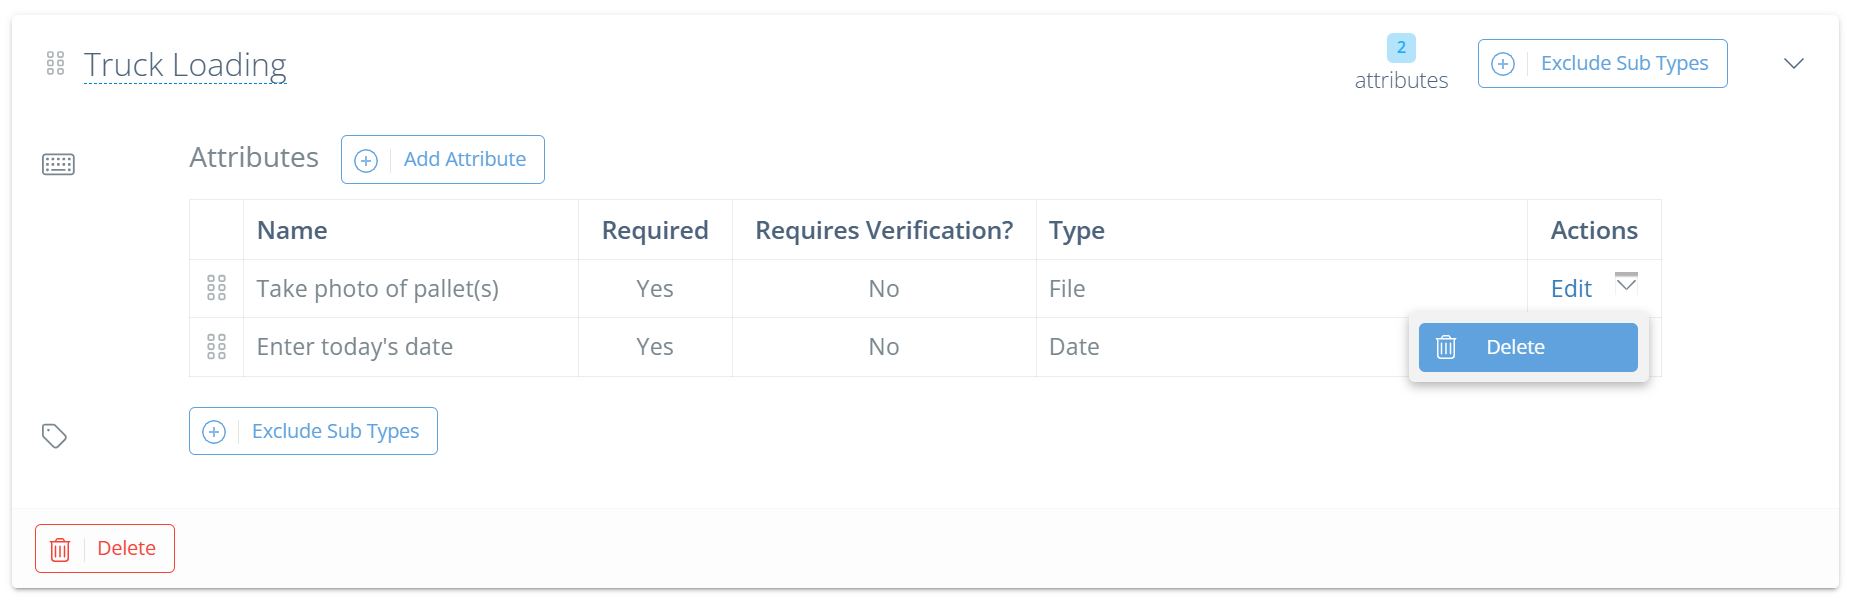
Changing the OrderClick and drag the six dots to the left of an attribute name to change the order of the attributes. Customer criteria can be reordered the same way, using the six dots to the left of the criteria name.
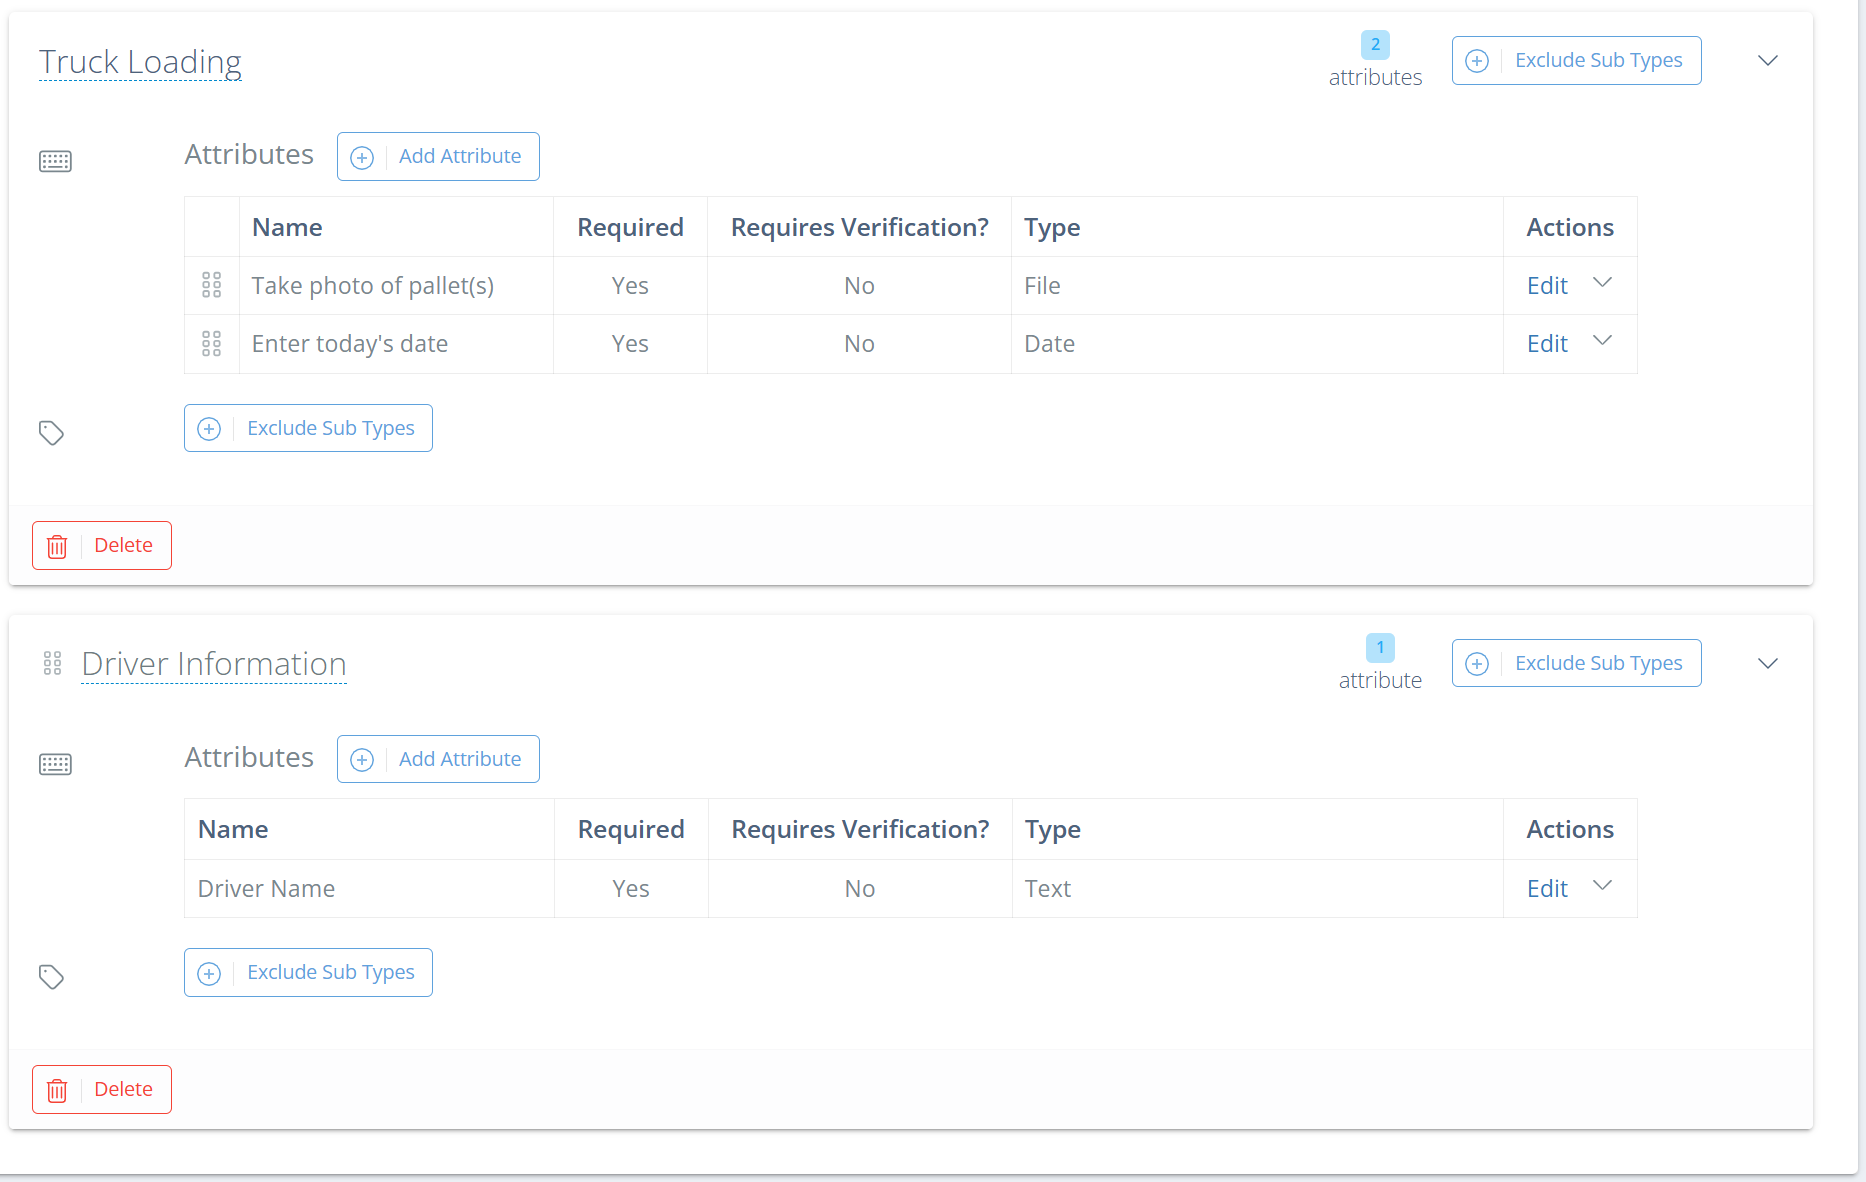
On customer criteria, you can also drag attributes from one criteria to another, as long as every criteria keeps at least one attribute. For example, in the image below you couldn't move "Driver Name" to "Truck Loading", because it's the only attribute on "Driver Information". You could move "Enter today's date" to "Driver Information".
Exclude Order Sub Types
NetSuite OnlyOrder sub types come from NetSuite, so tenants integrated with QuickBooks Online don't have order sub types to exclude.
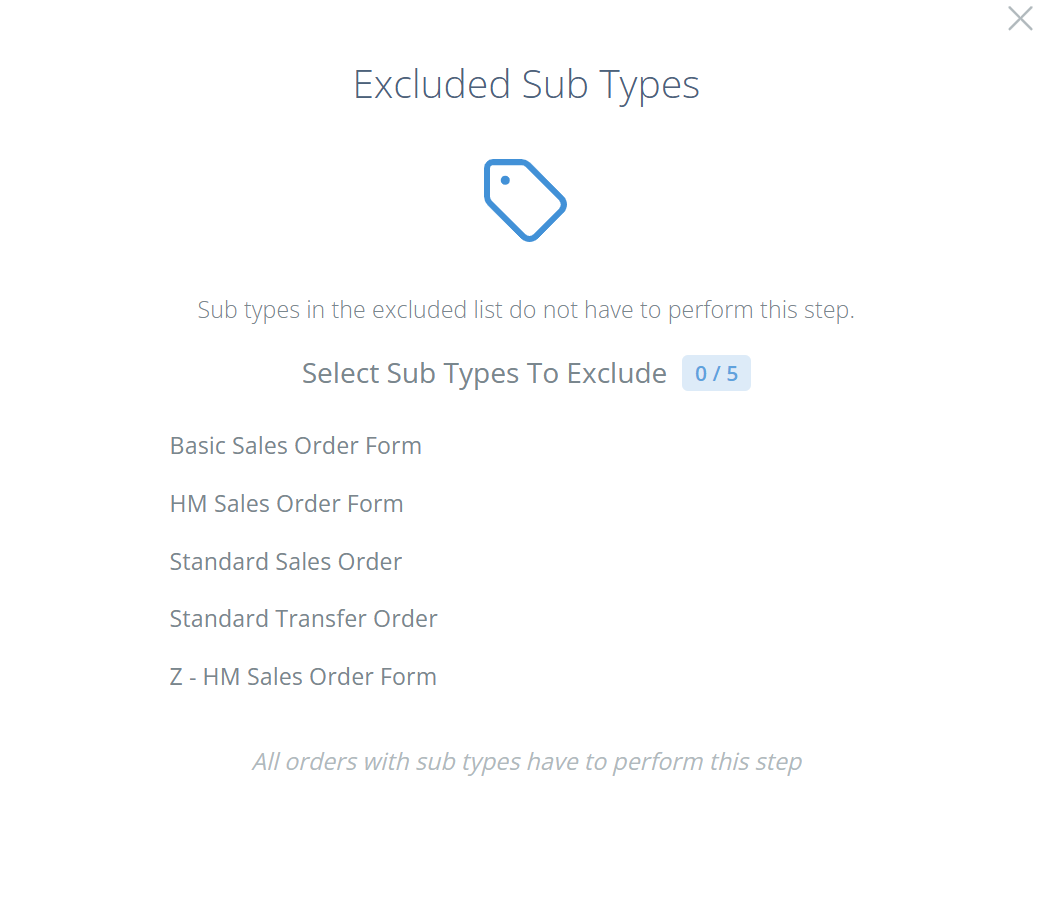
Sometimes a criteria doesn't need to be completed for a certain type of order. Excluding a sub type removes only that criteria from those orders, not the whole inspection (unless every criteria excludes the same sub type).
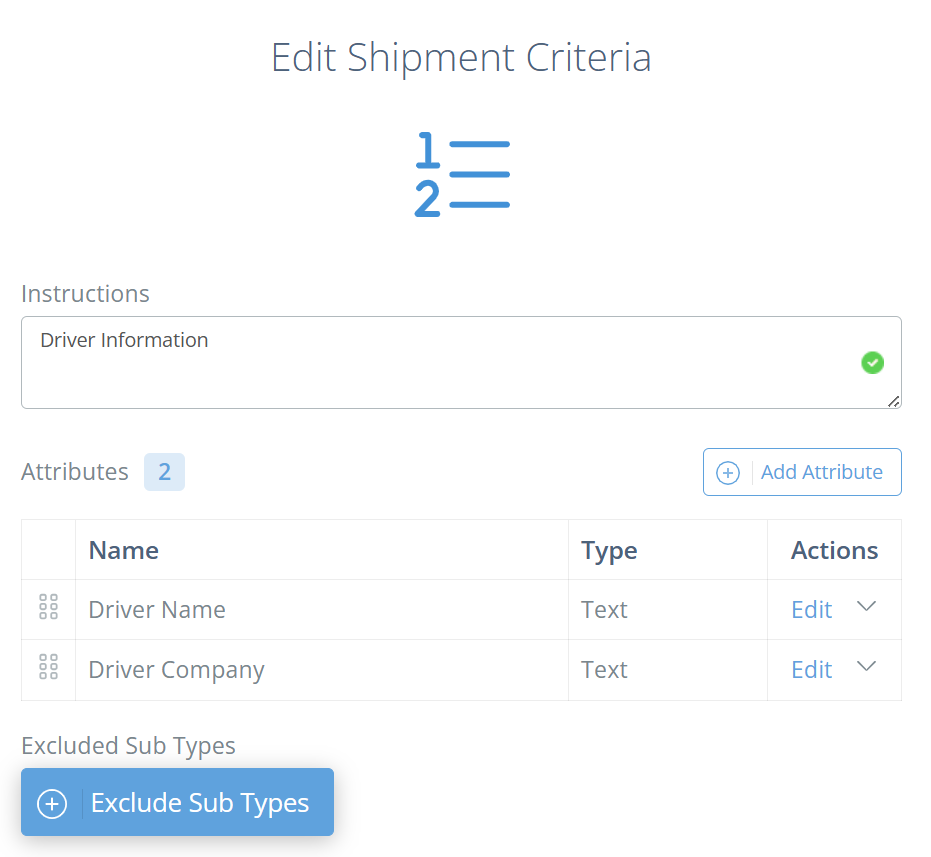
To exclude a sub type, click "Exclude Sub Types" on the criteria and select the sub types to exclude. Orders with any sub type you don't select still get the criteria.
The sub types listed on your site may differ from the image below, depending on your site settings.
Delete Criteria and Attributes
At the Company Level
To delete a criteria, click "Edit" on the company, click on the criteria to expand it, then click "Delete" in the bottom left.
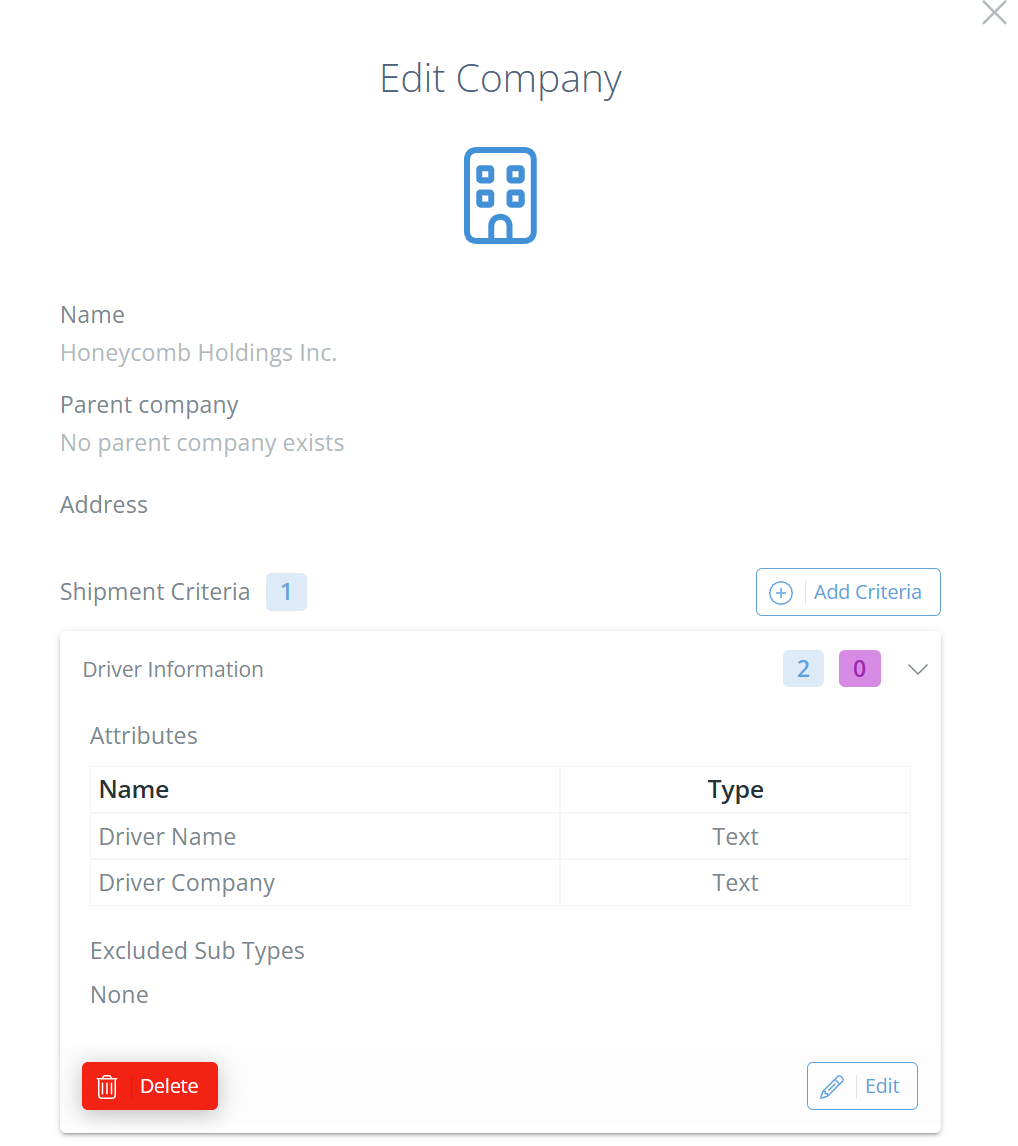
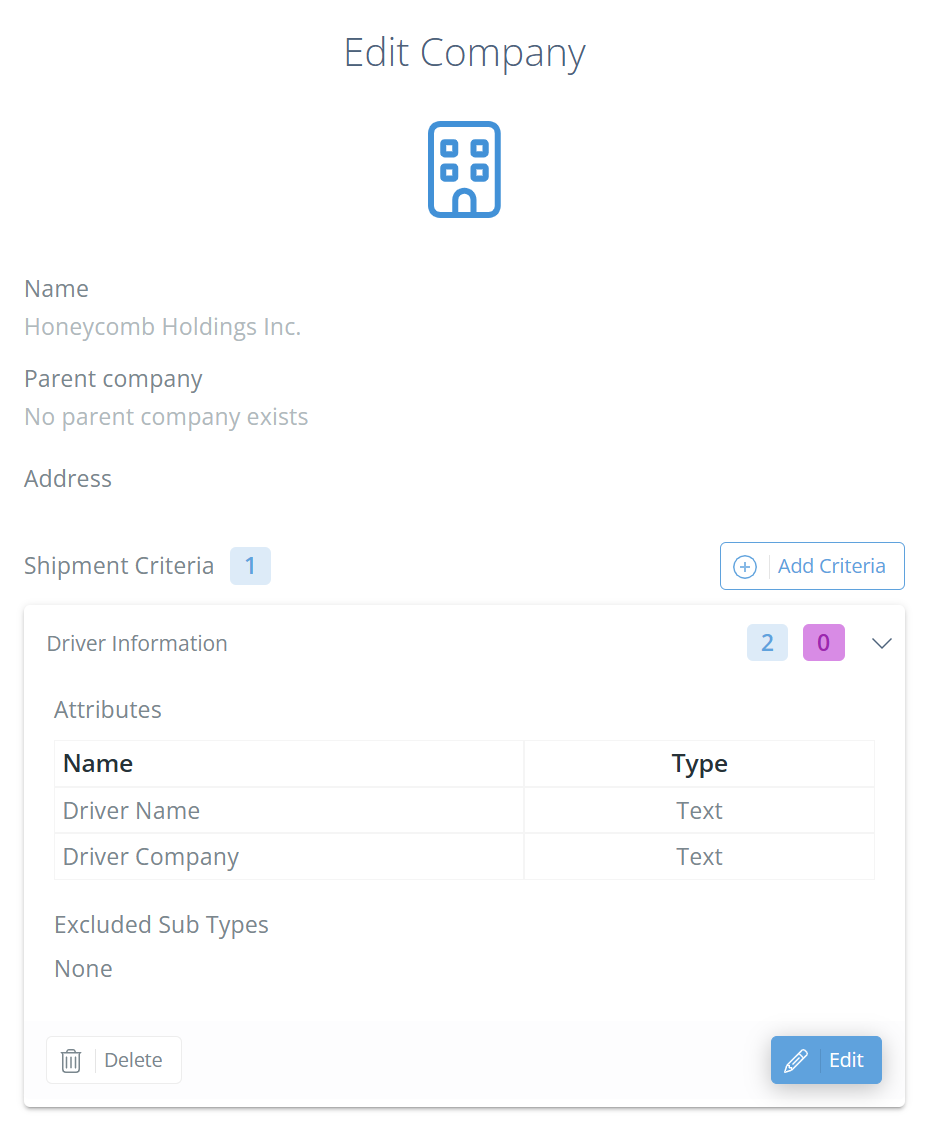
To delete an attribute, click "Edit" on the company, click on the criteria to expand it, then click "Edit" in the bottom right.
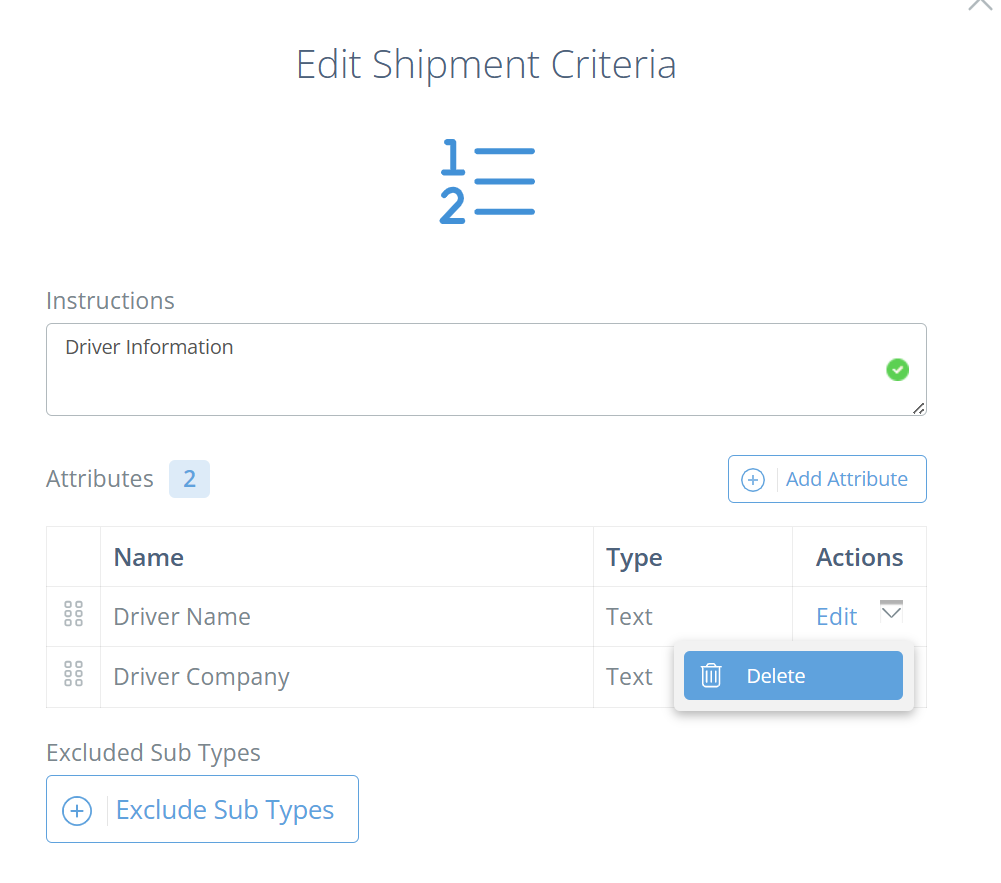
Click the dropdown arrow in the Actions column and click "Delete" to remove the attribute from the criteria.
At the Customer Level
To delete a criteria, click on the criteria (not the name) to expand it, then click "Delete" in the bottom left.
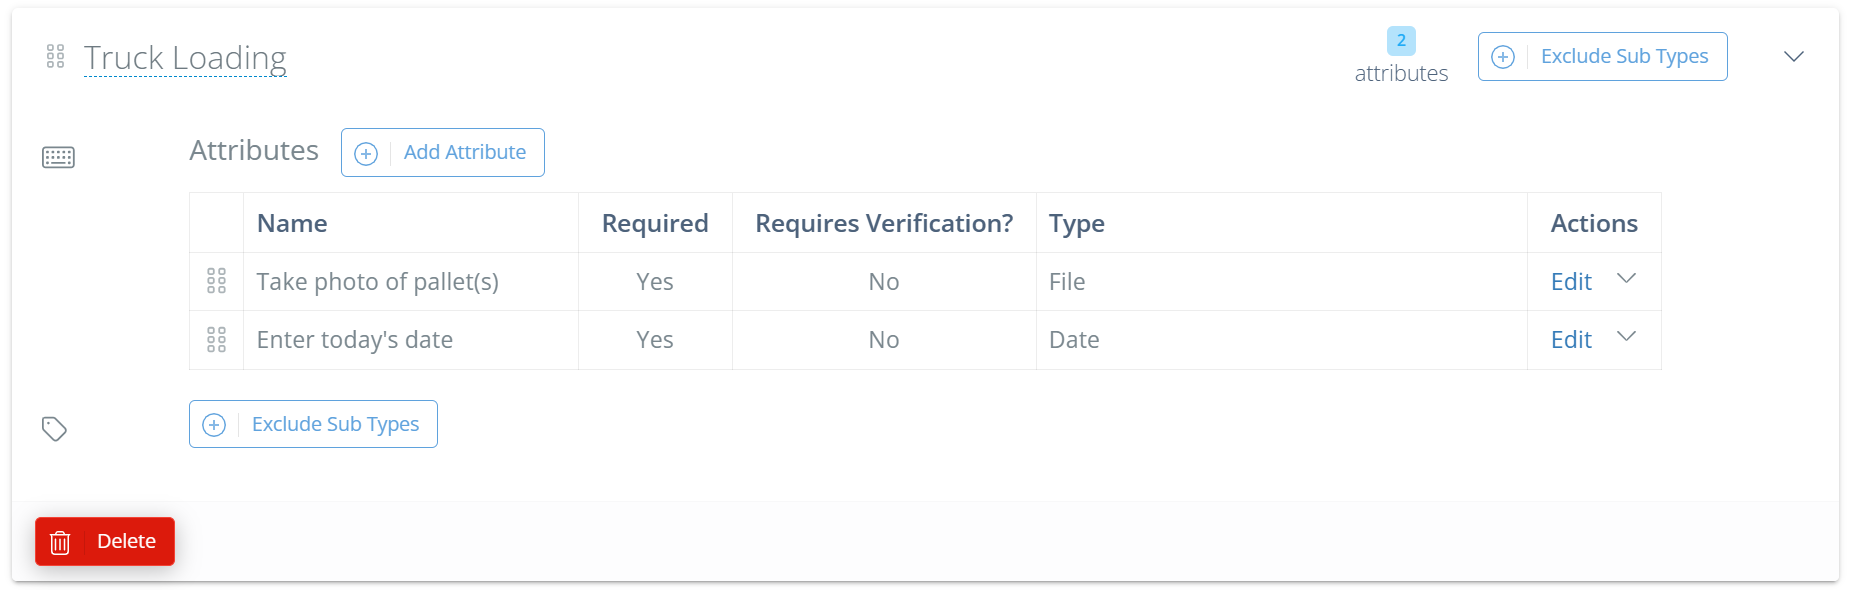
To delete an attribute, click on the criteria (not the name) to expand it, then click the dropdown arrow in the Actions column and click "Delete".
Choose Who Signs
Each company chooses which roles sign its shipping inspections and escalations. Click on the gear icon in the top right, go to "Company Settings", and stay on the "Company" tab. Expand the company to see its "Roles":
- Shipping inspection approval – the roles that can sign a shipping inspection. "Anyone can sign" means any user can.
- Yellow escalation approval and Red escalation approval – the roles that must sign an escalation of that level. When more than one role is listed, every role must sign. If no role is listed, the built-in Yellow Escalation or Red Escalation role signs.
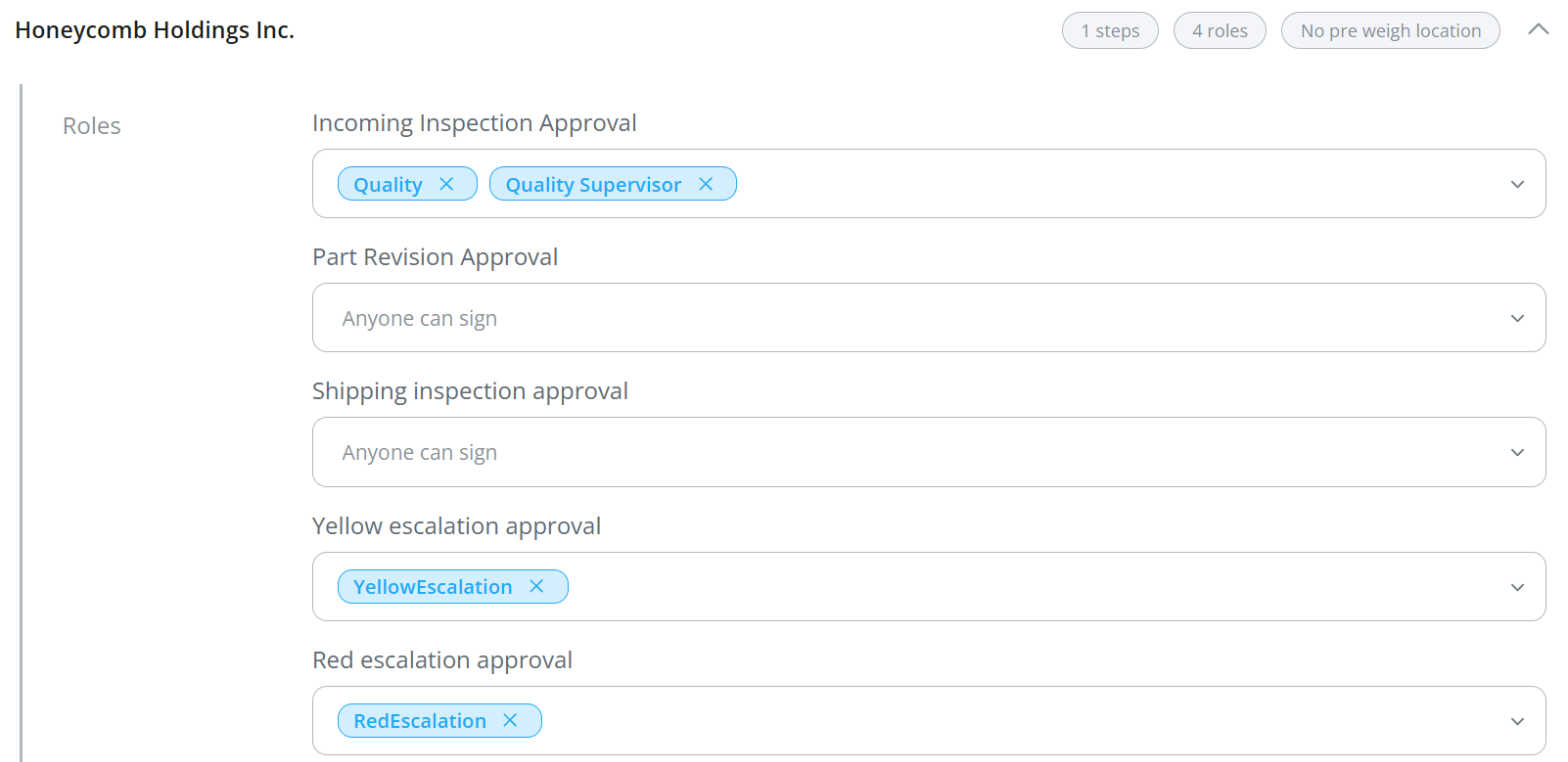
Escalations that are already open keep the roles they had when they were created, so a change here only applies to new escalations.
Permissions
Admins can limit who works with shipping inspections on the Permissions page, in the "Pick Pack Ship" section:
- Record Shipping Inspection Attribute – record and edit values on a shipping inspection.
- Remove Shipping Inspection Attribute – remove a recorded value.
- Create Shipping Inspection Role and Delete Shipping Inspection Role – change the "Shipping inspection approval" roles in Company Settings.
- Complete Shipment – complete a shipment once its inspection has every signature.
Assign Every Role at OnceThese permissions are open to everyone until a role or user is assigned. As soon as you assign one, only the roles and users on that permission can do the action, so add every role that needs it at the same time.
See the Permissions page for the full list.
Complete a Shipping Inspection
Once a shipping inspection is set up (at either the company or customer level), it shows on new shipments. Shipments created before the inspection was set up don't get it, but a new shipment on an older order does.
Signatures Are Required to ShipA shipment can't be completed until its shipping inspection, and any escalation on it, has every signature it needs.
Record the Values
Go to the Ship tab, open the order, and find the shipment section. Each criteria is listed with a number. Click on a criteria to expand it and see its attributes.
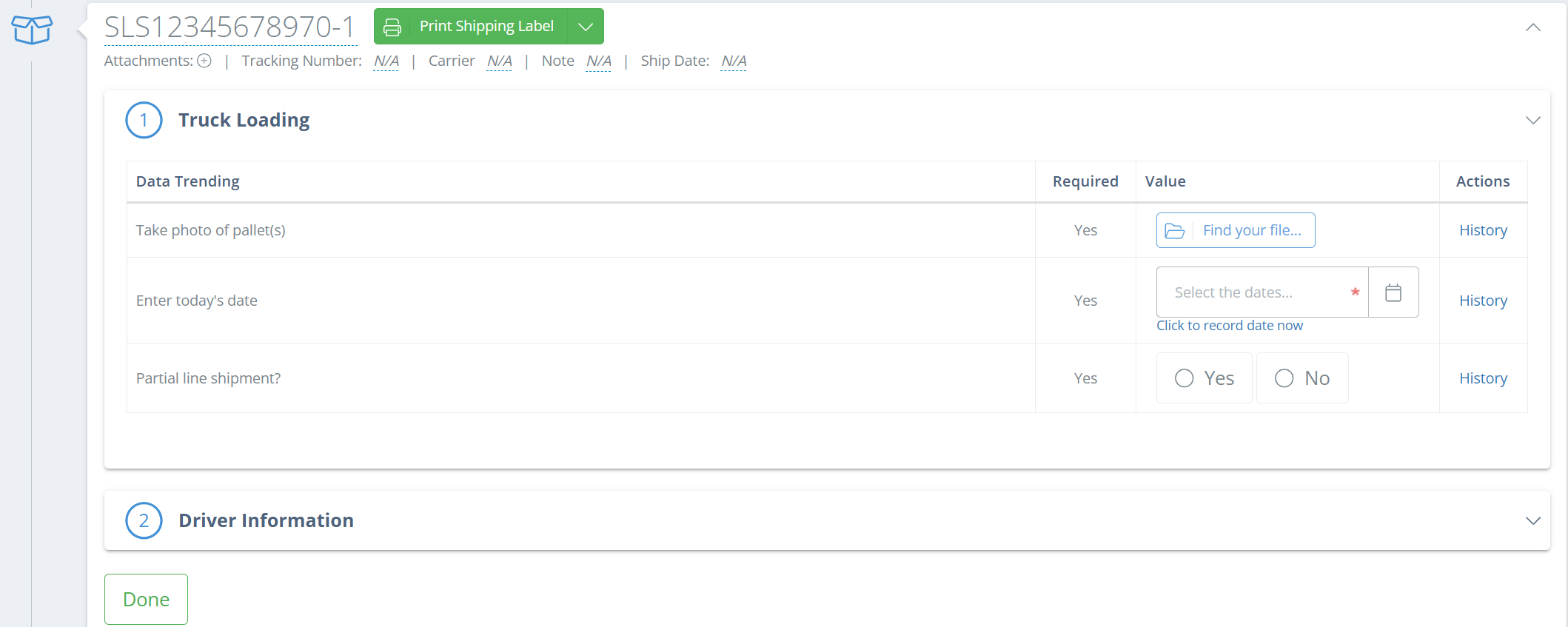
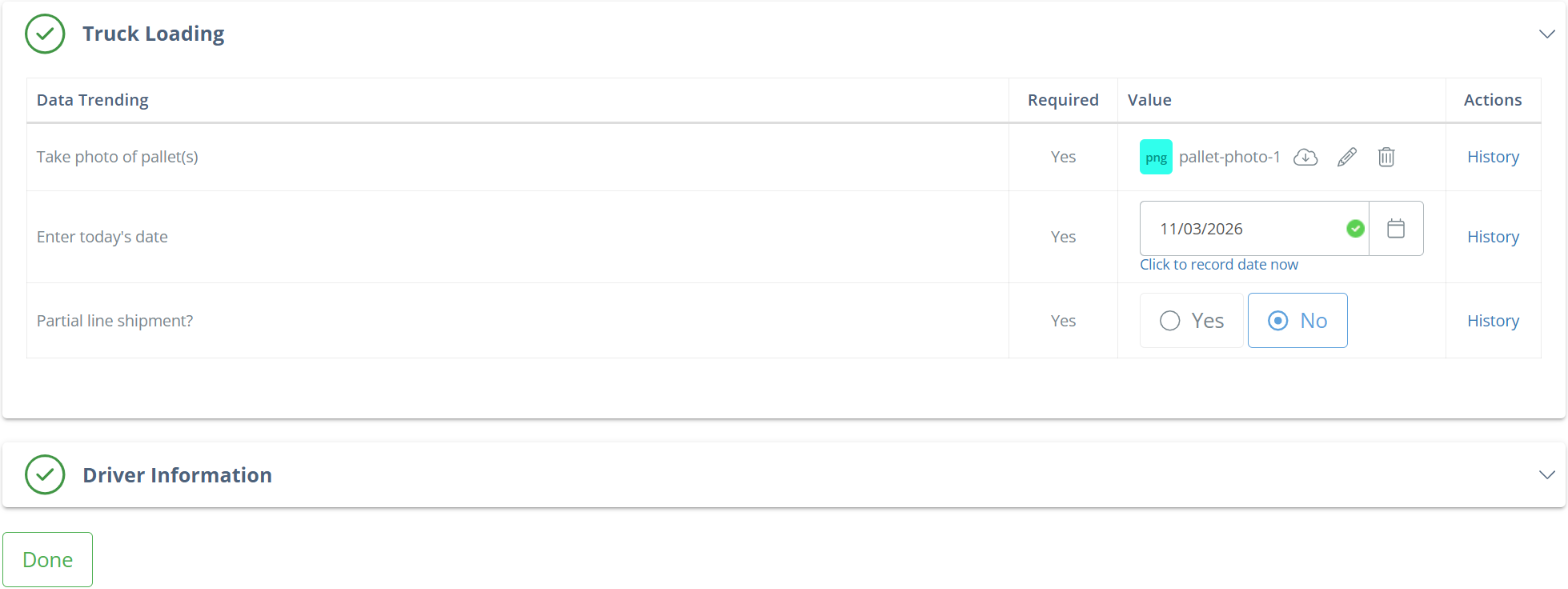
Each value saves as soon as you enter it. Use "Click to record date now" under a date attribute to fill in today's date. When all of a criteria's required attributes are filled in correctly, its number changes to a green checkmark.
Sign the Inspection
When every criteria is complete, click "Done" to sign the inspection. DataNinja confirms that "The shipment inspection has been completed", and shows when the inspection was completed. If the company's "Shipping inspection approval" setting lists roles, only users with one of those roles can sign.
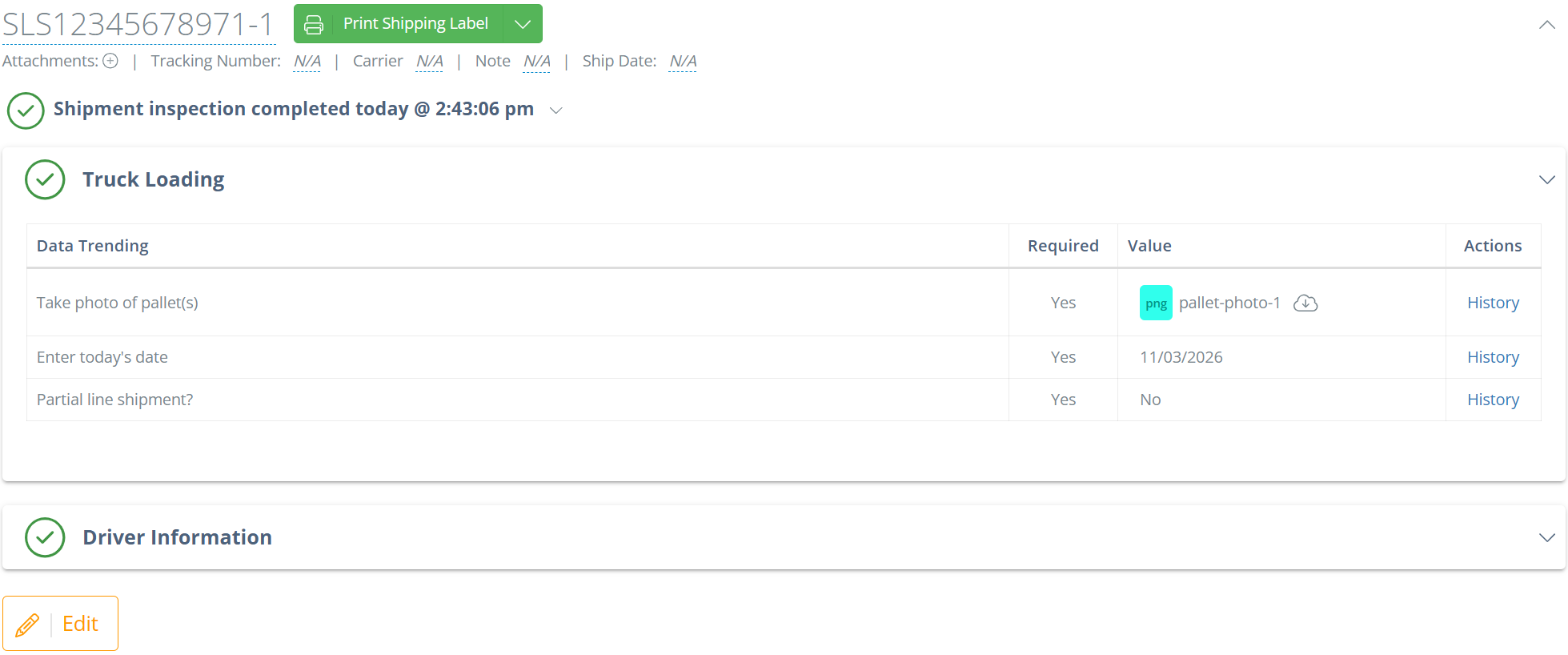
Escalations
A value that doesn't meet an attribute's requirements, such as a number outside its range or an answer other than the expected one, triggers an escalation. A pop-up tells you which attribute escalated and why. Click "I Understand" to close it.
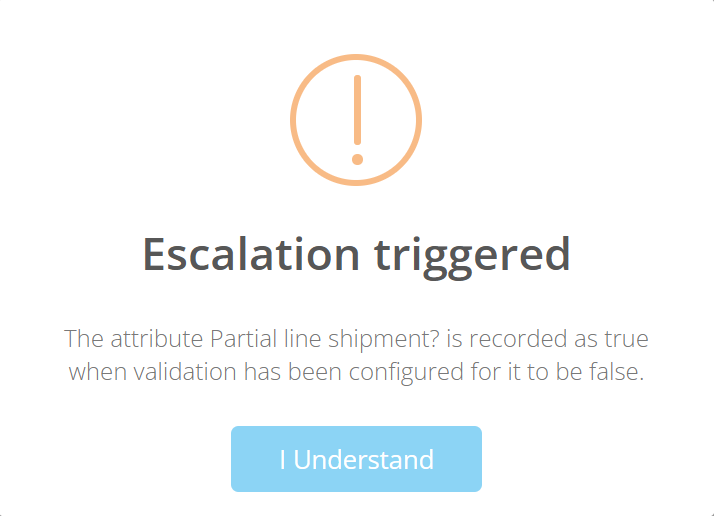
The criteria is labeled Escalation, and the expected value shows in red under the attribute.
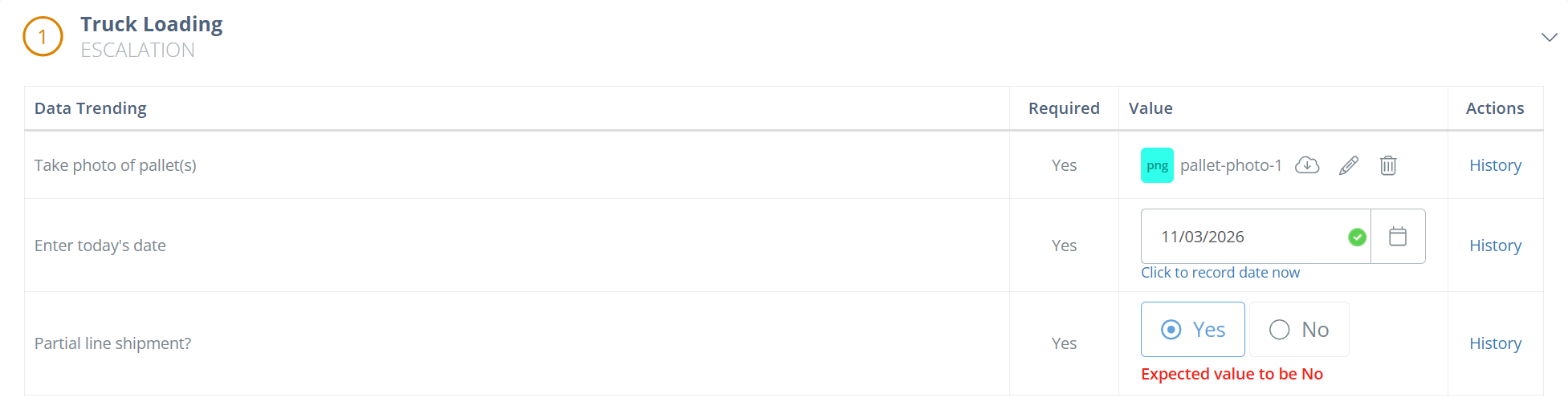
If the value was entered by mistake, select or enter the correct value. The Escalation label goes away once the values pass.
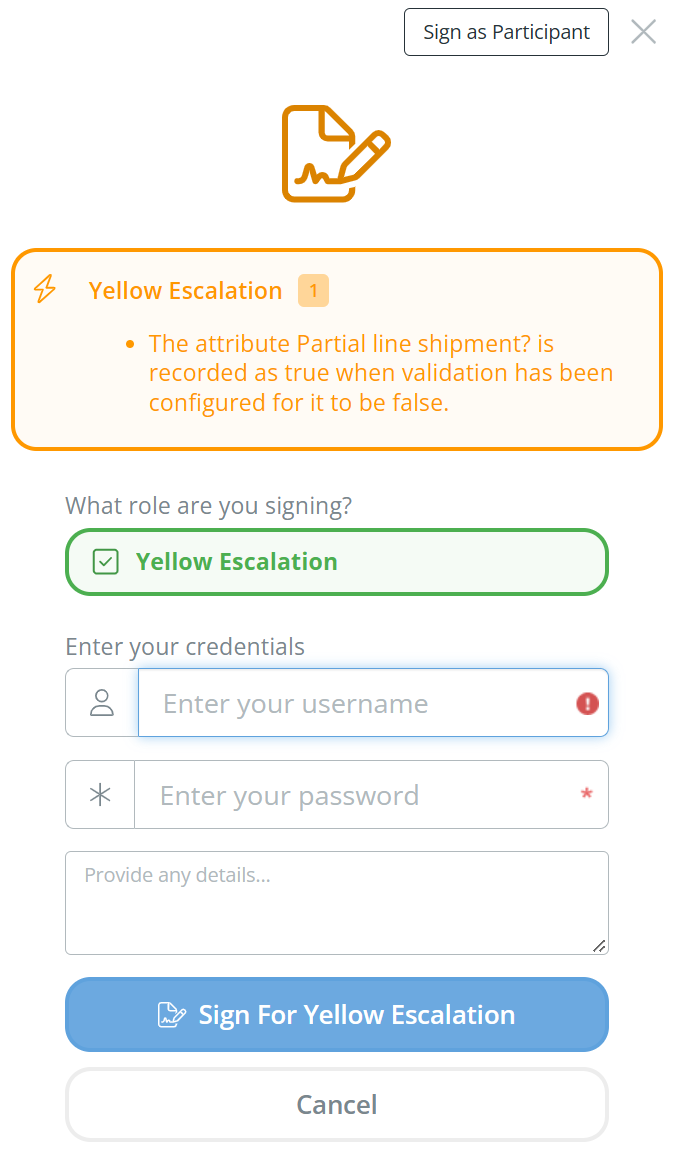
If the value is correct, sign the inspection as usual. The escalation stays open, and it has to be signed by the roles set for its level in Choose Who Signs. The shipment shows an Escalation box with the reason, and a "Sign" button next to "Edit".
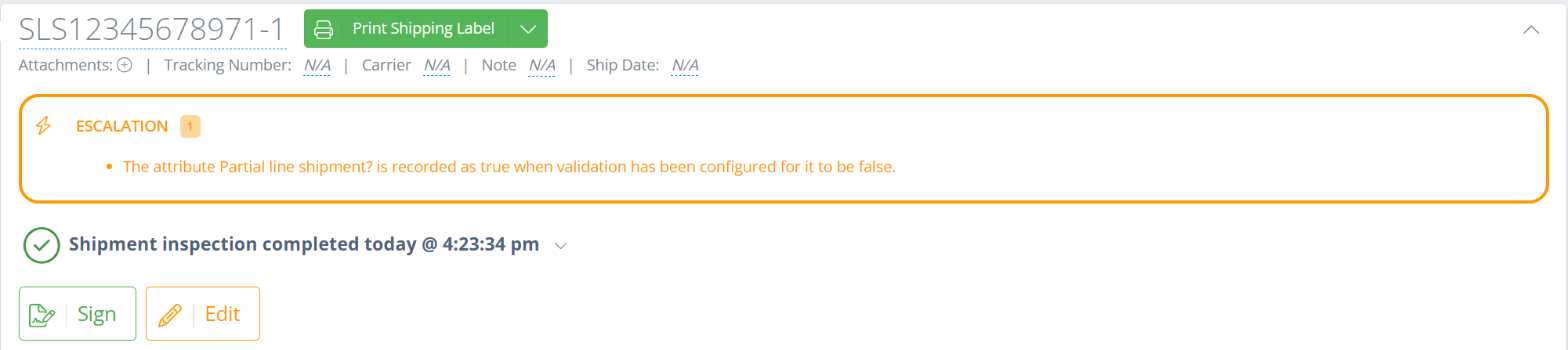
To sign the escalation, click "Sign". The sidebar shows the escalation level (Yellow or Red) and its reason. Choose the role you're signing for, enter your username and password, add any details, and click the "Sign For" button. Once the escalation is signed, its reason is added to the history below the inspection. "Sign as Participant" records your signature without counting toward the escalation, for someone who helped but isn't an approver.
Edit a Completed Inspection
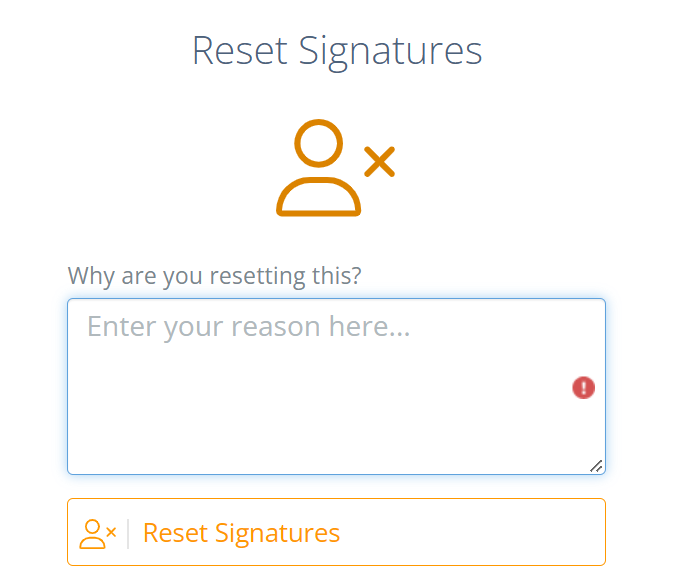
To change a value after the inspection is signed, click "Edit". The "Reset Signatures" sidebar asks why you're resetting the signatures. Enter a reason and click "Reset Signatures". The inspection opens for editing again, and it has to be signed again before the shipment can be completed. If you correct a value that caused an escalation and sign again, the escalation messages and Escalation labels go away.
Updated 13 days ago