
Custom Fields
Adding custom fields in DataNinja
Español: Lee esta página en español.
Français : Consultez cette page en français.
If you require extra data collection fields, you can add custom fields to nearly any part of DataNinja without the help of a developer. Common objects to create Custom Fields on are 'Part' and 'Shipment'. Custom Fields are set up on the API page, which can be accessed by clicking on the gear icon, going to All Lists, and then clicking on the API result.
Adding a Custom Field
Open the API page and go to the Explorer tab, then search which object your Custom Field will live on.
Remember that any object with a green 'CF' circle can have a Custom Field.
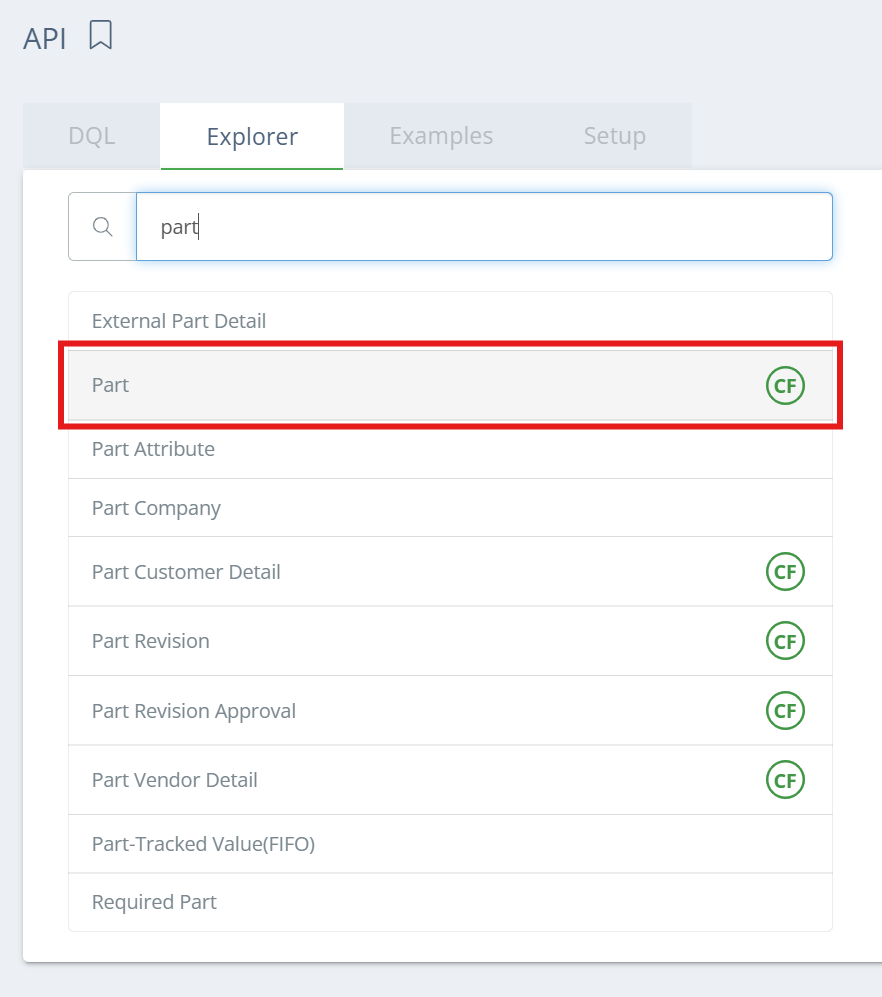
Screencap from v4.21.265.34
Click on the object to view all the standard fields associated with the object, then click on the 'Custom Fields' tab. Now click on 'Add Custom Field'.
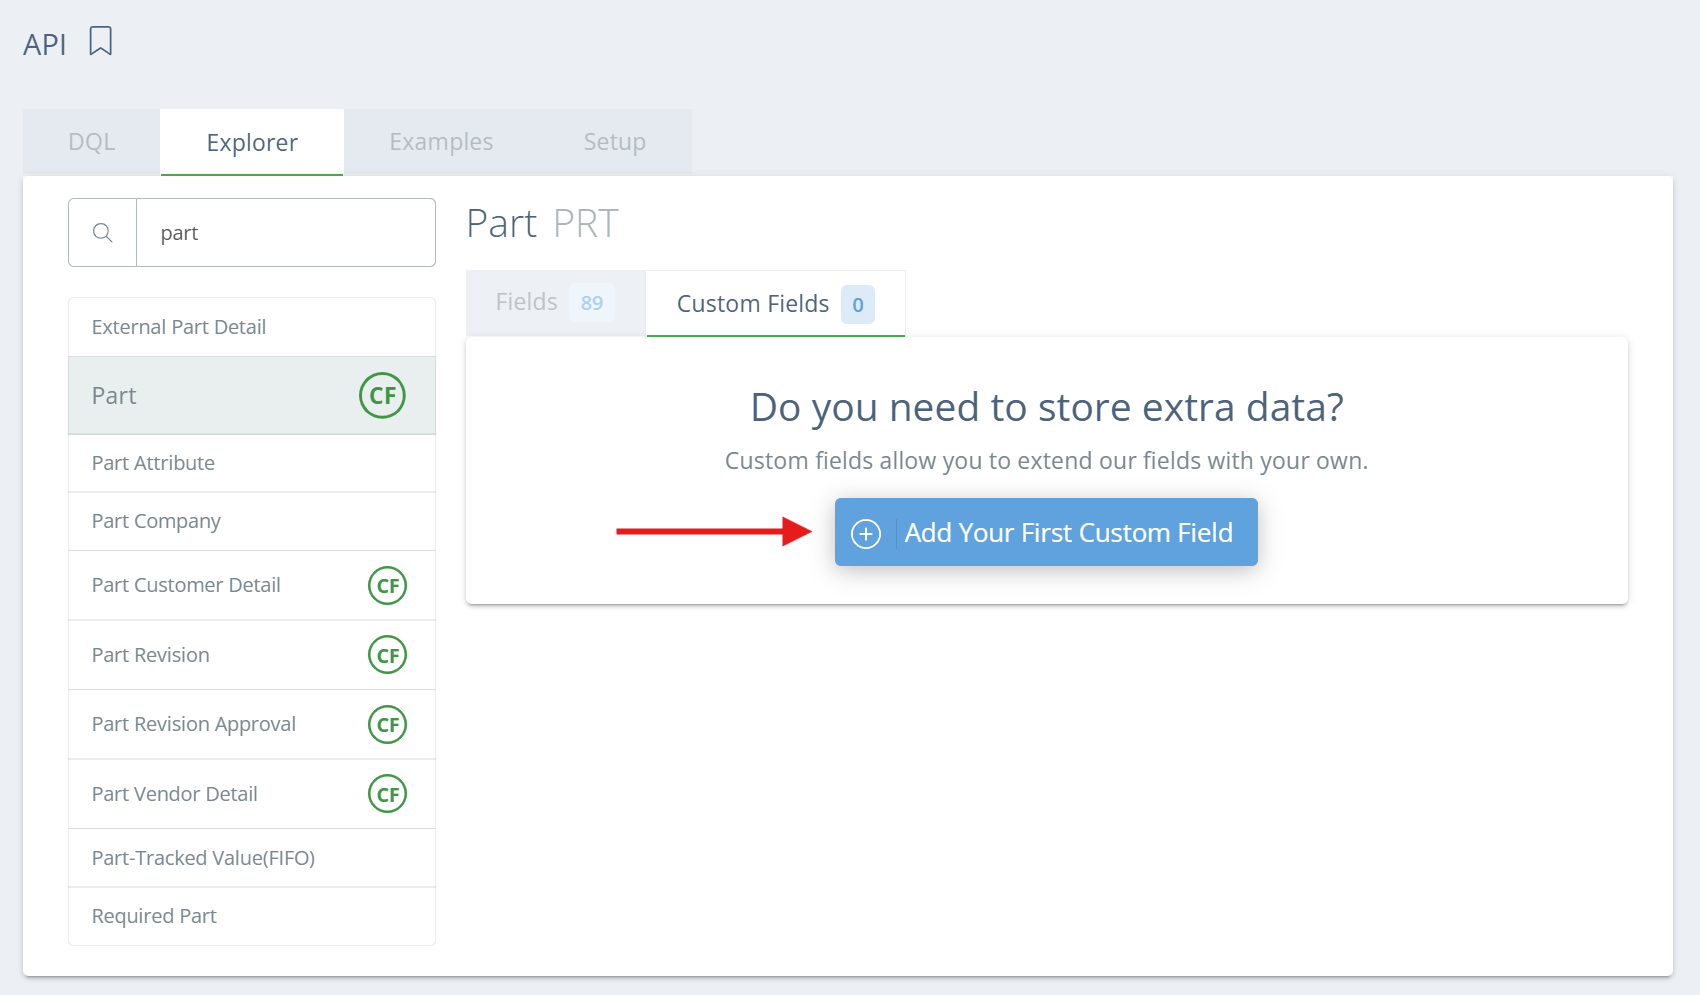
Screencap from v4.21.265.34
In the new aside, fill out the details for the new field. The Display Name is what will visually show in the UI, and the Api is how the field will be stored in the DataNinja database, so be specific.
Custom Fields should rarely be set to required, as it applies to all instances of the object (ex. all parts, not just finished goods or raw materials) and can cause NetSuite sync issues if applied on certain objects.
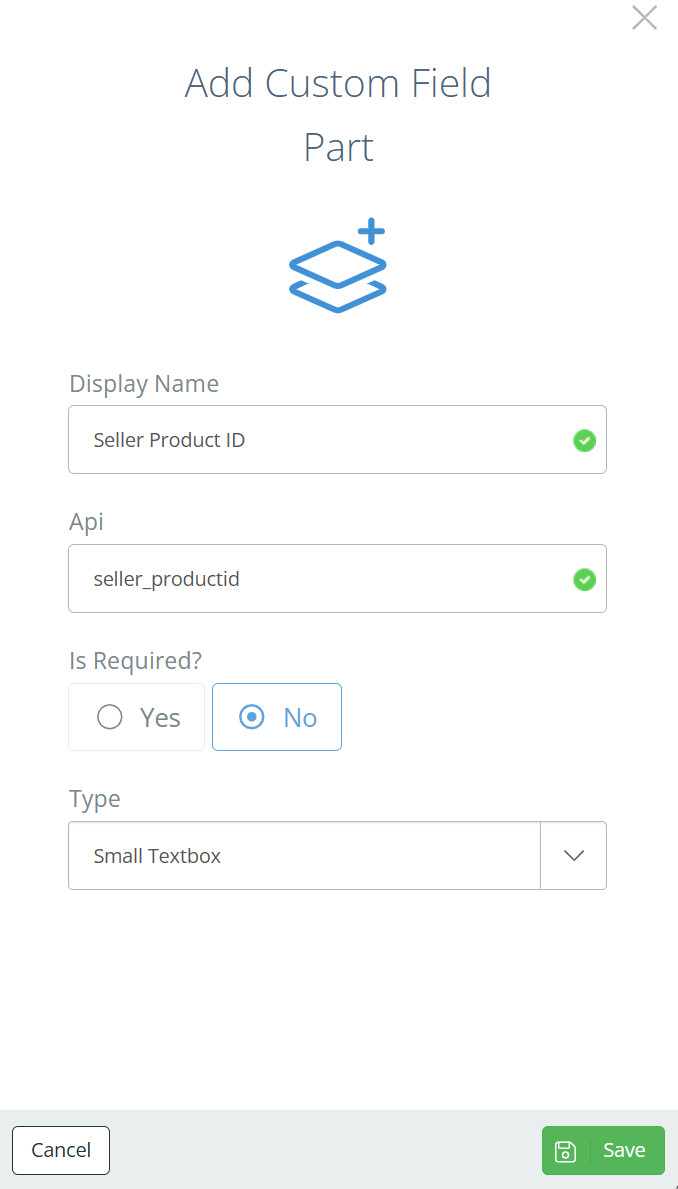
The Type will depend on what data you want to collect, and if you want the input to be chosen from a pre-determined list of options.
| Type | Description |
|---|---|
| Boolean | True/False |
| Check Box List | Check mark a pre-determined list of options |
| Date | Date only |
| Date Time | Date and time stamp |
| An email address | |
| Hyperlink | Any hyperlink |
| Image Reference | An image URL |
| Large Textbox | Alphanumeric input, textbox size is adjustable and shows more than 1 line by default |
| Multi Select | Select 1 or more from a pre-determined list |
| Number | Numeric values only |
| Phone | A phone number |
| Radio Button | Select 1 option from a pre-determined list, but the options show as buttons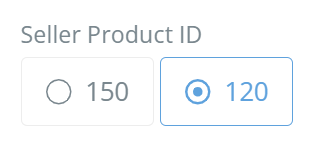 |
| Single Select | Select 1 option from a pre-determined list, but the options show in a dropdown |
| Small Textbox | Alphanumeric input, textbox size is not adjustable and shows only 1 line |
If you choose a Type that needs a pre-determined list of options, a new row will appear where you will enter in the available options. This list can be edited at any time.
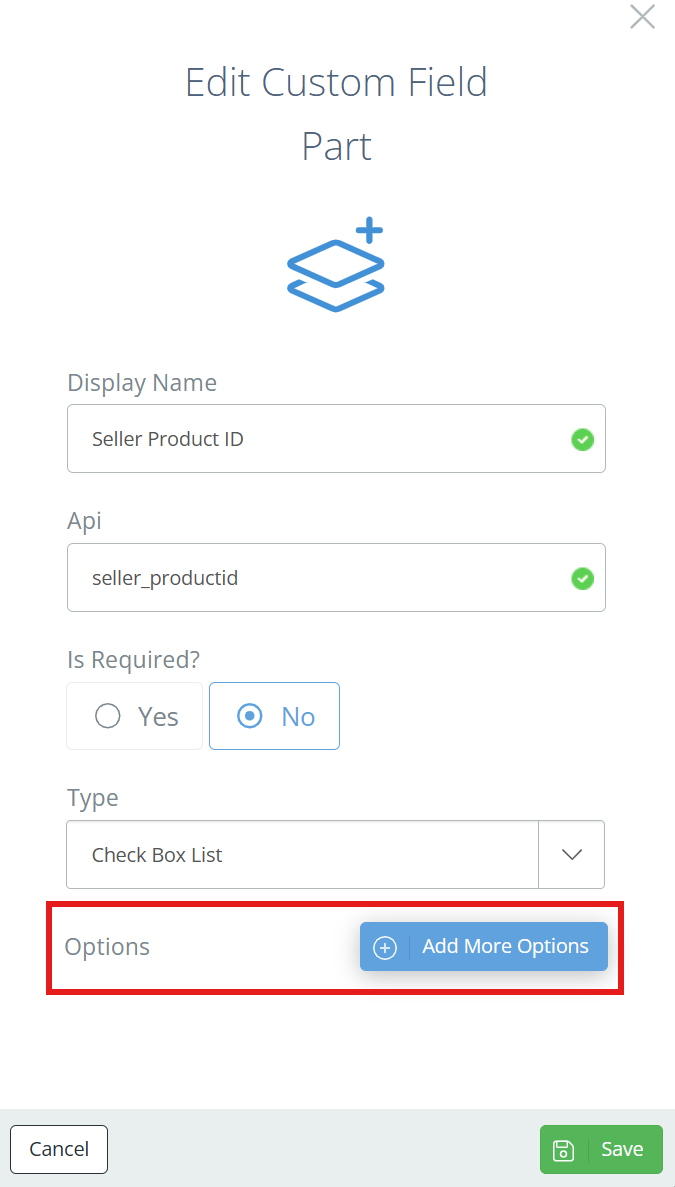
Example
Let's say that you need to record a Seller Product ID for some of your Finished Goods. To do that in DataNinja, click on the gear icon and go to All Lists, then open the API page. On the API page, go to the Explorer tab and search 'Part'.
Screencap from v4.21.265.34
Click on 'Part' then switch to the Custom Fields tab and click "Add Custom Field".
In the new aside, fill out the details for the new field. If only some of your parts need this information, leave it set to not required. If all parts in your inventory need this field, be sure to set it as required.
For this scenario you would select Small Textbox as the type, or Large Textbox would work too. Click 'Save' and the custom field will now be visible on the Part. By default, all custom fields will show at the bottom of the Edit Part aside. See our Part Configuration page for more.
Updated 8 days ago